Table of Contents
Advertisement
INSTALLATION, OPERATION
& MAINTENANCE MANUAL
Watts
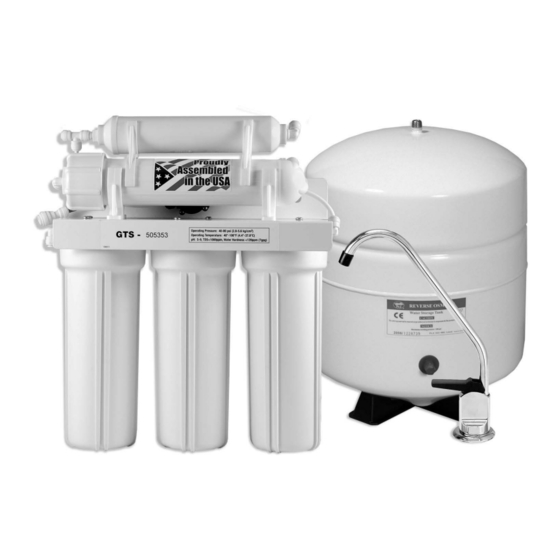
Residential Reverse Osmosis Systems
®
MODELS
GTS450S & GTS550S
Warning:
Please read carefully before proceeding with installation. Failure to follow attached
instructions or operating parameters may lead to the product's failure.
Refer to enclosed warranty for operating parameters
to ensure proper use with your water supply.
© Watts 2010
M-WQP-GTS-1041
Page 1
Advertisement
Table of Contents

Related Manuals for Watts GTS450S


Summary of Contents for Watts GTS450S
- Page 1 & MAINTENANCE MANUAL Watts Residential Reverse Osmosis Systems ® MODELS GTS450S & GTS550S Warning: Please read carefully before proceeding with installation. Failure to follow attached instructions or operating parameters may lead to the product’s failure. Refer to enclosed warranty for operating parameters to ensure proper use with your water supply.
- Page 2 Your system is a four (GTS450S) or five (GTS550S) stage RO which is based upon separate treatment segments within the one complete water filtration system. These stages are as follows: 5 Stage RO System has 3 vertical bowls.
-
Page 3: Table Of Contents
With proper installation and maintenance, this system will provide you with high quality water for years to come. All of our water enhancement products are rigorously tested by independent laboratories for safety and reliability. Table of Contents Operational Parameters ........................4 Contents of Reverse Osmosis System .................... -
Page 4: Operational Parameters
Operational Parameters Do not use with water that is micro biologically unsafe or of unknown quality without adequate disinfection before or after the system. System is intended to be installed on the cold water line only. Operating Temperatures: Maximum 100°F (37.8°C) Minimum 40°F (4.4°C) Operating Pressure: Maximum 85 psi (6.0 kg/cm... -
Page 5: How To Use The Quick Connect Fittings On Your Ro System
How to use the Quick Connect Fittings on Your RO System This reverse osmosis system is equipped with quick connect tube fittings for easy maintenance. The quick connect fittings do not require any tools which makes it a very simple task to connect and disconnect tubing from the RO module. To make a connection, the tube is simply pushed into the fitting. -
Page 6: Drill A Hole For The Faucet In A Porcelain Sink
Drill a Hole for the Faucet in a Porcelain Sink Most sinks are pre drilled with 1 ½” or 1 ¼” diameter hole that you can use for your Note: RO faucet. (If you are already using it for a sprayer or soap dispenser, see step 1) Porcelain sinks are extremely hard and can crack or chip easily. -
Page 7: Typical Ro Faucet Installation
Typical RO Faucet Installation Drinking Feed Tube Connection Non Air Gap Faucet Locate the 3/8” threaded quick connect fitting in the parts bag. After the faucet has been mounted, thread the fitting on the to faucet stem. Connect the 3/8” blue feed tube to the 3/8” quick connect fit- ting on the faucet stem. -
Page 8: Drain Saddle Installation
Drain Saddle Installation - Fits standard 1 ¼” – 1 ½” drain pipes Caution: If you have a garbage disposal, do not install the drain saddle near it. Installation of the drain saddle must be either above the garbage disposal, or if a second sink drain is available, install it above the cross bar on the second drain. -
Page 9: Green Tube Connection - Feed Water
Green Tube Connection - Feed Water Step 19 Connect the green tube to the RO Module quick connect elbow on the left side of the unit. Remove a brass nut, plastic sleeve and brass insert from the parts bag. To assemble, place the brass nut on the green tube first, then the sleeve (small tapered end of sleeve must point to the end of tube) and then push the brass insert all the way into the end of the tube. -
Page 10: Start Up Instructions
Congratulations! You have completed the installation of new your Reverse Osmosis system. Please Follow the Startup Instructions. Start up Instructions Turn on the incoming cold water at the angle stop valve. Open the needle valve on the brass Step 1 Adapt-a-Valve by turning counter clockwise. -
Page 11: Six Month Maintenance
6 Month System Maintenance Items needed: √ Stage 1 - Sediment Filter √ Stage 2 & 3 - Carbon Block Filter - Stage 3 Only on the GTS550S Step 1 Turn off the incoming water supply to the RO by turning the needle valve on the adapt-a-valve clockwise until it stops. -
Page 12: Annual Maintenance
Annual Maintenance √ Stage 1 - Sediment Filter √ Stage 2 & 3 - Carbon Block Filter - Stage 3 Only on the GTS550S √ Stage 5 - 10” Final Polishing filter √ 1/2 Cup of hydrogen peroxide or common household bleach. Note: Sanitizing of unit is recommended. -
Page 13: Membrane Replacement
Normally, a membrane would be replaced during a semiannual or annual filter change. However, if at any time you notice a reduction in water production or an unpleasant taste in the reverse osmosis water, it could be time to replace the membrane. Watts Premier recommends replacing the membrane when TDS reduction falls below 75%. -
Page 14: Check Air Pressure In The Tank
Check Air Pressure in the Tank Important: Check air pressure only when tank is empty of water! Check air pressure in the storage tank when you notice a decrease in available water from the RO system. Air can be added with a bicycle pump using the schrader valve that is located on the lower side of the tank behind the blue plastic cap. -
Page 15: Trouble Shooting
TROUBLE SHOOTING Problem Cause Solution 1. Low/Slow Production Low Water Pressure Assure a minimum of 40 psi incoming water pressure. Premier sells a booster pump if home water pressure is low. Make sure water supply is turned on and Adapta Valve is all the way open. -
Page 16: Reverse Osmosis System (Diagram / Parts List)
5 Stage Reverse Osmosis System Third Filter Bowl on GTS550S System Only Page 16... -
Page 17: Performance Data Sheet
*independantly tested and verified by Bio Vir Laboratories Depending on water chemistry, water temperature, and water pressure Watts R.O. Systems production and performance will vary. Efficiency rating means the percentage of the influent water to the system that is available to the user as reverse osmosis treated water under operating conditions that approximate typical daily usage. -
Page 18: Arsenic Fact Sheet
This Watts reverse osmosis system is designed to remove up to 98% of pentavalent arsenic. It will not convert trivalent arsenic to pentavalent arsenic. Under laboratory standard testing conditions, this system reduced 0.30 mg/L (ppm) pentavalent... -
Page 19: Service Record
Service Record Date of Purchase:__________ Date of Install:___________ Installed by:__________________ 3rd stage 2 nd stage Final Filter 1st stage Date Carbon Carbon Carbon Membrane Sediment (6 months) (6 months) (1 year) (2-5 years) (6 months) W500S Only NOTES: Page 19... -
Page 20: Limited Warranty
Include a note stating the problem experienced and include your name, address and your return authorization number. No returns will be accepted with out the proper return authorization number. WATTS will repair it, or replace it, and ship it back to you prepaid.
Need help?
Do you have a question about the GTS450S and is the answer not in the manual?
Questions and answers