Advertisement
Quick Links
Use & Care
Guide
®
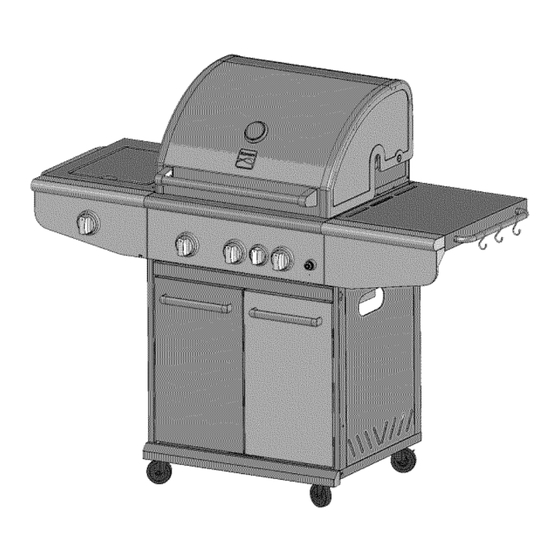
Liquid
Propane
Gas Grill
Sears
Model
No:
119.16433010
Safety
Parts
Use
and
Care
Assembly
Espa_ol,
Pg.
30
This
Grill
is for
Outdoor
Use
Only
•
Read
and
follow
all Safety,
Assembly,
and
Use
& Care
Instructions
in this
Guide
before
assembling
and
cooking
with
this
grill.
•
Failure
to follow
all
instructions
in
this
Use
& Care
Guide
may
lead
to
fire
or explosion,
which
could
result
in property
damage,
personal
injury
or death.
Grill
Information
Center
Missing
Parts?
Assembly
Questions?
Operation
Problems?
Before
returning
grill
to store,
call 1-800-933-0527
Tools
needed
for
assembly:
Protective
work
gloves
and eyewear
Phillips
head screwdriver
(included
in hardware
pack)
SAVE
THESE
INSTRUCTIONS!
See our
extensive
assortment
of outdoor
living
products
on-line
at
www.sears.com
and
www.kmart.com
Sears
Brands
Management
Corporation,
Hoffman
Estates,
IL 60179
U.S.A.
© 2010
Sears
Brands,
LLC
Printed
in China
B10SR9-R
Advertisement

Related Manuals for Kenmore 119.1643301


Summary of Contents for Kenmore 119.1643301
- Page 1 Use & Care Guide ® Liquid Propane Gas Grill Sears Model 119.16433010 Safety Parts Care Assembly Espa_ol, This Grill is for Outdoor • Read follow all Safety, & Care Instructions Guide before assembling cooking with this grill. • Failure to follow...
- Page 2 Frequently Asked Questions ... 28- 29 Spanish Guide ... 30-58 Repair Protection Agreement ... Sears Parts and Service Information Kenmore Full Warranty If this grill fails due to a defect in material or workmanship within one year from the date of purchase, call 1-800-4- MY-HOME®...
-
Page 3: Pre-Assembly
Visually inspect the hose prior to each use for cuts, cracks, excessive wear, or other use the gas grill if the hose appears Call Sears at 1-800-4-MY-HOME® (1-800-469-4663) for a Kenmore gas hose assembly. first reading... - Page 4 Phillips Head Bolt M6×35mm Qty: 4 pcs Phillips Head Bolt M6x16mm Qty: 24 pcs Phillips Head Bolt M6xl0mm Qty: 4 pcs Phillips Head Bolt M4×Smm Qty: 22 pcs Plastic Washer Qty: 8 pcs Phillips Head Screwdriver Qty: 1 pc Battery Size AA Qty: 1 pc...
- Page 5 Part *ASMA0085-01 *ASMA0014-03 CA0046-001 FLPP0114 SE0213 CA0045-002 *ASMA0014-05 *ASMB0085-01 SC1020 *ASMB0085-02 SD0051 *ASMB0085-03 SC0097 $1027-037D-006 SD0024-A SE9009 $1018-000C-026 PLABS0090-001 PLABS0103-001 PLABS0104-001 FA0121-001 SE0286-012 SE0287-013 $1020-023D-004 *ASMB0085-04 SB0131B SE0078 *ASMB0085-05 *ASMB0085-06 S1007-012E-016 SC0101 SE0148 CI0018-012 SC0100 SE0237Z *ASMB0085-07 SH1100-A $1046-000C-001 FE0025M SE0153-002 Description Hood Assembly...
- Page 6 Part $7004-042D-001 $7001-042D-017 *ASMD0085-01 *ASMD0085-02 PLABS0090-001 PLABS0103-001 S7005-F00B-026 *ASMC0012-08 SE0084-012 *ASMD0085-03 SE0083 SB0045-001 $7002-042D-005 *ASMD0085-02 $7005-000B-027 *ASMC0012-08 SE0123-002 *ASMC0085-01 SE0257 $4025-042D-002 SE0055 *ASMC0085-02 SE0080-001 SE0290-002 SE0150 *ASMC0085-03 SE9027-011 *ASMC0085-04 *ASMC0085-05 PLABS0092N-001 *ASMC0085-06 SE0019-001 SE0289-001 SE0288-001 ASMF085 RNA0103 If you missing hardware or have To order...
- Page 7 _----(...
- Page 8 Remove Firebox from Cut fastening straps straps securing regulator Unscrew and discard holes of the cabinet. With the aid of an assistant, all foam packing Cabinet Front Crossbar Cabinet Toe Plate Install Casters to Cabinet Place the Cabinet Head Bolts (M6x16mm). Phillips Head Bolt M6x16mm Qty: 16 Cabinet...
- Page 9 Install Cabinet Toe Plate Attach the Cabinet (M6xl0mm), Place cabinet in upright Phillips Head Bolt M6xl0mm Qty: 4 Install Cabinet Doors Insert the Cabinet Cabinet Right Door top pin into the Cabinet extending into Cabinet, 2 Phillips Head Bolts (M6x35mm) at this time, Insert the Cabinet...
- Page 10 Hang Condiment Basket Attach the Cabinet (M4x8mm), Hang Condiment Phillips Head Bolt M4x8mm Qty: 2 Cabinet Door Stop Qty: 1 Attach Firebox to Cabinet With the aid of an assistant, Side Burner Ignition back of Cabinet, Line up the holes and attach (M6x16mm) and 4 Plastic Hint:...
- Page 11 Install Grease Tray Insert the Grease Tray along two sides of the Firebox from Insert tray with the grease wires and fuel line. Slide tray fully Install Grease Pan Bracket From the rear of cabinet, From the front of Cabinet, drain hole positioned as shown.
- Page 12 Install Side Shelf Attach the Side Shelf Upper (M4xSmm), Attach the Side Shelf Lower Front Panel to Side Shelf Upper Bolts (M4x8mm), Phillips Head Bolt M4x8mm qty: Install Towel Bar Handle, Slide 3 "S" Hooks onto the Towel Bar Handle, (M4) to attach the Towel Bar Handle to the Side Shelf position,...
- Page 13 Znstall Side Burner Attach the Side Burner (M4xSmm), Attach the Side Burner (M4xSmm), Phillips Head Bolt M4x8mm qty: Znstall Towel Bar Handle Use 2 Phillips Bar Handle to the Side Burner Phillips Head Bolt M4x8mm qty: Washer IV]4 Qty: Upper and Lower Control Panels...
- Page 14 Install Side Shelf Unscrew the 2 Phillips side of the firebox attach the side shelf frame. Slide the upper drop down. Use 2 Phillips firebox as shown Use 1 Phillips the firebox. See Inset Tighten the 2 previously Phillips Head Bolt M6x16mm Qty: Phillips Head Bolt M4x8mm Qty: 1...
- Page 15 Install Side Burner Unscrew the 2 Phillips side of the firebox attach the side Burner Slide the upper drop down. Use 2 Phillips firebox as shown Tighten the 2 previously Phillips Head Bolt M6x16mm Qty: Frame to Firebox Head bolts 1/4 inch from as shown in Inset 1.
- Page 16 Install Side Burner Valve Detach side burner wire through hole in left side of cabinet. Open side burner screws holding the side burner Secure the side burner Bolts (M4x8mm). Center the side burner with 2 previously Use 1 Phillips Head Bolt (M4x8mm) See Inset 4.
- Page 17 Install Heat Diffusers, Cooking Insert the heat diffusers back of the firebox. See Inset Place the Cooking Grates See Inset Insert the warming rack into the top of the firebox. back of the firebox. See Inset Inset Inset Place and Secure Unscrew the bolt and nut located LP Cylinder...
- Page 18 Install Battery Unscrew the electronic end facing out. Screw the electronic Battery Size AA Qty: Congratulations - Assembly Remove any additional clean all foam Read the remaining To transport grill, make sure that the rear casters ignition button. Place the AA Battery ignition button is now complete!
- Page 19 20lb. (9.1kg) Liquid Propane tank, which is not included with the grill. connect your gas grill to an LP gas tank that exceeds this capacity. A tank (305mm) in diameter by 18-1/2" the maximum size LP gas tank to use. You must use an "OPD"...
- Page 20 Notes about LP Gas Tank Exchange Many retailers that sell grills offer you the option replacing your empty LP gas tank exchange service. Use only those exchange companies that inspect, and certify their tanks. Exchange an OPD safety feature equipped tank in the LP gas tank section...
- Page 21 Flow Limiting Valves on LP Gas Tanks Your LP gas tank is equipped with valve that will restrict flow of gas sudden change in pressure. This without your knowledge. will things that your grill does not get will take longer to heat or you light...
- Page 22 Grill Lighting Instructions Before each use, check nicks, cuts, or abrasions. damaged in any way, before replacing authorized part from make sure all gas supply securely tightened. Familiarize yourself with Use and Care instructions Do not smoke while checking supply Be sure LP gas tank Open...
- Page 23 Never lean over the grill cooking lighting your gas grill. Keep your face and body a safe distance (at least 18 inches) from the lighting hole and burners lighting your grill with a match.
- Page 24 Shut off gas supply (turn the LP tank valve clockwise) to the gas grill. "Turn the control knobs to the "OFF" position. "Open the grill lid. Put out any flame with a Class B Fire extinguisher "Once the grill has cooled...
- Page 25 Immediately them off and dry the stainless they ever come in contact with your gas grill. They include, but are not limited chemicals (chlorine and bromine), fertilizer, ice melting salts, sea or salt water,...
- Page 26 Toreduce the chance of FLASHBACK clean the burner tubes as follows summer and fall, wherever spiders area, and if your grill has not been used for an extended period of time. Turn all burner control knobs to the "OFF" position. Turn the LP gas tank valve to the "OFF"...
- Page 27 Burn-Off Some of the new parts of your grill could residual oils. We recommend burners, turn to "Hi", and lower minutes to burn any oils off before first time. CAUTION: Operating "Hi" setting for longer than fifteen damage certain parts of your Preheating To preheat, light your...
- Page 28 LP to NG (natural gas) or vice versa? Answer: No, your gas grill is manufactured standards developed by CSA and ANSI for your safety and is certified for one type of gas only.
- Page 29 Never obstruct flow of ventilation around your grill housing. Question: The regulator and hose supplied gas grill does not fit the older I've used for years. Answer: U.S. Government regulates LP gas tanks. When regulations changed LP gas tank...
- Page 30 Congratulations onmaking a smartpurchase. Your newKenmore <R_ product i s designed and manufactured for yearsof dependable o peration. B ut likeall products, i t mayrequirerepairfromtimeto time.That'swhenhavinga Repair P rotection Agreement cansaveyoumoney andaggravation. Here's whatthe Repair P rotection A greement* includes: Expert service by our 10,000...
-
Page 31: Installation
For exped troubleshooting ++++++++++++++++++++ For repair- lawn and garden equipment, no matter who made it, no matter who sold it! For,the replacement owner s manuals that you need to do-it-yourself. For Sears professional and items like garage door openers and water heaters. 1-800-4-MY-HOME ®...
Need help?
Do you have a question about the 119.1643301 and is the answer not in the manual?
Questions and answers