Table of Contents
Advertisement
Quick Links
Advertisement
Table of Contents

Subscribe to Our Youtube Channel
Related Manuals for Planet VDR-300NU


Summary of Contents for Planet VDR-300NU
- Page 1 User Manual of VDR-300NU...
-
Page 2: Federal Communication Commission Interference Statement
Copyright Copyright 2014 by PLANET Technology Corp. All rights reserved. No part of this publication may be reproduced, transmitted, transcribed, stored in a retrieval system, or translated into any language or computer language, in any form or by any means, electronic, mechanical, magnetic, optical, chemical, manual or otherwise, without the prior written permission of PLANET. -
Page 3: National Restrictions
This device complies with Part 15 of the FCC Rules. Operation is subject to the Following two conditions: This device may not cause harmful interference This Device must accept any interference received, including interference that may cause undesired operation. Federal Communication Commission (FCC) Radiation Exposure Statement This equipment complies with FCC radiation exposure set forth for an uncontrolled environment. - Page 4 Do not dispose of WEEE as unsorted municipal waste; WEEE should be collected separately. Revision User’s Manual for 802.11n Dual band Wireless VDSL2 Router Model: VDR-300NU Rev: 1.0 (January, 2014) Part No. EM-VDR-300NU_v1 (2081-AC0360-000)
-
Page 5: Table Of Contents
User Manual of VDR-300NU Table of Contents CHAPTER 1.PRODUCT INTRODUCTION .................8 1.1 Package Contents ......................8 1.2 Product Description ......................9 1.3 Product Features ......................12 1.4 Product Specifications..................... 14 CHAPTER 2. HARDWARE INSTALLATION ..............18 2.1 Hardware Description ...................... 18 2.1.1 Front Panel.......................... - Page 6 5.2.5 NAT ............................63 5.2.6 Security ............................ 66 5.2.7 Parental Control ........................69 5.2.8 Quality of Service ........................71 5.2.9 Routing ............................. 74 5.2.10 DNS............................77 5.2.11 DSL ............................78 5.2.12 UPnP ............................79 5.2.13 DNS Proxy ..........................80 5.2.14 Print Server ..........................80 5.2.15 DLNA............................
- Page 7 5.5.5 Internet Time .......................... 121 5.5.6 Access Control ........................121 5.5.7 Update Software ........................123 5.5.8 Reboot............................ 123 APPENDIX A: PLANET DDNS ..................124 APPENDIX B: PERFORMANCE OF VDSL ROUTER PROFILES .........126 APPENDIX C: GLOSSARY.....................127...
-
Page 8: Chapter 1.Product Introduction
User Manual of VDR-300NU Chapter 1.Product Introduction 1.1 Package Contents Thank you for choosing PLANET VDR-300NU. Before installing the router, please verify the contents inside the package box. VDR-300NU Quick Installation CD-ROM Guide (User Manual included) Power Adapter Ethernet Cable Phone Cable RJ-45 / CAT5E 1.5 meter... -
Page 9: Product Description
IEEE 802.11a/b/g/n, Ethernet and VDSL2 (Very High Speed Digital Subscriber Line 2). Via VDSL 2 technology, the VDR-300NU offers very high performance access to Internet, up to 100Mbps for both downstream and upstream data transmission. VDSL2 absolutely offers the fastest data transmission speed over existing copper telephone lines without the need for rewiring. - Page 10 Multiple Functions for Broadband Communication The VDR-300NU integrates wireless LAN, USB storage, and 3G WAN services into one unit. It is designed to provide a simple and cost-effective xDSL Internet connection for a private Ethernet and 802.11a/b/g/n wireless network.
- Page 11 More Flexible File Sharing over USB port The VDR-300NU is built-in with two USB 2.0 ports which can be connected to a USB printer or storage device for file sharing. It can recognize the USB printer or storage automatically without user experience.
-
Page 12: Product Features
LAN. DHCP Server Support: Dynamic Host Configuration Protocol provides a dynamic IP address to PCs and other devices upon request. The VDR-300NU can act as a DHCP Server for devices on your local LAN. Wireless Features ... - Page 13 User Manual of VDR-300NU Wireless MAC Access Control: The Wireless Access Control feature can check the MAC address (hardware address) of wireless stations to ensure that only trusted wireless stations can access your LAN. Dual-SSID: It allows users to access different networks through a single AP.
-
Page 14: Product Specifications
User Manual of VDR-300NU 1.4 Product Specifications Model VDR-300NU Product Description 802.11n Dual Band Wireless VDSL2 Router Hardware Specifications 4 x 10/100Base-TX, Auto-Negotiation, Auto MDI/MDI-X RJ45 port Interfaces 1 x RJ-11 USB 2.0, Type-A, 5V DC/0.5A Output 2.4GHz : 2 x 2.5dBi... - Page 15 User Manual of VDR-300NU RFC2684 multiprotocol Encapsulation over ATM Adaptation Layer 5 RFC1483 multiprotocol Encapsulation over ATM Adaptation Layer 5 RFC2364 PPP over ATM ALL5 (PPPoA) RFC2516 PPP Over Ethernet (PPPoE) RFC1662 PPP in HDLC-like Framing ...
- Page 16 User Manual of VDR-300NU Device Configuration, Management and Update Web based GUI Localization support Embedded web server Download image via HTTP, TFTP client, TFTP server, FTP server Command Line Interface via serial port, telnet, or ssh Management ...
- Page 17 User Manual of VDR-300NU Environment Specifications Temperature / Humidity Operating: 0~40 degrees C, 10%~ 95% (non-condensing), Storage: -20~70 degrees C, 5~95% (non-condensing) Certification...
-
Page 18: Chapter 2. Hardware Installation
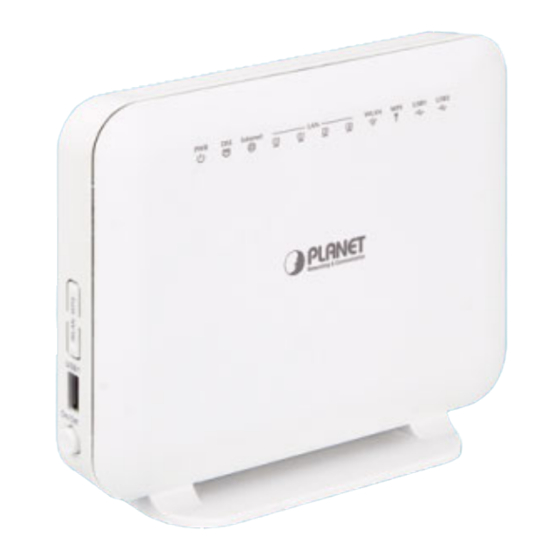
The front panel provides a simple interface monitoring of the router. Figure 2-1 shows the front panel of VDR-300NU. Figure 2-1 VDR-300NU Front Panel 2.1.2 LED Indications The LEDs on the top panel indicate the instant status of system power, WAN data activity and port links, and help monitor and troubleshoot when needed. - Page 19 Flashing Negotiation is in progress under Wi-Fi Protected Setup. Wi-Fi Protected Setup is disabled. The connection of 3G or USB device has established. Green Flashing Data is being transmitted. No signal is detected. Table 2-1 The LED indication of VDR-300NU...
-
Page 20: Rear Panel And Side Panel
2.1.3 Rear Panel and Side Panel The rear panel provides the physical connectors connected to the power adapter and any other network device. Figure 2-2 and Figure 2-3 shows the rear and side panel of the VDR-300NU. Figure 2-3 VDR-300NU Rear Panel... -
Page 21: Right Side Panel
User Manual of VDR-300NU 2.1.4 Right Side Panel Figure 2-4 VDR-300NU Side Panel Side Panel Interface and Button Definition Connector Description On/Off Power switch. USB1 For connecting the 3G network adapter or other USB storage devices. WLAN WLAN switch, for enabling or disabling the WLAN function. -
Page 22: Chapter 3. Connecting To The Router
UNIX or other platforms are compatible with TCP/IP protocols The above PCs are installed with Web browser 1. The Router in the following instructions is named as PLANET VDR-300NU. 2. It is recommended to use Internet Explorer 8.0 or above to access the Router. - Page 23 User Manual of VDR-300NU STEP 2. Connect the Power Adapter to the VDR-300NU. Check whether the PWR LED on the front panel are on accordingly. Figure3-1 shows the power adapter connection diagram. Figure 3-1: VDR-300NU Power Adapter Connection Diagram STEP 3. Use Ethernet cable to connect “LAN” port of the router and “LAN” port of your computer.
- Page 24 User Manual of VDR-300NU If you use 3G WAN service, connect the 3G USB data card to the USB port of the router.
-
Page 25: Chapter 4. Installation Guide
User Manual of VDR-300NU Chapter 4. Installation Guide 4.1 Configuring PC in Windows 7 1. Go to Start / Control Panel / Network and Internet / Network and Sharing Center and click Change adapter settings on the left banner. 2. Double-click Local Area Connection. - Page 26 User Manual of VDR-300NU 5. Select the Obtain an IP address automatically and the Obtain DNS server address automatically button. 6. Click OK to finish the configuration.
-
Page 27: Configuring Pc In Windows Xp
User Manual of VDR-300NU 4.2 Configuring PC in Windows XP 1. Go to Start / Control Panel (in Classic View). In the Control Panel, double-click on Network Connections 2. Double-click Local Area Connection. 3. In the Local Area Connection Status window, click Properties. - Page 28 User Manual of VDR-300NU 5. Select the Obtain an IP address automatically and the Obtain DNS server address automatically button. 6. Click OK to finish the configuration.
-
Page 29: Chapter 5. System Settings
User Manual of VDR-300NU Chapter 5. System Settings Determine your Connection Settings Before you configure the router, you need to know the connection information supplied by your Internet service provider. Connecting the VDSL 2 Router to your Network Unlike a simple hub or switch, the setup of the VDSL Router consists of more than simply plugging everything together. -
Page 30: Device Information
User Manual of VDR-300NU 5.1 Device Information Choose Device Info, and the submenus of Device Info are shown below: Figure 5-1-1 5.1.1 Summary Choose Device Info > Summary, and the following page appears. Figure 5-1-2 This page displays the device information such as the board ID, software version, and the information of... -
Page 31: Wan
User Manual of VDR-300NU 5.1.2 WAN Choose Device Info > WAN and the following page appears. Figure 5-1-3 This page displays the information of the WAN interface. You can select from Advanced Setup > Layer2 Interface to choose the type you need. - Page 32 User Manual of VDR-300NU Figure 5-1-5 On this page, you can view the statistical information about the received and transmitted data packets of the WAN interface. Click Reset Statistics to restore the values to zero and recount them. Choose Device Info > Statistics > xTM and the following page appears.
- Page 33 User Manual of VDR-300NU Figure 5-1-7 On this page, you can view the statistical information about the received and transmitted data packets of the xDSL interfaces. xDSL BER Test Click xDSL BER Test to perform a bit error rate (BER) test on the DSL line. The test page is as follows: Figure 5-1-8 The Tested Time (sec) can be 1, 5, 10, 20, 60, 120, 180, 240, 300, or 360.
-
Page 34: Route
User Manual of VDR-300NU Figure 5-1-9 When the xDSL BER Test completes, the following page appears. Figure 5-1-10 If the BER reaches e-5, you cannot access the Internet. 5.1.4 Route Choose Device Info > Route and the following page appears. On this page, you can view the route table information. -
Page 35: Arp
User Manual of VDR-300NU 5.1.5 ARP Choose Device Info > ARP and the following page appears. Figure 5-1-12 On this page, you can view the MAC address and IP address information of the device connected to the router. 5.1.6 DHCP Choose Device Info >... -
Page 36: Advanced Setup
User Manual of VDR-300NU 5.2 Advanced Setup Choose Advanced Setup and the submenus of Advanced Setup are shown below: Figure 5-2-1 5.2.1 Layer2 Interface Choose Advanced Setup > Layer2 Interface and the following page appears. ATM Interface Choose Advanced Setup > Layer2 Interface > ATM Interface . On this page, you can add or remove to configure DSL ATM Interfaces. - Page 37 User Manual of VDR-300NU Figure 5-2-3 On this page, you can enter this PVC (VPI and VCI) value, and select DSL link type (EoA is for PPPoE, IPoE, and Bridge.), encapsulation mode and service category. Object Description The virtual path between two points in an ATM network, and its valid...
-
Page 38: Eth Interface
User Manual of VDR-300NU If you want to remove this Interface, please select the Remove check box and click Remove. PTM Interface Choose Advanced Setup > Layer2 Interface > PTM Interface, and the following page appears. On this page, you can add or remove to configure PTM WAN Interfaces. - Page 39 User Manual of VDR-300NU Figure 5-2-6 Click Add and the following page appears. Figure 5-2-7 On this page, you can select an ETH port. Click Apply/Save to save configuration. If ETH Interface is selected, there are two WAN service types (PPPoE and IPoE).
-
Page 40: Wan Service
User Manual of VDR-300NU 5.2.2 WAN Service Choose Advanced Setup > WAN Service and the following page appears. Figure 5-2-8 On this page, you are allowed to add, remove, or edit a WAN service. If PTM Interface is selected, there are three WAN service types: PPP over Ethernet (PPPoE), IP over Ethernet, and Bridging. - Page 41 User Manual of VDR-300NU Step2 On the WAN Service page, click the Add button to display as Figure 5-2-11 shows. You can select ATM or PTM Interface for the WAN service and then click Next. Figure 5-2-11 Step3 On this page, select the WAN service type to be PPP over Ethernet (PPPoE). Click Next to continue the setting.
- Page 42 User Manual of VDR-300NU Figure 5-2-13 Object Description The correct user name provided by your ISP. PPP Username PPP Password The correct password provided by your ISP. If your ISP provides it to you, please enter it. If not, do not enter any PPPoE Service Name information.
- Page 43 User Manual of VDR-300NU connection. Once it detects the flow (like access to a webpage), the modem restarts the PPPoE dialup. If this function is disabled, the modem performs PPPoE dial-up all the time. The PPPoE connection does not stop, unless the modem is powered off and DSLAM or uplink equipment is abnormal.
- Page 44 User Manual of VDR-300NU Step6 On this page, you can obtain the DNS server addresses from the selected WAN interface. Click Next to continue the setting. Figure 5-2-15 Step7 On this page, it displays the information about the PPPoE settings. Click Apply/Save to save and apply the settings.
- Page 45 User Manual of VDR-300NU Adding an IP over Ethernet WAN service This section describes the steps for adding the IP over Ethernet WAN service. Step1 First, add a proper ATM or PTM interface for this WAN service at Layer2 Interface.
- Page 46 User Manual of VDR-300NU If Obtain an IP address automatically is selected, DHCP will be enabled for PVC in IP over Ethernet mode. If Use the following Static IP address is selected, please enter the WAN IP address, subnet mask and gateway IP address.
- Page 47 User Manual of VDR-300NU Adding a Bridging WAN service This section describes the steps for adding the Bridging WAN service. Step1 First, add a proper ATM or PTM interface for this WAN service at Layer2 Interface. Step2 On the WAN Service page, click the Add button to display as Figure 5-2-11. You can select ATM or PTM Interface for the WAN service and then click Next.
- Page 48 User Manual of VDR-300NU Adding a PPPoA WAN service This section describes the steps for adding the PPPoA WAN service. Step1 Choose Advanced Setup > Layer2 Interface > ATM Interface to dsiplay the ATM Interface Configuration page. On this page, you need to add a PVC for PPPoA mode. Click the Add button on the ATM Interface Configuration page to display the following page.
- Page 49 User Manual of VDR-300NU Figure 5-2-24 Step4 Select the proper interface for the WAN service and then click Next to display the following page. Figure 5-2-25 Step5 On this page, you may modify the service description. Click Next to display the following page. You can enter the PPP username and PPP password provided by your ISP.
- Page 50 User Manual of VDR-300NU Figure 5-2-26 Object Description The correct user name provided by your ISP. PPP Username PPP Password The correct password provided by your ISP. The value can be AUTO, PAP, CHAP, or MSCHAP. Usually, you can Authentication Method select AUTO.
- Page 51 User Manual of VDR-300NU by an uplink equipment such as BAS, through PPPoA dial-up. If this function is enabled, the modem uses this IP address as the WAN IP address. Enable IPv6 for this Enable this function, you can use IPv6 service. It will also need you to service check Request IPv6 Address and Request Prefix Delegation.
- Page 52 User Manual of VDR-300NU Figure 5-2-28 Step8 On this page, it displays the information about the PPPoA settngs. Click Apply/Save to apply the settings. You can modify the settings by clicking the Back button if necessary. Figure 5-2-29 Adding an IPoA WAN service...
- Page 53 User Manual of VDR-300NU Step1 Choose Advanced Setup > Layer2 Interface > ATM Interface to dsiplay the DSL ATM Interface Configuration page. On this page, you need to add a PVC for IPoA mode. Click the Add button. Step2 Select the DSL link type to be IPoA, and select the encapsulation mode to be LLC/SNAP-ROUTING (according to the uplink equipment).
- Page 54 User Manual of VDR-300NU Step4 Select the proper interface for the WAN service and then click Next to display the following page. Figure 5-2-32 Step5 On this page, you may modify the service description. Enter the WAN IP address, the WAN subnet mask, and primary DNS server provided by your ISP.
- Page 55 User Manual of VDR-300NU Step7 Select a preferred WAN interface as the system default gateway and then click Next. Figure 5-2-35 Step8 On this page, you can obtain the DNS server addresses from the selected WAN interface. After finishing setting, click Next.
- Page 56 User Manual of VDR-300NU Step9 On this page, it displays the information about the IPoA settngs. Click Apply/Save to save and apply the settings. You can modify the settings by clicking the Back button if necessary. Figure 5-2-37...
-
Page 57: Wan Service
User Manual of VDR-300NU 5.2.3 3G WAN Service Choose Advanced Setup > 3G WAN Service and the following page appears. Figure 5-2-38 This page is used to configure 3G connection. If you want to access the Internet through 3G connection, a 3G network card is required. - Page 58 User Manual of VDR-300NU On this page, you are allowed to configure the settings of the 3G USB modem. Object Description Enable USB If you want to access the Internet through the 3G network card, you must enable the USB modem.
- Page 59 User Manual of VDR-300NU If the 3G network card is installed, you may click the button on the Action column to establish or disconnect the 3G connection. When there is no DSL WAN connection, insert the 3G network card, and then system will perform dial-up automatically.
-
Page 60: Lan Configuration
User Manual of VDR-300NU 5.2.4 LAN Configuration Choose Advanced Setup > LAN and the following page appears. Figure 5-2-41 On this page, you can configure an IP address for the DSL router, enable IGMP snooping, enable or disable the DHCP server, edit the DHCP option, configure the DHCP advanced setup and set the binding between a MAC address and an IP address. - Page 61 User Manual of VDR-300NU Disable DHCP Server: If the DHCP server is disabled, you need to manually set the start IP address, end IP address and the lease time for the clients in the LAN. DHCP Server Enable DHCP Server: If you enable the DHCP sever, the clients will automatically acquire the IP address from the DHCP server.
- Page 62 User Manual of VDR-300NU On this page, you can set an IP address for the DSL IPv6 router, enable the DHCPv6 server, enable RADVD and enable the MLD snooping function. Object Description WIDE-DHCPv6 is an open-source implementation of dynamic host...
-
Page 63: Nat
User Manual of VDR-300NU 5.2.5 NAT Virtual Servers Firewall can prevent unexpected traffic on the Internet from your host on the LAN. The virtual server can create a channel that can pass through the firewall. In that case, the host on the Internet can communicate with a host on your LAN within certain port range. -
Page 64: Port Triggering
User Manual of VDR-300NU Object Description Use Interface Select an interface that you want to configure Select a proper service in the drop-down list. Select a Service Custom Server Enter a new service name to establish a user service type. - Page 65 User Manual of VDR-300NU On this page, you may add or remove an entry of port triggering. Click the Add button to display the following page. Figure 5-2-46 Object Description Use Interface Select an interface that you want to configure Select an Select a proper application in the drop-down list.
-
Page 66: Security
User Manual of VDR-300NU After finishing setting, click Save/Apply to apply the settings. You can use a single port number, several port numbers separated by commas, port blocks consisting of two port numbers separated by a dash, or any combination of these, for example 80, 90-140, 180. -
Page 67: Mac Filtering Setup
User Manual of VDR-300NU Figure 5-2-48 Click Add Firewall and the following page appears. Figure 5-2-49 Object Description name The name of firewall. interface You can select LAN or WAN from the drop-down list. type You can select IN or OUT from the drop-down list. - Page 68 User Manual of VDR-300NU Choose Security > MAC Filtering and the following page appears. Figure 5-2-50 On this page, you can add or remove the MAC filtering rule. You may change the MAC filtering policy from FORWARDED to BLOCKED by clicking the Change Policy button.
-
Page 69: Parental Control
User Manual of VDR-300NU Object Description Protocol Type Select the proper protocol type. Destination MAC Enter the destination MAC address. Address Source MAC Enter the source MAC address. Address Frame Direction The direction of transmission frame. WAN Interface Select the proper WAN interface in the drop-down list. -
Page 70: Url Filter
User Manual of VDR-300NU Figure 5-2-53 After finishing setting, click Apply/Save button to save and apply the settings. Url Filter Click Advanced Setup > Parental Control > Url Filter and the following page appears. Figure 5-2-54 This page is used to prevent the LAN users from accessing some Websites in the WAN. -
Page 71: Quality Of Service
User Manual of VDR-300NU Click the Add button to display the following page. Figure 5-2-55 On this page, enter the URL address and its corresponding port number. For example, enter the URL address http://www.google.com and the port number 80 and then click the Apply/Save button. - Page 72 User Manual of VDR-300NU Queue Configuration Choose Advanced Setup > Quality of Service > QoS Queue and the following page appears. On this page, you can enable, add or remove a QoS rule. Figure 5-2-57 The lower integer value for precedence indicates the higher priority.
-
Page 73: Qos Classification
User Manual of VDR-300NU After finishing setting, click Apply/Save to save and apply the settings. QoS Classification Choose Advanced Setup > Quality of Service > QoS Classification and the following page appears. Figure 5-2-59 On this page, you can enable, add or remove a QoS classification rule. -
Page 74: Routing
User Manual of VDR-300NU 5.2.9 Routing Default Gateway Choose Advanced Setup > Routing > Default Gateway and the following page appears. Figure 5-2-61 On this page, you can modify the default gateway settings. Select a proper WAN interface in the drop-down list of Selected WAN Interface as the system default gateway. -
Page 75: Policy Routing
User Manual of VDR-300NU Figure 5-2-63 Object Description IP Version Select the IP version. IPv4 or IPv6. Destination IP address/prefix Enter the destination IP address. length Interface Select the proper interface for the rule. Gateway IP The next-hop IP address. - Page 76 User Manual of VDR-300NU On this page, you can add or remove a static policy rule. Click the Add button to display the following page. Figure 5-2-65 On this page, enter the policy name, source IP and default gateway, and select the physical LAN port and interface.
-
Page 77: Dns
User Manual of VDR-300NU 5.2.10 DNS DNS Server Choose Advanced Setup > DNS > DNS Server and the following page appears. Figure 5-2-67 On this page, you can select a DNS server interface from the available interfaces, manually enter the DNS server addresses, or obtain the DNS address from a WAN interface. -
Page 78: Dsl
User Manual of VDR-300NU On this page, you are allowed to modify the DDNS settings. Click the Add button to display the following page. Figure 5-2-69 Object Description Hostname It is the domain name and it can be modified. Interface The interface that the packets pass through on the DSL router. -
Page 79: Upnp
User Manual of VDR-300NU Figure 5-2-70 On this page, you can set the DSL settings. Usually, you do not need to modify the factory default settings. After finishing setting, click Apply/Save to save and apply the settings. 5.2.12 UPnP Choose Advanced Setup > UPnP and the following page appears. -
Page 80: Dns Proxy
User Manual of VDR-300NU 5.2.13 DNS Proxy Choose Advanced Setup > DNS Proxy and the following page appears. Figure 5-2-72 On this page, you can enable or disable the DNS proxy function. After enabling the DNS proxy function, enter the host name of the broadband router and the domain name of the LAN network and then click Apply/Save to save and apply the settings. - Page 81 User Manual of VDR-300NU On this page, you can enable or disable the printer server. After finishing setting, click Apply/Save to save and apply the settings. GDI interface printers are not supported. Multifunction printers are not supported.
-
Page 82: Dlna
User Manual of VDR-300NU 5.2.15 DLNA Choose Advanced Setup > DLNA and the following page appears. Figure 5-2-74 On this page, select the Enable on-board digital media server check box and the following page appears. On this page, enter the media library path to run digital media server. -
Page 83: Storage Service
Insert a USB storage device, such as a flash drive or external hard drive, into the USB port on the right side or rear side of the VDR-300NU. The VDR-300NU can automatically identify attached storage and load its root directory folder. Follow the directions below for your operating system. - Page 84 User Manual of VDR-300NU Figure 5-2-78 Operation Instructions: Step 1. Create an account. 1). Click “Add” to display a dialogue box below: 2) Enter a user name and a password, which will be used by clients when accessing the USB storage device...
- Page 85 User Manual of VDR-300NU 3) Re-type to confirm password and then click the “Apply/Save” button. Step 2. Access shared file To access resources on such storage device, double click “Computer” on your PC and enter \\192.168.1.1 (The LAN IP address of the router).
- Page 86 User Manual of VDR-300NU At the User Name and Password prompt, type your proper user name and password to login. The filename only supports Unicode.
-
Page 87: Interface Grouping
User Manual of VDR-300NU 5.2.18 Interface Grouping Choose Advanced Setup > Interface Grouping and the following page appears. Figure 5-2-79 Interface grouping supports multiple ports to PVC and bridging groups. Each group will perform as an independent network. To support this feature, you must create mapping groups with the appropriate LAN and WAN interfaces using the Add button. -
Page 88: Ip Tunnel
User Manual of VDR-300NU Figure 5-2-80 On this page, please follow the on-screen configuration steps to configure the parameters of the interface grouping. After finishing setting, click Apply/Save to save and apply the settings. 5.2.19 IP Tunnel IPv6 in IPv4 Choose Advanced Setup >... - Page 89 User Manual of VDR-300NU Figure 5-2-82 IPv4 in IPv6 Choose Advanced Setup > IP Tunnel > IPv4inIPv6 and the following page appears. Figure 5-2-83 Click Add and the following page appears. On this page, you can add a new tunnel of IPv4 in IPv6.
-
Page 90: Ipsec
User Manual of VDR-300NU 5.2.20 IPSec Choose Advanced Setup > IPSec and the following page appears. Figure 5-2-85 On this page, you can add or remove the IPSec tunnel connections. Click the Add button to display the following page. Figure 5-2-86 On this page, set the parameters such as the IPSec connection name, tunnel mode, and remote IPSec gateway address. -
Page 91: Certificate
User Manual of VDR-300NU 5.2.21 Certificate Local Choose Advanced Setup > Certificate > local and the following page appears. Figure 5-2-87 On this page, you can acquire the local certificate by creating a certificate request or importing a certificate. - Page 92 User Manual of VDR-300NU www.mydomain.com). Browsers use this information to identify your Web site. Some browsers will refuse to establish a secure connection with your site if the server name does not match the common name in the certificate. Please do not include the protocol symbol "http://" or any port numbers or pathnames in the common name.
- Page 93 User Manual of VDR-300NU The certificate request needs to be submitted to a certificate authority, which will sign the request. Then the signed certificate needs to be loaded to the DSL router. Click Load Signed Certificate on this page and the following page appears.
- Page 94 User Manual of VDR-300NU Trusted CA Choose Advanced Setup > Certificate > Trusted CA and the following page appears. Figure 5-2-92 On this page, you may import or remove a CA certificate. Click the Import Certificate button to display the following page.
-
Page 95: Power Management
User Manual of VDR-300NU 5.2.22 Power Management Choose Advanced Setup > Power Management and the following page appears. This page allows control of Hardware modules to evaluate power consumption. Use the control buttons to select the desired option. Figure 5-2-94... -
Page 96: Multicast
User Manual of VDR-300NU 5.2.23 Multicast Choose Advanced Setup > Multicast and the following page appears. Figure 5-2-95 On this page, you can configure the multicast parameters. After finishing setting, click Apply/Save to save and apply the settings. -
Page 97: Wireless
User Manual of VDR-300NU 5.3 Wireless Choose Wireless and the submenus of Wireless are shown below: Figure 5-3-1 5.3.1 Basic Settings Choose Wireless > Basic to display the following page. On this page, the figure in the right area is 2-dimensional code. - Page 98 User Manual of VDR-300NU scanning. When many clients connect to the same access point, they can access Clients Isolation each other. If you want to disable the access between the clients that connect to the same access point, you can select this option.
-
Page 99: Security
User Manual of VDR-300NU 5.3.2 Security Choose Wireless > Security to display the following page. Figure 5-3-3 This page allows you to configure the security features of the wireless LAN interface. On this page, you can configure the network security settings by the Wi-Fi Protected Setup (WPS) method or setting the... -
Page 100: Wps Setup
User Manual of VDR-300NU WPS Setup Figure 5-3-4 There are 2 primary methods used in the Wi-Fi Protected Setup: PIN entry, a mandatory method of setup for all WPS certified devices. Enter STA PIN: If you select it, you need to enter the station PIN from client. - Page 101 User Manual of VDR-300NU Figure 5-3-5 Open Mode Figure 5-3-6 Object Description Select SSID Select a SSID for configuring the security settings. Select the Open mode. Network...
- Page 102 User Manual of VDR-300NU Authentication Enable or disable WEP encryption. After enabling this function, you WEP Encryption can set the encryption strength, current network key, and network keys. Encryption Strength You can set 64-bit or 128-bit key. Current Network Key The current key that you use.
- Page 103 User Manual of VDR-300NU Figure 5-3-8 Object Description Select SSID Select a SSID for configuring the security settings. Network Select the 802.1X in the drop-down list. Authentication RADIUS Server IP Enter the IP address of the RADIUS server. RADIUS server is used to Address authenticate the hosts on the wireless network.
- Page 104 User Manual of VDR-300NU WPA Mode Figure 5-3-9 Object Description Select SSID Select a SSID for configuring the security settings. Network Select the WPA mode. Authentication WPA Group Setting the interval for renewing key. Rekey Interval RADIUS Server IP Enter the IP address of the RADIUS server.
- Page 105 User Manual of VDR-300NU WPA-PSK Mode Figure 5-3-10 Object Description Select SSID Select a SSID for configuring the security settings. Network Select the WPA-PSK mode. Authentication The key for WPA encryption. Click the Click here to display button to...
- Page 106 User Manual of VDR-300NU WPA2 Mode Figure 5-3-11 Object Description Select SSID Select a SSID for configuring the security settings. Network Select the WPA2 mode. Authentication WPA2 Enable or disable pre-authentication. Preauthentication Network Re-auth Set the network re-auth interval.
- Page 107 User Manual of VDR-300NU WPA2-PSK Figure 5-3-12 For the parameters’ description of WPA2-PSK mode, please refer to the WPA-PSK mode. Mixed WPA2/WPA Figure 5-3-13 For the parameters’ description of Mixed WPA2/WPA mode, please refer to the WPA2 mode.
-
Page 108: Mac Filter
User Manual of VDR-300NU Mixed WPA2/WPA-PSK Figure 5-3-14 For the parameters’ description of Mixed WPA2/WPA-PSK mode, please refer to the WPA-PSK mode. 5.3.3 MAC Filter Choose Wireless > MAC Filter to display the following page. Figure 5-3-15 This page is used to allow or reject the wireless clients to access the wireless network of the wireless router. -
Page 109: Wireless Bridge
User Manual of VDR-300NU Object Description Disabled Disable the wireless MAC address filtering function. Allow the wireless clients with the MAC addresses in the MAC Address Allow list to access the wireless network of the wireless router. Reject the wireless clients with the MAC addresses in the MAC Deny Address list to access the wireless network of the wireless router. -
Page 110: Advanced Settings
User Manual of VDR-300NU This page allows you to configure the wireless bridge features of the wireless LAN interface. Object Description AP mode You may select Access Point or Wireless Bridge. Enable or disable the bridge restrict function. Bridge Restrict Remote Bridges Enter the remote bridge MAC address. - Page 111 User Manual of VDR-300NU Fill in the appropriate channel to correspond with your network settings. All devices in your wireless network must use the same channel in Channel order to work correctly. This router supports auto channeling functionality. Auto Channel Specifies the timer of auto channeling.
- Page 112 User Manual of VDR-300NU and a wireless client. The default value is Auto. Select the basic transmission rate ability for the AP. Basic Rate Packets that are larger than this threshold are fragmented into multiple packets. Try to increase the fragmentation threshold if you encounter Fragmentation high packet error rates.
-
Page 113: Station Info
User Manual of VDR-300NU make it has very low power consumption. WMM Power Save is an improvement to the 802.11e amendment adding advanced power management functionality to WMM. Click Apply/Save to configure the advanced wireless options and make the changes take effect. -
Page 114: Diagnostics
User Manual of VDR-300NU 5.4 Diagnostics 5.4.1 Diagnostics Click Diagnostics > Diagnostics, and the following page appears. This page is used to test the connection to your local network, the connection to your DSL service provider, and the connection to your Internet service provider. - Page 115 User Manual of VDR-300NU Click Diagnostics > Fault Management and the following page appears. Figure 5-4-2...
-
Page 116: Management
User Manual of VDR-300NU 5.5 Management Choose Management and the submenus of Management are shown below: Figure 5-5-1 5.5.1 Settings Backup Choose Management > Settings > Backup to display the following page. Figure 5-5-2 On this page, click the Backup Settings button to save your router’s settings to your local PC. -
Page 117: System Log
User Manual of VDR-300NU Restore Default Choose Management > Settings > Restore Default to display the following page. Figure 5-5-4 On this page, click the Restore default settings button, and then system returns to the default settings. 5.5.2 System Log Choose Management >... - Page 118 User Manual of VDR-300NU Figure 5-5-6 On this page, you can set 3 types of system log modes, including Local, Remote, and Both. Object Description Local When selecting Local, the events are recorded in the local memory. When selecting Remote, the events are sent to the specified IP Remote address and UDP port of the remote system log server.
-
Page 119: Snmp Agent
User Manual of VDR-300NU On this page, you can view the system log. Click the Refresh button to refresh the system log. Click the Close button to exit. 5.5.3 SNMP Agent Choose Management > SNMP Agent,and the following page appears. -
Page 120: Client
User Manual of VDR-300NU 5.5.4 TR-69 Client Choose Management > TR-069Client to display the following page. Figure 5-5-9 WAN Management Protocol (TR-069) allows an Auto-Configuration Server (ACS) to perform auto-configuration, provision, collection, and diagnostics to this device. On this page, you may configure the parameters such as the ACS URL, ACS password, and connection request user name. -
Page 121: Internet Time
User Manual of VDR-300NU 5.5.5 Internet Time Choose Management > Internet Time to display the following page. Figure 5-5-10 On this page, you may configure the router to synchronize its time with the Internet time servers. After enabling Automatically synchronize with Internet time servers, the following page appears. - Page 122 User Manual of VDR-300NU Figure 5-5-12 On the page, you can modify the username and password of different users. After finishing setting, click the Apply/Save button to save and apply the settings. Services Choose Management > Access Control > Services Control and the following page appears.
-
Page 123: Update Software
User Manual of VDR-300NU On this page, you can enable or disable the different types of services. After finishing setting, click the Apply/Save button to save and apply the settings. 5.5.7 Update Software Choose Management > Update Software and the following page appears. -
Page 124: Appendix A: Planet Ddns
Appendix A: Planet DDNS First of all, please go to http://www.planetddns.com to register a Planet DDNS account, and refer to the FAQ (http://www.planetddns.com/index.php/faq) for how to register a free account. To select DNS > Dynamic DDNS Step 1. Press Add button... - Page 125 Apply the settings and ensure you have connected the WAN port to the Internet. In a remote device, enter the Domain Name to the internet browser’s address bar. You can go to My Devices page of Planet DDNS website to check if the “Last Connection IP” is displayed. This indicates your DDNS service is working properly.
-
Page 126: Appendix B: Performance Of Vdsl Router Profiles
User Manual of VDR-300NU Appendix B: Performance of VDSL Router Profiles The table below is a performance table for profile and line distance; this data is just for reference. The actual data rate will vary on the quality of the telephone line and environmental factors. -
Page 127: Appendix C: Glossary
User Manual of VDR-300NU Appendix C: Glossary Address mask A bit mask select bits from an Internet address for subnet addressing. The mask is 32 bits long and selects the network portion of the Internet address and one or more bits of the local portion. Sometimes it called subnet mask. - Page 128 User Manual of VDR-300NU Central Office. Refers to equipment located at a Telco or service provider's office. Customer Premises Equipment located in a user's premises DHCP (Dynamic Host Configuration Protocol) DHCP is software that automatically assigns IP addresses to client stations logging onto a TCP/IP network.
- Page 129 User Manual of VDR-300NU File Transfer Protocol. The Internet protocol (and program) transfer files between hosts. Hop count A measure of distance between two points on the Internet. It is equivalent to the number of gateways that separate the source and destination.
- Page 130 User Manual of VDR-300NU Media Access Control Layer - A sub-layer of the Data Link Layer (Layer 2) of the ISO OSI Model responsible for media control. Management Information Base - A collection of objects can be accessed via a network management protocol, such as SNMP and CMIP (Common Management Information Protocol).
- Page 131 User Manual of VDR-300NU Request for Comments - Refers to documents published by the Internet Engineering Task Force (IETF) proposing standard protocols and procedures for the Internet. RFC can be found at www.ietf.org. Route The path that network traffic takes from its source to its destination. The route a datagram may follow can include many gateways and many physical networks.
- Page 132 User Manual of VDR-300NU Static IP Address A static IP address is an IP address permanently assigned to computer in a TCP/IP network. Static IP addresses are usually assigned to networked devices that are consistently accessed by multiple users, such as Server PCs, or printers. If you are using your Router to share your cable or DSL Internet connection, contact your ISP to see if they have assigned your home a static IP address.
- Page 133 User Manual of VDR-300NU Wide area network - A data communications network that spans any distance and is usually provided by a public carrier (such as a telephone company or service provider).
- Page 134 ΑΠΑΙΤΗΣΕΙΣ ΚΑΙ ΤΙΣ ΛΟΙΠΕΣ disposições da Directiva 1999/5/CE. ΣΧΕΤΙΚΕΣ ΔΙΑΤΑΞΕΙΣ ΤΗΣ ΟΔΗΓΙΑΣ 1999/5/ΕΚ Por medio de la presente, PLANET Technology Español Corporation, declara que 802.11n Dual band Slovensky Výrobca PLANET Technology Corporation, týmto Wireless VDSL2 Router cumple con los requisitos deklaruje, že táto 802.11n Dual band Wireless VDSL...
Need help?
Do you have a question about the VDR-300NU and is the answer not in the manual?
Questions and answers