Planet WNRT-625G User Manual
802.11n 3g broadband router
Hide thumbs
Also See for WNRT-625G:
- Quick installation manual (12 pages) ,
- Quick installation manual (2 pages)
Table of Contents
Advertisement
Quick Links
Advertisement
Table of Contents

Related Manuals for Planet WNRT-625G


Summary of Contents for Planet WNRT-625G
- Page 1 802.11n 3G Broadband Router WNRT-625G User’s Manual...
-
Page 2: Federal Communication Commission Interference Statement
Copyright Copyright © 2009 by PLANET Technology Corp. All rights reserved. No part of this publication may be reproduced, transmitted, transcribed, stored in a retrieval system, or translated into any language or computer language, in any form or by any means, electronic, mechanical, magnetic, optical, chemical, manual or otherwise, without the prior written permission of PLANET. - Page 3 Do not dispose of WEEE as unsorted municipal waste and have to collect such WEEE separately. Revision User’s Manual for PLANET 802.11N Wireless Router Model: WNRT-625G Rev: 1.0 (April. 2009)
-
Page 4: Table Of Contents
TABLE OF CONTENTS CHAPTER 1 INTRODUCTION......................... 5 ......................5 ACKAGE ONTENTS ..........................5 EATURES ........................5 PECIFICATION CHAPTER 2 HARDWARE INSTALLATION / NETWORK SETUP ............ 7 ..........................7 UTLOOK .....................8 ARDWARE NSTALLATION ........................11 ETWORK ETUP CHAPTER 3 WEB LOGIN ........................13 CHAPTER 4 QUICK SETUP ........................15 CHAPTER 5 GENERAL SETUP ...................... -
Page 5: Chapter 1 Introduction
Chapter 1 Introduction Thank you for purchasing WNRT-625G. This manual guides you on how to install and properly use the WNRT-625G in order to take full advantage of its features. Package Contents • WNRT-625G x 1 • Stand x 1 •... - Page 6 PWR, WLAN, WAN * 1, LAN * 4 Compatible Mobile UMTS/HSDPA network Compatible mobile Please contact with PLANET Technical Support for latest information. service provider Compatible internet Please contact with PLANET Technical Support for latest information. PC adapter list N Data Rate Table (1)
-
Page 7: Chapter 2 Hardware Installation / Network Setup
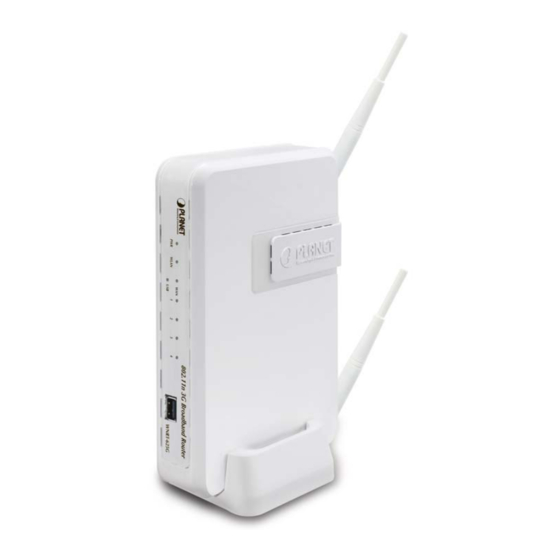
Chapter 2 Hardware Installation / Network Setup Please follow the below instruction to build the wireless network connection between WNRT-625G and your computers. Outlook Front Panel For 3G / 3.5G modem USB Adapter LED Name Light Status Description POWER Router is switched on and correctly powered. -
Page 8: Back Panel
2. Adjust the antennas of WNRT-625G. Try to adjust them to a position that can best cover your wireless network. The antenna’s position will enhance the receiving sensitivity. - Page 9 3-1. Connect your 3G/3.5G USB modem to the USB port located in front panel of WNRT-625G. NOTE: Please also check with your local dealer or PLANET Web site for supported 3G/3.5G USB adapter 3-2. Connect ADSL/Cable Modem to WAN port of WNRT-625G via RJ-45 Ethernet cable.
- Page 10 4. Connect all of your network devices to LAN port of WNRT-625G. Connect all your computers, network devices (network-enabled consumer devices other than computers, like game console, or switch / hub).Connect one of the LAN ports on WNRT-625G to your LAN switch/hub or a computer with a RJ-45 cable.
-
Page 11: Network Setup
Network Setup After you install your WNRT-625G, the TCP/IP settings should be set to obtain an IP address from a DHCP server (WNRT-625G) automatically. To verify your IP address, please follow the steps below: Click on Start > Run. In the run box type “cmd” and click OK. (Windows VistaR users type cmd in the Start .Search box.)At the... -
Page 12: Assign A Static Ip Address
LAN IP address on your router. Example: If LAN IP address of WNRT-625G is 192.168.0.1, make your IP address 192.168.0.X where X is a number between 2 and 99. Make sure that the number you choose is not in use on the network. -
Page 13: Chapter 3 Web Login
Chapter 3 Web Login WNRT-625G with an assigned IP address allows you to monitor and configure via web browser (e.g., MS Internet Explorer or Netscape). Open your web browser. Enter the IP address of your WNRT-625G in the address field (default IP address is http://192.168.0.1). - Page 14 Section Description Select your Internet connection type and then input the configurations needed Quick Setup to connect to your Internet Service Provider (ISP). This section contains configurations for the Broadband router’s advance functions such as: Port Forwarding, Virtual Server, Access Control, Hacker General Setup Attack Prevention, DMZ, Special applications and other functions to meet your LAN requirements.
-
Page 15: Chapter 4 Quick Setup
Chapter 4 Quick Setup This section describes the basic configuration of the WNRT-625G and allows you to connect to Internet easily. 4.1 Time Zone The time information is used for Log entries and Firewall settings. You can keep the default Time Server address or set a new IP address for your router to synchronize its time. -
Page 16: Wan Type
4.2 WAN Type Before establishing the Internet connection, please be sure to check with your ISP, and obtain all necessary information from them. Broadband Description With 3G mobile USB adapter providing Internet service. Please refer to 3G/3.5G section 4.2.1 for details. ISP will automatically give you an IP address. -
Page 17: Cable Modem
4.2.1 3G/3.5G With 3G mobile USB adapter providing Internet service. Some ISP may also require you to fill in additional information. Parameters Description Please input Pin Code for your UMTS or HSDPA or EVDO connection, this is optional, PIN Code and only required if your service provider asks you to do so. - Page 18 When the configuration finished, click “OK” to next step or click “Back” to previous step. After press “OK”, you will see a web screen to prompt you the configurations save successfully. You may press “Apply” to restart WNRT-625G with new configuration. Please refer to section 4.2.7 for more information about this screen.
-
Page 19: Pppoe Xdsl
Parameters Description IP address assigned by your The IP address that you’re ISP should provide you. Service Provider Subnet Mask Enter the Subnet Mask provided by your ISP (e.g. 255.255.255.0). DNS Address The IP address of ISP’s DNS (Domain Name Service) Server. Service Provider Gateway The ISP’s IP address gateway. -
Page 20: Pptp Xdsl
If you select “Continuous”, the router will always connect to the ISP. If the WAN line breaks down and links again, the router wills auto-reconnect to the ISP. If you select “Connect On Demand”, the router will auto-connect to the ISP when a client in LAN want to use the Internet and keep connected until the WAN idle timeout. - Page 21 Parameter Description Obtain an IP address Select it if the ISP requires you to obtain an IP address by DHCP automatically. Host Name Type in the host name provided by your ISP if any; otherwise, just leave it blank. To connect to the Internet, your ISP will require a MAC address from your PC. MAC Address Type in this MAC address in this section or use the “Clone MAC Address”...
-
Page 22: L2Tp Xdsl
If you select “Connect On Demand”, the router will auto-connect to the ISP when a client in LAN wants to use the Internet and keep connected until the WAN idle timeout. The router will close the WAN connection if the time period that no one is using the Internet exceeds the “Idle Time”. - Page 23 Parameter Description Obtain an IP address Select it if the ISP requires you to obtain an IP address by DHCP automatically. If your ISP requires a Host Name, type in the host name provided by your ISP; Host Name otherwise, just leave it blank. To connect to the Internet, your ISP will require a MAC address from your PC.
-
Page 24: Telstra Big Pond
line breaks down and links again, the router shall auto- reconnect to the ISP. If you select “Connect On Demand”, the router will auto-connect to the ISP when someone wants to use the Internet and keep connected until the WAN idle timeout. -
Page 25: Basic Settings
Parameters Description User Name Enter the User Name provided by your ISP for the connection. Password Enter the Password provided by your ISP for the connection. User Decide login If you ISP has provide the login server IP address to you, please check this box and server manually enter the Login Server IP address below. -
Page 26: Save Settings Successfully
When you press “OK” in above configuration, the settings will be saved and the screen appears as below. Before WNRT-625G restarting, the settings are saved, but not function yet. Press “Apply” to restart WNRT-625G for the change to take effect immediately. -
Page 27: Chapter 5 General Setup
Chapter 5 General Setup After click on the “General Setup” button at the main Page, you should see the screen below. The General Setup contains advanced features that allow you to configure the router to meet the network’s needs such as: Wireless, Port Forwarding, Virtual Server, Access Control, URL Blocking, Special Applications, DMZ and other functions. -
Page 28: System
This section shows how to setup the Broadband router’s system Time Zone, Password and Remote Management Administrator. 5.1.1 Time Zone The Time Zone allows WNRT-625G to allocate its time on the settings configured here; it will affect log display functions such as Security Log and Firewall settings. Parameter Description Select the time zone of the country you are currently in. -
Page 29: Password Setup
You may refer to section 4.2.7 for the information of this screen. Note: If you forget the password, please reset the WNRT-625G to the factory default by press RST/WPS button (on WNRT-625G’s rear panel) over 30 seconds. -
Page 30: Wan
5.1.3 Remote Management You can specify a Host IP address that can perform remote management from Internet. Parameters Description The IP address of the host on Internet that will have management / configuration access to the Broadband router. Leave it to 0.0.0.0 means anyone can access the router’s web-based configuration from any remote location. -
Page 31: Fail Over
5.2.1 Fail Over WAN failure detection works by detecting the presence of traffic on the 3G modem link. If the link is idle for too long the router will attempt to ping a target IP address. If the ping does not reply, the router assumes the link is down and attempts to fail over to Ethernet WAN link. - Page 32 WAN Priority Please select the WAN connection priority from the drop-down menu. Please input the idle time for detecting the Internet Detect (3): connection. If the major Internet connection is idle for this amount of time then the Idle Timeout router will send a ping to the target IP Address you have assigned.
- Page 33 5.2.3 Static IP If Static IP is selected, your ISP should provide all the information required in this screen. Please refer to the section 4.2.2 for more settings of this option. 5.2.4 PPPoE Select PPPoE if your ISP requires PPPoE protocol to connect to the Internet. Your ISP should provide all the information required in this section.
- Page 34 5.2.5 PPTP Select PPTP if your ISP requires the PPTP protocol to connect to the Internet. Your ISP should provide all the information required in this section. Please refer to section 4.2.4 for more settings of this option. 5.2.6 L2TP Select L2TP if your ISP requires the L2TP protocol to connect to the Internet.
- Page 35 5.2.7 Telstra Big Pond Select Telstra Big Pond if your ISP requires the Telstra Big Pond protocol to connect you to the Internet. Telstra Big Pond protocol is used by the ISP in Australia. Your ISP should provide all the information required in this section.
- Page 36 After configuration complete, please click “Apply” button to save the configuration. Then you will see a screen to prompt you the settings are saving successfully. You may press “Continue” for configure other settings or “Apply” to restart WNRT-625G with new configuration. You may refer to section 4.2.7 for the information of this screen.
-
Page 37: Lan
After configuration complete, please click “Apply” button to save the configuration. Then you will see a screen to prompt you the settings are saving successfully. You may press “Continue” for configure other settings or “Apply” to restart WNRT-625G with new configuration. Please refer to section 4.2.7 for more information about this screen. - Page 38 After configuration complete, please click “Apply” button to save the configuration. Then you will see a screen to prompt you the settings are saving successfully. You may press “Continue” for configure other settings or “Apply” to restart WNRT-625G with new configuration. Please refer to section 4.2.7 for more information about this screen.
-
Page 39: Wireless
After configuration complete, please click “Apply” button to save the configuration. Then you will see a screen to prompt you the settings are saving successfully. You may press “Continue” for configure other settings or “Apply” to restart WNRT-625G with new configuration. Please refer to section 4.2.7 for more information about this screen. - Page 40 5.4.1 Basic Settings In this page, allows you configure wireless information, the detail information please following below table. 2.4GHz (B): It forces the WNRT-625 to operate in 802.11b only. 2.4GHz (G): It forces the WNRT-625 to operate in 802.11g only. 2.4GHz (N): It forces the WNRT-625 to operate in 802.11n only.
-
Page 41: Advance Settings
5.4.2 Advance Settings You should not change the parameters in this screen unless you know what effect the changes will have on WNRT-625G. Please click “Apply” to save the settings when configuration finished. Parameters Description “Fragment Threshold” specifies the maximum size of packet during the Fragment Threshold fragmentation of data to be transmitted. - Page 42 After configuration complete, please click “Apply” button to save the configuration. Then you will see a screen to prompt you the settings are saving successfully. You may press “Continue” for configure other settings or “Apply” to restart WNRT-625G with new configuration. Please refer to section 4.2.7 for more information about this screen.
- Page 43 300.0 5.4.3 Security WNRT-625G provides complete wireless LAN security functions, includes WEP, WPA-pre share key (WPA-AES, WPA2-TKIP, WPA2 Mixed) and WPA RADIUS (WPA-AES, WPA2-TKIP, WPA2 Mixed). With these security functions, you can prevent your wireless LAN from illegal access. Please make sure your wireless stations use the same security function. In default, the security...
- Page 44 5.4.3.1 WEP When you select 64-bit or 128-bit WEP key, you have to enter WEP keys to encrypt data. You can generate the key by yourself. You can enter four WEP keys and select one of them as default key. Then the access point will just allow the clients that with the same encryption keys connected.
- Page 45 After configuration complete, please click “Apply” button to save the configuration. Then you will see a screen to prompt you the settings are saving successfully. You may press “Continue” for configure other settings or “Apply” to restart WNRT-625G with new configuration. Please refer to section 4.2.7 for more information about this screen.
- Page 46 After configuration complete, please click “Apply” button to save the configuration. Then you will see a screen to prompt you the settings are saving successfully. You may press “Continue” for configure other settings or “Apply” to restart WNRT-625G with new configuration. Please refer to section 4.2.7 for more information about this screen.
- Page 47 After configuration complete, please click “Apply” button to save the configuration. Then you will see a screen to prompt you the settings are saving successfully. You may press “Continue” for configure other settings or “Apply” to restart WNRT-625G with new configuration. Please refer to section 4.2.7 for more information about this screen.
-
Page 48: Access Control
After configuration complete, please click “Apply” button to save the configuration. Then you will see a screen to prompt you the settings are saving successfully. You may press “Continue” for configure other settings or “Apply” to restart WNRT-625G with new configuration. Please refer to section 4.2.7 for more information about this screen. - Page 49 ‘unConfigured’. This is the WPS PIN code of this wireless router. This code is useful when Self PIN code WNRT-625G router sets as Enrollee, you need to fill this number into the web page of the other device. SSID The SSID of this wireless router will be displayed here.
- Page 50 1. Ensure you have set the security setting on WNRT-625G (as Registrar). 2. Click the WPS button on WNRT-625G (or the “Start PBC” button on the web interface of WNRT-625G) and the other device (supports PBC function) in 2 minutes.
-
Page 51: Qos
3. Click the PIN buttons on WNRT-625G and the other device in 2 minutes. 4. If you see the wireless client in the list, WPS-PIN setting is successful. Wireless device Wireless device Wireless device PIN (as Enrollee) setup step: 1. Select Config Mode: “Enrollee” on WNRT-625G. - Page 52 After configuration complete, please click “Apply” button to save the configuration. Then you will see a screen to prompt you the settings are saving successfully. You may press “Continue” for configure other settings or “Apply” to restart WNRT-625G with new configuration. Please refer to section 4.2.7 for more information about this screen.
- Page 53 Add/Edit QoS Rule You can assign packet classification criteria by its source IP range, destination IP range, traffic type, protocol, and source port range and destination port range parameters. The parameters that you leave as blank will be ignored. The priority of this rule will be applied to packets that match classification criteria of this rule.
-
Page 54: Nat
Please enter the IP address of the PC from remote site. If you don’t assign, Remote IP Address please let it blank. Please input the range of local (source) port number that will be affected by this rule. If you want to apply this rule on port 80 to 90, please input ’80-90’; if Remote Port Range you want to apply this rule on a single port, just input the port number, like ‘80’;... -
Page 55: Static Routing
After configuration complete, please click “Apply” button to save the configuration. Then you will see a screen to prompt you the settings are saving successfully. You may press “Continue” for configure other settings or “Apply” to restart WNRT-625G with new configuration. Please refer to section 4.2.7 for more information about this screen. -
Page 56: Port Forwarding
After configuration complete, please click “Apply” button to save the configuration. Then you will see a screen to prompt you the settings are saving successfully. You may press “Continue” for configure other settings or “Apply” to restart WNRT-625G with new configuration. Please refer to section 4.2.7 for more information about this screen. -
Page 57: Virtual Server
After configuration complete, please click “Apply” button to save the configuration. Then you will see a screen to prompt you the settings are saving successfully. You may press “Continue” for configure other settings or “Apply” to restart WNRT-625G with new configuration. Please refer to section 4.2.7 for more information about this screen. - Page 58 Parameters Description Enable Virtual Server Enable Virtual Server. This is the LAN client/host IP address that the Public Port number packet will be sent to. Private IP Note: You need to give your LAN PC clients a fixed/static IP address for Virtual Server to work properly.
- Page 59 After configuration complete, please click “Apply” button to save the configuration. Then you will see a screen to prompt you the settings are saving successfully. You may press “Continue” for configure other settings or “Apply” to restart WNRT-625G with new configuration. Please refer to section 4.2.7 for more information about this screen.
-
Page 60: Special Applications
5.6.4 Special Applications Some applications require multiple connections, such as Internet games, video conferencing, Internet telephony and others. In this section you can configure the router to support multiple connections for these types of applications. Parameters Description Enable Enable the Special Application function. Type IP Address for the Popular Application. - Page 61 After configuration complete, please click “Apply” button to save the configuration. Then you will see a screen to prompt you the settings are saving successfully. You may press “Continue” for configure other settings or “Apply” to restart WNRT-625G with new configuration. Please refer to section 4.2.7 for more information about this screen.
- Page 62 After configuration complete, please click “Apply” button to save the configuration. Then you will see a screen to prompt you the settings are saving successfully. You may press “Continue” for configure other settings or “Apply” to restart WNRT-625G with new configuration. Please refer to section 4.2.7 for more information about this screen.
-
Page 63: Firewall
After configuration complete, please click “Apply” button to save the configuration. Then you will see a screen to prompt you the settings are saving successfully. You may press “Continue” for configure other settings or “Apply” to restart WNRT-625G with new configuration. Please refer to section 4.2.7 for more information about this screen. - Page 64 Parameters Description You can select to enable or disable the firewall function. After selected, Enable/Disable please click “Apply” to make the settings effect. After configuration complete, please click “Apply” button to save the configuration. Then you will see a screen to prompt you the settings are saving successfully. 5.7.1 Access Control This screen allows you to restrict users from accessing certain Internet applications/services (e.g.
- Page 65 After configuration complete, please click “Apply” button to save the configuration. Then you will see a screen to prompt you the settings are saving successfully. You may press “Continue” for configure other settings or “Apply” to restart WNRT-625G with new configuration. Please refer to section 4.2.7 for more information about this screen.
- Page 66 Add PC Parameters Description Please input any text to describe this IP address, up to 16 alphanumerical Client PC Description characters. Please input the starting IP address in the left field, and input the end IP address in the right field to define a range of IP addresses, or just input the Client PC IP Addresses IP address in the left field to define a single IP address.
-
Page 67: Url Blocking
After configuration complete, please click “Apply” button to save the configuration. Then you will see a screen to prompt you the settings are saving successfully. You may press “Continue” for configure other settings or “Apply” to restart WNRT-625G with new configuration. Please refer to section 4.2.7 for more information about this screen. - Page 68 After configuration complete, please click “Apply” button to save the configuration. Then you will see a screen to prompt you the settings are saving successfully. You may press “Continue” for configure other settings or “Apply” to restart WNRT-625G with new configuration. Please refer to section 4.2.7 for more information about this screen.
- Page 69 DoS - Advanced Settings When you click ‘Advanced’ button in DoS menu, the following message will be displayed on your web browser: Parameters Description Set the threshold of when this DoS prevention mechanism will be activated. Please check the box of Ping of Death, and input the frequency of threshold Ping of Death (how many packets per second, minute, or hour), you can also input the ‘Burst’...
- Page 70 After configuration complete, please click “Apply” button to save the configuration. Then you will see a screen to prompt you the settings are saving successfully. You may press “Continue” for configure other settings or “Apply” to restart WNRT-625G with new configuration. Please refer to section 4.2.7 for more information about this screen.
-
Page 71: Chapter 6 Status
WAN and LAN interfaces, the current firmware and hardware version numbers, any illegal attempts to access your network, and information on all DHCP client PCs currently connected to your network. Internet Connection View WNRT-625G’s current Internet connection status and other related information. -
Page 72: Device Status
This screen will show you the real-time information of WNRT-625G. Parameters Description This page shows the current system log of WNRT-625G. It displays the System Log working information about WNRT-625G. About the bottoms of the page, the system log can be saved to a local file by... -
Page 73: Security Log
View any attempts that have been made to illegally gain access to your network. Parameters Description This page shows the current security log of WNRT-625G. It displays any illegal attempts to access your network. About the bottoms of the page, the security log can be saved to a local file by Security Log press “Save”... -
Page 74: Active Dhcp Client
Active DHCP Client View your client's information that is currently linked to WNRT-625G's DHCP server. Parameters Description DHCP Client Table This page shows all the DHCP clients currently connected to your network. The “Active DHCP Client Table” displays the IP address and the MAC address and Time Expired of each Client. -
Page 75: Chapter 7 Tools
Chapter 7 Tools This page includes the basic configuration tools, such as Configuration Tools (save or restore configuration settings), Firmware Upgrade (upgrade system firmware) and Reset. Configuration Tools The Configuration Tools screen allows you to “Backup” the router’s current configuration setting. Saving the configuration settings provides an added protection and convenience when problems occur and you have to reset to factory default. -
Page 76: Firmware Upgrade
Configuration Tools restore the saved configuration to WNRT-625G. The "Restore to Factory Defaults" tool can force WNRT-625G to perform a power reset for restore it to original factory settings. After configuration complete, please click “Apply” button to save the configuration. Then you will see a screen to prompt you the settings are saving successfully. -
Page 77: Reset
Once you’ve selected the new firmware file, click “Apply” bottom to start the upgrade process. (You may have to wait a few minutes for the upgrade to complete and WNRT-625G restart). After the WNRT-625G restart, you can start using the router. -
Page 78: Chapter 8 Troubleshooting
Chapter 8 Troubleshooting If you found WNRT-625G is working improperly or stop responding to you, please kindly read this troubleshooting first. Some problems can be solved by you within very short time! Please contact with your local dealer if below methods are failed. - Page 79 4. Try to know what computers do on your local network. If someone’s transferring big files, other people will think Internet is really slow. 5. If this never happens before, call you Internet service provider to know if there is something wrong with their network.
-
Page 80: Ec Declaration Of Conformity
*Model Number: WNRT-625G * Produced by: Manufacturer‘s Name : Planet Technology Corp. Manufacturer‘s Address: 11F, No 96, Min Chuan Road Hsin Tien, Taipei, Taiwan, R.O.C. is herewith confirmed to comply with the requirements set out in the Council Directive on the 1999/5/EC R&TTE.
Need help?
Do you have a question about the WNRT-625G and is the answer not in the manual?
Questions and answers