
Related Manuals for Saeco Atlante 500


Summary of Contents for Saeco Atlante 500
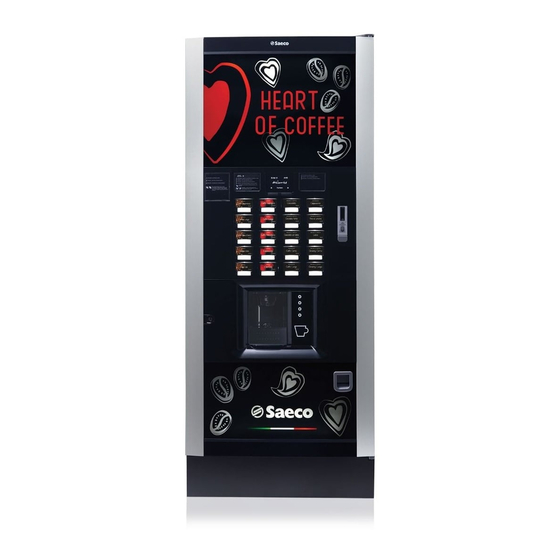
- Page 1 Vending Machine WARNING: This instruction manual is intended exclusively for specialized personnel.
-
Page 2: Main Parts
English MAIN PARTS ATLANTE 500 MAIN PARTS Door lock Display Product keypad Coin slot Coin return button Instruction plate Dispensing outlet door Coin return slot... - Page 3 English ATLANTE 500 1 GRINDER VERSION MAIN PARTS Coffee bean hopper C Coffee Group Container 1 (instant products) Coffee ground channel Container 2 (instant products) Fluid discharge tank Container 3 (instant products) Collecting tray Container 4 (instant products) Cup dispenser...
- Page 4 English ATLANTE 500 2 GRINDER VERSION MAIN PARTS Coffee bean hopper C Coffee ground channel Container 1 (instant products) Fluid discharge tank Container 2 (instant products) Collecting tray Container 3 (instant products) Cup dispenser Container 4 (instant products) Stirrer dispenser...
- Page 5 English ATLANTE 500 1 & 2 GRINDER VERSION MAIN PARTS Power Board Air break device Coffee boiler Pump Triac board Suction unit Water connection coupling Power cord socket...
-
Page 6: Container 3 (Instant Products)
English ATLANTE 500 INSTANT VERSION MAIN PARTS Container 5 (instant products) Fluid discharge tank Container 1 (instant products) Collecting tray Container 2 (instant products) Cup dispenser Container 3 (instant products) Stirrer dispenser Container 4 (instant products) Sugar container Instants opening... - Page 7 English ATLANTE 500 INSTANT VERSION MAIN PARTS Power Board Air break device Triac board Instant product boiler Suction unit Water connection coupling Power cord socket...
- Page 8 English ATLANTE 700 MAIN PARTS Door lock Display Product keypad Coin slot Coin return button Instruction plate Dispensing outlet door Coin return slot...
-
Page 9: Coffee Bean Hopper C
English ATLANTE 700 1 GRINDER VERSION MAIN PARTS Coffee bean hopper C Coffee Group Container 6 (instant products) Descaler device Container 5 (instant products) Coffee ground channel Container 1 (instant products) Fluid discharge tank Container 2 (instant products) Collecting tray Container 3 (instant products) Cup dispenser Container 4 (instant products) -
Page 10: Spiral Mixer
English ATLANTE 700 2 GRINDER VERSION MAIN PARTS Coffee bean hopper C Descaler device Container 5 (instant products) Coffee ground channel Container 1 (instant products) Fluid discharge tank Container 2 (instant products) Collecting tray Container 3 (instant products) Cup dispenser Container 4 (instant products) Stirrer dispenser Coffee grinder... - Page 11 English ATLANTE 700 1 & 2 GRINDER VERSION MAIN PARTS Power Board Air break device Steam boiler Coffee boiler Pump Triac board Instant product boiler Suction unit Water connection coupling Power cord socket...
-
Page 12: Dispensing Arm
English ATLANTE 700 INSTANT VERSION MAIN PARTS Container 6 (instant products) Descaler device Container 5 (instant products) Fluid discharge tank Container 1 (instant products) Collecting tray Container 2 (instant products) Cup dispenser Container 3 (instant products) Stirrer dispenser Container 4 (instant products) Sugar container Instants opening CPU card... - Page 13 English ATLANTE 700 INSTANT VERSION MAIN PARTS Power Board Air break device Triac board Instant product boiler Suction unit Water connection coupling Power cord socket...
-
Page 14: Table Of Contents
9.2 PROGRAMMING MENU 2.2 DESCRIPTION AND INTENDED USE 9.3 MAINTENANCE MENU 2.3 VENDING MACHINE IDENTIFICATION 9.4 MACHINE READY / FREE BUTTON 2.4 ATLANTE 500 TECHNICAL SPECIFICATIONS 9.5 RESET 2.5 ATLANTE 700 TECHNICAL SPECIFICATIONS 10 OPERATION AND USE 3 SAFETY 10.1 BEVERAGE SELECTION 3.1 INTRODUCTION... -
Page 15: Introduction To The Manual
Always refer to this publication before carrying out any operation. User Indicates the user of the vending machine. This person is Manufacturer: SAECO Vending S.p.A. not authorized to carry out any cleaning or maintenance Località Casona, 1066 40041 Gaggio Montano operation. -
Page 16: Information On The Vending Machine
English INFORMATION ON THE VENDING MACHINE Information for the Do not place any product inside the vending machine which may be dangerous as a result of unsuitable temperatures. Maintenance Technician The vending machine must be installed in a well-lit, dry area, away from bad weather and dust, on a floor Improper use of the vending machine invalidates all suitable to support its weight. -
Page 17: Vending Machine Identification
English Vending Machine Identification The vending machine is identified by the name, model and serial number which can be found on the relevant data plate. Data plate The following data can be found on the plate: • name of Manufacturer; •... -
Page 18: Atlante 500 Technical Specifications
English ATLANTE 500 Technical Container capacity Specifications Coffee beans (1 Grinder model) 3,5 kg Dimensions (w x h x d) 646 x 1830 x 810 mm Coffee beans (2 Grinders model) 2,6 + 2,6 kg Weight 162 kg Freeze-dried coffee (Instant Model) -
Page 19: Atlante 700 Technical Specifications
English ATLANTE 700 Technical Container capacity Specifications Coffee beans (1 Grinder model) 4,2 kg Dimensions (w x h x d) 750 x 1830 x 865 mm Coffee beans (2 Grinders model) 3,5+ 3,5 Kg Weight 184 kg Freeze-dried coffee (Instant Model) 1,2 kg Decaffeinated coffee 1 kg... -
Page 20: Safety
• read the instructions contained in this publication and in the amendments) and CE Marking Directive 93/68/EEC, enclosed documents carefully; SAECO Vending has drawn up a technical file of the ATLANTE 500 and ATLANTE 700 vending machine held • use personal protection devices during installation, testing and at its plants. -
Page 21: Safety Devices
English Supply operator This operation, necessary for starting up the vending machine, disables the safety system. The Maintenance Technician assigns the safekeeping of the access key to the Supply operator who is in charge of product supply, external cleaning, and starting up / stopping of the vending machine. -
Page 22: Handling And Storage
English HANDLING AND STORAGE Unloading and handling Storage Unloading and handling operations after transportation If the vending machine is not installed immediately, it must be carried out only by qualified personnel and using should be stored in a sheltered area, conforming to the suitable equipment. -
Page 23: Installation
English INSTALLATION Warning • Door safety microswitch disabling keys (Maintenance Technician) • Product labels and prices The vending machine cannot be installed outdoors; • Instruction plate avoid placing it in areas where the temperature is less than 1°C or more than 25°C and in particularly dump •... -
Page 24: Use Of Different-Sized Stirrers
English From the discharge tank, take out the accessory packet containing the following items: - 4 feet; - 1 key for the brew group. Lift the pallet in a way that the four fixing A screws can be removed. Adjust the levelling using the relevant feet. Before operating the machine, unscrew the 4 screws to remove the central plate support bracket. -
Page 25: Label Application
English Remove the protection and disconnect the connectors. To substitute the 90 mm stirrers with those of 105 mm or 115 mm proceed as follows: • Unfasten the two screws fixing the stirrer guide; Withdraw the keypad panel. • Move the stirrer guide into the hole corresponding to the desired dimension and tighten the two screws. - Page 26 English Standard product configuration Atlante 500 Instant...
- Page 27 English Standard product configuration Atlante 700 Instant...
- Page 28 English Standard product configuration ATLANTE 500 1 macina...
- Page 29 English Standard product configuration ATLANTE 700 1 macina...
- Page 30 English Standard product configuration ATLANTE 500 2 macina...
- Page 31 English Standard product configuration ATLANTE 700 2 macina...
-
Page 32: Fitting The Coffee Grounds Bag
English 5.4.2 Atlante 500 Instruction Place the plates on the transparent protections and fit them back on the keypad panel. Plates Open the door and release the transparent protection by pressing the retainer. Fitting the coffee grounds Insert the plate on the transparent protection and fit it Remove the clip from the grounds discharge channel. -
Page 33: Fitting The Payment Systems
English Fitting the payment systems Connection to water mains The vending machine is designed for the installation of It is recommended to use a descaling device for the various payment systems, such as: water network supplying the vending machine, - parallel banknote reader 24V DC; especially for water with a high calcium and magnesium content (hard water). -
Page 34: Connection To The Electric Network
English Connection to the electric network The Maintenance Technician, who is responsible for the installation of the vending machine, must ensure that: • the electric system complies with current safety regulations; • the supply voltage corresponds to that indicated on the data plate. -
Page 35: Description Of Controls For Atlante
English DESCRIPTION OF CONTROLS FOR ATLANTE 500 Display 6.3.2 “-” Key - Sugar Quantity The display shows the messages during standard Decreases the quantity of sugar in the selected beverage. operation, programming and maintenance modes. Press the key before selecting the beverage. -
Page 36: 5-Button Keypad
English 5-button Keypad The 5-button keypad allows for the use of 5 quick controls without entering the programming or maintenance menu. Key 1 : Free selection It allows a free selection. Key 2 : Washing It performs a wash cycle of mixing bowls. Key 3 : Total counter It displays total and partial counters for products for 5 seconds. -
Page 37: Description Of Controls For Atlante
English DESCRIPTION OF CONTROLS FOR ATLANTE 700 Display 7.3.3 Set 1 Pre-selection button The display shows the messages during standard The function connected to the button may be chosen from operation, programming and maintenance modes. the following options: A. Beverage 16 B. -
Page 38: Supply And Starting Up
8.1.2 Single Grinder Version The containers delivered are designed to dispense the 8.1.1 Instant Version following products: Instant product Atlante 500 Atlante 700 The containers delivered are designed to dispense the Hot Chocol a te Hot Chocolate following products: Milk... -
Page 39: Instant Product Supply
English Instant product supply Coffee bean supply Open the cover of the container to be supplied. Remove the container cover. Pour the instant product into the container. Put coffee beans into the container. Close the container cover. Sugar supply Replace the cover on the container. For the double coffee grinder version, the operation To refill the Instant version vending machine with sugar, fill described above must be repeated for both the containers... -
Page 40: Coffee Grinding Calibration
English • free the adjusting lever from the rack and put the internal To adjust the solenoid valve capacity turn the flow divider pulling peg into one of the 4 possible positions in regulating screw. Turn it clockwise to reduce water the basic coffee quantity area (7 gr - 8 gr - 9 gr - 10gr);... -
Page 41: Cup Supply
English Introduce the stirrers with their packing band into the • load two of the most accessible tubes. column; once they are placed on the bottom, cut and remove the band. • replace the cover on the cup columns. 8.10 First start-up of the vending machine Supply the vending machine (following the instructions... -
Page 42: Cleaning The Parts In Contact With Foodstuffs
English Before powering the machine, thus starting the automatic The rinsing operation must be repeated until water installation make sure that the water softener is filled with flows out of the brewing nozzles regularly. water and the air bubbles are removed. 8.11.1 Automatic filling instant 8.12... -
Page 43: Programming And Maintenance Menu
English PROGRAMMING AND MAINTENANCE MENU This section illustrates how to set up or modify the vending machine programming and maintenance settings. It is therefore necessary to read it carefully, and intervene only when the correct sequence of operations to be performed is fully understood. Key description of programming Programming menu and maintenance phases... - Page 44 English 9.2.2 Structure of the EV Water Soluble Empty 1.15. 1.28.8. programming menu Assign Time 8 1.16. T-Fitting 1.28.9. Water Empty ITEM NO. MENU ITEM 1.17. Pulse counter Time SYSTEM MANAGEMENT Multiple 1.18. 1.1. VM Code beverage Cofee Empty 1.28.10. 1.2.
- Page 45 English MENU ITEM (*) = Visible only if complete 5.8.10. Alarm timeout ITEM NO. menus are enabled. 2.9. Decimal Digits 2.10. Credit Wdog 5.8.11. Refill allarm BEVERAGE BREWING timeout 5.9. Door Heaters 3.1. Product Before Show 3.1.1.-7. Instant pr. 1-7 5.10.
- Page 46 English 9.2.3 Description of messages in the programming menu DISPLAY Description The SYSTEM MANAGEMENT items are: SYSTEM MANAGEMENT … 1.1. Enables an identification code to be assigned to the vending machine. VM Code 531000 Enables setting of the maximum amount of beverage or coffee. Once the maximum amount is reached, the 1.2.
- Page 47 English DISPLAY Description The “Stand-by” and “ECO” modes allow reducing the energy consumption of the machine. 1.6. Energy save It is possible to select one or both modes. … The “ECO” mode is activated after some minutes of inactivity which can be set by means of 1.6.1.
- Page 48 English DISPLAY Description 1.9.2.1. Allows selecting the desired preheating type for the brew group. HS type The possible options are: 1HS3 light 2HS3 Strong 3HS2 The first 2 modes require the presence of the steam boiler as they use a puff of steam to preheat the brew group.
- Page 49 English DISPLAY Description 1.13. Cup dispenser settings. Cup Management 1.13.1. Cup Dispenser 1.13.1.1. It enables using the cup dispenser. Enable It sets the number of cups left in the dispenser when the refill microswitch for the following 1.13.1.2. cup column has to be activated. Cup stock 1.13.1.3.
- Page 50 B. Set 1 Pre-selection C. Disabled A - Beverage button 16 (11 for Atlante 500): this is the default function. Button 16 (11 for Atlante 500) functions as a regular button. B - Set 1 Pre-selection: by choosing this function the button becomes a pre-selection button for the 21-40 (16-30 for Atlante 500).
- Page 51 … A. Beverage 17 (12 for Atlante 500) B. Set 2 Pre-selection A - Beverage button 17 (12 for Atlante 500): this is the default function. Button 17 (12 for Atlante 500) functions as a regular button. B - Set 2 Pre-selection: by choosing this function the button becomes a pre-selection button for the 41-60 beverage set (31-45 for Atlante 500).
- Page 52 Allows setting a password to access the maintenance menu. Service Password Important If the password is lost, you will have to contact the Saeco Vending Technical Assistance Service to regain access to the Programming Menus. 1.26. Adjusts the contrast of the display.
- Page 53 English DISPLAY Description The Atlante machine may be equipped with one or two microswitches for brew group 1.35. positioning according to when it was produced. The software can automatically detect how Micro BU many microswitches are installed on the machine (this function is available starting from the software version 2.xx.xx).
- Page 54 Enables access to particular functions of the MDB protocol. MDB settings … It allows disabling or enabling the possibility of performing any Saeco Card recharge 2.4.1. operation By setting RECHARGE = NO the vending machine will only deduct the cost Recharge Enabled from MDB cards.
- Page 55 Beverage yes The BUTTON - BEVERAGE NUMBER connection changes in the case that buttons 16 (11 for Atlante 500) and 17 (12 for Atlante 500) are used as "PRE-SELECTION" buttons - see the "BUTTONS 16 AND 17 TABLE" and "BUTTONS 11 AND 12 TABLE"...
- Page 56 English DISPLAY Description 3.3. This is the order in which the products making up the beverage are brewed. Beverage … The possible choices are: 3.3. 0 =does not dispense any product Beverage 1 1 = dispenses product 1 Sequence 0C00 2 = dispenses product 2 3 = dispenses product 3 4 = dispenses product 4 5 = dispenses product 5...
- Page 57 English DISPLAY Description Allows choosing whether the beverage will be dispensed using the cold beverage dispensing 3.3. Beverage Cold beverage 3.3. Allows choosing whether the beverage will be dispensed with or without paper cup. Beverage Include cup 3.3. This defines the quantity of sugar to be dispensed with the beverage. Beverage Sugar 2 The following "SUGAR TABLE"...
- Page 58 English DISPLAY Description 4.2.1.2 Single price setting Single Prices Enables selection of the price level to associate to each beverage. B01: P00 0.00 Select the beverage to associate to a price using the UP and DOWN keys and confirm with ENTER, then select the price level (from 001 to 099) again with the UP and DOWN keys and confirm with ENTER.
- Page 59 English DISPLAY Description 4.2.4.3 Single price setting Single Prices Enables selection of the price level to associate to each beverage. B01: P00 0.00 Select the beverage to associate to a price using the UP and DOWN keys and confirm with ENTER, then select the price level (from 001 to 099) again with the UP and DOWN keys and confirm with ENTER.
- Page 60 English DISPLAY Description 4.3.4.2./ 4.4.4.2. Global price 4.3.4.2./ 4.4.4.2. Global price 0.00 4.3.4.3./ 4.4.4.3. Single Prices 4.3.4.3./ 4.4.4.3. Single Prices B01: P00 0.00 4.5. Allows you to select if the beverages will be provided free-of-charge, upon payment, or Free free-of-charge within a time range. Never 4.6.
- Page 61 English DISPLAY Description [° C] Allows the setting of the temperature desired inside the machine [Range: 3 .. 30]. The 5.5./ 6.5. control turns off the cooling group if the set value is reached and it turns it on if the Temperature 1/2 temperature is higher than the target plus 1°C (as long as the technical specifications of the …...
- Page 62 English DISPLAY Description To prevent a customer from selecting a product of which the machine has run out, each 5.12./ 6.12. Capacity ctrl enabled spiral can be enabled to supply only a preset number of products. 5.13./ 6.13. The following is necessary in order to operate with independent control: Capacity 1- enable independence control (menu "Capacity ctrl enabled");...
- Page 63 English DISPLAY Description We go to the code assignment menu (menu "Unit codes"). Select motor 121. By default, we have: motor 121 assigned to code 121. M121 --> 121 This is fine. 121 will be our main unit selection. We now move onto motor 122 and set it up in such a way that it is assigned not to code 122, but rather to code 121.
- Page 64 English PAIRING TABLE Channel Payment system Coin validator Coin validator Coin validator Coin validator Coin validator Coin validator Cancelling machine SUGAR TABLE Sugar in beverage Sugar in beverage with Settings without preselection preselection Without sugar Quantity preselected Quantity preselected Quantity preselected Quantity preselected Quantity preselected Stop sugar...
- Page 65 English ATLANTE 500: BUTTONS 11 AND 12 TABLE KEY 11 and 12 = KEY 11 and 12 = PRESELECTION BEVERAGE 11 and 12 Press Press Press Press PRESELECTION PRESELECTION 11+KEY 12+KEY Beverage 1 Beverage 1 Beverage 16 Beverage 31 Beverage 2...
- Page 66 English ATLANTE 700: BUTTONS 16 AND 17 TABLE KEY 16 and 17 = KEY 16 and 17 = PRESELECTION BEVERAGE 16 and 17 Press Press Press Press PRESELECTION PRESELECTION 16+KEY 17+KEY Beverage 1 Beverage 1 Beverage 21 Beverage 41 Beverage 2 Beverage 2 Beverage 22 Beverage 42...
-
Page 67: Maintenance Menu
English Maintenance menu 9.3.2 Structure of the maintenance menu The structure of the maintenance menu is indicated in ITEM NO. MENU ITEM section “Structure of the Maintenance Menu”. MAINTENANCE 1.1. Error log The section “Description of Messages in the Maintenance 1.2. - Page 68 English 9.3.3 Description of messages in the maintenance menu DISPLAY Description This function allows to show and reset the errors that may be present. It is also possible to carry out maintenance on the vending machine. MAINTENANCE To reset the errors, use the menu under the maintenance item. …...
- Page 69 English DISPLAY Description 1.4.3. Allows handling the coffee brew group. Brew Group Calib. Allows selecting one of the solenoid valves on the vending machine and activating it for 10 1.4.4. seconds, in order to check the flow (flow adjustment is described in par. "Water Flow EV calib.
- Page 70 English DISPLAY Description 2.12. Allows resetting the statistical data. Reset 3./ 4. SNACK 1/ SNACK 2 … 3.1./ 4.1. It allows manual testing of the photoelectric cell system operation. The machine emits a Photocell test beep each time the photoelectric cell system detects an object. …...
-
Page 71: Machine Ready / Free Button
English Machine Ready / Free Button Open the door, disable the safety device (see section “Safety Devices”) and press the P3 key. If pressed during the initial warm-up, this button allows inducing the “MACHINE READY” status before the boilers reach their set temperature. If pressed after the “MACHINE READY”... -
Page 72: Operation And Use
10.1 Beverage selection dispensing message (default message is: "WAIT FOR PRODUCT"). The ATLANTE 500 vending machine can dispense 39 beverages. Beverage selection The ATLANTE 700 vending machine can dispense 54 If the vending machine is not set to dispense free beverages. -
Page 73: Cleaning And Maintenance
English CLEANING AND MAINTENANCE Unplug the power cord before performing any 11.2 Cleaning and scheduled cleaning and/or maintenance operation. maintenance All components must be rinsed with warm water only, without using any detergent or solvent that could It is prohibited to perform cleaning or maintenance modify their form and operation. -
Page 74: Maintenance Schedule
English 11.2.1 Maintenance schedule COMPONENT TO BE MAINTENANCE CLEANED Use a cloth dampened with cleansers suitable for contact Display with food. Use a cloth dampened with cleansers suitable for contact "Operating instructions" label with food. Beverage dispensing outlet Use a cloth dampened with cleansers suitable for contact with food. -
Page 75: Drip Tray Cleaning
English 11.2.2 Drip tray cleaning 11.2.4 Emptying the fluid discharge tank Unscrew the knob, remove, open and thoroughly clean the Remove the tank from the vending machine. drip tray. Wash the tank, than replace it inside the machine. 11.2.5 Cleaning of the coffee brew group Remove the protection carter and disconnect the hose from the dispensing arm. - Page 76 English Remove the brew group keeping the lever in 3 position. 11.2.6 Cleaning the instant product dispenser and the mixer Disconnect the dispensing hose from the nozzle and from the dispensing arm. Wash the brew group with lukewarm water and clean the upper filter carefully.
- Page 77 English Remove the fan by levering carefully with a flat Remove the dispensing outlet. screwdriver. Remove the lower plate from the dispensing outlet and wash it thoroughly with lukewarm water. Reassemble the lower plate onto the dispensing outlet only when they are completely dry. Assemble the components in reverse order.
- Page 78 English To clean a soluble product canister: The following operations are necessary to clean the sugar container: • remove the container by pushing it towards the inside of the vending • turn the container locking lever clockwise; machine in order to release the lock (A), then push it upwards; •...
- Page 79 English 11.2.9 Cleaning the dispensing arm 11.2.10 Cleaning the coffee grinder Remove the elastic which blocks the hoses. Each month, clean the coffee grinder of any residues that might lead to deposits. After removing the coffee bean hopper (see section "Cleaning the Containers"), clean the coffee grinder carefully with an aspirator.
-
Page 80: Non-Scheduled Maintenance
English 11.2.12 Cleaning the stirrer channel Remove the stirrer chute Wash the stirrer chute with lukewarm water and follow the above procedure in the reverse order to refit into place 11.3 Non-scheduled maintenance The vending machine is equipped with an assembly plate containing most of the vending machine components (Coffee grinder, Gear motor, Mixer, Instant product motors, Pump, Turbine and De-humidifier). -
Page 81: Programming Key
English At the start-up, the message "DATA TRANSFER - VMC ==> KEY" will be displayed. If the inserted key is empty refer to example A and if the key already contains data refer to example B. In case A, it is only possible to transfer the parameters from the vending machine to the programming key. -
Page 82: Software Update
English 11.5 Software update • if the version of the installed software is equal or newer than 1.00.06 version, rename file "SAE_ATLA.s19". The vending machine management programme is stored in flash memory included “Freescale If the file name is not correct, the software will not be MC9S12XEP100”... - Page 83 English • After a CPU beep** release the P1 button; • 3 close beeps and the restart of the vending machine confirm that the software has been updated. • switch off the vending machine; • Remove the VDRIVE and the interface circuit. *All common USB keys used on PCs are suitable.
-
Page 84: Troubleshooting
English TROUBLESHOOTING The following table indicates the possible error or alarm causes which may lead to a partial or total arrest of the vending machine. The following is reported for each cause: • associated code, reported in the error LOG; •... - Page 85 English Error Machine without snack Machine With Cause Notes / Recommended Intervention Code slaves Snack Slaves Instant product Models with 2 boilers Beverages with Check the coffee boiler (connections, ==>beverages with instant boiler instant products thermostats, temperature sensor). products not available temperature not available sensor reading...
- Page 86 English Error Machine without snack Machine With Cause Notes / Recommended Intervention Code slaves Snack Slaves Slow instant Models with 2 boilers Beverages with ==>beverages with instant product boiler instant products products not available warming up not available Instant Models ==> Vending machine out of service BDV warning Warning only...
- Page 87 English Error Machine without snack Machine With Cause Notes / Recommended Intervention Code slaves Snack Slaves Photoelectric cells - Photoelectric cell Check the product supply. the maximum system disabled number of consecutive E59 errors on different Check the photoelectric cell system. selections has been reached.
-
Page 88: Storage Disposal
English STORAGE DISPOSAL 13.1 Change of location 13.2 Inactivity and storage periods Should the vending machine be positioned in another site If the vending machine needs to be stored or remains it is necessary to carry out the following operations: inactive for a long period, carry out the same operations as described in section “Change Location", therefore: •... -
Page 89: Instructions For End-Of-Life Disposal Treatment
English INSTRUCTIONS FOR END-OF-LIFE DISPOSAL TREATMENT 14.1 INFORMATION FOR THE USER This product complies with EU Directive 2002/96/EC. The symbol on the product or on its packaging indicates that this product may not be treated as household waste. Instead it shall be handed over to the applicable collection point for the recycling of electrical and electronic equipment.