Panasonic HC-X1000 Operating Instructions Manual
4k video camera
Hide thumbs
Also See for HC-X1000:
- Owner's manual (54 pages) ,
- Basic operating instructions manual (44 pages)

Related Manuals for Panasonic HC-X1000


Summary of Contents for Panasonic HC-X1000
-
Page 1: Operating Instructions
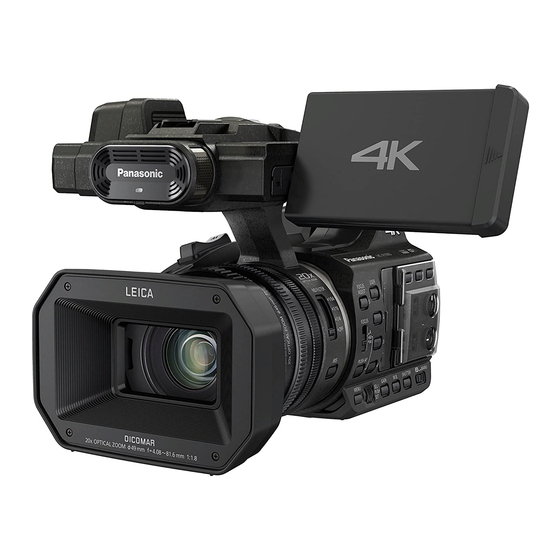
Operating Instructions 4K Video Camera HC-X1000 Model No. Please read these instructions carefully before using this product, and save this manual for future use. SQW0069... -
Page 2: Read This First
∫ Indemnity about recorded for recording motion pictures content This unit can record motion pictures using four Panasonic does not accept any responsibility different recording methods, including MOV for damages directly or indirectly due to any (LPCM), MP4 (LPCM), MP4 and AVCHD... -
Page 3: This Unit
∫ About security Be careful about the possibility of theft or loss of the unit, and be careful not to leave the unit unattended. Please note that Panasonic does not accept any responsibility for the compromise, manipulation, and loss of information caused by these events. -
Page 4: Table Of Contents
Contents Read this first ..........2 Counter display ..........57 Setting the Time Code ......58 Preparation Setting the User Information ....59 Setting the Recording Counter....60 USER button ..........61 Names and Functions of Main Parts .... 6 Setting the USER button......61 Power supply.......... - Page 5 With a PC Menu Using this unit with a PC......93 Using the Menu ..........132 What you can do with a PC ....93 Camera Setup........132 Connecting to a PC ....... 93 Recording Setup ........139 Using this unit as a card reader..... 94 TC/UB SETUP ........
-
Page 6: Names And Functions Of Main Parts
Preparation Names and Functions of Main Parts ≥ It is not possible to use the remote control USB terminal [USB 3.0 DEVICE] (commercially-available) in the Intelligent 108) Auto Mode. USB terminal [USB 3.0 HOST] 102) [ZOOM S/S] (2.5 mm super mini jack) HDMI connector [HDMI] It is possible to operate zoom operation or Audio input terminals 2 (XLR 3 pin) - Page 7 40 41 33 34 35 37 38 44 45 46 47 Tripod receptacle Menu button [MENU] Eyepiece corrector lever Multi-function dial [SEL/PUSH SET] User 5 buttons [USER5]/[FOCUS 46, 49, 51, 76, 81) ASSIST] Gain button [GAIN] Focus auto/Manual/¶ switch White Balance button [W.B.] [FOCUS A/M/¶] Shutter speed button [SHUTTER] Push AF buttons [PUSH AF]...
- Page 8 63 64 65 66 67 Infrared light 69, 152) Eye cup attachment part Recording lamp (Front) 158) Viewfinder Lens cover Eye cup Lens (LEICA DICOMAR) Exhaust opening (cooling fan) SD Card slot cover Battery release button [PUSH] Access lamp (card 1) Battery holder Card slot 1 Access lamp (card 2)
- Page 9 71 72 73 74 75 77 78 79 80 Internal microphones Accessory shoe Sub zoom lever 37, 151) ≥ This lever functions in the same manner as the zoom lever. Zoom lever [T/W] (In Recording Mode) Volume lever [rVOLs]/Thumbnail display switch [ ] (In Playback Mode) User 6 buttons [REC CHECK]...
- Page 10 ∫ Attaching/detaching the lens hood (How to detach the lens hood) While pressing and holding the lens hood release button, rotate the lens hood in the direction of the arrow to detach it. A Lens hood release button (How to attach the lens hood) ...
-
Page 11: Attaching The Eye Cup
Opening/closing the lens cover You can open/close the lens cover by sliding the lens cover open/close lever. ≥ When this unit is not in use, close the lens cover to protect the lens. OPEN CLOSE ≥ Do not press the lens cover hard. This may damage the lens or the lens cover. ≥... -
Page 12: Attaching The Shoulder Strap
∫ Attaching the Shoulder strap We recommend that you attach the shoulder strap (supplied) before going out of doors to record so as to avoid dropping this unit. A 20 mm or longer ∫ Attaching the front microphone ≥... -
Page 13: Attaching The Tripod
Attach an external microphone (optional) to the microphone holder, and tighten the microphone holder screws. Connect the external microphone to the AUDIO INPUT1 terminal (XLR 3 pin). ≥ When wiring the microphone cable, use the cable clamper of this unit. ... -
Page 14: Power Supply
Please be advised that we are not liable for any accident or failure occurring as a result of use of a counterfeit battery pack. To ensure that safe products are used we would recommend that a genuine Panasonic battery pack is used. Charging the battery When this unit is purchased, the battery is not charged. -
Page 15: Inserting/Removing The Battery
≥ We recommend using Panasonic batteries 16). ≥ If you use other batteries, we cannot guarantee the quality of this product. ≥ Do not heat or expose to flame. ≥ Do not leave the battery(ies) in a car exposed to direct sunlight for a long period of time with doors and windows closed. -
Page 16: Charging And Recording Time
Charging and recording time Charging/Recording time ≥ Temperature: 25 oC/humidity: 60%RH ≥ When using the viewfinder (times in parentheses are when using the LCD monitor) ≥ When [SYSTEM FREQ] is set to [50Hz(PAL)] 159) Battery model Size of Continuously Actual number Charging Recording... - Page 17 ≥ When [SYSTEM FREQ] is set to [59.94Hz(NTSC)] 159) Battery model Size of Continuously Actual number Charging Recording recording recordable recordable [Voltage/Capacity time mode format time time (minimum)] 4 h 45 min 2 h 30 min (LPCM) (4 h 30 min) (2 h 20 min) 6 h 5 min 3 h 10 min...
- Page 18 Checking the remaining power of the battery You can check the remaining power of the battery by looking at the battery capacity indication displayed on this unit's screen or by looking at the supplied battery VW-VBD58. ∫ Checking the remaining power using this unit Battery capacity indication ≥...
-
Page 19: Connecting To The Ac Outlet
Connecting to the AC outlet The unit is in the standby condition when the AC adaptor is connected. The primary circuit is always “live” as long as the AC adaptor is connected to an electrical outlet. Important: ≥ Use the supplied AC adaptor. Do not use the AC adaptor of another device. ≥... -
Page 20: Preparation Of Sd Cards
Preparation Preparation of SD cards The unit can record motion pictures or still pictures to an SD card. Cards that you can use with this unit Card type Capacity SDHC Memory Card 4 GB to 32 GB SDXC Memory Card 48 GB/64 GB ≥... -
Page 21: Inserting/Removing An Sd Card
Inserting/removing an SD card When using a non Panasonic SD card for the first time, or one which was previously used on another equipment, it is necessary to format the SD card. 30) When the SD card is formatted, all of the recorded data is deleted. Once the data is deleted, it cannot be restored. -
Page 22: Turning The Unit On/Off
Preparation Turning the unit on/off Set the power switch to ON while pressing the lock release button B to turn on the unit. To turn off the unit Set the power switch to OFF while pressing the lock release button. The status indicator goes off. -
Page 23: Using The Lcd Monitor/Viewfinder
Preparation Using the LCD monitor/Viewfinder The viewfinder is turned off and the LCD monitor is turned on when the LCD monitor is extracted. The viewfinder is turned on when the LCD monitor is retracted. Using the LCD monitor Extract the LCD monitor in the direction as indicated in the figure. -
Page 24: How To Use The Touch Screen
How to use the touch screen You can operate by directly touching the LCD monitor (touch screen) with your finger. ∫ Touch Touch and release the touch screen to select icon or picture. ≥ Touch the centre of the icon. ≥... -
Page 25: Viewfinder Adjustment
[LCD SET] It adjusts brightness and colour density on the LCD monitor. Select the menu. MENU : [DISP SETUP] # [LCD SET] Touch the desired setting item. [COLOUR]: Colour level of the LCD monitor [BRIGHTNESS]: Brightness of the LCD monitor [CONTRAST]: Contrast of the LCD monitor Touch... -
Page 26: Recording Yourself
[EVF COLOUR] The recording images or playback images on the viewfinder can be selected between colour/black and white. Select the menu. MENU : [DISP SETUP] # [EVF COLOUR]# [ON] or [OFF] [ON]: Displayed in colour [OFF]: Displayed in black and white Recording yourself ≥... -
Page 27: Setting Date And Time
Preparation Setting date and time When this unit is turned on, the message [SET TIME ZONE AND DATE/TIME] may appear. To make these settings, select [YES], and follow the instructions from Step 2-3 of the time zone setting procedure. Select the menu. MENU : [OTHER FUNCTION] # [CLOCK SET] Touch the date or time to be set, then set the... -
Page 28: Using The Menu Screen
Preparation Using the menu screen ≥ You can select menu items by operating the multi-function dial. MENU MENU Press the MENU button Touch the top menu A. Touch the submenu B. ≥ Next (Previous) page can be displayed by touching Touch the desired item to enter the setting. -
Page 29: Recording
Recording Before recording ∫ Basic camera positioning Normal recording Low-angle recording ≥ For easier low-angle recording, the sub recording start/stop button and the sub zoom lever can be used. ≥ Put your hand through the grip belt and hold the unit with both hands. Recording from a high position - 29 -... -
Page 30: Formatting Media
≥ When recording, make sure your footing is stable and there is no danger of colliding with another person or object. ≥ Hold the eye cup of the viewfinder as close as possible to your eye. ≥ Adjust the angle of the LCD monitor according to the position in which the unit is held. ≥... -
Page 31: Recording Motion Pictures
Recording Recording motion pictures ≥ Before turning on this unit, open the lens cover. Change the mode to Recording Mode. ≥ Extract the LCD monitor. Press the recording start/ stop button B to start recording. ≥ Recording will stop when you press the recording start/stop button again. -
Page 32: Recording Still Pictures
≥ When the file size of a recorded scene exceeds one of the following sizes or the recording time exceeds one of the following lengths of time, the scene will be divided automatically. j AVCHD scene: approximately 4 GB or 30 minutes j MOV/MP4 scene (when using an SDHC memory card): approximately 4 GB or 30 minutes j MOV/MP4 scene (when using an SDXC memory card): approximately 48 GB or 120 minutes ≥... - Page 33 ∫ About picture size Picture sizes in which still pictures will be recorded differ depending on the [REC MODE] setting and the [REC FORMAT] setting 139). Recording mode Recording format Aspect Picture size [REC FORMAT] setting with a 17:9 4096k2160 size of C4K (4096k2160) MOV (LPCM)/ [REC FORMAT] setting with a...
-
Page 34: Intelligent Auto Mode/Manual Mode
Recording Intelligent Auto Mode/Manual Mode MANU iA/MANU switch Slide the switch to change the Intelligent Auto Mode/Manual Mode. is displayed in the Manual Mode. ≥ ≥ The following modes appropriate for the condition are set just by pointing the unit to what you want to record in the Intelligent Auto Mode. -
Page 35: Automatic White Balance
≥ If you set the Image Stabilizer to (setting cancelled) in Manual Mode and set this unit to Intelligent Auto Mode, the Image Stabilizer setting when this unit is reset to Manual Mode will be determined by whether or not you press the Optical Image Stabilizer button. When the Optical Image Stabilizer The Image Stabilizer setting in Intelligent Auto Mode will button is pressed... -
Page 36: Intelligent Auto Plus
Intelligent Auto Mode Manual Mode Focus auto/Manual/¶ ± switch Push AF button ± INPUT 1, 2 switches ± ± CH1, CH2 switches ± ± Audio control knobs ± ± Optical Image Stabilizer ± ± button Zebra button ± ± Display/Mode check button ±... -
Page 37: Using The Zoom
Recording Using the zoom It can be zoomed up to 20k. ≥ (When the picture size of [REC FORMAT] 139) is 1920k1080 or below) It can zoom up to 40k when the [i.Zoom] is set to [ON]. 147) ≥ Zoom magnification can be checked in the screen display of Z00 to Z99. The value gets larger when zoomed in, and the value gets smaller when zoomed out. -
Page 38: Image Stabilizer Function
≥ If you take your finger off the zoom lever during zoom operation, the operation sound may be recorded. When returning the zoom lever to the original position, move it quietly. ≥ The sound of the zoom mechanism becomes louder than usual during fast zoom operation. This may cause the sound to be recorded during recording. -
Page 39: Focus
Recording Focus Perform focus adjustments using the focus ring. If auto focusing is difficult due to the conditions, then use Manual Focus. A FOCUS A/M/¶ switch B Push AF button C Focus ring FOCUS PUSH AF ≥ Switch to Manual Mode. Set the FOCUS A/M/¶... -
Page 40: Push Af
∫ To emphasise the outline of images Setting [EVF/LCD DETAIL] to [ON] helps you achieve focus easier by emphasizing the outlines of an image displayed on the LCD monitor and viewfinder. You can also adjust the emphasis level or change the frequency. ≥... -
Page 41: Using Focus Assist
Selecting a Focus Assist method MENU : [CAMERA SETUP] # [FOCUS ASSIST] # desired setting [EXPAND]: Magnifies the central area of the screen when Focus Assist is used. [PEAKING]: Highlights in-focus portions with colour when Focus Assist is used. [BOTH]: Sets both [EXPAND] and [PEAKING]. - Page 42 Increases the magnification level by 0.5k. Decreases the magnification level by 0.5k. ≥ You can adjust the magnification from 3k to 10k. ≥ The magnified area is displayed in full screen when the magnification is set to a level between 5.5k and 10k.
-
Page 43: Focus Transition
≥ Focus Assist is cancelled in following cases: j If you turn the unit off j If you press the THUMBNAIL button j When the setting of [FOCUS ASSIST] 40) is changed j When EVF/LCD detail is enabled. j When you set this unit to Intelligent Auto Mode using the iA/MANU switch. j When you set the FOCUS A/M/¶... - Page 44 Touch [EXIT] to complete the setting. ≥ The focus positions of the items you have set will be registered. ≥ The focus position settings are cancelled in the following cases: j If you turn the unit off j If you press the THUMBNAIL button j If you operate the zoom Using Focus Transition ≥...
- Page 45 ≥ When using Focus Transition, functions registered to the USER buttons 1 s 5 do not work with the USER buttons. To set the Focus Transition time ≥ Switch to Manual Mode. Select the menu. MENU : [CAMERA SETUP] # [FOCUS TRANSITION TIME] Touch the desired setting item.
-
Page 46: White Balance
Recording White Balance Automatic White Balance function may not reproduce natural colours depending on the scenes or lighting conditions. If so, you can adjust the White Balance manually. ≥ Use the multi-function dial to change the settings. P3200K W.B. ... - Page 47 This mode is used for Auto White Balance Mode and Intelligent Auto Mode. You can set this mode with a USER button. Only displayed when Manual White Balance Mode is in use. ≥ To return to Auto White Balance Mode, press the W.B. button or set this unit to Intelligent Auto Mode using the iA/MANU switch.
-
Page 48: Iris/Gain Adjustment
Recording Iris/Gain adjustment When recording a scene that is too dark (or bright) or a scene in a similar situation, manually adjust the iris and gain. Iris adjustment F4.0 IRIS A Iris value 1 IRIS button B Auto iris icon 2 Iris ring * It is displayed in Auto Iris Mode. -
Page 49: Gain Adjustment
∫ Adjusting brightness during the Auto Iris Mode ≥ Switch to Manual Mode. Select the menu. MENU : [CAMERA SETUP] # [AUTO IRIS LEVEL] Touch to adjust settings. Touch [EXIT] to complete the setting. Utilizing the USER button It is convenient to use following functions of the USER button when it is set to Iris adjustment. ≥... - Page 50 ≥ To return to Auto Gain Mode, press the GAIN button or set this unit to Intelligent Auto Mode using the iA/MANU switch. ≥ If you register [SUPER GAIN] to a USER button, you can set the gain value to 27 dB or 30 dB. ≥...
-
Page 51: Manual Shutter Speed
Recording Manual shutter speed Adjust the shutter speed when recording fast-moving subjects. ≥ Use the multi-function dial to change the settings. 1/60 SHUTTER SEL/ PUSH A Shutter speed SHUTTER button ≥ This is displayed in Manual Shutter Multi-function dial Mode. - Page 52 ≥ You may see a band of light around an object that is shining very bright, or highly reflective. ≥ During normal playback, image movement may not look smooth. ≥ If you record an extremely bright object or record under indoor lighting, colour and screen brightness may change or a horizontal line may appear on the screen.
-
Page 53: Audio Input
Recording Audio Input This unit can record audio in 2 ch. It is possible to switch between built-in microphone, external microphone, or connected audio equipment for each channel. ∫ About audio recording methods The audio recording method varies depending on the [REC MODE] setting. 139) Recording mode Audio recording method... - Page 54 ∫ Using an external microphone or audio equipment Connect an external microphone or audio equipment to AUDIO INPUT1, 2 terminals (XLR 3 pin). Use INPUT1 or INPUT2 switches to switch the connected audio input signal. LINE : Audio equipment is connected : An external microphone is connected +48V : When using a phantom microphone (which requires a...
-
Page 55: Adjusting The Audio Input Level
To remove the external microphone, etc., from the audio input terminals 1, 2 (XLR 3 pin) Remove while pushing on the PUSH section of the audio input terminals 1, 2 (XLR 3 pin). ≥ Set the input signal to built-in microphone by switching the CH1, CH2 switches to INT (L) or INT (R) after removing the external microphone. - Page 56 A Audio control knobs (CH1, CH2) B Audio level meter C -12 dB D 0 dB ≥ Adjust confirming the audio level meter. Using the ALC function ALC can reduce audio noise. For audio channel 1, select [AUDIO ALC CH1]: for audio channel 2, select [AUDIO ALC CH2].
-
Page 57: Counter Display
Recording Counter display You can change a counter display that indicates how much time has elapsed during recording or playback. COUNTER RESET A COUNTER button B RESET button Press the COUNTER button to switch the counter display. ≥ The display will be switched in the following order: Time Code # User Information* # Recording Counter # Off. -
Page 58: Setting The Time Code
Setting the Time Code Time code will display the recording time in hours, minutes, seconds, and frames. TC 00:00:00:00 (hour : minute : second : frame [NDF]) TC 00:00:00.00 (hour : minute : second . frame [DF]) ≥ The number of frames (frame count per second) varies depending on the frame rate in [REC FORMAT]. -
Page 59: Setting The User Information
≥ The time code will reset when the built-in lithium battery is exhausted when it is set to [FREE RUN]. [TC PRESET] You can set the initial time code. Select the menu. MENU : [TC/UB SETUP] # [TC PRESET] Touch the item to set and change with ≥... -
Page 60: Setting The Recording Counter
Setting the Recording Counter Recording Counter will display the recording time in seconds. 0:00:00 (hour : minute : second (When [REC COUNTER] is set to [TOTAL])) SCN 0:00:00 (hour : minute : second (When [REC COUNTER] is set to [SCENE])) [REC COUNTER] Select the counting method during the recording. -
Page 61: User Button
Recording USER button Each of the USER button can register one function from the 24 available functions. ≥ There are six USER buttons (USER1 to USER6) on the main body and four USER button icons (USER7 to USER10) displayed on the LCD monitor. Setting the USER button Select the menu. -
Page 62: Using The User Button
Using the USER button To use the set USER button, press USER1 to USER6 button or touch the USER7 to USER10 button icon displayed when you touch the LCD monitor. (When you use the USER1 to USER5 button) (When you use the USER6 button) USER FOCUS ASSIST... -
Page 63: Functions Of The User Button
Functions of the USER button ∫ List of USER button function Icon Item Function [FA] [FOCUS ASSIST] Focus Assist [B.Light] [BACKLIGHT] Backlight Compensation [S.Light] [SPOTLIGHT] Spotlight [B.FD] [BLACK FADE] Black Fade [W.FD] [WHITE FADE] White Fade [EVF/LCD] [EVF/LCD DETAIL] EVF/LCD detail [ATW.L] [ATW LOCK] ATW Lock... -
Page 64: Backlight Compensation
Focus Assist ≥ Register “Focus Assist” to a USER button. You can set the Focus Assist. Backlight Compensation ≥ Register “Backlight Compensation” to a USER button. Switches to automatic iris control to compensate the backlight. This makes the image brighter to prevent darkening of a backlit subject. ≥... -
Page 65: Atw Lock
EVF/LCD detail ≥ Register “EVF/LCD detail” to a USER button. [EVF/LCD DETAIL] helps you achieve focus easier by emphasizing the outlines of an image displayed on the LCD monitor or the viewfinder. ≥ These settings will not affect the images actually recorded. ATW Lock ≥... -
Page 66: Recording Check
Histogram ≥ Register “Histogram” to a USER button. A graph with brightness as horizontal axis and number of pixels at that brightness as vertical axis is displayed. It is possible to determine the exposure of the whole image by looking at the distribution in the graph. -
Page 67: Freeze Frame
≥ Register “DRS” to a USER button. ≥ Switch to Manual Mode. Selects the DRS (Dynamic Range Stretcher) function. It is possible to expand the dynamic range by compressing the video signal level of the highly illuminated area that gets washed out with standard recording. ≥... - Page 68 Area Mode You can apply a variety of effects to the subject you touch. ∫ Setting an Area Mode effect You can select the following menu items to set an effect to be applied when you touch the subject. MENU : [CAMERA SETUP] # [AREA MODE] # desired setting [INH]: Does not apply any effects of Area Mode.
- Page 69 ≥ Area Function is not possible in following cases: j In Intelligent Auto Mode j When a remote control (commercially-available) is connected ≥ When using Area Mode, even if you turn on Marker by pressing the ZEBRA button, the luminance display frame will not be displayed.
- Page 70 Level Gauge ≥ Register “Level Gauge” to a USER button. This function displays the horizontal/vertical tilt of the unit with the electronic level. ∫ To correct the tilt (Horizontal direction) (Vertical direction) When correcting the leftward tilt When correcting the downward tilt ≥...
- Page 71 Background ≥ Register “Background” to a USER button. When [2 SLOTS FUNC.] is set to [BACKGROUND], you can start/stop background recording. ≥ When the recording destination of motion pictures is set to [SD CARD 1] in [MEDIA SELECT] 30), [SD CARD 2] will be used for background recording. The following instructions assume that the recording destination of motion pictures is set to [SD CARD 1].
-
Page 72: Useful Functions
Recording Useful functions BARS DISP MODE CHK ZEBRA ND FILTER A BARS button B DISP/MODE CHK button C ZEBRA button D ND filter switch Colour Bar Screen BARS button Press the BARS button to output a colour bar screen to a television or monitor so you can adjust them. -
Page 73: Nd Filter
≥ The test tone volume differs depending on the [TEST TONE] setting. 157) ≥ You can record colour bars as motion pictures, but not as still pictures. ≥ If you press the BARS button while recording colour bars as a motion picture, you can stop displaying the colour bars. -
Page 74: Zebra
Zebra ZEBRA button It will switch between the zebra display and the marker display every time the button is pressed. Zebra 1 # Zebra 2 # Marker # setting cancelled * It is not displayed when the [ZEBRA DETECT 2]/[MARKER] is set to [OFF]. 153) (When Zebra 1 is set) (When Marker is set) -
Page 75: Using Operation Icons
Recording Using Operation Icons You can use convenient functions just by the easy operation of touching the screen. Touch the LCD monitor in the recording screen. ≥ The operation icons are displayed. Touch an operation icon. ≥ The following function is available. Refer to the respective pages for the operation. -
Page 76: Using Of Multi-Function Dial
Recording Using of multi-function dial A Multi-function dial SEL/ PUSH Selecting/setting items You can select and set menu items 28), etc. using the multi-function dial. Rotate the multi-function dial on the menu screen, etc., to move the cursor. ≥ The selected item will be displayed in yellow. Push the multi-function dial to set. - Page 77 ≥ The multi-function dial also allows you to select/set operation icons, thumbnails, etc. ≥ Parts that are finger-touch sensitive can be operated with the multi-function dial. (Excluding some functions) Using the multi manual function You can select the following functions and adjust their settings using the multi-function dial. You can also switch between the functions and adjust their settings.
- Page 78 To change the function you adjust Change settings in advance so that you can select more than two functions. ≥ Change settings as follows: Functions Settings to be changed in advance Gain adjustment Press the GAIN button to enable Manual Gain Mode. Press the W.B.
-
Page 79: Playback
Playback Motion picture/Still picture playback Set this unit to playback mode. Touch the play mode select icon A. Select the media C you wish to play back. (To set this unit to Motion Picture Playback Mode) ... - Page 80 (To set this unit to Still Picture Playback Mode) Touch the still picture F. Touch the scene or the still picture to be played back. ≥ Next (Previous) page can be displayed by touching Select the playback operation by touching the operation icon.
- Page 81 ∫ Change the thumbnail display While the thumbnail is displayed, the thumbnail display changes in the following order if the zoom lever or the sub zoom lever is operated to side or side. side) side) 20 scenes () 9 scenes () 1 scene () Scene information display * Detailed information of the scene is displayed when playing back motion pictures.
-
Page 82: Motion Picture Compatibility
Rotate the multi-function dial to adjust the volume. A [VOLUME] Push the multi-function dial to finish the adjustment ≥ Sound will be heard only during normal motion picture playback. ≥ If pause play is continued for 5 minutes, the screen returns to the thumbnails. ≥... -
Page 83: Motion Picture Playback Using Operation Icon
Motion picture playback using operation icon For details on the basic playback operations, refer to page 79. Playback operation Playback display Operating steps During Playback Touch the LCD monitor and slide from right to left (from left to right) during playback. Skip playback (to the start of a scene) - Page 84 Playback operation Playback display Operating steps Touch the direct playback bar A or slide it During Playback while touching. ≥ The playback pauses temporarily and skips Direct playback to the position touched or slid to while touching. ≥ Playback will start by releasing your touching or sliding finger.
-
Page 85: Useful Functions
Playback Useful functions Creating still picture from motion picture You can save a frame of a recorded motion picture as a still picture. The picture size with which a still picture will be recorded differs depending on the picture size of [REC FORMAT] with which the motion picture was recorded. -
Page 86: Resuming The Previous Playback
Resuming the previous playback If playback of a scene was stopped halfway, the playback can be resumed from where it was stopped. MENU : [VIDEO SETUP] # [RESUME PLAY] # [ON] If playback of a motion picture is stopped, appears on the thumbnail view of the stopped scene. -
Page 87: Deleting Scenes/Still Pictures
≥ Scenes recorded with the following [REC FORMAT] settings are grouped separately on the date list. A recording format icon will be displayed next to the date. Recording format Icon to be displayed [REC FORMAT] setting with a size of C4K (4096k2160) [REC FORMAT] setting with a size of 4K (3840k2160) [REC FORMAT] setting with a size of FHD (1920k1080) [PS 1080/50p]/[PS 1080/60p]... -
Page 88: Protecting Scenes/Still Pictures
(When [MULTI] is selected in Step 1) Touch the scene/still picture to be deleted. ≥ When touched, the scene/still picture is selected and the indication appears on the thumbnail. Touch the scene/still picture again to cancel the operation. ≥ Up to 99 scenes can be selected to be deleted. (When [SINGLE] is selected in Step 1) Touch the scene/still picture to be deleted. -
Page 89: Watching Video/Pictures On Your Tv
Playback Watching Video/Pictures on your TV Confirm the terminals on your TV and use a cable compatible with the terminals. Image quality may vary with the connected terminals. A High quality 1 HDMI terminal 2 Video terminal ≥ When [SYSTEM FREQ] is set to a broadcasting system different from that of your region, images may not be played back correctly. - Page 90 Connect this unit to a TV. A HDMI cable (supplied) ≥ Be sure to connect to the HDMI terminal. ≥ Connecting with a HDMI cable B AV cable (commercially- available) Picture quality 1 To play back images recorded in 4K or high definition picture quality, connect this unit to the HDMI terminal of the TV.
- Page 91 ≥ This unit is not compatible with the VIERA Link. ≥ If you connect this unit to the TV when this unit is set to Recording Mode, a squealing sound may be output. Before connecting this unit, set it to Playback Mode. The microphone may pick up the sound from the speakers, producing an abnormal sound.
-
Page 92: Connecting With A Hdmi Cable
Counter display etc.) can be displayed/not displayed on the TV. MENU : [DISP SETUP] # [VIDEO OUT OSD] # [ON] or [OFF] Refer to the following support site for information about Panasonic TVs with an SD card slot for playing back your pictures. http://panasonic.net/ ≥... -
Page 93: With A Pc
With a PC Using this unit with a PC What you can do with a PC When you connect this unit to a PC, it recognises this unit as a card reader. The connection enables you to access the SD card in this unit from the PC. ≥... -
Page 94: Using This Unit As A Card Reader
SDXC Memory Card. ≥ When using an SDXC Memory Card, check the following support site. http://panasonic.net/avc/sdcard/information/SDXC.html About the screen indication of the unit ≥ Do not disconnect the USB cable, battery, or AC adaptor while the access lamp is on or card access icon ( ) appears on the unit screen. -
Page 95: If Using Mac
Drag and drop the still pictures onto the destination folder (on the PC’s HDD). To disconnect USB cable safely Select the icon in task tray displayed on the PC, and then click [Eject HC-X1000]. ≥ Depending on your PC’s settings, this icon may not be displayed. ∫ If using Mac When using this unit as a card reader, [CAM_SD] is displayed on the desktop. -
Page 96: About The Pc Display
About the PC display Example folder structure of an SD card: The following data will be recorded. 1 Up to 999 still pictures in JPEG format CAM_SD ([11000001.JPG] etc.) DCIM 2 MOV format motion picture data 100CDPFQ ([11000001.MOV], etc.) 3 MP4 format motion picture data ... -
Page 97: Using Hd Writer Xe 2.0
Important Notice ≥ When using an SDXC Memory Card, check the following support site. http://panasonic.net/avc/sdcard/information/SDXC.html ≥ It is impossible to write data to this unit from a PC. ≥ Motion pictures that have been recorded on another device cannot be written to the software supplied with this unit. -
Page 98: End User License Agreement
Panasonic does not warrant that the operation of the Software will be uninterrupted or error Article 2 Use by a Third Party free. Panasonic or any of its distributors will not Licensee may not use, copy, modify, transfer, be liable for any damage suffered by Licensee rent, lease, lend or allow any third party, arising from or in connection with Licensee’s... - Page 99 Software in any way beyond the range of use Article 9 With regard to MICROSOFT SQL granted under Article 9 (1), and shall not SERVER COMPACT 3.5 produced by Microsoft conduct operations such as reverse Corporation engineering, decompilation, disassembling, etc. (1) Licensee shall use the MICROSOFT SQL of the MICROSOFT SQL SERVER COMPACT SERVER COMPACT 3.5 only when included in...
- Page 100 Display High Colour (16 bit) or more (32 bit or more recommended) Desktop resolution of 1024k768 pixels or more (1920k1080 pixels or more recommended) Graphics card complying with DirectX 9.0c (DirectX 10 recommended) and DirectDraw overlay ™ PCI Express k16 is recommended Video memory of 256 MB or more recommended ≥...
-
Page 101: Reading The Operating Instructions Of The Software Applications
≥ You will need Adobe Acrobat Reader 5.0 or later or Adobe Reader 7.0 or later to read the PDF operating instructions. Select [Start] # [All Programs] # [Panasonic] # [HD Writer XE 2.0] # [Operating Instructions]. - 101 -... -
Page 102: Copy/Dubbing
≥ Please read the operating instructions of the USB HDD for how to use it. Preparing for copying/playing back Refer to the following support site for information about USB HDD. http://panasonic.jp/support/global/cs/e_cam (This Site is English only) When the USB HDD that requires formatting is connected, a message is displayed. Follow the instructions on the screen to format it. - Page 103 Connect the AC adaptor (supplied with USB HDD) to the USB HDD. ≥ If you are using a bus-powered or portable USB HDD, this unit can supply power to the USB HDD by USB Connection Cable (supplied with USB HDD). Connect the AC adaptor to this unit.
- Page 104 ∫ Points to check before copying ≥ When using a USB HDD for the first time, or using a USB HDD that has been used with other devices, first run [FORMAT MEDIA]. ≥ Before copying, go to [MEDIA STATUS] to check the amount of free space on the USB HDD. ≥...
-
Page 105: Simple Copy
Simple copy Connect this unit to the USB HDD to prepare for copying. 102) Touch [Simple copy]. ≥ When [Copy selected files] or [Playback from External Drive] is selected, terminate the connection with the USB HDD 106), and then perform the operation of Step 1. ≥... -
Page 106: Playing Back The External Drive
Playing back the External Drive ≥ Only motion picture/still picture that have been copied by connecting this unit to the USB HDD or copied with HD Writer XE 2.0 can be played back. USB3.0 HOST A USB Connection Cable (supplied with USB hard disk) B USB HDD (commercially-available) Connect this unit to the USB HDD to prepare for playback. -
Page 107: Dubbing With A Blu-Ray Disc Recorder, Video Device, Etc
(AVCHD) picture quality. For further details, see the operating instructions of your recorder. ≥ You can dub scenes recorded with [REC MODE] set to [MP4] to a Panasonic Blu-ray disc recorder that supports MP4 format. ≥ Scenes recorded with [REC FORMAT] set to [PS 1080/50p] can be dubbed to a Blu-ray disc only by using a device that supports AVCHD Progressive. -
Page 108: To Dub Using Equipment With A Usb Terminal
≥ You cannot dub scenes in the recording mode option [MOV(LPCM)] or [MP4(LPCM)]. ≥ When [SYSTEM FREQ] is set to a broadcasting system different from that of your region, dubbing may not be possible. ≥ When dubbing scenes in the recording mode option [MP4] that have a recording format size of 4K (3840k2160), use HD Writer XE 2.0 to convert their format to FHD (1920k1080). - Page 109 Touch [RECORDER] on the screen of this unit. ≥ When you select an option other than [RECORDER], reconnect the USB cable. Touch the media you wish to dub. ≥ When using the battery, the LCD monitor turns off after about 5 seconds. Touch the screen to turn the LCD monitor on.
-
Page 110: Dubbing In Standard Picture Quality
Dubbing in standard picture quality ∫ Dubbing using equipment without an SD card slot or a USB terminal, or using a video device You can dub by connecting an AV cable (commercially-available). ≥ Images are dubbed in standard quality. ≥ Use the AC adaptor to free you from worrying about the battery running down. Change the video input on the video device and TV that this unit is connected to. -
Page 111: Wi-Fi
Panasonic will not take any responsibility for any damage that arises when using this unit for any purpose other than as a wireless LAN device. - Page 112 ∫ This unit is WPS-compatible ™ WPS (Wi-Fi Protected Setup ) is a function that allows you to easily set up a connection with a wireless LAN device and make security-related settings. ≥ This unit cannot be used to connect to a public wireless LAN connection. ≥...
-
Page 113: Remote Operation
Wi-Fi Remote operation Using a smartphone, you can perform record operations from a remote location. Image App Image App A When connecting directly to a smartphone B When connecting to a wireless access point ≥ You need to turn on the Wi-Fi function of your smartphone. ≥... - Page 114 Setting up a direct Wi-Fi connection between this unit and a smartphone Using NFC, you can easily set up a direct connection between this unit and the smartphone. ∫ If the device is Android (NFC-compatible) Use NFC to set up a direct connection between this unit and the smartphone. ≥...
-
Page 115: Using Remote Operation With A Direct Connection
Using remote operation with a direct connection If the device is Android (NFC-compatible) ≥ Set the NFC function of the smartphone to ON. Start up the smartphone application “Image App”. Touch the smartphone on of this unit. ≥ Touch the NFC mark while a message asking you to touch the NFC mark on the device is displayed on the smartphone screen. -
Page 116: Using Remote Operation With A Wireless Access Point Connection
≥ If you touch an NFC-compatible smartphone to this unit, you can register up to five smartphones. When the number exceeds five, registrations will be deleted, starting from the oldest touched one. ≥ Please refer the instructions for the device you are using for information on how to set up and use a NFC-compatible smartphone. - Page 117 If the device is Android (non-NFC-compatible) or iOS Proceed to Step 6 when your Wi-Fi connection has been made via [Set Wireless Access Point] in [Wi-Fi Setup] 125). Connect the smartphone to a wireless access point. Press the USER button to which [Wi-Fi] is registered, and turn on the Wi-Fi function.
-
Page 118: About Remote Operation
About remote operation Screen display during remote operations Smartphone screen shots are example displayed in Motion Picture Recording Mode. Recording screen 1 Zoom 2 Remaining battery power of this unit 3 Focus assist* 150M 4 Infinity focus 5 Push auto focus ... -
Page 119: Install The "Image App
Wi-Fi Install the “Image App” About the “Image App” The “Image App” is an application provided by Panasonic. For Android apps For iOS apps Android 2.3.3 or later iOS 6.0 or later (iPhone 3GS is not supported.) Installation Connect your Android... -
Page 120: Setting Up A Wi-Fi Connection
Wi-Fi Setting Up a Wi-Fi Connection To use the Wi-Fi function, connect this unit to a wireless access point or smartphone via Wi-Fi. ∫ About the connection status icon when connected to Wi-Fi A The connection status icon When connected to wireless access point: connected to Wi-Fi/ not connected to Wi-Fi ≥... - Page 121 Follow the on-screen instructions of the smartphone to set up a connection. ≥ When the settings is complete, the smartphone and this unit are connected directly, allowing you to use remote operations. 115) Connecting with Android (non-NFC-compatible) or iOS device Press the USER button to which [Wi-Fi] is registered, and turn on the Wi-Fi function.
-
Page 122: Connecting To A Wireless Access Point
Connecting to a wireless access point ≥ Register [Wi-Fi] to a USER button. Check if the wireless access point you are using is compatible with WPS j If the wireless access point is compatible with WPS: Proceed to the following Connecting with WPS j If the wireless access point is not compatible with WPS: [Searching for wireless access points to set up a connection] 123) -
Page 123: Searching For Wireless Access Points To Set Up A Connection
Confirming that the Wi-Fi connection is complete is displayed on the screen Searching for wireless access points to set up a connection ≥ Confirm Encryption key (Password) of the selected wireless access point if the network authentication is encrypted. Press the USER button to which [Wi-Fi] is registered, and turn on the Wi-Fi function. -
Page 124: Setting Up A Connection Manually
Entering text ≥ Touch the text entry icon in the centre of the screen and enter the text. Icon Description of operation [A] etc. Enters a character. &/1 Moves the cursor to left or right. A/a/1 Switches between [A]/[a] (alphabet) and [&/ PQRS WXYZ [A/a/1]... -
Page 125: Setting Up A Direct Connection To A Smartphone
Network authentication type Encryption types that can be set [Open] [NONE]/[WEP] [WEP] There is no setup of an encryption types. [WPA-PSK]/[WPA2-PSK] [TKIP]/[AES] ≥ When [WEP] is selected, proceed according to step 8. Touch the desired Encryption method. ≥ If you select [NONE], a message is displayed after completing the connection. (When selecting [WEP]/[TKIP]/[AES]) Touch [INPUT], then enter the Password. -
Page 126: Connecting By Entering An Ssid And Password
Confirming that the Wi-Fi connection is complete is displayed on the screen Connecting with QR code Press the USER button to which [Wi-Fi] is registered, and turn on the Wi-Fi function. Select the menu. MENU Direct Connection : [Wi-Fi Setup] # [ Touch [Change connection type]. -
Page 127: If The Wi-Fi Connection Cannot Be Established
Confirming that the Wi-Fi connection is complete is displayed on the screen ≥ Transmission speed may decrease, or may not be usable depending on the environment it is used in. If the Wi-Fi connection cannot be established ≥ Please refer to the operating instruction of the device in use for details about the setting of the wireless access point or smartphone. - Page 128 Problem Check points The Wi-Fi connection is (Wireless Access Point Connection) not possible between this ≥ Make sure the smartphone is properly connected to the unit and a smartphone. wireless access point by checking the Wi-Fi settings of the smartphone. ≥...
-
Page 129: How To Use The [Wi-Fi Setup] Menu
Wi-Fi How to Use the [Wi-Fi Setup] Menu Configure various settings necessary to use the Wi-Fi function. When connected to Wi-Fi, the settings cannot be changed. Press the USER button to which [Wi-Fi] is registered, and turn on the Wi-Fi function. -
Page 130: Direct Connection
To switch the display order Touch the access point you want to switch the order. Switch the order by touching ≥ To change the wireless access point, delete one of the registered wireless access points, and then add one. [Direct Connection] Please refer to page 125. - Page 131 [Reset Wi-Fi Settings] You can change the Wi-Fi setting back to the default condition. ≥ Wi-Fi Password are also deleted. [Device Name] You can view and change this unit’s Device name (SSID), which is used for operating this unit as a wireless access point.
-
Page 132: Menu
Menu Using the Menu Refer to page for how to set up the Menu. Camera Setup Settings that are assigned to [SCENE1] in [CUSTOMISE SCENE] by default are indicated with underlined text. MENU : [CAMERA SETUP] # desired setting [CUSTOMISE SCENE] ≥... - Page 133 ≥ This function’s default setting is [SCENE1]. ≥ It is possible to switch the scene file by touching while displaying the operation icons. SCN1 SCN6 ≥ It will return to the default settings when [SCENE] is selected in [INITIAL SET]. 160) [DETAIL LEVEL] Adjusts the level of the image outline correction.
-
Page 134: Master Ped
[COLOUR TEMP A ch] Finely adjusts colour temperature after Ach White Balance adjustment. ≥ Switch to Manual Mode. Touch [COLOUR TEMP A ch]. Touch to adjust settings of colour. Touch [EXIT] to complete the setting. [COLOUR TEMP B ch] Finely adjusts colour temperature after Bch White Balance adjustment. ≥... - Page 135 [GAMMA] Tone or contrast of the image is set in accordance with the recorded scenes. ≥ Switch to Manual Mode. Touch [GAMMA]. Touch the desired setting item. [HD NORM]: This gamma setting is suitable for high definition picture quality recording. [LOW]: This is a gamma setting with gradual slope at the low illuminated area.
-
Page 136: Skin Tone Dtl
[MATRIX] Represents the colour during the recording. ≥ Switch to Manual Mode. Touch [MATRIX]. Touch the desired setting item. [NORM1]: Suitable for recording in the open air or under a halogen lamp. [NORM2]: Suitable for brighter colours than the [NORM1] mode. [FLUO]: Suitable for recording indoors under fluorescent lamp. - Page 137 [FOCUS TRANSITION TIME] ≥ Switch to Manual Mode. [DIRECT]/[2-15 SEC.]/[20 SEC.]/[30 SEC.]/[45 SEC.]/[60 SEC.]/[90 SEC.] You can set the length of time in which the focus will shift during Focus Transition. ≥ This function’s default setting is 2 seconds. [FOCUS TRANSITION REC] ≥...
-
Page 138: Agc Limit
[AREA MODE] [INH]/[FOCUS]/[IRIS]/[Y GET]/[FOCUS/IRIS]/[FOCUS/Y GET] You can set an Area Mode effect. ≥ This function’s default setting is [FOCUS/IRIS]. [AGC LIMIT] ≥ Switch to Manual Mode. [3dB]/[6dB]/[9dB]/[12dB]/[15dB]/[18dB]/[21dB]/[24dB] Sets the maximum possible gain value for Auto Gain Mode. ≥ This function’s default setting is [6dB]. [SUPER GAIN] ≥... -
Page 139: Recording Setup
Recording Setup All default settings are indicated with underlined text. MENU : [RECORD SETUP] # desired setting [MEDIA SELECT] [SD CARD 1] and [SD CARD 2] can be selected separately to record motion pictures or still pictures. [REC MODE] Switch the recording mode of the motion pictures to record. [MOV(LPCM)] This recording method is suitable for editing images. - Page 140 ≥ When [SYSTEM FREQ] is set to [59.94Hz(NTSC)], displayed frame rates differ from the actual ones. Displayed frame rate Actual frame rate 59.94p 59.94i 29.97p 23.98p * The actual frame rate will be 24.00p when [REC FORMAT] is set to [C4K/24p 100M]. ≥...
- Page 141 ≥ When [MP4(LPCM)] in [REC MODE] is selected Recording System frequency Size Frame rate Bit rate (VBR) format setting (Picture size) [59.94Hz(NTSC)]/ [C4K/24p 100M] Average 100 Mbps [50Hz(PAL)] (4096k2160) [4K/50p 150M] Average 150 Mbps (3840k2160) [4K/25p 100M] Average 100 Mbps [FHD/50p Average 200 Mbps [FHD/50p 100M]...
- Page 142 ≥ When [AVCHD] in [REC MODE] is selected Recording System frequency Picture size Frame rate Bit rate (VBR) format setting [PS 1080/50p] Maximum 28 Mbps [PH 1080/50i] 1920k1080 Maximum 24 Mbps [HA 1080/50i] [50Hz(PAL)] Average 17 Mbps [HE 1080/50i] 1440k1080 Average 5 Mbps [PM 720/50p] 1280k720...
-
Page 143: Simultaneous Recording
[2 SLOTS FUNC.] You can set the auto switch recording, simultaneous recording and background recording. ≥ Insert SD cards to card slot 1 and card slot 2. [OFF]: Cancel the setting. [AUTO SW] Set the auto switch recording [SIMULTANEOUS]: Set the auto simultaneous recording *1, 2 [BACKGROUND] Set the background recording... -
Page 144: Time Lapse Rec
How to use background recording ≥ Register [BACKGROUND] to a USER button. Press the recording start/stop button to start recording. ≥ A motion picture will start being recorded to the two SD cards. ( will be displayed in red.) ≥ If you press the USER button to which [BACKGROUND] is registered, you can start recording only to the SD card in card slot 2. - Page 145 [OFF]: Cancel the setting. [1 SEC.]/[10 SEC.]/[30 SEC.]/[1 MINUTE]/[2 MINUTES]: Change the recording interval. appears on the screen. ≥ ≥ After recording, the setting of Interval Recording is cancelled. ≥ Audio cannot be recorded. Setup time Setup example Recording time Recorded time (recording interval) Sunset...
- Page 146 [PRE-REC] [ON]/[OFF] This allows the recording of an image and audio to start before you press the recording start/stop button. AVCHD scenes will be recorded from approximately 3 seconds before the operation, while MOV/MP4 will be recorded from approximately 4 seconds before the operation. PRE-REC appears on the screen.
-
Page 147: Time Stamp
≥ When [INFRARED REC] is set to [ON], this unit cannot be set to Intelligent Auto Mode even if you slide the iA/MANU switch. ≥ When [INFRARED REC] is set to [ON], focus values may not be displayed correctly. ≥ The shadow of the external microphone may appear on the edge of the screen, depending on its type or the way it is attached. -
Page 148: Slow Shutter
[SLOW SHUTTER] [ON]/[OFF] You can record bright pictures even in dark places by slowing the shutter speed. Slow Shutter works in Auto Shutter Mode. ≥ The shutter speed will be adjusted to one of the following values according to the ambient brightness. - Page 149 [AUDIO LEVEL CH1] [AUTO]/[MANUAL] Switches the adjustment method of the audio recording level for audio channel 1. [AUDIO LEVEL CH2] [AUTO]/[MANUAL] Switches the adjustment method of the audio recording level for audio channel 2. [AUDIO ALC LINKED] ≥ Set [AUDIO LEVEL CH1]/[AUDIO LEVEL CH2] to [MANUAL]. ≥...
-
Page 150: Tc/Ub Setup
[INPUT1 MIC LEVEL] [-40dB]/[-50dB]/[-60dB] Sets the input level of the external microphone connected to the audio input terminal 1 (XLR 3 pin). [INPUT2 MIC LEVEL] [-40dB]/[-50dB]/[-60dB] Sets the input level of the external microphone connected to the audio input terminal 2 (XLR 3 pin). TC/UB SETUP All default settings are indicated with underlined text. -
Page 151: Switch Setting
Switch setting All default settings are indicated with underlined text. MENU : [SW SETUP] # desired setting [IRIS RING] Sets the rotation direction and iris control of the iris ring. [DOWN OPEN]: Iris will open when it is turned toward B. [UP OPEN]: Iris will open when it is turned toward A. -
Page 152: Bars Type
[INFRARED LIGHT] You can turn on/off the infrared light when [INFRARED REC] 146) is set to [ON]. ≥ Switch to Manual Mode. [ON]: Turn on the infrared light. [OFF]: Turn off the infrared light. [BARS TYPE] You can switch the type of colour bars to be displayed when you press the BARS button. Colour bars compliant with [SMPTE]: SMPTE... -
Page 153: Display Setting
Display setting Different menu items are displayed depending on whether this unit is in Recording Mode or Playback Mode. All default settings are indicated with underlined text. MENU : [DISP SETUP] # desired setting [USER BUTTON DISPLAY] [ON]/[OFF] Switches the display of the set USER button icons. [ZEBRA DETECT 1] Selects the brightness level of the left-leaning zebra patterns on the screen. -
Page 154: Guide Lines
[GUIDE LINES] /[OFF] You can check if the image is level while recording motion pictures and still pictures. The function can also be used to estimate the balance of the composition. ≥ The guidelines do not appear on the images actually recorded. ≥... -
Page 155: Date Format
[DATE FORMAT] [Y/M/D]/[M/D/Y]/[D/M/Y] It is possible to change the date format. [LEVEL GAUGE] [ON]/[OFF] This function displays the horizontal/vertical tilt of the unit with the electronic level. [HISTOGRAM] [ON]/[OFF] A graph with brightness as horizontal axis and number of pixels at that brightness as vertical axis is displayed. -
Page 156: Power Lcd
[POWER LCD] (Makes brighter)/ (Normal)/ (Makes less bright) This makes it easier to view the LCD monitor in bright places including outdoors. [LCD SET] It adjusts brightness and colour density on the LCD monitor. [EVF SET] [BRIGHT]/[NORMAL]/[DARK] Brightness of the viewfinder can be switched. [SELF SHOOT] [MIRROR]/[NORMAL] Switches the mirror function of the LCD monitor when recording yourself. -
Page 157: Av Output Setting
AV output setting Different menu items are displayed depending on whether this unit is in Recording Mode or Playback Mode. All default settings are indicated with underlined text. MENU : [AV OUT SETUP] # desired setting [HDMI RESOLUTION] [AUTO]/[2160p]/[1080p]/[1080i]/[720p]/[DOWN CONV.] Select the desired method of HDMI output. -
Page 158: Other Functions
[HDMI TC OUTPUT] [ON]/[OFF] Switches the output setting of time code information when this unit is connected to another device (HDMI-SDI converter, etc.) with an HDMI cable. Other Functions Different menu items are displayed depending on whether this unit is in Recording Mode or Playback Mode. -
Page 159: Clock Set
[RING LED (BLUE)] [ON]/[5 SEC.]/[OFF] The ring LED lights up blue in Recording Mode. ≥ When [5 SEC.] is set, the ring LED lights up for 5 seconds after the unit is turned on or the Recording Mode is switched. ≥... - Page 160 [ALERT SOUND] [OFF]/ (Volume low)/ (Volume high) Touch screen operation, start and stop of recording can be confirmed with this sound. 2 Beeps for 4 times When an error occurs. Check the sentence displayed on the screen. 167) [ECONOMY (BATT)] [ON]/[OFF] When about 5 minutes have passed without any operation, this unit automatically turns off to save battery life.
-
Page 161: Wi-Fi Setting
[UPDATE] The firmware of this device is updated. For the latest update information, check the support website below. (As of September 2014) http://panasonic.jp/support/global/cs/e_cam (This Site is English only) [OPERATION TIME] The accumulated operating time of this device is displayed. [LANGUAGE] You can select the language on the screen display and the menu screen. - Page 162 [Wi-Fi Easy Setup] Using the smartphone app “Image App”, you can transfer clock information and wireless access point information (SSID and password) between a smartphone and this unit. 120) [Set Wireless Access Point] You can add or delete wireless access points, or rearrange the display order of wireless access points.
-
Page 163: Video Setup
Video Setup All default settings are indicated with underlined text. ≥ Press the THUMBNAIL button to switch this unit to the Playback Mode. ≥ Touch the play mode select icon, and set this unit to Motion Picture Playback Mode. MENU : [VIDEO SETUP] # desired setting [REPEAT PLAY] [ON]/[OFF]... -
Page 164: Display
Display Indications ∫ Recording indications Example: Display in English PRE-REC TC 00:00:00:00 R 1h20m R 1h20m D 5X 150M ND1/64 50p FBC OPEN 1/100 AF50 15 11 2014 15:30 Auto switch recording 143) Simultaneous recording TC 00:00:00:00 143) Counter display Background recording... - Page 165 ND 1/4, ND filter ND 1/16, Focus Transition bar ND 1/64 AF50, MF50, Focus Luminance level 68, 74) Luminance display frame Audio recording method Centre Marker 154) AGC, 0dB Gain value Audio level meter Auto iris mode 15 11 2014 Date indication Backlight Compensation 15:30...
-
Page 166: Playback Indications
∫ Playback indications ∫ Indication of connection to USB HDD , 6, , 7, 8, 9, :, 1, ;, 5, D, E, ;1, 2; USB HDD Playback 106) Display during playback 79, 83) ∫ Indication of connection to other devices TC 00:00:00:00 Counter Display Accessing the card... -
Page 167: Messages
Display Messages Major confirmation/error messages to be indicated on the screen in text. CHECK CARD. This card is not compatible or it cannot be recognised by the unit. If this message appears even though motion pictures and still pictures are recorded on an SD card, the card may be unstable. -
Page 168: Others
Others Troubleshooting ∫ It is not a malfunction in following cases The lens, the viewfinder or ≥ This is due to condensation. It is not a breakdown. Please refer LCD monitor fog up. to page 2. A clicking sound is heard ≥... - Page 169 Indication Problem Check points Function display ≥ [CARD & BATTERY] or [OTHER DISPLAY] of the (Remaining Display, [DISP SETUP] is [OFF]. 155) Counter Display, etc.) is ≥ Press the COUNTER button to switch the counter display. not displayed. Recording Problem Check points The unit arbitrarily stops ≥...
- Page 170 With other products Problem Check points Although this unit is ≥ Please read the operating instructions of your TV and select correctly connected to a the channel that matches the input used for the connection. TV, images cannot be ≥ Change the setting of the unit depending on the cable seen.
- Page 171 About the Wi-Fi function Problem Check points Cannot operate from ≥ Install the smartphone app “Image App” on your smartphone. smartphone using remote 119) operation. I have forgotten the ≥ Perform [Reset Wi-Fi Settings] from the Setup menu 131). password for the Wi-Fi. This will set the Wi-Fi setting to the condition at the time of purchase, and you will be able to use the Wi-Fi setting menu.
-
Page 172: Cautions For Use
Others Cautions for use When you use the unit in a sandy or dusty About this unit place such as a beach, do not let sand or fine dust get into the body and terminals of the unit. The unit and the SD card become warm Also, keep the unit away from sea water. -
Page 173: About The Battery
temperature: 15 oC to 25 oC, Recommended Do not lift up this unit by the handle with the humidity: 40%RH to 60%RH) tripod still attached ≥ Extremely high temperatures or low ≥ When the tripod is attached, its weight will temperatures will shorten the life of the also affect the unit’s handle, possibly causing battery. - Page 174 About the AC adaptor/battery About the SD card charger When disposing of or giving away the SD card, note that: ≥ If the temperature of the battery is extremely ≥ Formatting and deletion of this unit or high or extremely low, charging may take time computer only changes the file management or the battery may not be charged.
- Page 175 LCD monitor will be slightly darker than usual Please note in advance that Panasonic is not immediately after the unit is turned on. The liable in any way for any direct or indirect...
-
Page 176: About Copyright
≥ “AVCHD”, “AVCHD Progressive” and the mentioned in these instructions are usually “AVCHD Progressive” logo are trademarks of the registered trademarks or trademarks of Panasonic Corporation and Sony the manufacturers who developed the system Corporation. or product concerned. ≥ Manufactured under license from Dolby This product is licensed under the AVC patent Laboratories. -
Page 177: Recording Modes/Approximate Recordable Time
Others Recording modes/approximate recordable time ≥ SD cards are only mentioned with their main memory size. The stated times are the approximate recordable times for continuous recording. ≥ If recording for long periods, prepare batteries for 3 or 4 times the period you wish to record for. ≥... - Page 178 ≥ When [REC MODE] is set to [MP4(LPCM)] SD card System frequency Recording format setting (l 159) 4 GB 16 GB 64 GB [59.94Hz(NTSC)]/ [C4K/24p 100M] 20 min 1 h 20 min [50Hz(PAL)] [4K/50p 150M] 12 min 55 min [4K/25p 100M] 20 min 1 h 20 min [FHD/50p...
-
Page 179: Approximate Number Of Recordable Pictures
≥ When [REC MODE] is set to [AVCHD] SD card System frequency Recording format setting (l 159) 4 GB 16 GB 64 GB [PS 1080/50p] 19 min 1 h 20 min 5 h 20 min [PH 1080/50i] 21 min 1 h 30 min [HA 1080/50i] [50Hz(PAL)] 30 min... - Page 180 Panasonic Corporation Web site: http://www.panasonic.com...
Need help?
Do you have a question about the HC-X1000 and is the answer not in the manual?
Questions and answers