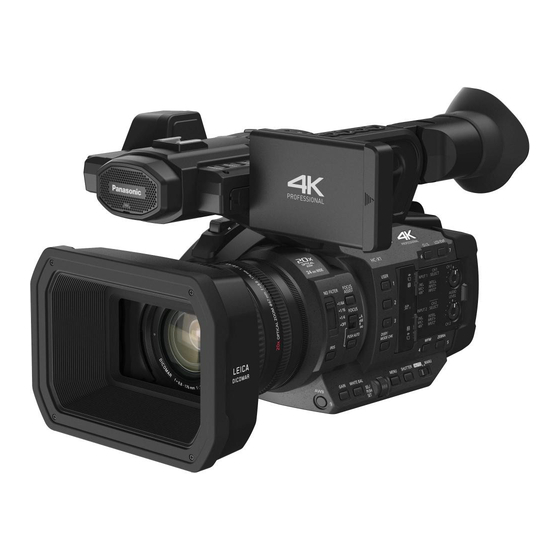

Related Manuals for Panasonic HC-X1GC


Summarization of Contents
1 Safety Precautions
1.1 General Guidelines
Essential safety precautions for servicing, covering component identification and handling.
1.2 Leakage Current Cold Check
Procedure to verify safety by checking leakage current after servicing.
1.3 Leakage Current Hot Check
Procedure to check leakage current under operational conditions for safety.
2 Warning
2.1 Prevention of Electrostatic Discharge (ESD) to Sensitive (ES) Devices
Guidelines to prevent damage to sensitive electronic components from electrostatic discharge.
2.2 How to Recycle the Lithium Ion Battery (U.S. Only)
Instructions for the proper recycling of lithium-ion batteries for users in the U.S.
2.3 Caution for AC Cord (For E/GC)
2.3.1 Information for Your Safety
Warnings regarding copyright infringement and exposure to hazards related to AC cord use.
2.3.2 Caution for AC Mains Lead
Safety instructions for the AC power cord, including fuse replacement and proper connection.
2.3.2.1 Important
Details on AC power connection, including wire coloring and grounding requirements.
2.3.2.2 Before Use
A minor instruction regarding the removal of the connector cover prior to unit operation.
2.3.2.3 How to Replace the Fuse
Step-by-step instructions for safely replacing the fuse in the AC power cord.
2.4 How to Replace the Lithium Battery
Procedure for safely removing and replacing the internal lithium battery.
3 Service Navigation
3.1 Introduction
Overview of the service manual's content and purpose for technicians.
3.2 General Description About Lead Free Solder (PbF)
Information regarding the use and identification of lead-free solder (PbF) in electronics.
3.3 How to Define the Model Suffix (NTSC or PAL model)
Explanation of model suffixes used to identify NTSC or PAL video output compatibility.
3.3.1 Defining methods
Visual methods to identify model suffixes based on safety markings on the unit.
3.4 Baking of replacement IC and defective P.C.B.
Procedure for baking sensitive integrated circuits and printed circuit boards to prevent moisture damage.
4 Specifications
General
General specifications covering power, consumption, dimensions, and weight of the camera.
Camera unit
Detailed specifications for the camera unit, including sensor, lens, and operational parameters.
6 Service Mode
6.1 Model/Destination Settings
Procedure to modify the camera's model or destination settings in service mode.
6.2 Lock Search and Error History Indication
How to access and interpret lock search and error history for troubleshooting.
6.3 Power ON Self Check Result Display
Displaying and understanding the results of the camera's power-on self-check routine.
6.4 Install the Wide Angle of View Adjustment data
Procedure for installing specific data for wide angle of view adjustment.
6.5 Adjustment function for the Service
An overview of various adjustment functions available for service technicians.
6.6 Restore the backed up adjustment data
Steps to restore previously saved adjustment data from an SD card.
6.7 Touch Panel Calibration
Procedure for calibrating the accuracy of the camera's touch panel interface.
7 Service Fixture & Tools
7.1 When Replacing the Camera Lens Unit or Main P.C.B. or IC3404(Flash Rom)
Precautions and procedures for replacing critical camera components.
7.1.1 Confirm the Serial Number (Camera Lens Unit, Video Camera)
Method to verify serial numbers before component replacement.
7.1.2 Download the Wide Angle of View Adjustment data
Instructions for downloading necessary data for wide angle of view adjustment.
7.1.3 Installation Procedure
Step-by-step guide for installing adjustment data using an SD card.
7.2 Convenient Jig
Description and use of a specific jig tool for convenient servicing tasks.
7.3 Extension Cable Connection
Basic information regarding the connection of extension cables for servicing.
8 Disassembly and Assembly Instructions
8.1 Disassembly Flow Chart for the Unit
A visual flowchart outlining the sequence for disassembling the camera unit.
8.2 PCB Location
Diagrams illustrating the physical location of various Printed Circuit Boards (PCBs) within the camera.
8.3 Disassembly Procedure for the Unit
Detailed step-by-step instructions for disassembling the camera unit.
8.3.1 Removal of the Lens Hood Unit
Instructions for the removal of the lens hood unit from the camera.
8.3.2 Removal of the Grip Ass'y
Instructions for the removal of the camera's grip assembly.
8.3.3 Removal of the Rec Check Button, Zoom Lever Unit, Zoom Base
Procedure for removing specific small components like the Rec Check button and zoom units.
8.3.4 Removal of the Power SS P.C.B., Power SS Unit
Instructions for the removal of the power supply printed circuit board and unit.
8.3.5 Removal of the Side Case L Unit, Fan Motor, Fan Damper
Instructions for removing the left side case, fan motor, and damper.
8.3.6 Removal of the XLR Rear P.C.B., Jack Unit
Instructions for removing the XLR rear PCB and associated jack unit.
8.3.7 Removal of the Jack DC P.C.B., Jack A Wired P.C.B., Jack Pin P.C.B.
Instructions for removing various jack-related printed circuit boards.
8.3.8 Removal of the Main Radiation Plate Unit
Instructions for removing the main radiation plate unit.
8.3.9 Removal of the Side Case R Unit
Instructions for removing the right side case unit.
8.3.10 Removal of the Kurupon Unit, Operation Camera P.C.B., Side R Operation P.C.B.
Instructions for removing the Kurupon unit and related operation PCBs.
8.3.11 Removal of the Rear Case Unit, Battery Catcher P.C.B.
Instructions for removing the rear case and battery catcher PCB.
8.3.12 Removal of the Main P.C.B.
Detailed instructions for the removal of the main printed circuit board.
8.3.13 Removal of the SD Holder P.C.B.
Instructions for removing the SD card holder printed circuit board.
8.3.14 Removal of the Camera Lens Unit
Step-by-step instructions for the removal of the camera lens unit.
8.3.15 Removal of the Lens Name Plate, MF Ring Unit
Instructions for removing the lens name plate and the manual focus ring unit.
8.3.16 Removal of the Zoom Motor
Instructions for the removal of the camera's zoom motor.
8.3.17 Removal of the Mic Cover Unit, Mic Case
Instructions for removing the microphone cover unit and its associated case.
8.3.18 Removal of the Handle Case T Ass'y
Instructions for the removal of the handle case T assembly.
8.3.19 Removal of the Sub SS Zoom P.C.B., Sub Zoom Unit, Handle Case T Unit
Instructions for removing sub zoom PCBs and the handle case T unit.
8.3.20 Removal of the Mic Holder Unit, Handle Operation P.C.B., XLR Front P.C.B.
Instructions for removing mic holder, handle operation, and XLR front PCBs.
8.3.21 Removal of the Handle Slide Ass'y
Instructions for the removal of the handle slide assembly.
8.3.22 Removal of the LCD Case T, LCD Unit, LCD Hinge Unit
Instructions for removing the LCD case T, LCD unit, and LCD hinge unit.
8.3.23 Removal of the Monitor P.C.B., LCD
Instructions for removing the monitor printed circuit board and the LCD panel.
8.3.24 Removal of the Handle Unit
Instructions for the removal of the main handle unit.
8.3.25 Removal of the Speaker
Instructions for the removal of the internal speaker.
8.3.26 Removal of the Handle Case B Unit
Instructions for removing the handle case B unit.
8.3.27 Removal of the EVF Unit
Instructions for the removal of the Electronic Viewfinder (EVF) unit.
8.3.28 Removal of the EVF P.C.B., Eye Sensor P.C.B.
Instructions for removing the EVF and eye sensor printed circuit boards.
8.3.29 Removal of the EVF P.C.B. Cushion
Instructions for removing the cushion component associated with the EVF PCB.
9 Measurements and Adjustments
9.1 Electric Adjustment
Details regarding electric adjustments and the necessary connection jigs.
9.1.1 About Light Box
Information pertaining to the use of a light box for specific adjustment procedures.
9.1.2 Adjustment Items
A comprehensive list of adjustment items and their associated settings.
9.1.3 Adjustment Procedure
A guide outlining the sequence and steps for performing various adjustments.
10 Factory Setting
10.1 How To Turn On The Factory Settings?
Procedure to access and activate the factory settings menu on the camera.
10.2 What Is The Factory Settings?
An explanation of the function and purpose of the camera's factory settings.
Need help?
Do you have a question about the HC-X1GC and is the answer not in the manual?
Questions and answers