Table of Contents
Advertisement
Quick Links
Uninterruptible Power Supply (UPS)
Instruction Manual
* Read this instruction manual before the installation and use of BN100XR/BN150XR/BN240XR to ensure
that you fully understand the critical do's and don'ts of the devices.
* Keep this instruction manual within easy reach of where you install BN100XR/BN150XR/BN240XR so
that you can refer to it when necessary.
This manual may not be reproduced in whole or in part without permission.
The contents of this manual are subject to change without notice.
BN100XR/BN150XR/BN240XR
Advertisement
Table of Contents

Related Manuals for Omron POWLI BN100XR


Summary of Contents for Omron POWLI BN100XR
- Page 1 Uninterruptible Power Supply (UPS) BN100XR/BN150XR/BN240XR Instruction Manual * Read this instruction manual before the installation and use of BN100XR/BN150XR/BN240XR to ensure that you fully understand the critical do's and don'ts of the devices. * Keep this instruction manual within easy reach of where you install BN100XR/BN150XR/BN240XR so that you can refer to it when necessary.
- Page 2 Introduction Thank you for purchasing Omron's Uninterruptible Power Supply (UPS). • The UPS protects computers and other devices from surge voltage (a phenomenon in which extraordinary high voltage occurs instantaneously) caused by power failures, voltage variations, instantaneous voltage drops and power failures, and lightning.
-
Page 3: Introduction
IMPORTANT SAFETY INSTRUCTIONS 1. SAVE THESE INSTRUCTIONS This manual contains important instructions for Model BN100XR/BN150XR/ BN240XR/MB240XR that should be followed during installation of the UPS and batteries. 2. SYMBOL This symbol indicates the ground. This symbol indicates that the on UPS is ON. This symbol indicates that the UPS is OFF. -
Page 4: Table Of Contents
Table of Contents Table of Contents Introduction IMPORTANT SAFETY INSTRUCTIONS ......................1 Directions for safe use ............................3 1. Preparation ..............................11 Unpacking the UPS ........................... 11 Checking the accessories ......................... 11 Part names ............................12 Explanetion of symbols used on unit ....................16 2. -
Page 5: Directions For Safe Use
Directions for safe use Read this instruction manual before installation and Directions for safe use use to ensure that you fully understand the critical do's and don'ts of your UPS. ● The safety symbols used in this manual and their meanings are as follows. Warning Misuse may cause death or serious injury. - Page 6 Directions for safe use Cautions (installation) Keep packing materials, including plastic bags and film, out of the reach of children ● Should children swallow or put their head into the packing materials, there is danger of suffocation. Provide secure grounding ●...
- Page 7 Directions for safe use Cautions (installation) When performing rack installation, ensure that the UPS is supported and stabilized by using both the support angles and the table clamps that were included. When connecting a battery unit and/or adding another battery unit, be sure to place the battery unit in a position lower than the main unit.
- Page 8 Directions for safe use Cautions (use) In a case where the Battery Replacement Lamp comes on or the backup time becomes shorter than the required backup time, replace the battery pack with a new one while the UPS is running, or stop the UPS and discard the old battery pack.
- Page 9 Directions for safe use Cautions (maintenance) Before maintaining devices connected to the UPS, turn off the UPS and remove the AC Input Plug from the wall outlet (commercial power). ● Even if you remove the AC Input Plug during the operation of the UPS, the backup function of the UPS keeps feeding power through the power supply output receptacle of the UPS.
- Page 10 Directions for safe use Notes After purchasing the UPS, charge the battery until the battery charge indication shows that the battery is fully charged. ● If you do not use your UPS for a long time after purchase, the battery may deteriorate and become unusable. ●...
- Page 11 Directions for safe use Explanations Usual operating method ● You may keep the UPS running without shutting down, or you may turn off the UPS each time the devices connected the UPS are turned off. You can choose either way, depending on which is convenient. ●...
- Page 12 Directions for safe use Explanations Auto restart after shutdown processing by UPS monitoring software ● In the event of a power failure, some PC models (see *1 below) automatically restart immediately after the completion of the OS shutdown processing by the UPS monitoring software. In this case, the UPS stops during restart or after startup, possibly damaging files and/or the hard disk.
-
Page 13: Preparation
1. Preparation 1. Preparation 1-1 Unpacking the UPS Cautions Keep the weight in mind when unpacking and carrying the UPS. Place and run the UPS on a structurally sound and level base. ● If the UPS falls over, or if you drop it, it may cause injury. ●... -
Page 14: Part Names
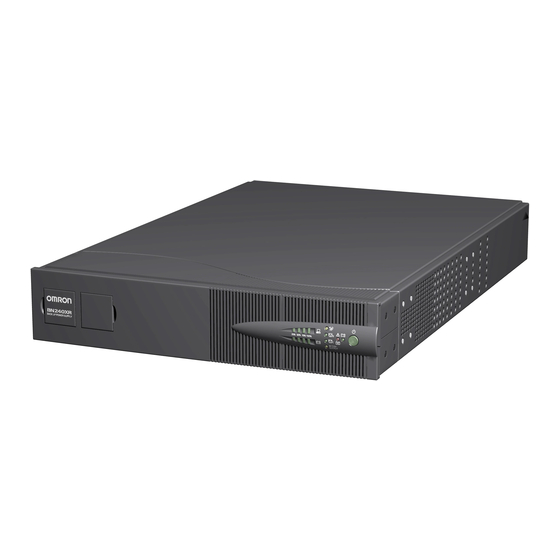
1. Preparation 1-3 Part names 1. Front panel ● BN100XR 25% 50% 75% 100% BACK UP POWER SUPPL Y AC115V OUTPUT Control panel Logo plate Battery panel Note: There is a fixing screw for the battery panel beneath the logo plate. ●... - Page 15 1. Preparation ● Control panel (BN150XR/BN240XR) Power switch To turn ON To turn OFF Press Press 25% 50% 75% 100% AC115V OUTPUT Switch FUNCTION Power switch Indication lamp Continuous illumination Blinking display A (green) Power supply output/receptacle A output indication Charging (blinks once every 10 seconds) B (yellow) Battery mode indication Testing the battery (blinks once per second)
-
Page 16: Rear Panel
1. Preparation 2. Rear panel ●BN100XR/BN150XR INPUT PROTECTION 34Z5 OUTPUT U.P.S. AC100-115V MODEL : BN150XR 50/60Hz RS232C INPUT AC100V INPUT AC100V 15A/1000W MAX. SER. : 50/60Hz 15A MAX. 50/60Hz 15A MAX. ●BN240XR 20A MAX. 34Z5 U.P.S. 20A MAX. RS232C 無停電電源装置 INPUT AC100V MODEL : BN240XR 15A MAX. - Page 17 34Z5 U.P.S. BATTERY SUPPLY Battery unit MODEL : MB240XR EXTENDED BATTERY FOR BATTERY CONNECTOR BATTERY CONNECTOR OMRON UPS BN240XR Volt : 72Vdc Volt : 72Vdc TO UPS or TO OTHER TO UPS or TO OTHER DC BRAKER SER. BATTERY MODULES...
-
Page 18: Explanation Of Symbols Used On Unit
1. Preparation 1-4 Explanation of symbols used on unit Symbol Description UPS is ON. UPS is OFF. Add-on battery unit is connected to the UPS. An error occurred with the UPS. Connection overload. Output capacity exceeded by connected devices. Batteries at end of useful life. Necessary to replace the batteries. Output receptacle B is ON. -
Page 19: Installation And Connection
2. Installation and connection 2. Installation and connection 2-1 Precautions and notes on installation and connection Precautions and notes on installation and connection are given below. Be sure to read them for correct use. Cautions (Compulsory (do's)) Keep the weight in mind when unpacking and carrying the UPS. Place and run the UPS on a structurally sound and level base. - Page 20 2. Installation and connection Cautions (Prohibition (don'ts)) Do not obstruct the air inlets and outlets on the sides and rear of the UPS. Do not place the UPS in an enclosed space or cover the UPS. ● Doing so may lead to abnormal overheating or fire. ●...
- Page 21 2. Installation and connection Notes Do not create a short between the output lines of the UPS, or a ground fault between the output lines and the ground. ● The UPS may fail. When the UPS is in operation, do not insert the AC Input Plug into the Power Supply Output Receptacle of the same UPS.
-
Page 22: Installation
2. Installation and connection 2-2 Installation The UPS permits the following installing methods. Choose the one best suited for the environment. 1. Rackmount installation 2. Stationary installation ● Horizontal ● Upright intatllation for BN240XR/MB240XR 1. Rackmount installation (EIA 19-inch rack/server rack) Cautions When performing rack installation, ensure that the UPS is supported and stabilized by using both the support angles and the table clamps that were... - Page 23 2. Installation and connection ● Rack installation for BN240XR (MB240XR) Follow steps 1 through 6 for installation. Make sure to use the support clamps (support angles, front support clamp 3 3 3 3 3 , rear support clamp 6 6 6 6 6 ). Two types of nuts have been included for 2 2 2 2 2 and 5 5 5 5 5 .
- Page 24 2. Installation and connection 2. Stationary installation Perform installation only as shown in the diagrams below. ● Horizontal installation This product does not have rubber feet, and there are no screw threads on the bottom side. For stationary horizontal installation, make sure that this product does not slide or fall. Do not place things on the units.
-
Page 25: Adding A Battery Unit (Mb240Xr)
2. Installation and connection 2-3 Adding a battery unit (MB240XR) • It is possible to connect up to two add-on battery units (MB240XR) to the BN240XR. • It is possible to perform connection while the main unit (BN240XR) is plugged in. When connected to a 2.4KVA/2000W device, the backup time for one add-on battery is 10 minutes, and the backup time for two add-on batteries is 20 minutes (for new battery at ambient temperature of 20°C). -
Page 26: Connection Of Ac Input Cable
2. Installation and connection 2-4 Connection of AC input cable 1. BN100XR • It is possible to use a wall outlet (commercial power) with a basic 15A pin (NEMA 5-15). • It is possible to connect to a 2-pin outlet using the included 3-pin to 2-pin adapter. In this case, make sure that the grounding is connected separately. -
Page 27: Connecting The Devices
2. Installation and connection ● Use of 20A plug Maximum usable capacity is the rated output capacity of the BN150XR (1500VA/1000W). • Provide a wall outlet (commercial power) suitable for the shape of the 20A plug (NEMA L5-20). • Replace the AC Input Plug of the BN150XR with the included NEMA L5-20 plug. ●... - Page 28 2. Installation and connection ● Connecting devices to the output receptacles It is not p ossible to connect a device that surpasses the rated capacity of the output recep- tacle, even if it is within the output rated capacity of the BN240XR. Distribute the connec- tions so that each outlet is within its rated capacity.
- Page 29 2. Installation and connection ● When the overload indication appears, output stops The time it takes until output stoppage occurs differs depending on the degree of overload. Operation status Overload amount Time until output stops Around 110% and up 5 minutes Line mode Around 120% and up 10 seconds...
-
Page 30: Checking The Operation
2. Installation and connection 2-6 Checking the operation Before using the UPS, follow the steps below to check whether the Battery mode functions properly. (This operational check of removing the “AC Input Plug” from the wall outlet is carried out on the assumption that power failure would occur.) (1) Connect your PC and other devices to the UPS, and then insert the AC Input Plug of the UPS into a wall outlet (commercial power). -
Page 31: Charging The Battery
2. Installation and connection The beeping sound varies depending on the state of the battery. The operation is normal. Proceed to (5). The operation is abnormal. • If the display looks like either of those shown in "C. Failure (displays and beeps when a failure occurs in a device) of "3-3 Beeps and displays”... -
Page 32: Operating The Ups
3. Operating the UPS 3. Operating the UPS 3-1 Precautions and notes on operation During the operation, follow the do's and don'ts below. Cautions (use) In a case where the Battery Replacement Lamp comes on or the backup time becomes shorter than the required backup time, replace the battery pack with a new one while the UPS is running, or stop the UPS and discard the old battery pack. -
Page 33: Operating And Stopping Procedures
3. Operating the UPS Notes Turn off the UPS before opening a circuit breaker or removing the AC Input Plug from a wall outlet (commercial power). If you cannot stop the UPS for some reason, bring the UPS to automatic stop through the UPS monitoring software, which requires the least backup time. - Page 34 3. Operating the UPS ● Stopping procedure 1. Press the power switch ( ) of the UPS. ● The switch on the front side returns to its original position, the beep sounds for 3 seconds, and output stops immediately. ● All of the indication lamps go out. After that, the indicator blinks once every 10 seconds.
-
Page 35: Beeps And Displays
3. Operating the UPS 3-3 Beeps and displays A. Normal (Normal operation status) Display Beep Output Charge Description None Stop Stop Status: Lit or not lit, Operation is interrupted due to removal of Not lit Blinking depending on status the AC Input Plug or abnormal input power supply. - Page 36 3. Operating the UPS B. Failure (displays and beeps when a power failure and/or irregularities in the input power supply occur) Display Beep Output Charge Description Continuous Stop Status: Every (dis- Due to power failure or input voltage 4 seconds charging) irregularities, power is being supplied to Lit or not lit,...
- Page 37 3. Operating the UPS Display Beep Output Charge Description Status: Every 0.5 The rated output capacity is exceeded second because too many devices are linked to the UPS. When this status continues for the periods of time shown below, it will become Lit or not lit, Not lit Blinking...
-
Page 38: Measuring The Backup Time
4. Measuring the backup time 4. Measuring the backup time 4-1 Measuring method of the backup time (1) Insert the AC Input Plug of the UPS into a wall outlet (commercial power) and charge the battery for at least 12 hours. (The power switch may be turned ON, and the status of devices linked to the UPS does not matter.) ●... -
Page 39: Maintenance And Inspection
5. Maintenance and insection 5. Maintenance and inspection 5-1 Checking the battery The sealed lead-acid battery mounted in the UPS has its own life. (The life of the battery varies depending on storage conditions, the operating environment, and backup frequency.) As the end of the battery life draws near, deterioration takes place much faster. - Page 40 ● Replaceable battery pack Model name: BP150XR A Use a screwdriver to pry off the square plate on the left with the OMRON logo printed on it. B Remove the two screws. C Pull the left side of the plastic panel toward you.
- Page 41 5. Maintenance and insection D Pull the battery pack connector as shown in the diagram on the left. (Be careful not to pull the wiring.) E Slide the metal cover to the right and remove it. F Grab the white label attached to the bottom side of the battery pack, and pull it toward you.
- Page 42 Model name: BP240XR A Use a screwdriver to pry off the square plate on the left with the OMRON logo printed on it. B Remove the two screws. C Firmly pull the left side of the plastic panel toward you.
- Page 43 Model name: BP240XR A Use a screwdriver to pry off the square plate on the left with the OMRON logo printed on it. B Remove the two screws. C Firmly pull the left side of the plastic panel toward you.
- Page 44 5. Maintenance and insection E Pull out the safety plug. (The connection inside the battery is cut.) F Remove the screw that holds the metal cover in place. G Slide the metal cover to the left and remove it. H Pull out the battery pack as far as 10 cm. Firmly pull forward on the connector located on the right side to detach it.
-
Page 45: Maintenance Of The Main Unit
5. Maintenance and insection 5-3 Maintenance of the main unit 1. Cleaning the UPS main unit Soak a soft cloth in water with/without soap, then wring tightly. Softly wipe the main unit. Do not use products such as thinner or benzene. (Deformation and/or discoloration may occur.) 2. -
Page 46: Using The Ups Monitoring Software
6. Using the UPS monitoring software 6. Using the UPS monitoring software * If you do not use the UPS monitoring software and contact signal I/O, this step is not required. 6-1 Performing auto shutdown Auto shutdown can be performed in the following two ways. 1. -
Page 47: Connection Methods
6. Using the UPS monitoring software 6-2 Connection methods 1. USB connection 2. RS-232C connection USB port Connect to RS-232C Connect terminal to USB terminal Connector Connector Connector Connector Connect to Connect to RS-232C Connect to USB port of UPS Connect to port of UPS computer... -
Page 48: About The Included Ups Monitoring Software
6. Using the UPS monitoring software 6-3 About the included UPS monitoring software The included UPS monitoring software enables you to save files automatically and perform shutdown processing of the computer when there is a power failure. However, the time between the occurrence of a power failure and the completion of the shutdown of your PC must be within the backup time measured in "4-1 Measuring method of the backup time"... - Page 49 6. Using the UPS monitoring software Explanations Auto restart after shutdown processing by UPS monitoring software ● In the event of a power failure, some PC models (see *1 below) automatically restart immediately after the completion of the OS shutdown processing by the UPS monitoring software. In this case, the UPS stops during restart or after startup, possibly damaging files and/or the hard disk.
-
Page 50: Using The Contact Signal I/O Card
7. Using the contact signal I/O card 7. Using the contact signal I/O card 7-1 Adding a signal I/O card A Contact Signal I/O card can be added in the option card slot on the backside of the UPS. ● Signal I/O cards (Model: SC05) are sold separately. 7-2 Details on contact signal I/O (SC05 card) You can develop your unique system based on the following specifications to automate the process at a power failure. -
Page 51: Notes And Explanations For The Use Of Contact Signal I/O
7. Using the contact signal I/O card 5. Contact Signal I/O ratings ● Signal output (BU and BL) Photo coupler ratings Applied voltage: 24V DC or less Maximum current: 20mA ● Signal input (BS) Input voltage: HIGH 5 to 12V DC, LOW 2.5V DC or less 6. -
Page 52: Using Snmp/Web Card
Serial connection asynchronous system (setting only) Number of controllable computers Maximum of 32 (this includes slave UPS when coordinated shutdown is in effect) Support MIB UPSMIB (RFC1628), OMRON MIB Other Equipped with real-time lock UPS monitoring software- Windows NT 4.0, Windows 2000, Windows XP, Widows Server 2003 compatible OS Red Hat Linux 7.27/7.3/8.0... -
Page 53: Additional Functions And Function Setting Changes For The Ups
9. Additional functions and function setting changes for the UPS 9. Additional functions and function setting changes for the UPS 9-1 Auto battery test This UPS has a function that automatically checks for battery deterioration, and an alarm will sound whenever the battery needs replacement. -
Page 54: Estimated Backup Time And Backup Time Test In Battery Mode
9. Additional functions and function setting changes for the UPS 9-2 Estimated backup time and backup time test in Battery mode 1. Estimated backup time The estimated time of backup in the current operating conditions is displayed on the UPS monitoring software monitor screen. - Page 55 9. Additional functions and function setting changes for the UPS 4. Output voltage selection/Input power supply sensitivity selection settings (Factory settings) 100V output/normal voltage sensitivity Settings can be made by selecting from the following four modes: ● 100V AC output/normal voltage sensitivity With input of 100V AC, output is 100V AC.
-
Page 56: Troubleshooting
10. Troubleshooting 10. Troubleshooting Problems Solution • The AC Input Plug is not connected to a wall outlet. The battery indicator does not • Voltage and/or frequency are out of the operating range. blink every 10 seconds (when • Check that the AC Input Plug is properly plugged into a wall outlet. the power switch is OFF). - Page 57 10. Troubleshooting Problems Solution The Error Lamp comes on. An error or malfunction has occurred in the UPS. Shut down the UPS and the connected devices. • After disconnecting all of the connected devices, turn ON the power switch of the UPS.
-
Page 58: Reference
References Reference A. Specifications Operation method Line interactive method Cooling method Forced air cooling 100 VAC Rated input voltage 90 VAC+3% ~ 118 VAC+3% (100 VAC output/normal voltage sensitivity) 85 VAC+3% ~ 118 VAC+3% (100 VAC output/low voltage sensitivity) Voltage range 92 VAC+3% ~ 118 VAC+3% (115 VAC output/normal voltage sensitivity) 88 VAC+3% ~ 118 VAC+3% (115 VAC output/low voltage sensitivity) 50 / 60Hz+4Hz... - Page 59 References • When rated capacity is exceeded, there is a warning, and output stops with Overload protection passage of time • Output drops (in Battery mode) Backup output (grounded 3-pin) x 4 (BN100XR) • 10A (NEMA 5-15) x 2 • 10A (NEMA 5-15) output delay, ON/OFF controllable x 1 AC output •...
-
Page 60: Dimensional Outline Drawings
References B. Dimensional outline drawings (unit:mm / Tolerance - 1mm) BN100XR BN150XR MB240XR The figure indicates the condition with rack support clamps attached. Battery Unit... -
Page 61: Circuit Block Diagram
Output receptacle C circuit (Delay and ON-OFF controllable) Battery D. Optional products The following optional devices and parts are available. For further information, refer to OMRON's general catalogs for peripheral devices. Add-on battery unit Model: MB240XR For BN240XR Model: BP150XR... - Page 62 This manual may not be reproduced in whole or in part without permission. The contents of this manual are subject to change without notice. OMRON Corporation K1L-D-03512E...
Need help?
Do you have a question about the POWLI BN100XR and is the answer not in the manual?
Questions and answers