Table of Contents
Advertisement
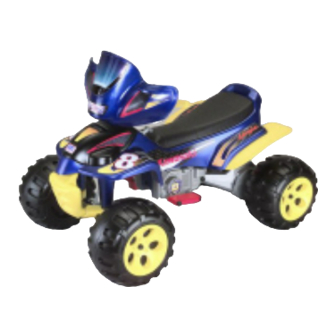
Product features may
vary from the picture above.
Please read this manual and save it with your original sales receipt.
Tools needed for assembly: Phillips Screwdriver, Hammer and Pliers (all not included);
Use only with a Power Wheels
and a Power Wheels
Kawasaki
®
and Ninja
®
are U.S. trademarks owned by and used under license from Kawasaki Motors Corp., U.S.A.Kawasaki Motors Corp., U.S.A. All Rights Reserved.
This product is neither manufactured nor distributed by Kawasaki Motors Corp., U.S.A. Consumer inquiries should be directed to: Power Wheels by Fisher Price
Fisher-Price, Power Wheels, Power Wheels by Fisher-Price and Power Lock are U.S. trademarks of Mattel, Inc.
®
Cap Nut Assembly Tool (included).
®
12 Volt Battery with Built-in Thermal Fuse
®
12 Volt Charger (both included).
www.powerwheels.com
Owner's Manual
with Assembly Instructions
For Model 73690
®
®
.
Advertisement
Table of Contents

Related Manuals for Power Wheels Kawasaki NINJA 73690


Summary of Contents for Power Wheels Kawasaki NINJA 73690
- Page 1 U.S. trademarks owned by and used under license from Kawasaki Motors Corp., U.S.A.Kawasaki Motors Corp., U.S.A. All Rights Reserved. This product is neither manufactured nor distributed by Kawasaki Motors Corp., U.S.A. Consumer inquiries should be directed to: Power Wheels by Fisher Price Fisher-Price, Power Wheels, Power Wheels by Fisher-Price and Power Lock are U.S.
-
Page 2: Table Of Contents
Important Information ..............2 Warnings and Caution . -
Page 3: Warnings And Caution
ELECTRICAL HAZARD • Battery can fall out and injure a child if vehicle tips over. Always use battery clamp. • PREVENT FIRE - Never modify the electrical system. Alterations could cause a fire resulting in serious injury and could also ruin the electrical system. - Use of the wrong type battery or charger could cause a fire or explosion resulting in serious injury. -
Page 4: Parts
• If you experience a problem with this product, or are missing a part, please call us at 1-800-348-0751, rather than return this product to the store. • Please identify all parts before assembly and save all packaging material until assembly is complete to ensure that no parts are discarded. - Page 5 Parts Fairing Top Handlebar Cover Bottom Handlebar Cover 12 Volt Charger 12 Volt Battery Key Assembly Round Bushing - 2 Radio Knob - 2 Handlebar Cap Nut Microphone Assembly Tool Part Not Shown: Label Sheet #8 x " Screw – 17* #10 - 32 Lock Nut - 2 .437 Cap Nut –...
-
Page 6: Parts Diagram
Note: Some parts shown are assembled on both sides of vehicle. Vehicle Body Cowling Seat Wheel - 4 Hubcap - 4 Cap Nut - 6 Steering Column Right Mudflap 12 Volt Battery Key Assembly Parts Diagram Microphone Radio Knob - 2 Grip - 2 Top Handlebar Cover Bottom Handlebar Cover... -
Page 7: Battery Charging
ELECTRICAL HAZARD WARNING • Battery can fall out and injure a child if vehicle tips over. Always use battery clamp. • PREVENT FIRE - Never modify the electrical system. Alterations could cause a fire resulting in serious injury and could also ruin the electrical system. - Page 8 Important Notes • Your new battery must be charged for at least 18 hours before you use it in your vehicle for the first time. • We recommend that you start charging your battery before beginning assembly of your new vehicle. •...
-
Page 9: Assembly
WARNING Children can be harmed by small parts, sharp edges and sharp points in the vehicle’s unassembled state, or by electrical items. Care should be taken in unpacking and assembly of the vehicle. Children should not handle parts, including the battery, or help in assembly of the vehicle. - Page 10 • Slide a hubcap, indented side down, onto the rear axle. • Slide a wheel onto the rear axle. Make sure the ribs on the wheel face up. • Slide a rear wheel driver, ring side down, onto the rear axle.
- Page 11 Wheel Hubcap Cap Nut Assembly Tool Cap Nut Ring • Face the front end of the vehicle body. • Slide a washer onto one of the Round Bushing front axles. • Slide a round bushing, ring end first, onto the front axle. •...
- Page 12 PRESS HERE To Snap Side Tabs • Press firmly on each side of the cowling to snap the four side tabs into the slots in the vehicle body. Make sure the rear tab stays aligned with the slot. Note: You may need to flex the shifter to the side to fit the cowling over the high speed lock-out screw.
- Page 13 Hole Lock Nut Neck • Position the handlebar so that the side with the three holes and circular indent face up. • Fit the neck against the bottom of the handlebar. Align the holes in the handlebar and neck. • Insert a #10-32 x 1 "...
- Page 14 • Fit the top handlebar cover to the bottom handle- bar cover. • Insert three #8 x " screws through the holes in the top handlebar cover. Tighten the screws with a Phillips screwdriver. Do not over-tighten. Screw Tab • While pushing the top handlebar cover and the fairing together, insert four #8 x "...
-
Page 15: Label Decoration
Proper label application will help to keep the labels looking their best! When applying labels, keep the following guidelines in mind: • Wash your hands before applying the labels. • Before applying the labels, wipe the surface of the vehicle with a clean, dry cloth to remove any dust or oils. •... - Page 16 Label Decoration Right Side Left Side...
-
Page 17: Battery Installation
IMPORTANT! Use only a Power Wheels with built-in thermal fuse. Use of any other battery will damage your vehicle. Make sure that you charge the battery for at least 18 hours using the enclosed Power Wheels 12 volt charger before operating your vehicle for the first time. -
Page 18: Battery Care And Disposal
Battery Care and Disposal Care If a battery leak develops, avoid contact with the leaking acid and place the damaged battery in a plastic bag. See information below for proper disposal. If acid comes in contact with skin or eyes, flush with cool water for at least 15 minutes and call a physician. -
Page 19: Rules For Safe Driving
RIDING HAZARD WARNING Prevent Injuries and Deaths • Direct Adult Supervision Required • Keep Children Within Safe Riding Areas These areas must be: - away from swimming pools and other bodies of water to prevent drownings - generally level to prevent tipovers - away from steps, driveways, roads and alleys. -
Page 20: How To Operate Your Vehicle
How to Operate Your Vehicle As assembled, your vehicle is ready to roll in low speed (2 child is ready to drive the vehicle in high speed (5 mph, maximum), follow the instructions (step 3) to disconnect the high speed lock-out. Beginner - Low Speed Drive Shifter REMOVE LOCK-OUT... -
Page 21: Fcc Statement (United States Only)
How to Operate Your Vehicle Shifter REMOVE LOCK-OUT SCREW ON SIDE OF SHIFTER FOR HIGH SPEED OPERATION IMPORTANT! To avoid damaging the motors and gears, stop the vehicle before shifting between low and high speed. • Make sure the shifter is in the HIGH SPEED position. •... -
Page 22: Problems And Solutions Guide
Problems and Solutions Guide IMPORTANT! If you experience a problem with your vehicle, first check the Problems and Solutions Guide below. If you still experience a problem, please contact Power Wheels toll-free at 1-800-348-0751 between 8 AM and 6 PM (EST) Monday through Friday. Or, contact your local Power Wheels Authorized Service Center list beginning on page 24. - Page 23 Problems and Solutions Guide Problem Short run time Undercharged battery Overcharged battery Battery is old and will not accept full charge Tripped thermal fuse Vehicle runs sluggishly Undercharged battery Battery needs charging Battery is old and will not accept full charge Vehicle is overloaded Driving conditions are too stressful Vehicle runs in low speed, but...
-
Page 24: Authorized Service Centers
Problems and Solutions Guide Problem When the foot pedal is pressed only one rear wheel spins Sometimes the vehicle doesn’t run, but other times it does When the foot pedal is pressed, the vehicle won’t run without a push Loud clacking or grinding noise from a motor-gearbox Charger gets warm during use Battery makes a sizzling or... - Page 25 SACRAMENTO - California Electric Service Center, 1821 “Q” Street, 95814, (916) 443-5711 SALINAS - SRS Hobbies, 407 Front Street, 93901, (831) 424-4044, SAN DIEGO - California Electric Service Center, 3430 El Cajon Blvd., 92104, (619) 283-6488 SAN JOSE - California Electric Service Center, 481 So.
- Page 26 LAKE CHARLES - Capitol Schwinn Cyclery, 722 E. Prien Lake Road, 70605, (337) 474-9090 NEW IBERIA - Voorhies Supply Company, 401 W. St. Peter Street, 70560, (337) 364-2431 NEW ORLEANS (METAIRIE) - Le Jouet, Inc., 1700 Airline Hwy., 70001, (504) 837-0533 SHREVEPORT - Shreveport Shaver and Appliance, 9750 St.
- Page 27 DAYTON - Layer Electric, 603 South Ludlow Street, 45402, (937) 224-9608 DAYTON (NEW CARLISLE) - Ballweg Do-It Center, 3300 South Dayton, Lakeview Rd., 45344, (937) 849-1306 GALION - Allied Electrical Repair, 1404 Harding Way East, 44833, (419) 468-4962, (800) 648-6771 GROVE CITY -City Bike Repair, 3957 Broadway, 43123, (614) 871-9123 LIMA - Crouse Lumber Do-It Center, 333 E.
- Page 28 IMPORTANT! DO NOT use this vehicle for the first time until you have charged the battery for 18 hours. Remember to… Charge the battery immediately after each use. Charge the battery once a month during storage, even if the vehicle has not been used. Failure to follow these instructions will permanently damage your battery and void your warranty.
Need help?
Do you have a question about the Kawasaki NINJA 73690 and is the answer not in the manual?
Questions and answers