Table of Contents
Advertisement
Quick Links
Advertisement
Table of Contents

Related Manuals for Planet WNRT-300


Summary of Contents for Planet WNRT-300
-
Page 2: Federal Communication Commission Interference Statement
Copyright Copyright 2011 by PLANET Technology Corp. All rights reserved. No part of this publication may be reproduced, transmitted, transcribed, stored in a retrieval system, or translated into any language or computer language, in any form or by any means, electronic, mechanical, magnetic, optical, chemical, manual or otherwise, without the prior written permission of PLANET. -
Page 3: Ce Mark Warning
Federal Communication Commission (FCC) Radiation Exposure Statement This equipment complies with FCC radiation exposure set forth for an uncontrolled environment. In order to avoid the possibility of exceeding the FCC radio frequency exposure limits, human proximity to the antenna shall not be less than 20 cm (8 inches) during normal operation. CE mark Warning This is a class B device, in a domestic environment;... - Page 4 Do not dispose of WEEE as unsorted municipal waste and have to collect such WEEE separately. Revision User’s Manual for PLANET 802.11n Wireless Portable AP / Router Model: WNRT-300 Rev: 1.0 (June, 2011)
-
Page 5: Table Of Contents
CONTENTS Chapter 1. Product Introduction......................1 1.1. Package Contents ......................1 1.2. Product Description .......................1 1.3. Product Features......................2 1.4. Product Specification.....................4 Chapter 2. Hardware Interface ......................7 2.1. Overview........................7 2.2. LED Indications ......................7 Chapter 3. Installation Guide ....................... 9 3.1. - Page 6 4.6. Firewall ........................37 4.6.1. Port Filtering ......................38 4.6.2. IP Filtering ......................39 4.6.3. MAC Filtering.....................39 4.6.4. Port Forwarding ....................40 4.6.5. URL Filtering......................42 4.6.6. DMZ........................42 4.6.7. VLAN .........................43 4.7. QoS ..........................45 4.8. Route Setup ........................46 4.9. Management .......................47 4.9.1. Status.........................47 4.9.2. Statistics ......................48 4.9.3.
-
Page 7: Chapter 1. Product Introduction
More Flexibility and Mobility With the tiny-sized and stylish design, the WNRT-300 is easy to carry for the true mobility. It can operate in various environments with the hardware switch modes including AP, Router, and Client, which helps to immediately set up a wireless network without software configuration. -
Page 8: Product Features
Protected Setup (WPS) with configuration in PBC and PIN type. Just push the WPS button or key in the PIN code, the secure connection between the WNRT-300 and the wireless clients can be built immediately, which offers users a convenient and fast method to construct a secure wireless network. - Page 9 User’s Manual of WNRT-300 Compliant with IEEE 802.11n wireless technology capable of up to 150Mbps data rate Backward compatible with 802.11b/g standard Equipped with one 10/100Mbps RJ-45 Ethernet port for LAN/WAN, Auto MDI/MDI-X supported Wireless Network Range Extender ...
-
Page 10: Product Specification
User’s Manual of WNRT-300 1.4. Product Specification WNRT-300 Product 150Mbps 802.11n Wireless AP / Router Hardware Specification Interface LAN/WAN 1 x 10/100Mbps Auto MDI/MDI-X RJ45 port Gain: 1 x Internal 2dBi Antenna Antenna Orientation: Omni-directional Front panel (from left to right):... - Page 11 User’s Manual of WNRT-300 Wireless Mode Repeater (WDS+AP) Universal Repeater (AP+Client) WEP (64/128-bit) encryption security WPA-Enterprise / WPA2-Enterprise (TKIP/AES) Encryption Security WPA-Personal / WPA2-Personal (TKIP/AES) 802.1x Authentication Provide wireless LAN ACL (Access Control List) filtering Wireless MAC address filtering...
- Page 12 User’s Manual of WNRT-300 Operating: 10 ~ 90% (Non-Condensing) Humidity Storage: 5 ~ 90% (Non-Condensing)
-
Page 13: Chapter 2. Hardware Interface
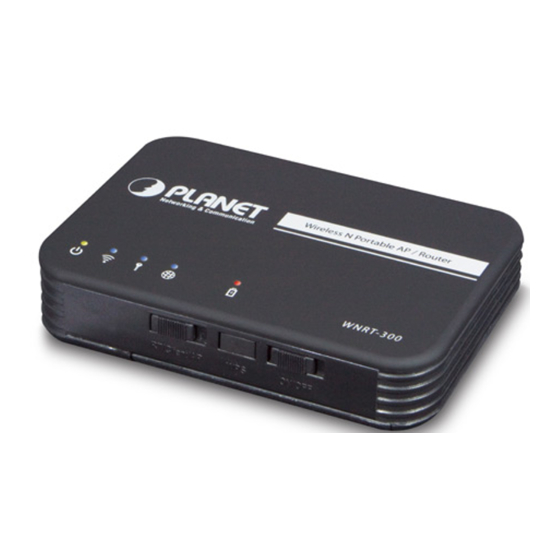
WPS Button Press the button for about 5 seconds to activate the WPS function. Reset Reset the WNRT-300 to the factory default settings by holding the Reset button and pressing down for about 5 seconds. 2.2. LED Indications The LEDs on the top panel indicate the instant status of system power, wireless data activity, WPS, port links, battery, and help monitor and troubleshoot when needed. - Page 14 User’s Manual of WNRT-300 Figure 2-3 Top Panel LED Definition COLOR STATE FUNCTION Device power on Power Green Device power off Flash Low battery power Flash The Wireless function is enabled. WLAN Blue The Wireless function is disabled. WPS is activated...
-
Page 15: Chapter 3. Installation Guide
In Router Mode, the NAT (Network Address Translation) function and DHCP server are both enabled, and all wireless clients share the same public IP assigned by ISP through WAN port of the WNRT-300. The WNRT-300 is supposed to connect with the Cable / xDSL Modem by UTP cable. -
Page 16: Ap Mode
Ethernet directly by UTP cable. Figure 3-2 3.2.3. Client Mode In Client Mode, the WNRT-300 is supposed to act as a wireless station for the PC. Users can site survey the available local AP and choose someone to connect with. Figure 3-3... -
Page 17: Manual Network Setup - Tcp/Ip Configuration
192.168.1.1, and the default Subnet Mask is 255.255.255.0. These values can be changed as you desire in the web UI of the WNRT-300. In this section, we use all the default values for description. No matter you want to configure the WNRT-300 via wired or wireless connection, the PC need to be assigned an IP address first. - Page 18 User’s Manual of WNRT-300 3) In the prompt window shown below, double click on the Internet Protocol (TCP/IP). Figure 3-5 4) Choose Obtain an IP address automatically, and Obtain DNS server automatically as shown in the figure below. Then click OK to save your settings.
-
Page 19: Configure The Ip Address Manually
1) Continue the settings from the last figure, select Use the following IP address radio button. 2) If the LAN IP address of the WNRT-300 is 192.168.1.1, enter IP address 192.168.1.x (x is from 2 to 254), and Subnet mask 255.255.255.0. -
Page 20: Hardware Installation
After that, please install the WNRT-300 according to the following steps. Step 1. Please shift the hardware switch on the WNRT-300 to the operation mode you want to use, and follow the figure below to install it for the purpose of configuration. - Page 21 The procedures of hardware installation are finished. Please continuously follow the next section to start setup in the web UI. If you want to configure the WNRT-300 via wireless connection, please use your PC to site survey the wireless signal of WNRT-300, and connect your PC with it wirelessly. Default SSID: default...
-
Page 22: Starting Setup In Web Ui
Figure 3-5 3.5. Starting Setup in Web UI It is easy to configure and manage the WNRT-300 via web browser. To access the web UI of the WNRT-300, please open a web browser and enter the default IP address http://192.168.1.1 in the address field of the browser. - Page 23 Using Proxy checkbox, and click OK to finish it. After you enter the username and password, the main screen appears as Figure 3-9 Figure 3-9 WNRT-300 Web UI Screenshot The next chapter will introduce the functions of the web UI. -17-...
-
Page 24: Chapter 4. Configuration In Web Ui
Chapter 4. Configuration in Web UI 4.1. Login After successfully logging into the web UI of the WNRT-300, you will see the main menus on the left side of the web-based utility. There are some different options appear as the operation mode changes. - Page 25 User’s Manual of WNRT-300 Step 1. The figure below is the screen of the Setup Wizard in Router Mode. Please click the “Next>>” button to continue. Figure 4-2 Step 2. Please select the corresponding WAN connection type of your Internet service, and fill the correct parameters in the blanks.
- Page 26 User’s Manual of WNRT-300 AP Mode Step 1. The figure below is the screen of the Setup Wizard in AP Mode. Please click the “Next>>” button to continue. Figure 4-4 Step 2. Please enter the SSID for recognizing the wireless connection. The default setting is “default”.
- Page 27 User’s Manual of WNRT-300 Step 3. Please select the wireless security mode, and setup the password for wireless connection. Then click the “Finished” button to save the settings and reboot to take effect. Figure 4-6 Client Mode Step 1. The figure below is the screen of the Setup Wizard in Client Mode. Please click the “Next>>”...
- Page 28 User’s Manual of WNRT-300 Figure 4-7 Step 2. Please enter the SSID of the AP you want to connect with, or you can click the “Site Survey” button to search the available local AP. The details of the available AP will appear. Then choose the AP you want to connect to, and click the “Next>>”...
-
Page 29: Operation Mode
User’s Manual of WNRT-300 Figure 4-9 4.3. Operation Mode This page shows the current operation mode, but users can only change it by shifting the hardware switch on the WNRT-300. Figure 4-10 -23-... -
Page 30: Wireless
User’s Manual of WNRT-300 4.4. Wireless The Wireless menu contains submenus of the settings about wireless network. Please refer to the following sections for the details. Figure 4-11 4.4.1. Basic Settings Choose menu “Wireless Basic Settings”, and you can configure the basic settings for the wireless network in this page. - Page 31 Network Type In Infrastructure, the wireless LAN serves as a wireless station. And the user can use the PC equipped the WNRT-300 to access the wireless network via other access point. In Ad hoc, the wireless LAN will use the Ad-hoc mode to operate.
-
Page 32: Advanced Settings
Broadcast SSID If you enable “Broadcast SSID”, every wireless station located within the coverage of the WNRT-300 can discover its signal easily. If you are building a public wireless network, enabling this feature is recommended. In private network, disabling “Broadcast SSID” can provide better wireless network security. - Page 33 User’s Manual of WNRT-300 Figure 4-13 Wireless Advanced Settings Object Description Fragment Threshold You can specify the maximum size of packet during the fragmentation of data to be transmitted. If you set this value too low, it will result in bad performance.
- Page 34 User’s Manual of WNRT-300 Protection It is recommended to enable the protection mechanism. This mechanism can decrease the rate of data collision between 802.11b and 802.11g wireless stations. When the protection mode is enabled, the throughput of the AP will be a little lower due to many of frame traffic should be transmitted.
-
Page 35: Security
User’s Manual of WNRT-300 4.4.3. Security Choose menu “Wireless Security”, and you can configure the settings of wireless security for the wireless network in this page. After the configuration, please click the “Apply Changes” button to save the settings. -
Page 36: Access Control
Choose menu “Wireless Access Control”, you can choose to allow or deny the computer of specified MAC address to connect with the WNRT-300 in this page. After the configuration, please click the “Apply Changes” button to save the settings. -
Page 37: Wds Settings
APs which you want to communicate with in the table and then enable the WDS. Choose menu “Wireless WDS Settings”, and you can configure WDS to connect the WNRT-300 with another AP in this page. After the configuration, please click the “Apply Changes” button to save the settings. -
Page 38: Site Survey
User’s Manual of WNRT-300 Current WDS AP List You can select some MAC address of the AP, and click the “Delete Selected” button to delete it. 4.4.6. Site Survey Choose menu “Wireless Site Survey” to scan the available local AP. If any Access Point is found, you could choose any one to connect with manually when the Client Mode is enabled. -
Page 39: Wps
Here you can check if the connection via WPS is established or not. WPS Status Self-PIN Number It is the PIN number of the WNRT-300 here. Click the “Start PBC”, and then activate WPS as well in the client Push Button device within 2 minutes. -
Page 40: Tcp/Ip Settings
User’s Manual of WNRT-300 Figure 4-19 Wireless Schedule 4.5. TCP/IP Settings The TCP/IP Settings menu contains submenus of the settings about LAN and WAN. Please refer to the following sections for the details. Figure 4-20 4.5.1. LAN Interface Choose menu “TCP/IP Settings LAN Interface”, and you can configure the parameters for LAN (Local Area Network). - Page 41 LAN Interface Object Description IP Address The LAN IP address of the WNRT-300, and default is 192.168.1.1. You can change it according to your request. Subnet Mask Default is 255.255.255.0. You can change it according to your request. Default Gateway Default is 0.0.0.0.
-
Page 42: Wan Interface
User’s Manual of WNRT-300 4.5.2. WAN Interface Choose menu “TCP/IP Settings WAN Interface”, and you can configure the parameters for the Internet network. After the configuration, please click the “Apply Changes” button to save the settings. Figure 4-22 WAN Interface... -
Page 43: Firewall
Check the box to enable Ping access from the Internet Network. Check the box to enable the web server access of the Enable Web Server Access WNRT-300 from the Internet network. on WAN Enable IPsec pass through Check the box to enable IPsec pass through function on VPN on VPN connection connection. -
Page 44: Port Filtering
User’s Manual of WNRT-300 4.6.1. Port Filtering Choose menu “Firewall Port Filtering”, and you can configure which port range and protocol to be restricted. After the configuration, please click the “Apply Changes” button to save the settings. Figure 4-24... -
Page 45: Ip Filtering
User’s Manual of WNRT-300 4.6.2. IP Filtering Choose menu “Firewall IP Filtering”, and you can configure which IP address and protocol to be restricted. After the configuration, please click the “Apply Changes” button to save the settings. Figure 4-25... -
Page 46: Port Forwarding
User’s Manual of WNRT-300 Figure 4-26 MAC Filtering Object Description Enable MAC Filtering Enable MAC filtering MAC Address Add MAC address you want to control The description of this setting Comment Check the “Select” box of which rule you want to delete, and then click the “Delete Selected” button to delete it. - Page 47 User’s Manual of WNRT-300 Figure 4-27 Port Forwarding Object Description Enable Port Forwarding Enable Port Forwarding function Add LAN IP address of specified host or server on the private local IP Address network Protocol Select the port number protocol type (TCP, UDP or both). If you are...
-
Page 48: Url Filtering
User’s Manual of WNRT-300 4.6.5. URL Filtering Choose menu “Firewall URL Filtering”, and you can configure which URL addresses to be blocked. After the configuration, please click the “Apply Changes” button to save the settings. Figure 4-28 URL Filtering Check the “Select”... -
Page 49: Vlan
Multiple AP) to a VLAN on your network. Client devices that associate using the SSID are grouped into this VLAN. Up to 5 security profiles can be enabled at one time in WNRT-300, thus allowing up to 5 different SSIDs to be used simultaneously. Cooperating with the VLAN support, network administrators can define separated wireless subnets for various Class-of-service and security policies. - Page 50 User’s Manual of WNRT-300 Choose menu “Firewall VLAN”, and you can configure the settings of virtual LAN. VLAN refers to a group of logically networked devices on one or more LANs, so that they can communicate with each other as if they were attached to the same wire. In fact, they are located on different LAN segments.
-
Page 51: Qos
Figure 4-31 Object Description Check the box to enable the QoS function. Enable QoS Automatic Uplink Speed Check the box to adjust the uplink speed automatically by the WNRT-300. Or enter the uplink data rate manually in the field below. -45-... -
Page 52: Route Setup
Automatic Downlink Check the box to adjust the downlink speed automatically by the Speed WNRT-300. Or enter the downlink data rate manually in the field below. QoS Rule Setting To set the priority rule, you can appoint the computer by IP address or MAC address, and enter it in the correct field. -
Page 53: Management
User’s Manual of WNRT-300 4.9. Management The Management menu contains submenus of the general settings of the WNRT-300. Please refer to the following sections for the details. Figure 4-33 4.9.1. Status Choose menu “Management Status” to show the current status and some basic settings of the WNRT-300. -
Page 54: Statistics
User’s Manual of WNRT-300 4.9.2. Statistics Choose menu “Management Statistics” to show the packet counters for transmission and reception regarding to wireless and Ethernet network. Figure 4-35 Statistics Item Description It shows the statistic count of sent packets on the wireless LAN interface. -
Page 55: Ddns
User’s Manual of WNRT-300 4.9.3. DDNS Choose menu “Management DDNS” to configure the settings about Dynamic DNS. Dynamic DNS is a kind of service that provides users with a valid, unchanging internet domain name (an URL) to go with that (possibly ever changing) IP address. After the configuration, please click the “Apply Changes”... -
Page 56: Time Zone Setting
User’s Manual of WNRT-300 4.9.4. Time Zone Setting Choose menu “Management Time Zone Setting” to configure the system time. You can also maintain the system time by synchronizing with a public time server over the Internet. After the configuration, please click the “Apply Changes” button to save the settings. -
Page 57: Log
User’s Manual of WNRT-300 Figure 4-38 Denial of Service Object Description Enable DoS Check to enable DoS function. User may set other related configurations Prevention about DoS below 4.9.6. Log Choose menu “Management Log” to configure the settings of system log. You can check the box of... -
Page 58: Upgrade Firmware
Select which log you want to check. Related information will be shown at below. 4.9.7. Upgrade Firmware Choose menu “Management Upgrade Firmware” to upgrade the firmware of the WNRT-300. Select the new firmware file downloaded from the PLANET website, and then click “Upload” button to upgrade it. -52-... -
Page 59: Save/Reload Settings
Click the “Save…” button to backup the configuration of the Save Settings to File WNRT-300. And then save the “config.dat” in your computer. Load Settings from File Select the configuration file of the WNRT-300, and then click the “Upload” button to reload the configuration back into the WNRT-300. -53-... -
Page 60: Password
New Password Input the password for this user. Confirmed Password Confirm the password again. 4.10. Logout Click “Logout” to log out the web UI of the WNRT-300. And then click the “Apply Change” button for sure. Figure 4-43 Logout -54-... -
Page 61: Chapter 5. Quick Connection To A Wireless Network
User’s Manual of WNRT-300 Chapter 5. Quick Connection to a Wireless Network 5.1. Windows XP (Wireless Zero Configuration) Step 1: Right-Click on the wireless network icon displayed in the system tray Figure 5-1 Step 2: Select [View Available Wireless Networks]... - Page 62 User’s Manual of WNRT-300 Step 4: Enter the encryption key of the Wireless Router (1) The Wireless Network Connection box will appear (2) Enter the encryption key that configured in section 4.4.3 (3) Click the [Connect] button Figure 5-3 Step 5: Check if “Connected” is displayed...
-
Page 63: Windows 7 (Wlan Autoconfig)
User’s Manual of WNRT-300 Some laptops are equipped with an “Wi-Fi ON/OFF” hardware switch for the internal wireless LAN. Make sure the it is switched to “ON” position. 5.2. Windows 7 (WLAN AutoConfig) WLAN AutoConfig service is built-in in Windows 7 and can be used to detect and connect to wireless network. - Page 64 User’s Manual of WNRT-300 Figure 5-7 If you want to connect to this Wireless Router in the future, please check the box of [Connect automatically]. Step 3: Enter the encryption key of the Wireless Router (1) The [Connect to a Network] box will appear (2) Enter the encryption key that configured in section 4.4.3...
- Page 65 User’s Manual of WNRT-300 Figure 5-8 Figure 5-9 Step 4: Check if “Connected” is displayed Figure 5-10 -59-...
-
Page 66: Mac Os X
User’s Manual of WNRT-300 5.3. Mac OS X Step 1: Right-Click on the network icon displayed in the system tray The AirPort Network Connection menu will appear Figure 5-11 Step 2: Highlight and select the wireless network (SSID) to connect... - Page 67 User’s Manual of WNRT-300 Figure 5-13 If you want to connect to this Wireless Router in the future, please check [Remember this network]. Step 4: Check if the AirPort is connect to the selected wireless network. If “Yes”, then there will be a “check” symbol in front of the SSID.
- Page 68 User’s Manual of WNRT-300 There is another way to configure the MAC OS X Wireless settings: Step 1: Click and open the [System Preferences] by going to Apple > System Preference or Applications Figure 5-14 Step 2: Open Network Preference by clicking on the [Network] icon...
- Page 69 User’s Manual of WNRT-300 Step 3: Check Wi-Fi setting and select the available wireless network (1) Choose the AirPort on the left-menu (make sure it is ON) (2) Select Network Name [default] here If this is the first time to connect to the Wireless Router, it should shows “Not network selected”.
-
Page 70: Iphone / Ipod Touch / Ipad
User’s Manual of WNRT-300 5.4. iPhone / iPod Touch / iPad Step 1: Tap the [Settings] icon displayed in the home screen Figure 5-17 Step 2: Check Wi-Fi setting and select the available wireless network (3) Tap [General] \ [Network] (4) Tap [Wi-Fi] If this is the first time to connect to the Wireless Router, it should appears “Not... - Page 71 User’s Manual of WNRT-300 Figure 5-19 Step 3: Tap the target wireless network (SSID) in “Choose a Network…” (1) Turn on Wi-Fi by tapping “Wi-Fi” (2) Select SSID [default] Figure 5-20 Step 4: Enter the encryption key of the Wireless Router (1) The password input screen will be displayed (2) Enter the encryption key that configured in section 4.4.3...
- Page 72 User’s Manual of WNRT-300 Figure 5-21 Step 5: Check if the iDevice is connected to the selected wireless network. If “Yes”, then there will be a “check” symbol in front of the SSID. Figure 5-22 -66-...
-
Page 73: Appendix
WNRT-300. All cords and cables should be to access it via web browser correctly and firmly inserted to the device. If all LEDs on the WNRT-300 are off, please check the status of power adapter, and make sure it is correctly powered. - Page 74 DNS setting. a. Check if the “Broadcast SSID” is disabled. Unable to be found by the b. Are you too far from the WNRT-300? Try to get closer. wireless clients c. Please remember that you have to enter SSID to your wireless client device manually, if SSID broadcast is disabled.
- Page 75 *Model Number: WNRT-300 * Produced by: Manufacturer‘s Name : Planet Technology Corp. Manufacturer‘s Address: 10F., No.96, Minquan Rd., Xindian Dist., New Taipei City 231, Taiwan (R.O.C.) is herewith confirmed to comply with the requirements set out in the Council Directive on the 1999/5/EC R&TTE.
- Page 76 ΠΡΟΣ ΤΙΣ ΟΥΣΙΩΔΕΙΣ ΑΠΑΙΤΗΣΕΙΣ ΚΑΙ ΤΙΣ disposições da Directiva 1999/5/CE. ΛΟΙΠΕΣ ΣΧΕΤΙΚΕΣ ΔΙΑΤΑΞΕΙΣ ΤΗΣ ΟΔΗΓΙΑΣ 1999/5/ΕΚ Español Por medio de la presente, PLANET Technology Slovensky Výrobca PLANET Technology Corporation, týmto Corporation, declara que 802.11n Wireless deklaruje, že táto 802.11n Wireless Portable AP / Portable AP / Router cumple con los requisitos Router je v súlade so základnými požiadavkami a...
Need help?
Do you have a question about the WNRT-300 and is the answer not in the manual?
Questions and answers