Table of Contents
Advertisement
Quick Links
Download this manual
See also:
Quick Manual
Advertisement
Table of Contents

Related Manuals for Planet WNRT-632


Summary of Contents for Planet WNRT-632
-
Page 2: Federal Communication Commission Interference Statement
Copyright Copyright 2010 PLANET Technology Corp. All rights reserved. No part of this publication may be reproduced, transmitted, transcribed, stored in a retrieval system, or translated into any language or computer language, in any form or by any means, electronic, mechanical, magnetic, optical, chemical, manual or otherwise, without the prior written permission of PLANET. -
Page 3: Ce Mark Warning
Federal Communication Commission (FCC) Radiation Exposure Statement This equipment complies with FCC radiation exposure set forth for an uncontrolled environment. In order to avoid the possibility of exceeding the FCC radio frequency exposure limits, human proximity to the antenna shall not be less than 20 cm (8 inches) during normal operation. - Page 4 Do not dispose of WEEE as unsorted municipal waste and have to collect such WEEE separately. Revision User’s Manual for PLANET 802.11n Wireless Gigabit Broadband Router Model: WNRT-632 Rev: 1.1 (July. 2011)
-
Page 5: Table Of Contents
Table of Contents Chapter 1 Introduction ....................7 1.1 Packing Contents ....................7 1.2 Spec Summary Table ..................8 1.3 Hardware Configuration ..................9 1.4 LED indicators....................11 1.5 Procedure for Hardware Installation..............12 Chapter 2 Making Configuration .................. 14 2.1 Login to Configure from Wizard ................15 2.2 System Status ....................19 2.3 Advanced ......................20 2.3.1 Basic Setting ...................20... - Page 6 2.3.5.3 Backup Setting................63 2.3.5.4 Reset to default................64 2.3.5.5 Reboot ..................64 2.3.5.6 Miscellaneous Items ..............65 Appendices and Index....................66 802.1x Setting ......................66 WPA Settings ......................71 FAQ and Troubleshooting ....................79 What can I do when I have some trouble at the first time? ......79 How do I connect router by using wireless?.............81...
-
Page 7: Chapter 1 Introduction
Thank you for purchasing WNRT-632. This manual guides you on how to install and properly use the WNRT-632 in order to take full advantage of its features. 1.1 Packing Contents Make sure that you have the following items: WNRT-632 x 1 ... -
Page 8: Spec Summary Table
1.2 Spec Summary Table Device Interface WNRT-632 Ethernet WAN RJ-45 port, 10/100/1000Mbps, auto-MDI/MDIX Ethernet LAN RJ-45 port, 10/100/1000Mbps, auto-MDI/MDIX Antenna 3dBi detachable antenna WPS Button For WPS connection To enable or disable Wireless Radio Wireless Enable/disable LED Indication Power/Status / WAN / LAN1 ~ LAN4/ Wi-Fi ●... -
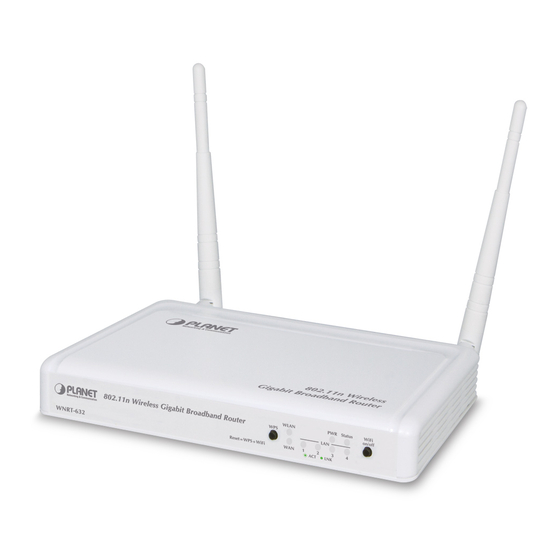
Page 9: Hardware Configuration
Environment & Certification Package dimension (W x D x H) (mm) 245 x 207 x 60 Package Information Package weight (gross weight) (g) Operation Temp. Temp.: 0~40°C, Humidity 10%~90% non-condensing ● Storage Temp. Temp.: -10~70°C, Humidity: 0~95% non-condensing ● EMI Certification CE/FCC compliance ●... - Page 10 Figure 2-2 Rear Panel Antenn Power LAN 1~4 Power...
-
Page 11: Led Indicators
1.4 LED indicators LED status Description Status Green in flash Device status is working. WAN LED Green RJ45 cable is plugged Green in flash Data access Green RJ45 cable is plugged LAN LED Green in flash Data access Green WLAN is on Green in flash Data access WiFi LED... -
Page 12: Procedure For Hardware Installation
1.5 Procedure for Hardware Installation Step 1. Attach the antenna. 1.1. Remove the antenna from its plastic wrapper. 1.2. Screw the antenna in a clockwise direction to the back panel of the unit. 1.3. Once secured, position the antenna upward at its connecting joint. This will ensure optimal reception. - Page 13 Step 3 Insert the Ethernet patch cable into Wired WAN port: Insert the Ethernet patch cable form DSL Modem into Wired WAN port on the back panel of Router. Step 4. Power on Router: 4.1. Connect the power adapter to the receptor on the back panel of your Router and Push Power switch Step 5.
-
Page 14: Chapter 2 Making Configuration
This product provides Web based configuration scheme, that is, configuring by your Web browser, such as Mozilla Firefox or or Internet Explorer. This approach can be adopted in any MS Windows, Macintosh or UNIX based platforms. -
Page 15: Login To Configure From Wizard
2.1 Login to Configure from Wizard Configure the settings by the following steps: 2.1 Open web browser, type the default IP address (http://192.168.0.1) System Password: “admin” 2.2 Select “Wizard”, and then click “Enter”. 2.3 Start to configure Internet setting by click “Next >”... - Page 16 2.5 Select “Auto Detecting WAN Type” and then click “Next >” button. 2.6 Click “Next >” to continue the setting. Example, the Dynamic WAN type is detected. 2.7 Modify the Wireless settings. Click “Next >” if setting by default. (Strongly suggest changing the SSID to protect your wireless network.)
- Page 17 2.8 Setup the Wireless Security. Click “Next >” if setting by default. (Strongly suggest configuring the security to protect your wireless network.) 2.9 Make sure all the settings are configured correctly, and then click “Apply Settings” button. You can ignore the wan connection test by uncheck the “Do you want to proceed the network testing?”...
- Page 18 2.11 Click “Finish” to complete the Setup. Or you can click “Configure Again” to setup the wizard again.
-
Page 19: System Status
2.2 System Status This option provides the function for observing this product’s working status: WAN Status: If the WAN port is assigned a dynamic IP, there may appear a “Renew” or “Release” button on the Sidenote column. You can click this button to renew or release IP manually. Statistics of WAN: Enables you to monitor inbound and outbound packets... -
Page 20: Advanced
2.3 Advanced 2.3.1 Basic Setting Please Select “Advanced Setup” to Setup... -
Page 21: Primary Setup - Wan Type, Virtual Computers
2.3.1.1 Primary Setup – WAN Type, Virtual Computers Click “Change”... - Page 22 This option is primary to enable this product to work properly. The setting items and the web appearance depend on the WAN type. Choose correct WAN type before you start. 1. LAN IP Address: the local IP address of this device. The computers on your network must use the LAN IP address of your product as their Default Gateway.
- Page 23 PPP over Ethernet: Some ISPs require the use of PPPoE to connect to their services. PPPoE Account and Password: the account and password your ISP assigned to you. For security, this field appears blank. If you don't want to change the password, leave it empty. PPPoE Service Name: optional.
- Page 24 Auto-reconnect to disable this feature. If Auto-reconnect is enabled, this product will connect to ISP automatically, after system is restarted or connection is dropped. Connection Control: There are 3 modes to select: Connect-on-demand: The device will link up with ISP when the clients send outgoing packets. Auto-Reconnect (Always-on): The device will link with ISP until the connection is established.
-
Page 25: Dhcp Server
2.3.1.2 DHCP Server DHCP Server: Choose “Disable” or “Enable.” Lease time: This is the length of time that the client may use the IP address it has been assigned by dhcp server. IP pool starting Address/ IP pool starting Address: Whenever there is a request, the DHCP server will automatically allocate an unused IP address from the IP address pool to the requesting computer. -
Page 26: Wireless
2.3.1.3 Wireless Wireless settings allow you to set the wireless configuration items. Wireless: The user can enable or disable wireless function. Schedule Setting: The device can turn off Wireless depend as Schedule. Network ID (SSID): Network ID is used for identifying the Wireless LAN (WLAN). Client stations can roam freely over this product and other Access Points that have the same Network ID. - Page 27 WPS (WiFi Protection Setup) WPS is WiFi Protection Setup which is similar to WCN-NET and offers safe and easy way in Wireless Connection.
- Page 28 WDS (Wireless Distribution System) WDS operation as defined by the IEEE802.11 standard has been made available. Using WDS it is possible to wirelessly connect Access Points, and in doing so extend a wired infrastructure to locations where cabling is not possible or inefficient to implement. Hybrid Mode It means the device can support WDS and AP Mode simultaneously.
- Page 29 Security: Select the data privacy algorithm you want. Enabling the security can protect your data while it is transferred from one station to another. There are several security types to use: WEP: When you enable the 128 or 64 bit WEP key security, please select one WEP key to be used and input 26 or 10 hexadecimal (0, 1, 2…8, 9, A, B…F) digits.
- Page 30 WPA2-PSK (AES) 1. Select Pre-share Key Mode If you select HEX, you have to fill in 64 hexadecimal (0, 1, 2…8, 9, A, B…F) digits If ASCII, the length of Pre-share key is from 8 to 63. 2. Fill in the key, Ex 12345678 WPA2 (AES) Check Box was used to switch the function of the WPA.
-
Page 31: Change Password
Wireless Client List 2.3.1.4 Change Password You can change Password here. We strongly recommend you to change the system password for security reason. -
Page 32: Forwarding Rules
2.3.2 Forwarding Rules 2.3.2.1 Virtual Server... -
Page 33: Special Ap
This product’s NAT firewall filters out unrecognized packets to protect your Intranet, so all hosts behind this product are invisible to the outside world. If you wish, you can make some of them accessible by enabling the Virtual Server Mapping. A virtual server is defined as a Service Port, and all requests to this port will be redirected to the computer specified by the Server IP. -
Page 34: Miscellaneous Items
2.3.2.3 Miscellaneous Items IP Address of DMZ Host DMZ (DeMilitarized Zone) Host is a host without the protection of firewall. It allows a computer to be exposed to unrestricted 2-way communication for Internet games, Video conferencing, Internet telephony and other special applications. NOTE: This feature should be used only when needed. -
Page 35: Security Settings
UPnP Setting The device also supports this function. If the OS supports this function enable it, like Windows XP. When the user get IP from Device and will see icon as below: 2.3.3 Security Settings... -
Page 36: Packet Filters
2.3.3.1 Packet Filters Packet Filter enables you to control what packets are allowed to pass the router. Outbound filter applies on all outbound packets. However, Inbound filter applies on packets that destined to Virtual Servers or DMZ host only. You can select one of the two filtering policies: 1. - Page 37 For source or destination IP address, you can define a single IP address (4.3.2.1) or a range of IP addresses (4.3.2.1-4.3.2.254). An empty implies all IP addresses. For source or destination port, you can define a single port (80) or a range of ports (1000-1999). Add prefix "T"...
- Page 38 Example 2: (1.2.3.100-1.2.3.119) Remote hosts can do everything except read net news (port 119) and transfer files via FTP (port 21) behind Router Server. Others are all allowed. After Inbound Packet Filter setting is configured, click the save button.
- Page 39 Outbound Filter: To enable Outbound Packet Filter click the check box next to Enable in the Outbound Packet Filter field. Example 1: Router LAN IP is 192.168.12.254 (192.168.12.100-192.168.12.149) Located hosts are only allowed to send mail (port 25), receive mail (port 110), and browse Internet (port 80);...
- Page 40 Example 2: Router LAN IP is 192.168.12.254 (192.168.12.100 and 192.168.12.119) Located Hosts can do everything except read net news (port 119) and transfer files via FTP (port 21) Others are allowed After Outbound Packet Filter setting is configured, click the save button.
-
Page 41: Domain Filters
2.3.3.2 Domain filters Domain Filter Let you prevent users under this device from accessing specific URLs. Domain Filter Enable Check if you want to enable Domain Filter. Log DNS Query Check if you want to log the action when someone accesses the specific URLs. Privilege IP Addresses Range Setting a group of hosts and privilege these hosts to access network without restriction. - Page 42 Action When someone is accessing the URL met the domain-suffix, what kind of action you want. Check drop to block the access. Check log to log these access. Enable Check to enable each rule. Example: In this example: 1. URL include “www.msn.com” will be blocked, and the action will be record in log-file. 2.
-
Page 43: Url Blocking
2.3.3.3 URL Blocking URL Blocking will block LAN computers to connect to pre-defined Websites. The major difference between “Domain filter” and “URL Blocking” is Domain filter require user to input suffix (like .com or .org, etc), while URL Blocking require user to input a keyword only. In other words, Domain filter can block specific website, while URL Blocking can block hundreds of websites by simply a keyword. - Page 44 In this example: 1. URL include “msn” will be blocked, and the action will be record in log-file. 2. URL include “sina” will be blocked, but the action will be record in log-file...
-
Page 45: Internet Access Control
2.3.3.4 Internet Access Control The device provides "Administrator MAC Control" for specific MAC to access the device or Internet without restriction. It also provides 3 features to access Internet: MAC Control by host, Group MAC Control and Interface Access Control depend as user-defined time Schedule. Administrator MAC Control Regardless the MAC access configuration of administrator, specific MAC can access the device. - Page 46 1. MAC control MAC Address Control allows you to assign different access right for different users and to assign a specific IP address to a certain MAC address. MAC Address Control Check “Enable” to enable the “MAC Address Control”. All of the settings in this page will take effect only when “Enable”...
- Page 47 LAN, it means the client can't send or receive any data via this device. Choose "allow" or "deny" to allow or deny the clients, whose MAC addresses are not in the "Control table", to associate to the wireless LAN. Control table "Control table"...
- Page 48 Example: In this scenario, there are three clients listed in the Control Table. Clients 1 and 2 are wireless, and client 3 is wired. 1.The "MAC Address Control" function is enabled. 2."Connection control" is enabled, and all of the wired and wireless clients not listed in the "Control table" are "allowed"...
- Page 49 6.Clients 1 and 2 are allowed to associate to the wireless LAN, but a wireless client with a MAC address not specified in the Control table is denied to associate to the wireless LAN. Client 3 is a wired client and so is not affected by Association control.
- Page 50 WNRT-632 3. Interface Access Control The device defines 5 Interfaces as Lan1, Lan2, Lan3, Lan4 and Wi-Fi. The device allows different interface to access Internet by time schedule For example, Schedule Rule 1 sets “always” everyday with limitation. Schedule Rule 2 sets 08:00~23:00 Monday ~ Friday.
- Page 51 WNRT-632...
-
Page 52: Miscellaneous Items
2.3.3.5 Miscellaneous Items Remote Administrator Host/Port In general, only Intranet user can browse the built-in web pages to perform administration task. This feature enables you to perform administration task from remote host. If this feature is enabled, only the specified IP address can perform remote administration. -
Page 53: Advanced Settings
detect if this packet is valid. DoS Attack Detection When this feature is enabled, the router will detect and log the DoS attack comes from the Internet. Currently, the router can detect the following DoS attack: SYN Attack, WinNuke, Port Scan, Ping of Death, Land Attack etc. -
Page 54: System Time
2.3.4.1 System Time Get Date and Time by NTP Protocol Selected if you want to Get Date and Time by NTP Protocol. Time Server Select a NTP time server to consult UTC time Time Zone Select a time zone where this device locates. Set Date and Time using PC’s Date &... -
Page 55: System Log
Function of Buttons: Sync Now: Synchronize system time with network time server Daylight Saving: Set up where the location is. 2.3.4.2 System Log This page supports two methods to export system logs to specific destination by means of syslog (UDP) and SMTP (TCP). -
Page 56: Ddns Service
SMTP Server IP and Port Input the SMTP server IP and port, which are concatenated with ':'. If you do not specify port number, the default value is 25. For example, "mail.your_url.com" or "192.168.1.100:26". Send E-mail alert to The recipient who will receive these logs. You can assign more than 1 recipient, using ';’... -
Page 57: Snmp
2.3.4.4 SNMP In brief, SNMP, the Simple Network Management Protocol, is a protocol designed to give a user the capability to remotely manage a computer network by polling and setting terminal values and monitoring network events. Enable SNMP You must check Local, Remote or both to enable SNMP function. If Local is checked, this device will response request from LAN. -
Page 58: Routing
SNMP Version Please select proper SNMP Version that your SNMP Management software supports. 2.3.4.5 Routing Routing Tables allow you to determine which physical interface address to use for outgoing IP data grams. If you have more than one routers and subnets, you will need to enable routing table to allow packets to find proper routing path and allow different subnets to communicate with each other. - Page 59 or uncheck the Enable checkbox. Example: Configuration on NAT Router Destination SubnetMask Gateway Enabled 192.168.1.0 255.255.255.0 192.168.123.216 ˇ 192.168.0.0 255.255.255.0 192.168.123.103 ˇ So if, for example, the client3 wanted to send an IP data gram to 192.168.0.2, it would use the above table to determine that it had to go via 192.168.123.103 (a gateway).
-
Page 60: Schedule Rule
2.3.4.6 Schedule Rule You can set the schedule time to decide which service will be turned on or off. Select the “enable” item. Press “Add New Rule” You can write a rule name and set which day and what time to schedule from “Start Time” to “End Time”. The following example configure “ftp time”... -
Page 61: Qos Rule
2.3.4.7 QoS Rule Local IP: Please input Client IP, ex:192.168.12.33. Remote Priority: Please input Global IP and port, ex:168.96.2.3 and port 21... -
Page 62: Toolbox
2.3.5 Toolbox 2.3.5.1 View Log You can View system log by clicking the View Log button. -
Page 63: Firmware Upgrade
2.3.5.2 Firmware Upgrade You can upgrade firmware by clicking Firmware Upgrade button. 2.3.5.3 Backup Setting You can backup your settings by clicking the Backup Setting button and save it as a bin file. Once you want to restore these settings, please click Firmware Upgrade button and use the bin file you saved. -
Page 64: Reset To Default
2.3.5.4 Reset to default You can also reset this product to factory default by clicking the Reset to default button. 2.3.5.5 Reboot You can also reboot this product by clicking the Reboot button. -
Page 65: Miscellaneous Items
2.3.5.6 Miscellaneous Items MAC Address for Wake-on-LAN Wake-on-LAN is a technology that enables you to power up a networked device remotely. In order to enjoy this feature, the target device must be Wake-on-LAN enabled and you have to know the MAC address of this device, say 00-11-22-33-44-55. -
Page 66: Appendices And Index
802.1x Setting 1. Equipment Details Figure 1: Testing Environment (Use Windows 2000 Radius Server) PC1: Microsoft Windows XP Professional without Service Pack 1. PC2: Microsoft Windows XP Professional with Service Pack 1a or latter. Authentication Server: Windows 2000 RADIUS server with Service Pack 3 and HotFix Q313664. Note. - Page 67 2. DUT Configuration: 1.Enable DHCP server. 2.WAN setting: static IP address. 3.LAN IP address: 192.168.0.1/24. 4.Set RADIUS server IP. 5.Set RADIUS server shared key. 6.Configure WEP key and 802.1X setting. The following test will use the inbuilt 802.1X authentication method such as ,EAP_TLS, PEAP_CHAPv2(Windows XP with SP1 only), and PEAP_TLS(Windows XP with SP1 only) using the Smart Card or other Certificate of the Windows XP Professional.
- Page 68 3. If choosing use smart card or the certificate as the EAP type, we select to use a certificate on this computer. 4. We will change EAP type to fit the variable test condition. Figure 2: Enable IEEE 802.1X and select EAP type 4.
- Page 69 6. Windows XP will prompt that the authentication process is success or fail and end the authentication procedure. 7. Terminate the test steps when PC1 get dynamic IP and PING remote host successfully. Figure 3: Certificate information on PC1 Figure 4: Authenticating...
- Page 70 Figure 5: Authentication success 4.2 DUT authenticate PC2 using PEAP-TLS. 1. PC2 choose the SSID of DUT as the Access Point. 2. Set authentication type of wireless client and RADIUS server both to PEAP_TLS. 3. Disable the wireless connection and enable again. 4.The DUT will send the user's certificate to the RADIUS server, and then send the message of authentication result to PC2.
-
Page 71: Wpa Settings
WPA Settings Wireless Router: LAN IP: 192.168.0.1 WAN IP: 192.168.122.216 Radius Server: 192.168.122.1 User A : XP Wireless Card:Ti-11g Tool: Odyssey Client Manager Refer to: www.funk.com Download: http://www.funk.com/News&Events/ody_c_wpa_preview_pn.asp Or Another Configuration:... - Page 72 WPA: For this function, we need the server to authenticate. This function is like 802.1x. The above is our environment: Method 1: 1. The User A or User B have to get certificate from Radius, first. http://192.168.122.1/certsrv User name: fae1 Password: fae1 2.
- Page 73 4. Go to Odyssey Client Manager, choose “Profiles” and Setup Profile name as “1” Login name and password are fae1 and fae1. Remember that you get certificate from Radius in Step1.
- Page 74 5. Then Choose “certificate” like above. 6. Then go to Authentication and first Remove EAP/ TLS and Add EAP/TLS again.
- Page 75 7. Go “Network” and Select “1” and ok...
- Page 76 8. Back to Connection and Select “123kk. If successfully, the wireless client has to authenticate with Radius Server, like below: 9. Result: Method 2: 1. The User A or User B has to get certificate from Radius first. http://192.168.122.1/certsrv User name: fae1 Password: fae1...
- Page 77 2. Then Install this certificate and finish. 3. Setting on the router and client: Router:...
- Page 78 Client: Go to “Network Connection” and select wireless adapter. Choose “View available Wireless Networks” like below: Advanced choose “123kk” Select “Wireless CA and Enable” in Trusted root certificate authority: Then, if the wireless client wants to associate, it has to request to authenticate.
-
Page 79: Faq And Troubleshooting
What can I do when I have some trouble at the first time? 1. Why can I not configure the router even if the cable is plugged in the ports of Router and the led is also light? A: First, make sure that which port is plugged. If the cable is in the Wan port, please change to plug in Lan port 1 or Lan port 4: Then, please check if the Pc gets ip address from Router. - Page 80 2. Why can I not connect the router even if the cable is plugged in Lan port and the led is light? A: First, please check Status Led. If the device is normal, the led will blink per second. If not, please check How blinking Status led shows. There are many abnormal symptoms as below: Status Led is bright or dark in work: The system hanged up .Suggest powering off and on the router.
-
Page 81: How Do I Connect Router By Using Wireless
5. When I use Static IP Address to roam Internet, I can access or ping global IP 202.93.91.218, But I can not access the site that inputs domain name, for example http://espn.com A: Please check the dns configuration of Static IP Address. Please refer to the information of ISP and assign one or two in dns item. - Page 82 About wireless client, you will see wireless icon: Then click and will see the ap list that wireless client can be accessed: If the client can not access your wireless router, please refresh network list again. However, I still can not fine the device which ssid is “default”, please refer to Q3.
- Page 83 Choose the one that you will want to connect and Connect: If successfully, the computer will show and get ip from router: 2. When I use AES encryption of WPA-PSK to connect even if I input the correct pre-share key? A: First, you must check if the driver of wireless client supports AES encryption.
- Page 84 3. When I use wireless to connect the router, but I find the signal is very low even if I am close to the router? A: Please check if the wireless client is normal, first. If yes, please send the unit to the seller and verify What the problem is.
- Page 85 Person responsible for making this declaration Name, Surname Tom Shih Position / Title : Product Manager Taiwan Dec., 2010 Place Date Legal Signature PLANET TECHNOLOGY CORPORATION e-mail: sales@planet.com.tw http://www .planet.com.tw 10F., No.96, Minquan Rd., Xindian Dist., New Taipei City 231, Taiwan (R.O.C.) Tel:886-2-2219-9518 F ax:886-2-2219-9528...
- Page 86 ΣΥΜΜΟΡΦΩΝΕΤΑΙ ΠΡΟΣ ΤΙΣ ΟΥΣΙΩΔΕΙΣ disposições da Directiva 1999/5/CE. ΑΠΑΙΤΗΣΕΙΣ ΚΑΙ ΤΙΣ ΛΟΙΠΕΣ ΣΧΕΤΙΚΕΣ ΔΙΑΤΑΞΕΙΣ ΤΗΣ ΟΔΗΓΙΑΣ 1999/5/ΕΚ Español Por medio de la presente, PLANET Technology Slovensky Výrobca PLANET Technology Corporation, týmto Corporation, declara que 802.11n Wireless Gigabit deklaruje, že táto 802.11n Wireless Gigabit Broadband Router cumple con los requisitos Broadband Router je v súlade so základnými...
Need help?
Do you have a question about the WNRT-632 and is the answer not in the manual?
Questions and answers