Nokia 9300i User Manual
Hide thumbs
Also See for 9300i:
- User manual (107 pages) ,
- Service manual (27 pages) ,
- Software setup manual (19 pages)
Table of Contents
Advertisement
Quick Links
Download this manual
See also:
Service Manual
Advertisement
Table of Contents

Related Manuals for Nokia 9300i


Summary of Contents for Nokia 9300i
- Page 1 Nokia 9300i User Guide...
- Page 2 Do not dispose of these products as unsorted municipal waste. Copyright © 2005 Nokia. All rights reserved. Reproduction, transfer, distribution or storage of part or all of the contents in this document in any form without the prior written permission of Nokia is prohibited.
- Page 3 Nokia reserves the right to revise this document or withdraw it at any time without prior notice The availability of particular products may vary by region.
-
Page 4: Table Of Contents
Memory cards................19 Call barring...................34 Instructions in your device.............20 Call, network, and phone line settings........35 Using the CD-ROM...............20 Voice mailbox settings.............36 Nokia support and contact information......20 Log....................36 Stickers in the sales package..........21 Transferring data from other devices.........21 Messaging................37 Personalizing your device............21 Messaging center...............37... - Page 5 Presentations..............66 Using world clock...............99 Viewing presentations.............66 Using Alarm clock...............99 Creating presentations.............67 Data and software management......100 Inserting tables................68 Working with different views..........68 Data mover................100 Backup..................101 Calendar................70 Data transfer................101 Creating calendar entries............70 Sync....................102 Calendar views................72 Nokia PC Suite................103 Installing applications and software........103...
- Page 6 Wallpapers and color schemes...........115 Shortcuts................116 General shortcuts..............116 Application-specific shortcuts..........117 Nokia original enhancements.........122 Battery..................123 Car kit Nokia 616..............123 256 MB Reduced Size MultiMediaCard MU-9....124 Wireless GPS Module LD-1W..........124 Wireless Plug-in Car Handsfree HF-6W......125 Battery information...........126 Nokia battery authentication guidelines......126 Care and maintenance..........128...
-
Page 7: For Your Safety
For your safety Read these simple guidelines. Not following them may be SWITCH OFF IN AIRCRAFT dangerous or illegal. Your device has a separate GSM radio Follow any restrictions. Wireless devices can and wireless LAN radio. Switching off the device by cause interference in aircraft. -
Page 8: About Your Device
CONNECTING TO OTHER DEVICES with your service provider before you can utilize network services. Your service provider may need to give you When connecting to any other device, read its additional instructions for their use and explain what user guide for detailed safety instructions. Do charges will apply. -
Page 9: Enhancements, Batteries, And Chargers
This device is intended for use when supplied with power from the ACP-12 and LCH-12 chargers. Warning: Use only batteries, chargers, and enhancements approved by Nokia for use with this particular model. The use of any other types may invalidate any approval or warranty, and may be dangerous. -
Page 10: Getting Started
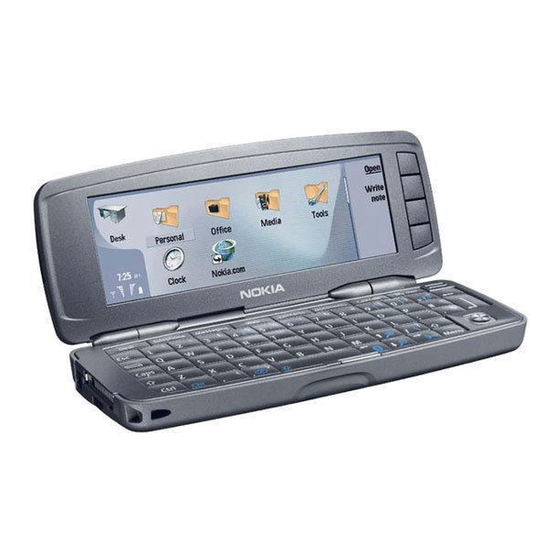
Getting started The Nokia 9300i smartphone offers you various business applications, such as e-mail, office tools, and Web browsing, and flexible and fast network connections with integrated wireless LAN and EGPRS (EDGE). Installing the SIM card, battery, and memory card Keep all SIM cards out of the reach of small children. -
Page 11: Charging The Battery
is pointing towards the SIM card slot and the contact area is facing downwards. See "Memory cards" on page 19. 3. Insert the battery. Align the contacts of the battery with the corresponding connectors on the battery compartment. After the battery is inserted, the communicator interface starts up. -
Page 12: Switching The Device On And Off
3. When the battery is fully charged, the bar stops The communicator interface starts up first after the scrolling. Disconnect the charger from the device and battery is inserted. You cannot switch on the cover phone then from the AC outlet. immediately after the battery has been inserted, you must wait until the communicator interface has started When the battery charge level is too low for operation,... -
Page 13: First Start-Up
First start-up Antenna Your device has two The first time you switch your device on, you need to set internal antennas. some basic settings. You can change the settings later. Open the cover and follow the instructions on the communicator display. Note: As with any other radio 1. -
Page 14: Keys And Connectors
Keys and connectors 5 — Infrared port and microphone. Make sure that you do not cover the microphone with your hand during phone calls. 6 — Charger connector. 7 — Earpiece. Communicator interface Communicator keyboard 1 — Application buttons. Each button starts the corresponding application, except My own key, which you Keys and connectors can configure to open any application. - Page 15 4 — Bluetooth key. To activate Bluetooth, press the Chr+ The communicator display turns on when you open the . To deactivate, press the Chr+ again. cover. The application that was active the last time the 5 — The Zoom keys. Pressing Chr+zoom keys makes the device was used is shown on the display.
-
Page 16: Scrolling And Making Selections
About the Menu key The communicator keyboard has a Menu key. Press the Menu key to access the various menu options. The options available depend on the application you are in. The chosen option affects the item that is currently selected or open. - Page 17 To select items one by one, scroll to the first item, press To send a file, press Menu, and select File > Send. You can and hold the Ctrl key, scroll to the next item, and press send a file as an e-mail, fax, short message, or multimedia space bar to select it.
-
Page 18: Cover Phone
Cover phone Bluetooth is activated. You have an active infrared connection. If the To view the most recently dialed numbers, press indicator blinks, your device is trying to connect to the Scroll to a number or name, and press again to call the other device, or the connection has been lost. -
Page 19: Volume Control
Nokia 9210 Communicator sales package with your Nokia Use the keypad lock (keyguard) to prevent the keys on the 9300i, you must convert the memory card with Data cover phone from being accidentally pressed. mover and reinstall the applications that you previously To lock the keypad, press the center of the scroll key installed to the memory card. -
Page 20: Instructions In Your Device
The sales package CD-ROM is compatible with Windows 98SE, Windows ME, Windows 2000, and Windows XP. You can find the extended User Guide for Nokia 9300i and some additional guides in the CD-ROM. You can also install the Nokia PC Suite and read the User's Guide for Nokia PC Suite from the CD-ROM. -
Page 21: Stickers In The Sales Package
Transferring data from other devices There are several ways to transfer data, such as contacts or calendar information, to your Nokia 9300i from compatible devices. See "Data and software management," p. 100. Personalizing your device Note: Your service provider may have requested that certain features be disabled or not activated in your device. -
Page 22: Cover Phone
Cover phone access code, and key in the country code, area With the cover phone, you can, for example, make and code (omit the leading 0, if necessary), and phone receive calls, and change profiles. Most of these features number. are also available in the communicator interface. -
Page 23: Answering A Call
Traditional text input on, press Menu in standby mode, and select Settings > Call settings Speed dialling. > Press a number key repeatedly until the desired character To call your voice mailbox (network service), in standby appears. There are more characters available for a mode, press and hold , or press and the Call key. -
Page 24: Accessing The Menu Functions
For example, to write To access a function by scrolling, press Menu in standby "Nokia" when the English dictionary is selected, press mode, scroll to the desired main menu, for example, for N, for o, for k, for i, and for a. -
Page 25: Messages
You can write other types of messages on the Contains setting groups (profiles) Profiles communicator interface. See "Messaging," p. 37. that you can activate. Only one profile can be active at a time. When sending messages, your device may display Message sent. -
Page 26: Call Register
Contacts To send a service command to your service provider (network service), select Service commands. Write the command, and press the Call key or Send. You can view and manage the names and phone numbers (contacts) that you have saved in the phone memory or Call register the SIM card. -
Page 27: Profiles
Profiles Scroll to the desired name, and press Details. Scroll through the phone numbers added to the name. Press Menu, and select Profiles. To save a name and phone number in the selected memory, press Menu, and select Contacts contact. >... - Page 28 dialing keys by pressing and holding the • Help text activation — to set the phone to show help corresponding key. texts that guide you in using the menu functions of the • Call waiting — select Activate to request the network cover phone.
- Page 29 • Lock system — to lock the device. To unlock the device, press Unlock in standby mode. See "Defining > device lock settings," p. 86. To adjust phone display settings, scroll to Display settings, and select: • Colour schemes — to choose the color for some parts of the phone display, such as the indicators for the signal strength and battery charge level.
-
Page 30: Desk
Desk Desk is a starting point from which you can open all You can add your own shortcuts to Desk from most applications in the device or on a memory card. Use the applications. The shortcuts can open a document or a Web page. -
Page 31: Managing Groups
Scroll to a new icon, and press Done. Scroll to Name, enter the new name, and press Done. Managing groups You can group applications, shortcuts, or notes into different groups on Desk. You can have the same application or shortcut in several groups. To open a group, select the group, and press Open. -
Page 32: Telephone
Telephone To view calls you have recently made, answered, or In Telephone, you can view the contacts you have stored missed, press Recent calls, and select Dialled calls, in the telephone directory, SIM card, or memory card. You Received calls, or Missed calls. -
Page 33: Speed Dialing
Speed dialing To have a private phone call with a participant, scroll to the participant in the list, and press Private call. Speed dialing allows you to make a call by pressing a Viewing dialed, received, number key and the Call key when the device cover is closed. -
Page 34: Diverting Calls
Diverting calls LAN connection. Therefore, remember to comply with any applicable safety requirements when establishing and using a wireless LAN connection. You can divert incoming calls to your voice mailbox or to another phone number. Important: In the offline profile you cannot make To divert voice calls, go to Telephone, press Menu, and or receive any calls, or use other features that require GSM select... -
Page 35: Call, Network, And Phone Line Settings
Call, network, and phone line To set the device to select the network automatically, scroll to Network selection, press Change, and select settings Automatic. To use the call waiting service (network service), scroll to In the Other settings dialog you can define various Call waiting, press Change, and select On. -
Page 36: Voice Mailbox Settings
need a SIM card that supports the alternate line service To use the From/To information, press Use. You can and a subscription to two phone lines. answer text messages, faxes, or calls or add the caller or sender of a message to your contacts by pressing the To prevent the phone line selection, scroll to Block line appropriate button. -
Page 37: Messaging
Messaging Tip: When you take your Nokia 9300i into use, it In Messaging, you can create, send, receive, view, edit, and may recognize the SIM card provider and organize text messages, multimedia messages, e-mail configure the correct text message, multimedia messages, fax messages, and special text messages message, and GPRS settings automatically. -
Page 38: Writing And Reading Messages
• Sent — stores messages that have been sent, except To print a message, press Menu, and select File > those sent using Bluetooth. Printing > Print..The remote mailboxes that you define are usually shown To change the page layout before printing, press Menu, last in the list of folders. -
Page 39: E-Mail
Avoiding low memory The Nokia 9300i mail system is compliant with Internet standards SMTP, IMAP4 (rev 1), and POP3. You should regularly delete messages from Inbox and To receive and send mail, you must set up a remote Sent folders, and delete retrieved e-mail from the device mailbox service. -
Page 40: Changing The Internet Connection
message from your device to save memory. See "Avoiding To. Enter a subject and the message, and press Send. You low memory," p. 39. can also enter the recipient's e-mail address in the field. Note that e-mail addresses cannot contain accented Managing your e-mail offline enables you to save in characters such as Å, Ä, or É. -
Page 41: Sending Options
message or words with special characters are shown To receive a note when the recipient has opened the e- incorrectly, the cause may be the used character set. mail, select Request read report, press Change, and select Yes. Note that some e-mail servers may not support read Tip: You can change the character set for e-mail reports, or the user may have turned the read receipt that is in plain text format. - Page 42 without deleting remote mailbox files. See "Avoiding low them. For example, you can select a Web address memory," p. 39. or a phone number, and press the appropriate command button to open the Web page, send e- To retrieve e-mail from a remote server, scroll to your mail or call the number.
-
Page 43: Viewing Preferences
Remote e-mail mail icon next to the recipient and subject accounts. When you create an e-mail to send information. from your Nokia 9300i, you use the e-mail account. When you synchronize the device with Define the following on the Servers... - Page 44 your remote server. With POP3, you can check • Sync. e-mails in folders — Select the number of e-mails your remote mailbox and download your e- you want to download from the remote server to your mail. IMAP4 is a version of Internet Message folders.
-
Page 45: Text Messages
a remote mailbox. Note that the remote server must message is sent, the device tells you if the message support secure connections for this function to work. exceeds the maximum length allowed for one message. • Outgoing secure connection — Select whether you See "Text message settings,"... -
Page 46: Modifying Message Center Settings
Modifying message center settings number, place the cursor on the number, and press Call number to call the number. To view message centers, press Menu, and select Tools > Account settings..Select Text message, and press Edit. In Text message settings General, press Service centres. -
Page 47: Multimedia Messages
Multimedia messages separate the numbers with a semicolon or by pressing the Enter key after each number. Enter a subject, and create the message. When the message is ready, press Send. Note: Only devices that have compatible features To create a multimedia message, press Write message, can receive and display multimedia messages. -
Page 48: Receiving Multimedia Messages
To preview a multimedia message before sending it, Set the following options: press Menu, and select View > Preview. • Receive report — Select whether you want to receive a notification when the message has been successfully To delete a multimedia object, select the object you want delivered to the recipient. -
Page 49: Fax
To play a multimedia object, select the object, and receive multimedia messages always or only in your press Open. home network. • On receiving messages — Select Receive if you want to receive multimedia messages. The reception of Multimedia message account multimedia messages is on by default. -
Page 50: Special Message Types
To add a document, sheet or image to a fax, press Insert separate cover page, Full template to use a cover page object. Note that it may not always be possible to insert that includes all the contact information of both the a document to a fax. -
Page 51: Cell Broadcast
Receiving provisioning settings To stop receiving cell broadcast messages, press Reception off. To start receiving cell broadcast messages again, press Reception To view a message that contains connectivity settings, select the message, and press Open. If the device asks for To add, edit, or remove topics, press Menu, and select one a password, enter your password, and press OK. -
Page 52: Web
on Web pages. See "Keyboard shortcuts for is an HTML/XHTML browser that allows you to browsing," p. 55. connect to the Internet using GPRS, EDGE, or wireless LAN. The browser supports different plug-ins, such as Flash 6 To open a Web page, press Open Web address, enter the and audio plug-ins. -
Page 53: Downloading Files
To save a Web page with frames, select the frame, press To stop a cookie from being saved to your device, press Menu, and select File Save Save frame as..Refuse. > > Downloading files Opening visited pages To download a file, move the pointer on the link to the To view a list of Web pages and Web addresses that you file, and press the joystick. -
Page 54: Browser Settings
Your device may have some bookmarks loaded for sites images on a Web page, no images on a Web page, or not affiliated with Nokia. Nokia does not warrant or only those images that have already been saved to the endorse these sites. -
Page 55: Keyboard Shortcuts For Browsing
information requiring passwords, empty the • Press D to select the next element or E to select the cache after each use. previous element on a page. An element can be any item on the page, from text paragraphs to images. •... -
Page 56: Contacts
Contacts Managing contact cards You can use the Contacts application to create, edit, and manage all contact information, such as phone numbers and addresses. To open a contact database, scroll to the desired database in the Contacts directory list, and press Open. Note that if The main contact database is in the device memory. -
Page 57: Editing Contact Cards
To send a text or multimedia message to a contact, scroll To rename a field in the contact card, scroll to the field, to the contact in the Contacts directory list, move to the and press Rename field. If you are not allowed to rename right window, scroll to a mobile phone number, and press the field, Rename field... -
Page 58: Sending Contact Cards
80. business cards in vCard or Nokia Compact Business Card format to compatible devices using the SMS, MMS, or e- To open a contact group, scroll to a contact group in mail service or an infrared or Bluetooth connection. -
Page 59: Copying And Moving Contacts To Different Databases
Copying and moving contacts to different databases You can copy or move selected contacts from one database to another. To keep a copy of the contact card in the original database, select Copy to and the contact database where you want to copy the contact. -
Page 60: Documents
Documents To create a new document, open the Documents In Documents, you can write new and edit existing text application and start writing in the new document that documents. You can insert and view images and other is opened, or press Menu, and select File >... -
Page 61: Formatting Documents
To save and close a document, press Exit. If you have defined styles by either modifying particular pieces of text modified the file, press Save to save the document with a separately, or by using a template on which the style of default file name. -
Page 62: Viewing Tables
Cropping page, you can crop the image. Note that you cannot resize icons. To open an object for viewing or editing, select the object, and press the enter key. To remove an object from a document, select the object, and press the backspace key. Viewing tables You can open tables created with Microsoft Word for Windows in a separate view. -
Page 63: Sheet
Sheet To format worksheets, select the cell or cells you want to Sheet you can store your data in a file that is called a format, press Menu, and select Format and an appropriate workbook. Each workbook contains at least one menu option. -
Page 64: Working With Cells
Working with cells cell. On the worksheet, press Point reference, select the cells you want to include in the function with Shift +joystick, and press OK. To clear contents or formatting from cells, select the cells, Example: You want to add up the numbers in cells and press Clear. - Page 65 To create a chart sheet, select the worksheet cells that To delete a chart sheet, press Menu, and select Chart > contain the information you want to include in the chart, Delete chart. press Menu, and select Insert chart. Select the >...
-
Page 66: Presentations
Presentations Viewing slide shows In Presentations, you can open, view, edit, and save presentations created with Microsoft PowerPoint 97 or Special effects or animation in a presentation are shown later. You can also create new presentations. Note that in a slide show. Note that not all special effects or not all features and formatting of the original files are animations are supported. -
Page 67: Creating Presentations
projector. If the drivers are not installed, the menu Tip: To move the text field inside the slide, select options are not visible. For more information, check with the text field with the tab key, and scroll with the the data projector manufacturer or its representative. joystick. -
Page 68: Inserting Tables
Inserting tables To open the outline view, press Menu, and select View > Outline. To view the slide content, press Expand. To hide the To insert a table into a presentation, press Menu, and content, press Collapse. To open a slide for editing, select select Insert Table... - Page 69 tab key, and start writing. When you are ready, press OK, and move to the next text field.
-
Page 70: Calendar
Calendar • To-do notes remind you of things to do. They can be In Calendar, you can create and view scheduled events prioritized and organized into to-do lists. and appointments. You can also set alarms to calendar entries. To create a calendar entry, select the date, press Menu, and select File entry. -
Page 71: Managing Calendar Entries
Managing calendar entries does not remove it from the calendar. If you select Private in the Synchronisation field, the details of the To cross out an entry or mark it as tentative, select the entry will not be shown to others when you connect entry, press Menu, and select Entry Crossed out... -
Page 72: Calendar Views
Month view press Options. You can narrow down the search by specifying the target group, time period, and calendar entry type. Press Done Find to start searching. In the > In the Month view, you can browse the days of one month Find results view, you can modify the found entry and on the left frame, and view the entries for those days on... -
Page 73: Year Schedule View
the weekly time schedule shows the details of the entry. position in which you want the to-do notes displayed in The numbers to the right of the entry description indicate calendar views. the number of entries in that time box. For example, 1/3 means that you are seeing the details of the first of three entries. -
Page 74: File Manager
File manager Tip: To view hidden files, press Menu, and File manager, you can manage the contents and select View Show all files. > properties of files and folders. Go to Desk Office File manager. > > To create a new file or folder, move to the location where you want to create the new file or folder, press Menu, and select File... -
Page 75: Memory Card Security
To sort files and folders, press Menu, and select View device. If you use the memory card on another device, you > Sort by Sorting order. Select one of the available are asked for the password. Not all memory cards support options. -
Page 76: Control Panel
Control panel To set the current time and date, select General Date > Control panel, you can define and modify various time, select the Time Date fields, and enter the settings of your device. Modifying these settings affects numbers. When setting the date, you can also press the operation of your device across several applications. -
Page 77: Device Language
To define regional settings, select General Regional • Measurement units — Select either metric or > settings, and select the appropriate page. nonmetric units for length measurement. Time page Currency page Define the following: Define the following: • Time format —... -
Page 78: Data Management
• Contrast level — Press to increase or decrease Similarly, you can change the background image of the the difference between the lightest and darkest areas cover phone display on the Cover page. on the screen. • Brightness — Press to increase or decrease the Enhancement settings amount of white the colors contain. -
Page 79: Application Manager
Application manager To view the installation log, select Data management > Application manager, and select the Install log page. A list Application manager, you can view the details of shows what software has been installed and removed, installed applications or remove them from your device. and the date of installation or removal. -
Page 80: Telephone
• Install application — Specify what kind of applications locally, and select the e-mail you want to delete. For you want installed. If you select Only certified, only example, you can delete all e-mail, or only e-mails that applications with validated certificates can be are more than two weeks old. - Page 81 Browse to search for with your smartphone, see www.nokia.com. See also the the file. To listen to the selected tone, press Play. If you user guide of your car kit phone. have two alternate phone lines in use, you can specify Using the SIM access profile a ringing tone for each line.
- Page 82 for the device with the SIM card. If this device is • Divert if not answered — When activated, incoming your smartphone, and automatic authorization calls are diverted if you do not answer them within a is activated, the car kit phone finds the certain time period.
-
Page 83: Messaging
Wireless LAN • International except home country — If you have enabled international roaming with your network operator, you cannot make international calls abroad, To view the status of the wireless LAN connection, except to your home country. select Connections Wireless LAN. - Page 84 To modify general wireless LAN settings, select • Short retry limit — Specify the maximum number of Connections Wireless LAN, and select the Settings page. transmission attempts of a frame whose size is less > than or equal to the RTS threshold. Define the following: •...
-
Page 85: Security
Cable setup • Port range: — Specify the port range that is used for receiving data. To specify how the data cable is used, select • Use proxy: — Select Yes, if your Internet service Connections Cable setup. > provider requires that a proxy server is used to connect to the Internet. -
Page 86: Defining Device Lock Settings
Codes are shown as asterisks. When changing a code, • Lock code — Press Change to change the lock code. enter the current code, and then the new code twice. The new code must be 5 to 10 digits long. The preset code is 12345. -
Page 87: Certificate Manager
Certificate manager Defining PIN code settings To define PIN code settings, select Security Device > Important: Note that even if the use of certificates security, and select the PIN codes page. makes the risks involved in remote connections and Define the following: software installation considerably smaller, they must be •... -
Page 88: Extras
About product browse for the certificate file. Press Delete to remove a selected certificate. To view the version number of the software, select To check the authenticity of a certificate, select Extras About product, and scroll to the bottom of the >... -
Page 89: Internet Setup
To send a service request to your service provider, pressed New, press Yes. Select the access point from select Extras Service command editor, type the service the list, and press OK. > request, and press Send. 3. Define the settings. •... -
Page 90: Access Point Settings
Internet service that translates domain names such as • Password — A password may be needed to www.nokia.com into IPv4 addresses like connect to the Internet, and is usually provided by 192.100.124.195, or IPv6 addresses like the service provider. The password is often case- 3ffe:2650:a640:1c2:341:c39:14. - Page 91 Data call page • Show terminal window — If you select Yes, once a connection is established, you see the execution of the script. Define the following: • Connection type — Define the GSM data call type. To Other page High speed, the service provider must support this feature, and if necessary, activate it for your SIM card.
-
Page 92: Setting Up An Internet Access Point For A Wireless Lan
Setting up an Internet access point from the list. In the ad hoc mode, the users themselves name the wireless LAN. If you do not for a wireless LAN specify the network name here, you are asked to select a network when you establish a wireless LAN Your device has a predefined Internet access point for a connection. - Page 93 You can specify WPA (Wi-Fi protected access) and WPA2 Internet service that translates domain names such as (Wi-Fi protected access 2) authentication settings. The www.nokia.com into IPv4 addresses such as network must support this feature and corresponding 192.100.124.195, or IPv6 addresses like values must be entered in the wireless LAN access point.
-
Page 94: Selecting An Internet Access Point
bit initialization vector. For example, some Some Internet connections may appear inactive, but they manufacturers refer to the 104-bit key as a 128-bit key may still be sending and receiving data in the background. (104+24). Both keys offer the same level of encryption These connections may postpone the closing of the and are therefore interoperable. - Page 95 example, if you are using the Offline profile, no GPRS or GSM Internet access points are shown in the list. Tip: The Network connection dialog opens only if you have selected in the Ask before connecting field in the general Internet access point settings.
-
Page 96: Media Applications
Media applications Voice recorder Go to Desk > Media. The recorder cannot be used when a data call or GPRS connection is active. Go to Desk Media Voice rec.. > > Voice rec. can record a telephone conversation or voice memo, save the voice recording as a sound clip, play your For more information on using Images, RealPlayer, Music clip or other sound files, and edit sound files. - Page 97 Go to Desk Media > RealPlayer. > RealPlayer plays video, sound, and media from the Internet. RealPlayer plays many formats, including: MPEG-4, MP4 (not streaming), 3GP, SDP, RV, RA, RAM, and...
-
Page 98: Calculator
Calculator In Calculator, you can make calculations, and save the results to the calculator memory for later use. The Desk calculator can be used for basic calculations, and the Scientific calculator for more advanced calculations. Note: This calculator has limited accuracy and is designed for simple calculations. -
Page 99: Clock
Clock Tip: To change to the one-clock view which shows In Clock, you can view the date and time of your home only your home city information, press Menu, and and destination city, and manage clock alarms. select View Remote city details. -
Page 100: Data And Software Management
Nokia 9300i. and these later versions must be used with Nokia 9300i. 5. In the Nokia 9300i, select the data you want to move There may be additional steps, depending on the type of from your Nokia 9200 series Communicator. You can... -
Page 101: Backup
Data mover, or Convert mem. card synchronize your calendar and contacts entries between to convert a memory card for use in your Nokia 9300i. the two devices. Moving large amounts of data from your Nokia 9200 For information on compatible devices, contact your series Communicator may take some time. -
Page 102: Sync
Tools > Sync. > backspace key. Your device has a profile for Nokia PC Suite. Edit the PC After you have synchronized your device with a Suite profile only with Nokia PC Suite. compatible computer, you can view a synchronization log. -
Page 103: Nokia Pc Suite
Bluetooth. If you use PC Suite for compatible PC, and set the PC as authorized. See Nokia 9300i to transfer a file, save the file in the C:\nokia "Pairing with a device," p. 108. \installs folder in your device. If you use Microsoft Windows Explorer to transfer a file, save the file on a •... -
Page 104: Java
See "Installing applications and software," p. 103. file, and press the enter key to start the installation. The Java platform for the Nokia 9300i is J2ME. You can Use the Application manager to remove software. See search for Java applications with the browser, download "Application manager,"... -
Page 105: Connectivity
Connectivity • Internet settings name — Give a descriptive name There are several different connectivity types you can use for the connection. with your device. You can use wireless connectivity • Network ID — Select the network ID according to methods such as wireless LAN, Bluetooth or infrared, or a the destination network you want to access with USB (Universal Serial Bus) cable connection for PC Suite or... -
Page 106: Cable Connection
Note that you cannot use IP passthrough at the same time using radio waves, your device and the other devices do as Nokia PC Suite. You can define cable connection not need to be in direct line-of-sight. The two devices only... -
Page 107: Sending Data With Bluetooth
Create Nokia 9300i. See "SIM access profile," p. 81. your own passcode (1-16 characters long, numeric), If you have set Bluetooth as active and changed your... -
Page 108: Receiving Data With Bluetooth
Receiving data with Bluetooth To cancel pairing, select the Paired devices page. Select the device whose pairing you want to cancel, and press If you want to receive data using Bluetooth, set Bluetooth Delete. to be active and select the option Shown to all. -
Page 109: Infrared
Bluetooth or infrared drivers. • It is recommended that you have Nokia Modem Infrared Options installed on your computer. See www.nokia.com and the User's Guide for Nokia PC Do not point the IR (infrared) beam at anyone's eye or Suite for details. -
Page 110: Printing
the device to a compatible computer, and • Infrared - check that infrared is activated, the infrared activate the modem from the computer. ports of the device and the printer face each other, and there are no bright lights shining on either port. Note that you may not be able to use some of the other •... -
Page 111: Remote Configuration (Network Service)
Remote configuration 1. If you have no profiles defined, press New, otherwise press Menu, and select File > New. (network service) 2. If you already have profiles defined, choose whether you want to copy the values from an existing profile Device manager application helps you configure to be used as the basis for the new profile. -
Page 112: Data Connections
• Password — Type your password for the Features using wireless LAN, or allowing such features to configuration server. Confirm it in the Confirm run in the background while using other features, password field. Contact your service provider or increase the demand on battery power and reduce the system administrator for the correct password. -
Page 113: Connection Manager
• The infrastructure operating mode allows two kinds of To view detailed information about network connections, communication: wireless devices communicate with select the connection from the list, and press Details. The each other through a wireless LAN access point or type of information shown depends on the network wireless devices communicate with a wired LAN device connection type. -
Page 114: Personalizing Your Device
Personalizing your device There are several ways you can personalize your device. • Covers - You can change the front cover of your device. • Cover selection keys - You can change the functions that are shown above the left and right selection keys. •... -
Page 115: Cover Selection Keys
To rearrange the functions in the list, press Options, and select Organise. Scroll to the function that you want to move, press Move, and select where you want to move the function. Desk You can arrange the Desk in several ways. You can move applications to different groups from their original groups, create new groups, rename old groups, and modify the icons and names of the applications. -
Page 116: Shortcuts
Shortcuts Here are some of the available keyboard shortcuts in your Ctrl+F Find device. Shortcuts can make the use of the applications Ctrl+I Sort more efficient. Ctrl+M Move There are several different shortcut combinations that you can use: Ctrl+N • Shortcuts with Ctrl+key give you access to the Menu Ctrl+O Open functions. -
Page 117: Application-Specific Shortcuts
Shift+Backspace Delete text from right Shift+Ctrl+S Speed dials Ctrl+Telephone Open the Recent calls view in the Shift+Ctrl+V Call diverting telephone application Contacts Chr+alphabet Insert an accented character Ctrl+K Settings Chr+Tab Switch between open applications Ctrl+M Belongs to groups (in an open contact Chr+Telephone Redial the last dialed number card) - Page 118 Ctrl+I Sort by (sorts by the property you have Ctrl+G Go to date already selected, for example date or Ctrl+K Edit view settings sender) Ctrl+N Create a new meeting Ctrl+L Go online, or go offline if a connection is active Ctrl+Q Change view Ctrl+Q...
- Page 119 Ctrl+G Go to page Shift+Ctrl+C Insert a new chart Ctrl+I Italics Shift+Ctrl+D Delete the cell Ctrl+U Underline Shift+Ctrl+F Format the font Shift+Ctrl+A Format paragraph alignment Shift+Ctrl+G Insert a page break Shift+Ctrl+B Format bullets Shift+Ctrl+H Format row height Shift+Ctrl+D Format borders Shift+Ctrl+I Insert a function Shift+Ctrl+F...
- Page 120 File manager Ctrl+H Go to home page Ctrl+E Expand view Ctrl+I Load all images Ctrl+H Show all files Insert new folder (in bookmark view) Ctrl+I Sort by (the property you have already Ctrl+K Settings selected, for example name or date) Ctrl+M Fit to screen Ctrl+N...
- Page 121 Images Ctrl+T Full screen (with a video clip open) Ctrl+B Previous image (with an image open) Shift+Ctrl+K Settings Ctrl+F Next image (with an image open) Shift+Ctrl+S Save clip as (with a video clip open) Ctrl+R Rotate image (with an image open) Device manager Ctrl+T Full screen (with an image open)
-
Page 122: Nokia Original Enhancements
• Wireless Headset HS-36W • Car Kit N616 • Wireless Headset HS-37W • Car Kit CK-10 • Wireless Headset HS-26W • Nokia Converter for car kit CARK-91 CA-55 Carrying Mobile holders and antenna couplers • Carrying case CP-54 • Mobile Holder CR-5 •... -
Page 123: Battery
• Check regularly that all mobile phone equipment in a vehicle is mounted and operating properly. Use only batteries, chargers, and enhancements approved The Nokia 616 Car Kit by the phone manufacturer. The use of any other type may is an easy-to use and... -
Page 124: Mb Reduced Size Multimediacard Mu-9
Sales • External antenna connector package includes an MMC Adapter for a full size MMC • Uses a Nokia battery (rechargeable with compatible slot and an MMC Case. Nokia chargers) • Typical operating time up to 18h*, continuous tracking time up to 10 hours*, and standby time up to 7 days* •... -
Page 125: Wireless Plug-In Car Handsfree Hf-6W
*Depends on the used application and the external conditions. Wireless Plug-in Car Handsfree HF-6W Get on the road with the Nokia Wireless Plug-in Car Handsfree. This compact unit communicates with your compatible phone via Bluetooth wireless technology within a 10-meter range. "Speech tracking"... -
Page 126: Battery Information
If the battery is completely discharged, it may take a few Always use original Nokia batteries for your safety. To minutes before the charging indicator appears on the check that you are getting an original Nokia battery, display or before any calls can be made. -
Page 127: Authenticate Hologram
What if your battery is not authentic? If you cannot confirm that your Nokia battery with the hologram on the label is an authentic Nokia battery, please do not use the battery. The use of a battery that... -
Page 128: Care And Maintenance
Care and maintenance • Use only the supplied or an approved replacement Your device is a product of superior design and antenna. Unauthorized antennas, modifications, or craftsmanship and should be treated with care. The attachments could damage the device and may violate suggestions below will help you protect your warranty regulations governing radio devices. -
Page 129: Additional Safety Information
Additional safety information Operating environment health care facilities may be using equipment that could be sensitive to external RF energy. Remember to follow any special regulations in force in any area, and always switch off your device when its use Pacemakers is prohibited or when it may cause interference or danger. -
Page 130: Vehicles
Vehicles Potentially explosive environments RF signals may affect improperly installed or inadequately shielded electronic systems in motor vehicles such as Switch off your device when in any area with a potentially electronic fuel injection systems, electronic antiskid explosive atmosphere, and obey all signs and (antilock) braking systems, electronic speed control instructions. -
Page 131: Certification Information (Sar)
SAR values. Additional SAR information may be provided GUIDELINES FOR EXPOSURE TO under product information at www.nokia.com.. RADIO WAVES * The SAR limit for mobile devices used by the public is 2.0 W/kg averaged over 10 grams of body tissue. The Your mobile device is a radio transmitter and receiver. - Page 132 For SAR information in other regions, please look under product information at www.nokia.com.
-
Page 133: Index
Index connection methods cable 106 access points 84, 89, 92 cable infrared 109 ad hoc network 105 connections 106 modem 109 Alarm clock 99 settings 85 connections 40, 83, 113 anniversaries view in cache memory 53 connectivity types 105 Calendar 73 Calculator 98 connectors 14 answering a call 23, 32... - Page 134 dialed calls 26, 33 lock settings 86 display 15 locking the keypad 19 Images 96 indicators 18 locking the system 19 indicators 18 settings 77, 78 logs infrared 109 diverting calls 27, 34, 82 calls 26 installing Documents 60 data transfer 101 applications 103 downloading files 53 general 36...
- Page 135 multimedia messages 47 power 12 security Music player 96 Presentations 66 memory card 75 muting the ringing tone 32 previewing files 110 phone security 85 My contact card 57 printing 110 WLAN 83 My own key 77 privacy settings 88 selecting text 16 private key store 88 service messages 83...
- Page 136 WLAN 83, 84, 92 visited Web pages 53 Sheet 63 voice mailbox 23, 36 shortcuts 18, 26, 116 Voice recorder 96 signal strength 18 volume 19 SIM card installing 10 slide master view in wallpaper 78 Presentations 68 Web 52 slide shows 66 downloading files 53 SMS messages 45...
- Page 137 NOTE! This Limited Warranty is in addition to, and does not affect your legal it is not the entire Product) to a Nokia care center or Nokia designated (statutory) rights under your applicable national laws relating to the sale of service location.
- Page 138 To the extent permitted by applicable law(s) availability, coverage, services or range of the cellular or other network or Nokia does not assume any liability for loss of or damage to or corruption of system. Before the Product can be repaired or replaced, the operator may...
- Page 139 If such statutory provisions apply, to the extent to which Nokia is able to do so, its liability under those provisions will be limited, at its option to, in the case of goods: the replacement of the...
- Page 140 SOFTWARE Make the most of your phone with software for your phone and PC. Nokia PC Suite connects your phone and PC so you can manage your calendar, contacts, music and images, while other applications complement its use.
- Page 141 HOW DO I USE MY PHONE? The Set Up section, at www.nokia-asia.com/setup, helps you prepare your phone for use. Familiarise yourself with phone functions and features by referring to the Guides and Demos section at www.nokia-asia.com/guides. HOW DO I SYNCHRONISE MY PHONE AND PC? Connecting your phone to a compatible PC with the requisite Nokia PC Suite version from www.nokia-asia.com/pcsuite...
Need help?
Do you have a question about the 9300i and is the answer not in the manual?
Questions and answers