
Subscribe to Our Youtube Channel
Related Manuals for Omnitronic BD-1380


Summary of Contents for Omnitronic BD-1380
-
Page 1: User Manual
BEDIENUNGSANLEITUNG USER MANUAL BD-1380 I BD-1390 USB TURNTABLE © Für weiteren Gebrauch aufbewahren! Copyright Keep this manual for future needs! Nachdruck verboten! Reproduction prohibited! -
Page 2: Table Of Contents
Diese Bedienungsanleitung gilt für die Artikelnummern: 10603041, 10603043 This user manual is valid for the article numbers: 10603041, 10603043 Das neueste Update dieser Bedienungsanleitung finden Sie im Internet unter: You can find the latest update of this user manual in the Internet under: www.omnitronic.com... -
Page 3: Einführung
- sich die letzte Version der Anleitung im Internet herunter laden 1. EINFÜHRUNG Wir freuen uns, dass Sie sich für einen OMNITRONIC Plattenspieler entschieden haben. Wenn Sie nachfolgende Hinweise beachten, sind wir sicher, dass Sie lange Zeit Freude an Ihrem Kauf haben werden. -
Page 4: Bestimmungsgemässe Verwendung
Den Netzstecker immer als letztes einstecken. Vergewissern Sie sich, dass der Netzschalter auf „OFF“ steht, wenn Sie das Gerät ans Netz anschließen. Halten Sie das Gerät von Hitzequellen wie Heizkörpern oder Heizlüftern fern. Das Gerät darf nicht in Betrieb genommen werden, nachdem es von einem kalten in einen warmen Raum gebracht wurde. -
Page 5: Gerätebeschreibung
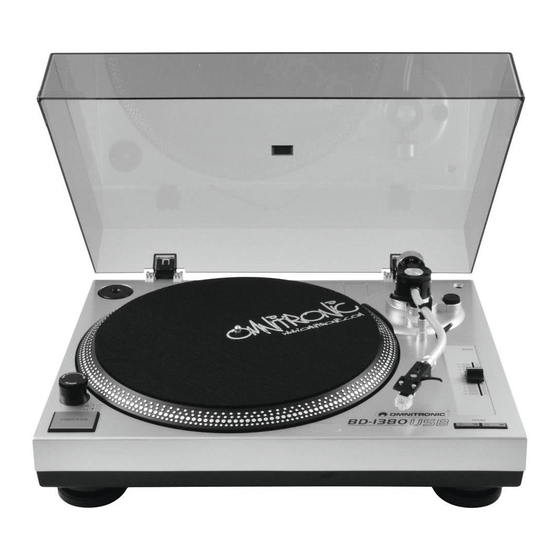
Dieses Gerät darf nur in einer Höhenlage zwischen -20 und 2000 m über NN betrieben werden. Nehmen Sie das Gerät erst in Betrieb, nachdem Sie sich mit seinen Funktionen vertraut gemacht haben. Lassen Sie das Gerät nicht von Personen bedienen, die sich nicht mit dem Gerät auskennen. Wenn Geräte nicht mehr korrekt funktionieren, ist das meist das Ergebnis von unsachgemäßer Bedienung! Reinigen Sie das Gerät niemals mit Lösungsmitteln oder scharfen Reinigungsmitteln, sondern verwenden Sie ein weiches und angefeuchtetes Tuch. - Page 6 4.2 Bedienelemente und Anschlüsse Diese Anleitung beschreibt exemplarisch das Modell BD-1380. Das Modell BD-1390 ist baugleich. Adapter für 7" Platten Tonarm-Lift Plattenteller Tonarm-Stütze mit Verriegelungshebel Spannungswahlumschalter Antiskating-Rad [unter dem Plattenteller] Netzschalter mit Stroboskop-Lampe Gegengewicht-Skala Taste START/STOP Gegengewicht für den Tonarm...
-
Page 7: Montage Und Grundeinstellungen
Analoger Audioausgang (Stereo-Cinch) USB-Anschluss Zum Anschluss an einen Line- oder Phono-Eingang, z.B. Zur Verbindung mit einem Computer. eines Verstärkers oder Mischpults. Netzkabel Umschalter PHONO/LINE Zum Anschluss an eine Steckdose. Umschalter für den Audiopegel des analogen Audio- eingangs • PHONO beim Anschluss an einen Phono-Eingang •... - Page 8 5.2 Systemträger und Gegengewicht für den Tonarm montieren 1. Nehmen Sie den Systemträger aus einem der beiden seitlichen Styropor-Verpackungsteile heraus, stecken Sie ihn auf das vordere Ende des Tonarmes und sichern Sie ihn mit der Verriegelungsmutter. 2. Nehmen Sie das Gegengewicht aus einem der beiden seitlichen Styropor-Verpackungsteile heraus und stecken Sie es auf das hintere Ende des Tonarmes, bis es einrastet.
-
Page 9: Anschlüsse
6. ANSCHLÜSSE Schalten Sie vor dem Anschließen oder Ändern bestehender Anschlüsse den Plattenspieler aus. 1. Verbinden Sie den analogen Audioausgang des Plattenspielers über das beiligende Cinch-Kabel mit den entsprechenden Eingangsbuchsen am Verstärker oder Mischpult. Achten Sie darauf, dass die rechts/links Belegung (Steckerfarbe rot/weiß) an beiden Geräten übereinstimmt. Klemmen Sie den Masse-Anschluss des Kabels an die Masse-Klemme des Verstärkers oder Mischpults. -
Page 10: Bedienung
Wenn das Gerät direkt an das örtliche Stromnetz angeschlossen wird, muss eine Trennvorrichtung mit mindestens 3 mm Kontaktöffnung an jedem Pol in die festverlegte elektrische Installation eingebaut werden. Das Gerät darf nur an eine Elektroinstallation angeschlossen werden, die den VDE-Bestimmungen DIN VDE 0100 entspricht. -
Page 11: Betrieb Mit Einem Computer
8. BETRIEB MIT EINEM COMPUTER Der Plattenspieler wird zusammen mit der Audio-Software Audacity geliefert. Audacity ist ein leicht zu bedienender Audioeditor und -recorder für Windows, Mac OS X, GNU/Linux und andere Betriebssysteme. Das Programm wurde lizenziert unter der GNU General Public License (GPL) und ist daher für jeden frei erhältlich. -
Page 12: Reinigung Und Wartung
Bei Bedarf kann das Tonabnehmersystem oder die Abtastnadel leicht ausgewechselt werden. Entsprechende Ersatzteile sind im Fachhandel erhältlich, z. B. das Tonabnehmersystem S-15 und die dazu passende Abtastnadel S-15 von OMNITRONIC. 1. Ziehen Sie zum Wechseln der Abtastnadel die Nadelhalterung nach vorne ab. Stecken Sie die neue Nadel auf das Abtastsystem. -
Page 13: Technische Daten
Abb. 9: Einstellen des Azimut 10.2 Ersatz-Systemträger Ein Ersatz-Systemträger (z. B. der Systemträger S-15 von OMNITRONIC) komplett mit einem Tonab- nehmersystem ermöglicht bei Bedarf einen schnellen Austausch. Der Systemträger lässt sich einfach durch Ab- und Anschrauben auswechseln. Stellen Sie anschließend das Auflagewicht und den Antiskating-Wert neu ein (Kapitel 5.3, 5.4). -
Page 14: Introduction
- download the latest version of the user manual from the Internet 1. INTRODUCTION Thank you for having chosen an OMNITRONIC turntable. If you follow the instructions given in this manual, we can assure you that you will enjoy this device for many years. -
Page 15: Operating Determinations
Always plug in the power plug least. Make sure that the power-switch is set to OFF position before you connect the device to the mains. Keep away from heaters and other heating sources! If the device has been exposed to drastic temperature fluctuation (e.g. after transportation), do not switch it on immediately. -
Page 16: Description
Operate the device only after having familiarized with its functions. Do not permit operation by persons not qualified for operating the device. Most damages are the result of unprofessional operation! Never use solvents or aggressive detergents in order to clean the device! Rather use a soft and damp cloth. Please use the original packaging if the device is to be transported. - Page 17 4.2 Operating elements and connections This user manual describes the BD-1380 as a reference. Model BD-1390 is identical in construction. Adaptor for 7" records Sliding control PITCH Platter Tone arm lift Voltage selector switch Tone arm rest with locking lever...
-
Page 18: Assembly And Basic Adjustments
Analog audio output (stereo RCA) USB connection for connecting a computer For connection to a line input or phono input, e.g. of an Mains cable for connection to a socket amplifier or mixer. Selector switch PHONO/LINE Switches the audio level of the analog audio output •... -
Page 19: Mounting The Headshell And The Counterweight For The Tone Arm
5.2 Mounting the headshell and the counterweight for the tone arm Take the headshell out of one of the two lateral polystyrene wrappings, place it onto the front end of the tone arm, and secure it with the locking nut. Take the counterweight out of one of the two lateral polystyrene wrappings and place it on the rear end of the tone arm until it locks into the place. -
Page 20: Connections
6. CONNECTIONS Prior to connecting or changing existing connections switch off the turntable. Connect the analog audio output of the turntable with the supplied RCA cable to the corresponding input jacks at the amplifier or mixer. Make sure that the right/left occupation (plug color red/white) is the same at both units. -
Page 21: Operation
If the device will be directly connected with the local power supply network, a disconnection switch with a minimum opening of 3 mm at every pole has to be included in the permanent electrical installation. The device must only be connected with an electric installation carried out in compliance with the IEC-standards. The electric installation must be equipped with a Residual Current Device (RCD) with a maximum fault current of 30 mA. -
Page 22: Operation With A Computer
8. OPERATION WITH A COMPUTER The turntable is supplied with the audio software Audacity. Audacity is an easy-to-use audio editor and recorder for Windows, Mac OS X, GNU/Linux, and other operating systems. The program was licensed under the GNU General Public License (GPL) and is thus free for everybody. However, you can also use the turntable with any other recording software. -
Page 23: Cleaning And Maintenance
S-15 and the matching stylus S-15 from OMNITRONIC. To change the stylus, pull off the stylus support in forward direction. Put the new stylus on the stylus system. -
Page 24: Technical Specifications
Fig. 9: Adjusting the azimuth 10.2 Replacement headshell A replacement headshell (e. g. the headshell S-15 from OMNITRONIC) including a phono cartridge system allows an immediate replacement, if required. The headshell can easily be replaced by unscrewing the existing one and screwing on the new one. After the replacement readjust the stylus pressure and the anti- skating value (chapters 5.3 and 5.4).
Need help?
Do you have a question about the BD-1380 and is the answer not in the manual?
Questions and answers