Advertisement
Table of Contents
- 1 Table of Contents
- 2 How to Contact Customer Care
- 3 Important Precautions
- 4 Before You Begin
- 5 How to Assemble the Elliptical Trainer
- 6 How to Set up the Elliptical Trainer
- 7 How to Upgrade the Console
- 8 How to Use the Basic Console
- 9 Maintenance and Troubleshooting
- 10 Exercise Guidelines
- 11 Part List
- 12 Exploded Drawing
- Download this manual
Model No.
Serial No.
The model number and serial num-
ber are found in the location shown
below. Write the model number and
serial number in the space above.
Serial
Number
Decal
Q
UESTIONS?
At FreeMotion Fitness, we're
committed to providing complete
customer satisfaction. If you
have questions, see HOW TO
CONTACT CUSTOMER CARE on
page 2 of this manual.
C
AUTION
Read all precautions and in-
structions in this manual before
using this equipment. Keep this
manual for future reference.
U
M
SER'S
ANUAL
Advertisement
Table of Contents

Related Manuals for Freemotion Elliptical trainer


Summary of Contents for Freemotion Elliptical trainer
- Page 1 Write the model number and serial number in the space above. Serial Number Decal UESTIONS? At FreeMotion Fitness, we’re committed to providing complete customer satisfaction. If you have questions, see HOW TO CONTACT CUSTOMER CARE on page 2 of this manual.
-
Page 3: Table Of Contents
How to Assemble the Elliptical Trainer ........ -
Page 4: How To Contact Customer Care
When ordering replacement parts, please also give the KEY NUMBER and DESCRIPTION OF THE PART(S) (see the PART LIST and the EXPLODED DRAWING on pages 27 to 31) Customer Care: 1-800-201-2109, Monday–Friday, 8 a.m.–5 p.m. Mountain Time FreeMotion Fitness, Inc. • 1096 Elkton Drive, Suite 600 • Colorado Springs, CO 80907... -
Page 5: Important Precautions
35 or persons with pre-existing health problems. Read all instructions before using. FreeMotion Fitness assumes no responsibility for personal injury or property damage sustained by or through the use of this product. -
Page 6: Before You Begin
The model number and serial number can be found on to make your workouts more effective and enjoyable. a decal attached to the elliptical trainer (see the front cover of this manual for the location of the decal). For your benefit, read this manual carefully before using the FREEMOTION elliptical trainer. -
Page 7: How To Assemble The Elliptical Trainer
LLIPTICAL RAINER Assembly requires two persons. Set the elliptical trainer in a cleared area and remove all packing materials. Do not dispose of the packing materials until assembly is completed. Assembly can be completed using the in- cluded hex keys. - Page 8 3. Attach the Upright Cover (29) to the Upright (2) with three #8 x 1/2" Button Head Screws (92). Attach the Water Bottle Holder (26) to the Frame (1) with four #8 x 1/2" Button Head Screws (92).
-
Page 9: How To Set Up The Elliptical Trainer
HOW TO CONNECT THE POWER CORD If the elliptical trainer has a Basic console, it can be used with or without a power cord. To purchase a power cord, see HOW TO CONTACT CUSTOMER CARE on page 2 of this manual. If the el- liptical trainer has a Workout TV console, a power cord must be used for the TV to be operated. -
Page 10: How To Upgrade The Console
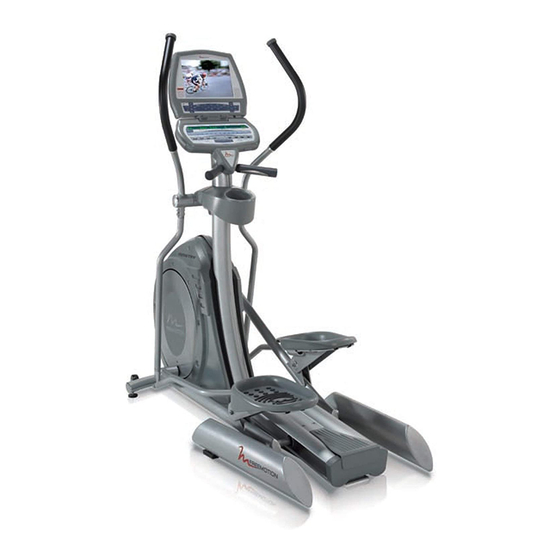
ONSOLE Your elliptical trainer has been pre-configured to operate with a Basic console and a Workout TV console (see the drawings below). To learn about the features of the Basic console, see page 9. To learn about the features of the Workout TV console, see the user’s manual included with the Workout TV console. -
Page 11: How To Use The Basic Console
-compatible chest pulse sensor features designed to help you get the greatest benefits (not included). from your exercise on the elliptical trainer. When the QUICK START mode is selected, the resistance of the Before using the elliptical trainer, please read pedals can be changed with the touch of a button. - Page 12 GRAM TO BEGIN” will scroll across the main display. Note: If one program is started and then a different If the elliptical trainer has a Basic console, it can be program is selected, the main display will not be reset used with or without a power cord.
- Page 13 THE MAIN DISPLAY Speed/RPM—The right end of the main display will show The main display will display a variety of text messages your pedaling speed, in miles to guide you through your workouts. In addition, the per hour or kilometers per main display will display the following information while hour, and your pedaling ca- you exercise:...
- Page 14 When the QUICK START mode or the MANUAL pro- THE PULSE SENSOR gram is selected, the matrix will show the resistance settings that you select. If there are thin sheets of plastic on the metal contacts on the pulse Flashing Column sensor, peel off the plastic.
- Page 15 After every 30 seconds that you exercise, a tone HOW TO USE THE QUICK START MODE will sound and the next column to the right will begin to flash. When you have exercised for 8 If you do not plan to use a program, the QUICK minutes, the same column will continue to flash, START mode will allow you to simply start exercising and all columns of indicators will shift one position...
- Page 16 segment of the program, the left column of the ma- Enter your age. trix will flash. During the last four seconds of the first segment, the column to the right will also A moment after the program is selected, the flash.
- Page 17 segment. Note: The same resistance setting may HOW TO USE THE RANDOM PROGRAM be programmed for two or more consecutive seg- ments. The RANDOM program will automatically change the resistance of the pedals during your workout. Each During the pro- Flashing Column time the program is selected, the resistance settings of gram, the matrix...
- Page 18 Next, the words “CONSTANT MODE” will appear Follow your progress with the main display. in the main display. If you plan to use the CON- STANT PULSE program, press the ENTER but- See THE MAIN DISPLAY on page 11. ton. If you plan to use the VARIABLE PULSE pro- gram, press the + or –...
- Page 19 The program is divided into 30-second segments. HOW TO USE THE INTERVAL PROGRAM One target heart rate setting is programmed for each segment. Note: If the CONSTANT PULSE The INTERVAL program will automatically change the program is selected, the same target heart rate setting is programmed for all segments.
- Page 20 Begin exercising. HOW TO USE THE PLATEAU PROGRAM See step 7 on page 15. During the PLATEAU program, the resistance of the pedals will gradually increase, remain constant for sev- Follow your progress with the main display. eral segments, and then gradually decrease. See THE MAIN DISPLAY on page 11.
- Page 21 Enter your weight. HOW TO USE THE FOOTHILLS, PEAKS, AND ALL-TERRAIN PROGRAMS See step 4 on page 14. Enter a program time. During the FOOTHILLS program, the resistance of the pedals will gradually increase and then gradually de- See step 5 on page 14. crease.
- Page 22 “MAINTENANCE MODE” will appear in the main display for a moment. If the elliptical trainer is used without a power cord, and if the pedals are stationary for a period View the total number of hours that the ellipti- of time, the console will turn off.
-
Page 23: Maintenance And Troubleshooting
If the console turns off as soon as the user stops pedaling, the battery pack may not be fully charged. The longer the elliptical trainer is used, the longer the battery pack will maintain a charge. If the symptom continues, call... - Page 24 7. SYMPTOM: THE PEDALS SLIP OR GIVE ON THE POWER STROKE OF EACH REVOLUTION If the pedals slip on the power stroke, the drive belt is slipping. You will need to adjust the tension of the drive belt. Remove the nine 1/4" x 3/4" Button Head Screws (59) from the Left Side Shield (6), and pivot the Left Side Shield to the side.
-
Page 25: Exercise Guidelines
FREEMOTION. The actual exercise you perform is heart rate for the recommended period of time. only a part of a safe and effective training program. - Page 26 3. Hamstring Stretch—Sit with one leg extended. WEIGHT LOSS TIPS Bring the sole of the opposite foot toward you and rest it against the inner thigh of your extended leg. At least four, 30-minute workouts per week, Reach toward your toes as far as possible. Hold along with a reduced-calorie diet, are for 15 to 30 seconds, then relax.
- Page 27 Gradually, your stamina will increase and it will become easier to exercise for longer periods of time. Get FIT with FREEMOTION Cool down after aerobic exercise. Effective aerobic exercise has three major parts: frequency , intensity , and time . The acronym "FIT"...
- Page 28 At this some tips that will help ease you into your new level you should strive to achieve your fitness goals. FREEMOTION routine. Set realistic short- and long-term goals for yourself. • Begin and end each exercise session with the Frequently re-evaluate your fitness goals and reward stretches on page 24.
-
Page 29: Part List
R1006A To locate the parts listed below, see the EXPLODED DRAWING on pages 29, 30, and 31. Key No. Qty. Description Key No. Qty. Description Frame #4 Nylon Locknut Upright #8 x 3/4" Screw Track Cover #8 x 1/4" Nylon Screw Track #10 x 3/8"... - Page 30 Key No. Qty. Description Key No. Qty. Description Upper CATV Cable User’s Manual Lower CATV Cable Bookrack #8 x 3/8" Screw Side Shield Trim #10 x 1/2" Console Back Screw Note: “#” indicates a non-illustrated part. Specifications are subject to change without notice. If parts are miss- ing or damaged, or if replacement parts are needed, see HOW TO CONTACT CUSTOMER CARE on page 2 of this manual.
-
Page 31: Exploded Drawing
XPLODED RAWING A R1006A... - Page 32 XPLODED RAWING B R1006A...
- Page 33 XPLODED RAWING R1006A...
- Page 34 FreeMotion Fitness, Inc. • 1096 Elkton Drive, Suite 600 • Colorado Springs, CO 80907 Part No. CC7147 R1006A Printed in USA © 2006 ICON IP, Inc.
Need help?
Do you have a question about the Elliptical trainer and is the answer not in the manual?
Questions and answers