Küschall k-series User Manual
Active wheelchair
Hide thumbs
Also See for k-series:
- User manual (60 pages) ,
- Service manual (44 pages) ,
- Service manual (28 pages)
Table of Contents
Advertisement
Quick Links
Download this manual
See also:
Service Manual
Advertisement
Table of Contents

Related Manuals for Küschall k-series


Summary of Contents for Küschall k-series
- Page 1 Active wheelchair User manual...
- Page 2 This product complies with Directive 93/42/EEC concerning medical devices. © Küschall AG, Switzerland Every effort has been made to ensure that the contents of this publication are fully up-to-date at the time of going to print. As part of its ongoing improvement of products, Küschall® AG re- serves the right to modify existing models at any time.
-
Page 3: Table Of Contents
K-Series Contents Contents General 4.10 Seat cushion 4.11 Seat position Information about the User Manual 4.12 Accessories Symbols Guarantee Set-up Service life Using the wheelchair Copyright protection Safety information Safety Braking during use Safety information Getting in and out of the wheelchair... - Page 4 K-Series After use 10.1 Re-use 10.2 Disposal...
-
Page 5: General
K-Series General 1 General IMPORTANT Indicates a hazardous situation that could result in damage to property if it is not avoided. 1.1 Information about the User Manual Tips and recommendations Thank you for choosing a Küschall® wheelchair. Gives useful tips, recommendations and information This User Manual contains important information about using for efficient, trouble-free use. -
Page 6: Service Life
K-Series General arising from the rectification of defects such as freight and travel expenses, labour costs, fees etc. Term of the guarantee The term of the guarantee is 24 months. The frame is guaranteed for 5 years. Wearing parts are not covered by the guarantee. -
Page 7: Safety
K-Series Safety - Avoid collisions in general. 2 Safety CAUTION! Risk of burning This section contains important safety information for the The wheelchair components can heat up when protection of the wheelchair user and assistant and for safe, exposed to strong sunlight.$ trouble-free use of the wheelchair. -
Page 8: Safety Devices
K-Series Safety 2.3 Safety devices WARNING! Risk of accidents Safety devices that are incorrectly set or no longer working (brakes, antitipper) can cause accidents. - Always check that the safety devices are working before you use the wheelchair and have them checked regularly by the specialist dealer. -
Page 9: Technical Data
K-Series Technical data 3 Technical data 3.1 Dimensions and weight Seat width (SB) Seat depth (ST) 340 – 480 mm 375 – 525 mm Lower leg length Seat height front (UL) 290 – 480 mm (SHv) 450 – 520 mm... -
Page 10: Environmental Conditions
K-Series Technical data 3.2 Environmental conditions 3.4 Identification label Do not expose the wheelchair to temperatures below -20°C or The identification label is attached to the frame of your above 40°C. wheelchair and gives the following information: 3.3 Tyre pressure... -
Page 11: Components And Their Function
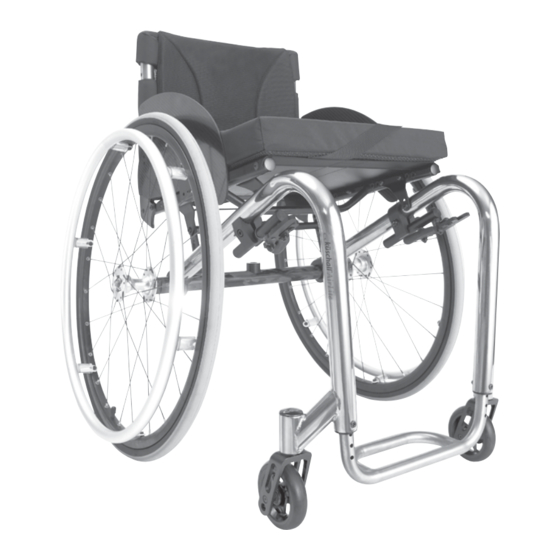
Frame Seat Clothes-guard Short description The Küschall K-Series is a rigid frame wheelchair with folding backrest. The equipment of your wheelchair may differ from the diagram as each wheelchair is manufactured individually to the specifications in the order. -
Page 12: Parking Brakes
K-Series Components and their function Standard brake 4.2 Parking brakes The parking brakes are used to immobilise the wheelchair when it is stationary to prevent it from rolling away. WARNING! Risk of overturning if you brake sharply... -
Page 13: Backrest
K-Series Components and their function Active brake Adjusting the backrest cover To apply the brake, pull the brake lever forwards beside or between your knees as far as possible. To release the brake, push the brake lever backwards beside or between your knees. -
Page 14: Push Handles
K-Series Components and their function Backrest angle The angle of the backrest can be adjusted. The adjustment must be carried out by the specialist dealer. Backrest bar WARNING! Risk of accidents The backrest bar is not suited for lifting or carrying the wheelchair with the user sitting in it as it can break. -
Page 15: Sides
K-Series Components and their function Height adjustable, angled push handles 4.5 Sides (optional) Side rest, infinitely height adjustable The infinitely height adjustable push handles allow any assistant to adjust the handles to a comfortable level. To set the height of the push handles, loosen the bolt ,... - Page 16 K-Series Components and their function Tighten the screw . Perform the setting on both sides. Swivelling Perform the setting on both sides. Raise the armrest a little and swivel it outwards. Simple armrest, height-adjustable, swivelling...
-
Page 17: Footrest
K-Series Components and their function Fitting 4.6 Footrest Push the mudguard into the holder. The height of the footrest can be adjusted. The adjustment must be carried out by the specialist dealer. Clothes-guard A clothes-guard can be fitted to protect your clothes. Before folding the back of the wheelchair, the clothes-guard must first be folded inwards against the backrest. -
Page 18: Antitipper
K-Series Components and their function Setting the height 4.7 Antitipper Press the spring pin on the antitipper and push the inner section to the position required. Allow the spring pin to An antitipper prevents the wheelchair from tipping engage in the nearest hole. -
Page 19: Rear Wheel Extension
K-Series Components and their function Perform the same setting on both sides. 4.10 Seat cushion IMPORTANT! A suitable cushion is needed to provide an even pressure Do not overtighten the knurled screw as this can distribution on the seat. -
Page 20: Accessories
K-Series Components and their function 4.12 Accessories Air pump The air pump is fitted with a universal valve connection. Postural belt Remove the dust cap from the valve connection. Your wheelchair can be fitted with a postural belt. The postural belt prevents you from sliding forward in your ... -
Page 21: Luggage Carrier
K-Series Components and their function Luggage carrier Transit wheels Your wheelchair can be fitted with a luggage carrier. When WARNING! not in use, the luggage carrier can be folded up. When using transit wheels, the parking brakes no IMPORTANT... - Page 22 K-Series Components and their function Pull the tube further downwards until the pin engages into the slot. Move the wheelchair to a stable object (door frame, heavy table), which you can use for support and hold onto it firmly with one hand.
-
Page 23: Set-Up
K-Series Set-up 5 Set-up CAUTION! Before using the wheelchair, check its general condition and its main functions. (See Section 8 – Maintenance) Your specialist dealer will supply your wheelchair ready for use. Your dealer will explain the main functions and ensure... -
Page 24: Using The Wheelchair
K-Series Using the wheelchair 6.2 Braking during use 6 Using the wheelchair Whilst you are moving, you brake by transferring force to the handrim with your hands. 6.1 Safety information Hold the handrims and press evenly with both hands until CAUTION! Risk of crushing the wheelchair stops. -
Page 25: Getting In And Out Of The Wheelchair
K-Series Using the wheelchair 6.3 Getting in and out of the wheelchair Hold the wheelchair and, if necessary, also hold a fixed object in the vicinity. WARNING! Risk of overturning 6.4 Driving and steering the wheelchair There is a high risk of overturning during the transfer. -
Page 26: Negotiating Steps And Kerbs
K-Series Using the wheelchair Finding the tipping point - Do not go up or down steps that are higher than 25 CAUTION An activated antitipper prevents the wheelchair from tipping backwards. - Deactivate the antitipper before going up or down steps or kerbs. -
Page 27: Going Up And Down Stairs
K-Series Using the wheelchair Going down a step Move the wheelchair right up to the kerb and hold the handrims. The assistant should hold both push handles, place one foot on the tipper aid (if installed) and tilt the wheelchair backwards so that the front wheels lift off the ground. -
Page 28: Negotiating Ramps And Slopes
K-Series Using the wheelchair 6.7 Negotiating ramps and slopes WARNING! Risk due to wheelchair being out of control When negotiating slopes or gradients your wheelchair could tip backwards, forwards or sideways. - Always have an assistant behind the wheelchair when approaching long slopes. - Page 29 K-Series Using the wheelchair Going up slopes To go up a slope, you must create some momentum, keep up the momentum and control the direction at the same time. Lean back and carefully allow the handrims to run through your hands.
-
Page 30: Stability And Balance When Seated
K-Series Using the wheelchair 6.8 Stability and balance when seated Point the front wheels forwards. (To do this, move your wheelchair forwards slightly then Some everyday activities and actions require you to lean back again.) forwards, sideways or backwards out of the wheelchair. This ... - Page 31 K-Series Using the wheelchair Point the front wheels forwards. (To do this, move your wheelchair forwards slightly then back again.) Do not apply the parking brakes. When reaching backwards do not reach so far that you...
-
Page 32: Transport
K-Series Transport 7.2 Folding and unfolding the wheelchair 7 Transport The wheelchair has a rigid frame. Nevertheless, the backrest can be folded forwards and fixed there. 7.1 Safety information WARNING! Risk of injury if wheelchair is not secured during transport Your wheelchair is not designed for passenger transport in vehicles. -
Page 33: Removing And Fitting The Rear Wheels
K-Series Transport Unfolding the wheelchair Pull the cord on the backrest of the wheelchair. Pull the backrest backwards using the backrest brace, until the backrest tube engages on both sides of the frame. Fold the clothes-guard back into position on both sides. - Page 34 K-Series Transport Fitting the rear wheels Release the brakes. With one hand, hold the wheelchair upright. With the other, hold the wheel through the external spoke rim around the wheel hub. Using your thumb, press the removable axle button and hold it down.
-
Page 35: Maintenance
K-Series Maintenance Check the tyre pressure 8 Maintenance Check the tyre pressure ( Pressure table in Section 3 - Technical data). 8.1 Maintenance schedule Inflate the tyres to the required pressure. To ensure safe and reliable operation, carry out the following ... - Page 36 K-Series Maintenance Clean the front wheels IMPORTANT The parking brakes must be reset after replacing the Check that the front wheels turn freely. rear wheels or changing their position. Remove any dirt or hair from the front wheel bearings.
-
Page 37: Cleaning
K-Series Maintenance IMPORTANT! check all the way round to ensure that the inner tube is Do not use coarse abrasives, aggressive cleaning not trapped between the tyre and the rim. products or high-pressure cleaners. Inflate the tyre to the maximum operating pressure. -
Page 38: Troubleshooting
K-Series Troubleshooting 9 Troubleshooting Faults may arise as a result of daily use, adjustments or changing demands on the wheelchair. The table below shows how to identify and repair faults. CAUTION! Contact your specialist dealer immediately if you notice a fault with your wheelchair, e.g. -
Page 39: Identifying And Repairing Faults
K-Series Troubleshooting 9.1 Identifying and repairing faults Fault Possible cause Action The wheelchair does not travel Incorrect tyre pressure on one rear wheel Correct tyre pressure (Section 3 - Technical data) in a straight line One or more spokes broken Replace faulty spoke(s) (specialist dealer) -
Page 40: After Use
K-Series After use 10 After use 10.1 Re-use The wheelchair is suitable for re-use. The following actions should be taken: Cleaning and disinfection according to Section 8 - Cleaning in this manual. Inspection according to Chapter 8 - Maintenance schedule in this manual. - Page 41 küschall® distributors Belgium & Luxemburg: Invacare nv • Autobaan 22 • B-8210 Loppem Tel: (32) (0)50 83 10 10 • Fax: (32) (0)50 83 10 11 • belgium@invacare.com Danmark: Invacare A/S • Sdr. Ringvej 37 • DK-2605 Brøndby Tel: (45) (0)36 90 00 00 • Fax: (45) (0)36 90 00 01 • denmark@invacare.com Deutschland: Invacare Aquatec GmbH •...
- Page 42 Küschall AG Benkenstrasse 260 CH-4108 Witterswil kueschall@invacare.com www.kueschall.com ENGLISH 2010-11 1544595...
- Page 43 Transporting the occupied wheelchair in a vehicle Insert for User Manual Insert for User Manual 1544595 / 2010-11 / EN...
- Page 44 ® Even when the küschall K-Series wheelchair is properly procedures and regulations are followed. secured and the following rules are met, injuries to passengers - The wheelchair must be secured in the vehicle with may occur in a collision or sudden stop.
- Page 45 Securing the wheelchair with a 4-point restraint WARNING! system - Make sure the tie-down points at the wheelchair are not damaged and that the parking brakes are fully functional. - It’s recommended to use puncture-proof tyres during transport to avoid brake problems due to reduced tyre pressure.
- Page 46 Using the front and rear straps of the 4-point restraint Attach the front straps above the castor supporters as system, secure the wheelchair to the vehicle mounted shown in the two figures above (see location of the rails. Refer to the user manual supplied with 4-point attachment labels).
- Page 47 IMPORTANT! - Check the plungers are fully engaged on both sides and located in the same position of the cut-out section of the rail. - Make sure that the angle between the rails and the straps lies between 40° and 45°. Fit posture belt WARNING! The posture belt must be used in addition to but...
- Page 48 Fastening the 3-point passenger restraint system WARNING! - Ensure the 3-point passenger restraint system fits as tightly across the user's body as possible without discomfort and no part is twisted. - Ensure the 3-point passenger restraint system is not held away from the user's body by parts of the wheelchair such as armrests or wheels etc.
- Page 49 Attach the 3-point passenger restraint system refering to the user manual supplied with your 3-point restraint system. IMPORTANT! - Apply the pelvic belt of the 3-point passenger restraint system low across the pelvis so that the angle of the pelvic belt is within the preferred zone (A) of 30°...
Need help?
Do you have a question about the k-series and is the answer not in the manual?
Questions and answers