Table of Contents
Advertisement
Quick Links
Advertisement
Table of Contents

Related Manuals for Kathrein UFC 762si


Summary of Contents for Kathrein UFC 762si
- Page 1 Operating manual - Englisch - DVB cable receiver UFC 762si/sw...
-
Page 2: Preface
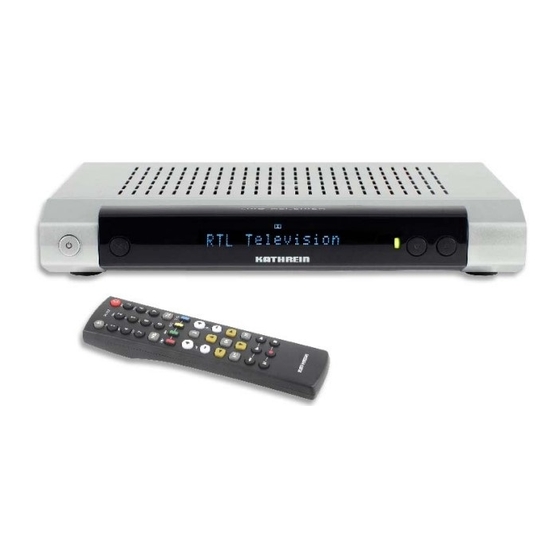
Your KATHREIN team RECEIVER FEATURES The receivers UFC 762si and UFC 762sw are suitable for the reception of digital cable TV and radio channels. The decoding systems for Conax and Cryptoworks are already integrated. In addition one Common Interface for a CA module is provided for decoding additional Pay-TV channels. -
Page 3: Important Information
Audio MPEG Inc. and Societa‘ Italiana per lo sviluppo dell‘elettronica, S.I.SV.EL, S.P.A, have granted KATHREIN-Werke KG rights of use which are subject to certain restrictions. These restrictions must also be observed by you as a customer. -
Page 4: Table Of Contents
... 2 PREFACE IMPORTANT INFORMATION ... 4 CONTENTS ... 6 SAFETY NOTES CONNECTION AND SET-UP CONNECTING THE RECEIVER ... 7 RF(HF) CONNECTION ... 7 TV CONNECTION INSERTING BATTERIES INTO THE REMOTE CONTROL CONTROLS, DISPLAYS AND CONNECTIONS ... 9 REMOTE CONTROL REMOTE CONTROL FUNCTION BUTTONS ... - Page 5 ... 35 SORT CHANNELS ... 38 TECHNICAL INFORMATION ... 38 CHANNEL INFORMATION SYSTEM INFORMATION AND SOFTWARE UPDATES VIA THE CABLE NETWORK ... 40 TIMER ... 40 MANUAL TIMER SETTING AUTOMATIC TIMER SETTING DELETING A TIMER EVENT ... 41 EDITING A TIMER ...
-
Page 6: Safety Instructions
SAFETY INSTRUCTIONS... -
Page 7: Connection And Set-Up
The following section is intended specifi cally for specialist dealers. You need not refer to this section unless you are carrying out the installation yourself. The “Connection Example” section provides a sample confi guration. Do not connect the receiver to the mains until all installation work has been properly carried out. Refer also to the information in the “Safety Instructions”... -
Page 8: Controls, Displays And Connections
CONTROLS, DISPLAYS AND CONNECTIONS This section provides a brief description of all the controls, displays and connections. VIEW OF FRONT PANEL (FLAP FOLDED DOWN) VIEW OF REAR PANEL Front panel controls and displays On/Off switch Display (cover folded down) Common Interface and Smartcard reader for accepting a CA module and for Pay-TV cards * Ejection button for the CA module... -
Page 9: Remote Control
REMOTE CONTROL FUNCTION BUTTONS The button symbols presented here can also be found in the description of the operating steps. Mute on/off For entering channel numbers or menu parameters Select main menu (Red) Select a channel list in channel lists management Volume (cursor buttons) -
Page 10: First Installation
Before using your receiver for the fi rst time, read the “Safety Instructions” and “Connection and Set-up” sections. The “Connection Examples” section provides a sample confi guration. Do not connect the receiver to the power supply until all installation work has been properly carried out. - Page 11 FIRST INSTALLATION Use the buttons to select the desired menu language. Pressing the button loads the desired menu language and calls up the next menu: Press the buttons to select the desired country. Press the buttons to access the “Screen Format”...
- Page 12 Use the buttons to select whether the network search should be “On” or “Off”. If the network search is set to “On” you will be shown the “Manual Search” in the next display. You should use this if your cable network operator has advised you of the frequency that can be searched.
- Page 13 Press the buttons to access the next line. If necessary you can add another symbol rate for the search for channels in addition to the usual one (shown in grey). You can use the numeric pad on the remote control to do this. Press the buttons to access the next line.
- Page 14 FIRST INSTALLATION After completion of the search, you will see the following message (example): If it happens that not all the channels available on the cable network are found, you can set the buttons to “Yes” and start searching again by pressing the button.
- Page 15 FIRST INSTALLATION Press the button to confi rm. The fi rst installation is now complete and your settings will be saved. The receiver will automatically return to the TV picture.
-
Page 16: Operation
OPERATION USING THE REMOTE CONTROL Press the button to confi rm settings in the menus or to open sub-menus. Change the settings line by line and press the button to save your changes. Press the button to quit the menu or to switch from a sub-menu to the next higher menu level. -
Page 17: Banner
BANNER When switching to a different channel or at the start of a new program the following information is displayed on the screen: Channel selected from ... (e.g. 1 = fi rst favourite list) Current and next programmes Current with start and end times time Press the button to obtain additional information about the next programme. -
Page 18: Videotext (Teletext)
OPERATION VIDEOTEXT (TELETEXT) Press the button to open Teletext. When Teletext is called up for the fi rst time you will be asked whether you wish in future to call up Teletext using the receiver remote control or as previously using the TV set remote control (see screen shot below). -
Page 19: Electronic Programme Guide (Epg)
ELECTRONIC PROGRAMME GUIDE (EPG) Press the button to open the electronic programme guide. The following display appears (example): Weekdays List of the current programmes with data on their start times and names Shows all programmes for the afternoon ( button green) / morning ( button red) Current date and time Use the... -
Page 20: Timer Programming From Epg
Press the buttons to page through the additional information (if there is more than one page). Use the buttons to obtain additional information on the next programmes and press the additional information again. TIMER PROGRAMMING FROM EPG The receiver offers you the facility to use the the timer. -
Page 21: Audio
The receiver copies the data available from the EPG directly to the information for programming the timer. You must program your external recorder identically to the receiver! Further information an creating and editing (changing/deleting) timers can be found in the “Timer” chapter. -
Page 22: Common Interface
CA module, except that in this case the chip contacts point downwards. COMMON INTERFACE of the UFC 762si/sw can accept one CA (Conditional Access) module. The (chip contacts pointing upwards and towards socket strip) in exactly the same way... -
Page 23: Main Menu
Press the button to open the main menu. The following display appears: Seven sub-menus are available, as detailed below: 1) Box Settings Various facilities are available for setting the picture, the language, the menu and for resetting to the factory settings 2) Search for Channels Automatic, Extended and Manual Searches 3) Sort Channels... -
Page 24: Box Settings
Five submenus are available, as detailed below: 1) Video Settings Specifying the video settings 2) Language Settings Setting the menu, subtitle and audio language 3) Menu Settings Specifying various menu settings 4) Miscellaneous Settings Time Zone Adjustment, the audio output format, the automatic output of Dolby Digital, the audio delay (if used) and the sorting of the channel list 5) Restore Factory Settings Restore Factory Settings... -
Page 25: Video And Audio Settings
VIDEO AND AUDIO SETTINGS Also attention bars at the bottom of the on- screen display! These provide information on what to do next. Use the buttons to select the line you want to change. Use buttons to make the changes. Screen Format: Select your TV's format here. -
Page 26: Language Settings
Restore Default Settings: Here you can restore the default settings for picture and sound To quit the menu and save the changes, press the LANGUAGE SETTINGS Also pay attention to the bars at the bottom of the on-screen display! These provide information on what to do next. -
Page 27: Menu Settings
MENU SETTINGS Also pay attention to the bars at the bottom of the on-screen display! These provide information on what to do next. Use the buttons to select the line you want to change. Use the Info Banner Duration: Here you can set the following banner display times: “Permanent”, “None” and then in 1-second steps up to 15 seconds. -
Page 28: Miscellaneous Settings
MISCELLANEOUS SETTINGS Also pay attention to the bars at the bottom of the on-screen display! These provide information on what to do next. Use the buttons to select the line you want to change. Use the Time Zone Adjustment: Here you can set whether the time zone is set automatically or manually. Time Zone (GMT): Here you can manually set the time zone (available only if “Time Zone Adjustment”... -
Page 29: Restore Factory Settings
RESTORE FACTORY SETTINGS Here you can restore all the settings to the pre-programmed factory settings. All your personal preferences (favourites lists, channel sorting, etc.) will be deleted! Use the buttons to change to “Yes” and confi rm the restore by pressing the BOX SETTINGS button. -
Page 30: Search For Channels
SEARCH FOR CHANNELS Select the search you want using the buttons and call up the desired sub-menu by pressing the button. You can choose between: Automatic Search: Here you can initiate a search over the preset broadcasting frequencies for the receiver or over the range of frequencies that you select. -
Page 31: Automatic Search
AUTOMATIC SEARCH The frequencies and symbol rates, and the channels available, may be different for different cable network operators. So as to keep the search time as short as possible, you can ask your cable network provider in advance for information on which programmes are transmitted on which frequencies and channels and with which symbol rates,... - Page 32 SEARCH FOR CHANNELS After completion of the search, you will see the following message (example): If it happens that not all the channels available on the cable network are found, you can set the buttons to “Yes” and start searching again by pressing the button.
-
Page 33: Extended Channel Search
SEARCH FOR CHANNELS EXTENDED CHANNEL SEARCH The pre-setting in this search is automatically set to the lowest start frequency and the highest end frequency available in the receiver. This ensures that all frequencies that the receiver is capable of receiving are searched for available channels. -
Page 34: Manual Search
MANUAL SEARCH So as to perform a targeted search for specifi c channels, the data must appear in the four lines frequency to modulation. Use the buttons to select the transmission channel (with transmission frequencies) that is to be searched. Press the buttons to access the next line. -
Page 35: Sort Channels
SORT CHANNELS Four favourites lists for TV and four for radio are available to you for sorting the channels within the channel lists. You can make up each favourites list with any channels you like. TV and radio channels cannot however be mixed within a single favourites list! Pressing the (blue) button toggles between the TV and radio favourites lists. - Page 36 The following display appears: Use the buttons here to select the lines to be edited and use the settings. You have the following selection options: Channels: “All”, “Only free to air” or “Only encrypted” Filter by: “No other fi lters”, “Network” (e.g. cable, Germany) or “Providers” (e.g. ARD) Network (available only if “Network”...
- Page 37 SORT CHANNELS Use the buttons to identify the desired channel in the channel list that you wish to load into the favourites list. Press the button and the channel will be added to the favourites list. A channel that is included in any of the four favourites lists is marked in the channel list with a “*”.
-
Page 38: Technical Information
TECHNICAL INFORMATION Use the buttons and the button to select the desired menu. Channel Information: Here you can view the following channel information: frequency, parameters, network, provider, service ID, Teletext PID, audio and video PID, signal strength and signal quality. System Information: Here the following information is provided: hardware version, system key, MAC address, product, software version, update software and operating hours. -
Page 39: System Information And Software Updates Via The Cable Network
SYSTEM INFORMATION AND SOFTWARE UPDATES VIA THE CABLE NETWORK These items cannot be changed, they merely provide information about current hardware and software versions. Press the button to confi rm the start of a search for new available software or press the cancel the session. -
Page 40: Timer
Press the button to open the main menu. Use the button (calls up the time menu directly by means of the following display appears (example): Note: must your external identically to the receiver. If timer recording is started in stand-by mode, the receiver switches back to stand-by when recording is fi... -
Page 41: Automatic Timer Setting
TIMER Use the buttons to select the line you want to change. Make the changes using the buttons and the numeric pad. Station: Set here the channel on which the program to be recorded will be broadcast. Pressing the button brings up a display of the channel list. -
Page 42: Security
SECURITY Press the button to open the main menu. Select the “Security” menu using the buttons and press button. Enter the receiver PIN (factory setting “0000”) and confi rm it by pressing the button. The following display appears (see example below): Use the buttons to select the lines to be changed and use the buttons to perform the settings. -
Page 43: Conditional Access
Press the button to open the main menu. Select the “Conditional Access” menu using the and press the button. The following display appears: Access to the Smartcard reader Access to the Smartcard in the Smartcard reader Access to the CA module with a Smartcard in the CI slot Common Interface... -
Page 44: Cryptoworks Ca - Smartcard In The Smartcard Reader
CONDITIONAL ACCESS CRYPTOWORKS CA - SMARTCARD IN THE SMARTCARD READER Press the button to call up the menu. The following display appears: Use the buttons to select the desired menu, and press the button to open it. The menus depend on the Smartcard that is used. -
Page 45: Change Maturity Rating
CHANGE MATURITY RATING Use the buttons to select the “Smartcard management” menu, and press the requested, enter the Smartcard PIN and confi rm by pressing the and confi rm by pressing the and confi rm by pressing the When fi rst select encrypted channel the receiver will... -
Page 46: Cryptoworks - Common (Ca Module)
CRYPTOWORKS - COMMON (CA MODULE) This menu informs you which CA module is fi tted to your receiver and which Smartcard is present in the CI slot. Select the “CryptoWorks - Common” menu using the it. You will then see the menu generated by the CA module. The screenshots below depend on the specifi... -
Page 47: Change Maturity Rating
CHANGE MATURITY RATING The screenshots below depend on the specifi c module and card, and so are only intended as examples. Use the buttons to select the “Smartcard management” menu, and press the The following display appears (example): Many modules rating when insert... -
Page 48: Software Update Via Internet/Service
83224 Grassau, Germany Tel.: +49 8641 9545-0 Fax: +49 8641 9545-35 & 9545-36 e-mail: service@esc-kathrein.de Internet: http://www.esc-kathrein.de Note: Factory settings must be restored following a successful software download. SERVICE If, despite reading this operating manual, you still have questions about getting started with the receiver or using it correctly, or if unexpected problems occur, please contact your specialist dealer. -
Page 49: Technical Appendix
TECHNICAL FEATURES Reception of digital cable TV and radio channels 2,000 channel memory positions 16-character alphanumeric display with status icons for indication of channel names and transmission information Conax and Cryptoworks decoding system embedded Common Interface for one CA module ¹ Integrated Smartcard reader ¹... - Page 50 Audio digital output (optical) Data interface Common Interface/Encryption system General Permissible ambient temperature Dimensions (W x H x D) Weight Preliminary data. Technical data subject to change. TECHNICAL APPENDIX UFC 762si 20210101/silver dBµV MSymb/s MBit/s V/Hz °C UFC 762sw 20210102/black...
-
Page 51: Scart Socket Assignment
SCART SOCKET ASSIGNMENT Signal Right audio output Right audio input Left audio output Audio earth Blue earth Audio left input Blue signal Switching voltage Green earth Data signal Green signal Data signal Red earth Data earth Red signal (C) Blanking signal Video earth Blanking signal earth Video output (FBAS/Y) -
Page 52: Connection Example
CONNECTION EXAMPLE Digital audio AC optical/electrical Hi-fi system Internet: http://www.kathrein.de KATHREIN-Werke KG • phone +49 8031 184-0 • Fax +49 8031 184-306 Anton-Kathrein-Straße 1 - 3 • P.O. Box 100 444 • 83004 Rosenheim GERMANY TECHNICAL APPENDIX Dolby Digital system...
Need help?
Do you have a question about the UFC 762si and is the answer not in the manual?
Questions and answers