Table of Contents
Advertisement
Quick Links
Download this manual
See also:
User Manual
Advertisement
Table of Contents

Subscribe to Our Youtube Channel
Related Manuals for Kathrein UFE 341/S Euroline


Summary of Contents for Kathrein UFE 341/S Euroline
- Page 1 Operating Manual DVB-Sat Caravan Receiver UFE 341/S Order no. 20210060...
-
Page 3: Preface
We wish you good reception and much pleasure using your new DVB-Sat caravan receiver. Your KATHREIN Euroline team Important Information If you unexpectedly encounter problems with your receiver, please contact your authorised dealer. -
Page 4: Table Of Contents
Contents Contents Preface................................3 Contents ................................4 Views and connections ........................... 5 Front view............................... 5 Rear view ............................... 5 Remote Control..............................6 Guide to the Remote Control ......................... 7 Using the Remote Control..........................8 Inserting Batteries in the Remote Control ...................... 8 Safety Instructions ............................ -
Page 5: Views And Connections
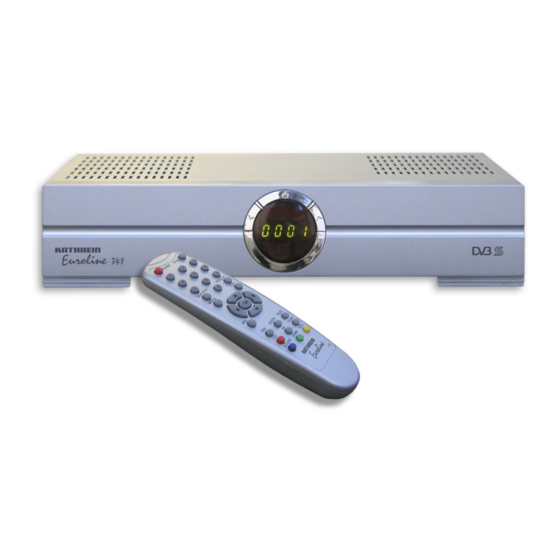
Views and connections Views and connections Front view Power/Standby button Channel select buttons Channel display Rear view SAT IF input socket SAT IF output (loop-through signal) RS 232 data port for serial data transfer during service (only with special cable) Scart connection for TV set Scart connection for video recorder S-VHS output... -
Page 6: Remote Control
Remote Control Remote Control... -
Page 7: Guide To The Remote Control
Remote Control Guide to the Remote Control 1) POWER: Receiver standby and power-on 2) Number pad (0-9): To enter channel numbers or menu parameters 3) QUALITY/P-: Display of information on the current channel, the satellite name, channel number etc. Also used to adjust the antenna and for scrolling (-) through the lists 4) MENU: Open main menu... -
Page 8: Using The Remote Control
Remote Control Using the Remote Control Press the OK button to confirm menu settings or to access lower menu levels. Change the settings line by line and confirm your input by pressing the OK button. Press the EXIT button to quit the menu or to switch from a submenu to the next highest menu level. -
Page 9: Safety Instructions
Safety Instructions Safety Instructions Important Information on Operating the Unit The following section contains important information about the operation, installation location and connection of the receiver. Read these instructions carefully before setting up the unit. Mains power cable Danger from electric shock! Make sure that the mains cable (power supply cable) is not damaged. -
Page 10: Mains Voltage
Safety Instructions Mains voltage Important! Power the unit only from a 12 V DC voltage source, and via the 230/12 V adapter provided. It must only be connected to the mains power and switched on once the connections to the antenna and the TV set have been made. Long periods of absence / storms Note! Always turn off the unit at the mains switch if you will be absent for a... -
Page 11: Operation
Operation Operation Channel Selection The receiver is shipped with the most popular satellites programmed in to it. For perfect reception, your antenna must be aligned to one or more of them. Press the SEL button to call up the list of pre-programmed satellites. Select the satellite and press the OK button. -
Page 12: Channel Information
Operation Channel Information When you switch channels the following information is displayed on- screen: Channel type: TV or radio Channel number and name EPG (Electronic Programme Guide) reception is indicated by the letter "E" Videotext (Teletext) reception is indicated by the letter "T" Current channel being received, time and satellite name Videotext (Teletext) The receiver continuously transmits the Videotext/Teletext signal, if... -
Page 13: Electronic Programme Guide (Epg)
Operation Electronic Programme Guide (EPG) The EPG (Electronic Programme Guide) button displays programme information, provided the information is transmitted by the broadcaster. Use the buttons to switch between the displayed programmes. To switch to the next/previous day, press the Recall/P+ or Quality/P- button as appropriate. - Page 14 Operation You can also view the details directly while the current programme is running by pressing the red button. You then see the information you need about the current TV programme without having to switch to EPG mode (see screenshot). Note: To be able to view the programme information you must leave the programme in question on for a few moments.
-
Page 15: Audio
Operation Audio Press the Audio button to view the sound mode (TV or radio) being broadcast over the receiving channel. Select the sound mode and press the OK button to save it. If the channel is not transmitting language information, the receiver shows "Unknown". -
Page 16: Main Menu
Main menu Main menu Accessing the Main Menu (MENU Button) Press the MENU button to access the main menu, select the submenu you want and press OK. Five submenus are available, as detailed below: 1) Timer Menu for preset programme recording or for automatic stop 2) Edit Channel List Sort, edit and delete channels 3) Edit Favourite List... -
Page 17: Timer Setting (Automatic Programming)
Main menu Timer Setting (Automatic Programming) Note: The timer can be programmed either by way of the EPG (Electronic Programme Guide; see page 13) or as follows: The clock must be correctly set so the timer is ready for programming (see "Installation Menu/System Setup/Setting the Time"). -
Page 18: Organising Channels And Favourites
Main menu Organising Channels and Favourites Sort: 1. Press the "Menu" button to access the receiver's menu. 2. Choose "Edit Channel List" and press "OK" to confirm. 3. Then select the channel you want to move using the cursor buttons (the channel is highlighted in yellow). 4. - Page 19 Installations-Menu Fav: 1. Press the "Menu" button to access the receiver's menu. Choose "Edit Channel List" and press "OK" to confirm. Press the blue button to access the "Favourites" menu. The four Favourites lists are displayed. Use the buttons to switch between the displayed channels (the selected channel is highlighted yellow).
-
Page 20: Installations-Menu
Installations-Menu Installations-Menu Adapting the receiver to your satellite reception system: 1) LNB Configuration Enter information on the antenna (satellite,LO frequency, LNB voltage, presence of a DiSEqC™ switch, DiSEqC™ input, DiSEqC™ repeat) 2) Scan Search for transponders or complete satellites; only free-to-air channels or encrypted and free-to-air channels 3) System Setup Adapt to your TV set;... -
Page 21: Lnb Configuration
Installations-Menu LNB Configuration In this menu you can configure your receiver for your antenna: Select the LNB type (standard programming for universal LNBs) LNB supply voltage DiSEqC™ Switch V1.0 DiSEqC™ Input DiSEqC™ Repeat: If the receiver is operated in a reception system with two or more DiSEqC™... -
Page 22: Scan (Channel Setup)
Installations-Menu Scan (Channel Setup) Channel search: Note: In addition to displaying the reception strength and quality, the receiver also features an audible-signal help function to aid in adjusting the antenna, It can be activated in this menu using the Mute button. You can use the red "Delete TP"... - Page 23 Installations-Menu In this menu you can run the scan. 1) Satellite Scan Press the OK button to display the list of satellites and select the one you want. You can also enter a new satellite here. The "Help" line shows you what to do. A maximum of 16 satellites can be set up.
-
Page 24: Searching For A New Channel Using The Transponder Scan
Installations-Menu Searching for a New Channel using the Transponder Scan 1. Press the "Menu" button on your remote control. 2. Select the "Installation" menu and press "OK" to confirm. 3. Then select the "Scan" menu and again press "OK" to confirm. 4. - Page 25 Installations-Menu 4) Network Search If you set this option to "Yes", the receiver will automatically receive the transponder frequency lists (where available) and add them to the transponder list for the scan. Note: For some satellites this information does not match the actual data, so errors may occur when using this function.
-
Page 26: System Setup
Installations-Menu System Setup Language Settings Access to the language menus: German, French, Italian, Spanish, English, Czech. You can also select your preferred languages for audio and subtitles here. TV Settings Select the video output standard (PAL, NTSC, SECAM, AUTO), screen mode (4:3 or 16:9) and output signal at the TV output: CVBS: FBAS (composite colour) video signal Note: Selection of the screen mode (4:3 or 16:9) always depends on your... -
Page 27: Osd Settings (Menu Display)
Installations-Menu OSD Settings (Menu Display) Select the various display parameters: Time Settings The time and date must be programmed to enable the receiver to display the correct information in information messages and for operation of the timer (as well as on the front panel in Standby mode). The internal clock is set as follows: a) Apply the time transmitted by the satellite (default). -
Page 28: System Information
Installations-Menu Note: It may be that some channels do not transmit the correct GMT time. In this case the receiver will display an incorrect time. To display the previous time, tune in to a different European channel and wait a few minutes for the receiver to display the correct time again. -
Page 29: Parental Control
Installations-Menu Parental Control In this menu you can lock all the menus to prevent incorrect settings from accidentally being made. To activate the parental control you need to lock all the menus. Important: If you change the password, be sure to make a note of it. If you forget your password the unit will require reprogramming at the factory, which is not covered by warranty. -
Page 30: Software Update
If there is a new software release for your DVB-S receiver, you can download it from: http://www.kathrein.de/de/sat/news/update.htm The website also provides information and tips on software updating via the receiver's RS 232 data port. You can order the necessary zero-... -
Page 31: Games
Games Games Games From the main menu, choose "Game" using the buttons and press the OK button. Display: You can then choose one of the two games. Note: After selecting a game, follow the instructions given on-screen. Games are controlled using the buttons as indicated below: Tetris Snake... -
Page 32: Functions And Technical Data
Functions and technical data Functions and technical data • Reception of free-to-air digital satellite TV channels and radio stations • 4,000-channel memory (1,000 pre-programmed) • Suitable for software updates via PC (RS 232) • Automatic transponder and satellite scan • Manual input of PID data possible •... -
Page 33: Technical Data
Functions and technical data Technical Data Type UFE 341/S Order number 20210060 Colour Silver RF range Sat IF frequency range 950-2150 Input level range dbµV 44-83 Reception threshold (EB/NO) ≤ 4.5 TV system Video Modulation, FEC, de-multiplexer DVB-S standard Video resolution CCIR 601 (720 x 576) Decoding MPEG-1 and 2 compatible... -
Page 34: Connection Diagram
Connection Diagram Connection Diagram *) When connecting directly to the vehicle’s electrical system by 12 V cable (supplied), make sure an adequate 3 A current is used! -
Page 35: Your Notes
Your notes Your notes... - Page 36 KATHREIN-Werke KG Phone +49 8031 1840 Fax +49 8031 184306 Anton-Kathrein-Straße 1-3 P.O. Box 10 04 44 83004 Rosenheim...
Need help?
Do you have a question about the UFE 341/S Euroline and is the answer not in the manual?
Questions and answers