Table of Contents
Advertisement
Advertisement
Table of Contents

Subscribe to Our Youtube Channel
Related Manuals for Kathrein UFD 170


Summary of Contents for Kathrein UFD 170
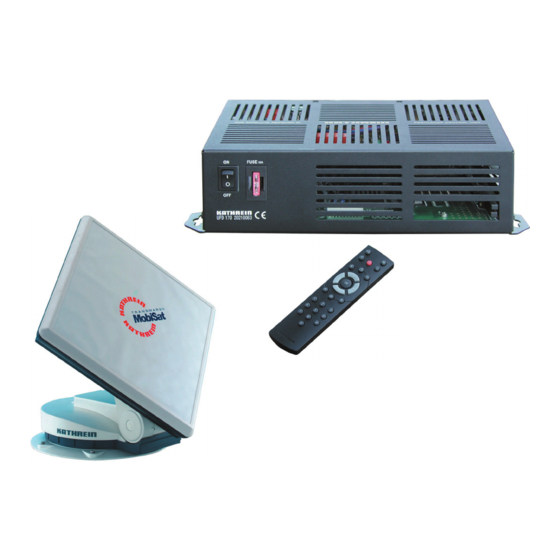
- Page 1 Operating Manual UFD 170 DVB-S Receiver Turntable...
-
Page 3: Foreword
We hope you will have a good reception and gain a lot of enjoyment from your new DVB caravan receiver and automatic positioner. Your KATHREIN Team If you should experience any unexpected problems with your UFD 170/ turntable, please contact your specialist dealer or our hotline: KATHREIN-Werke KG Technical Customer Support... -
Page 4: Table Of Contents
Contents Foreword Contents Safety Instructions and Important Information Connection and Setup Connecting the Unit SAT-IF Connection Reception Requirements Reception System Presets TV Connection Audio Connection Dolby Connection IR Receiver IR Receiver IR Receiver Inserting Batteries in the Remote Control Controls, Displays and Connections Front View Rear View Remote Control Function Keys... - Page 5 Contents EPG Timer Programming Managing Channel List/Channels Selecting the Last Programmes Received Favourite Channel Setting Up a Favourite Channel Renaming the Favourite Lists Selecting a Favourite Channel from a Favourite List Undoing Favourite Selection Channel List Mode (Favourite, Satellite, Alphabetical) Complete Channel List Sorting Channels Deleting Channels...
- Page 6 Contents Alignment (Satellite Search) Manual Correction Change of Location Reset/Park Reset Park Special Messages for Turntable System Protection Messages Satellite Lost / Limit Reached Turntable Unit Software Download Manual Lowering to Park Position Safety Instructions Manual Retraction Service Glossary Brief Technical Glossary...
-
Page 7: Safety Instructions And Important Information
Safety Instructions and Important Information This page contains important information on the operation, installation location and connection of the unit. Read these instructions carefully before setting up the unit. Power supply cable Make sure that the power supply cable is not damaged. Units with a damaged power supply cable must be disconnected from the power supply and repaired by a qualifi... -
Page 8: Connection And Setup
Refer to the information in the “Safety instructions” section. If you will be using the UFD 170 in conjunction with a CAP 210 or CAP 310 from Kathrein, the installation instructions for the relevant CAP unit must be followed during installation. -
Page 9: Tv Connection
IR Receiver Inserting Batteries in the Remote Control Connect the UFD 170 (TV Scart socket) and the TV set with a Scart cable. If your TV has a stereo feature, you can receive the sound in stereo via the Scart connection. -
Page 10: Controls, Displays And Connections
Controls, Displays and Connections Front View Rear View Front View Power switch (ON/OFF) Fuse 2 Common Interface slots for 2 CA modules This section contains a brief description of all controls, displays and connections. Connection for separate infrared receiver Turntable unit SAT-IF signal input Receiver SAT-IF signal input(connected to “5”) RS 232 data interface Turntable unit SAT-IF signal loop... -
Page 11: Remote Control Function Keys
Controls, Displays and Connections Remote Control Function Keys Switching to remote control Select last four programmes Select favourites Programme overview EPG programme guide Locks a channel Programme list Programme information Help (cursor keys) Programme selection Select sub-menus and menu options Mute on/off Numerical input for programmes... -
Page 12: Important Information On The Remote Control
Important information on the remote control Remote control instruction sets Note: You can only operate the UFD 170 using the remote control (RC 400) supplied. Without the remote control, it is not possible to set up or control the receiver and the turntable. -
Page 13: Operating Instructions
Operating Instructions Menu Concept Note: The bar at the lower edge of the screen provides information on each menu option. Language Selection The structure of the menu concept is based on logical operating sequences. In TV mode, the currently selected programme always appears in the upper right-hand corner of the screen (in radio mode, a black background is shown). -
Page 14: Alphanumeric Assignment Of Remote Control Number Keys
Operating Instructions Alphanumeric Assignment of Remote Control Number Keys You use the number keys to enter programme and satellite names. The numbers and letters appear in the name fi elds of the corresponding menus. -
Page 16: Initial Setup
The unit is then in standby mode. Turn on the receiver with the Your UFD 170 welcomes you. The following OSD then appears: The turntable then searches for the factory-preset programme. In this case, this is “Das Erste” on the ASTRA satellite. The following message then appears: ... - Page 17 Initial Setup As soon as the turntable has found the correct satellite, the automatic fi ne-tuning is carried out. The search lasts a maximum of 90 seconds (if the signal level is suffi cient, the satellite position is immediately saved by the turntable). The screen may “freeze” during the fi ne tuning - this is determined by the system.
-
Page 18: Receiver Factory Satellite Setting
Initial Setup This message appears when “HDP mode” is deactivated. Press to switch to the main menu, and then use the keys to call up the “HDP Antenna Se- keys to call up the “HDP Antenna Se- keys to call up the “HDP Antenna Se- ... -
Page 19: On Screen Display (Osd)
On Screen Display (OSD) General Help Function The bar at the lower edge of the screen provides information about each menu option. The receiver functions are controlled by a microprocessor and comprehensive software. The explanations below are intended to help you understand all the processes, and to enable you to locate errors. -
Page 20: Tv / Radio Channel Message
On Screen Display (OSD) TV / Radio Channel Message Channel message Channel message Radio Error Message The channel message is displayed for a few seconds each time you change the programme, or constantly if you press that a channel is being received even if no picture can be seen (e.g. in radio mode). -
Page 21: Video Text
Video Text This symbol in the programme display shows you whether video text is broadcast for the selected programme. When you press the key, the receiver processes the broadcast video text - including for encrypted signals - for your TV set. The following display appears for a short time: During a search, the programme page you are searching for (here P100) is shown in the top left-hand corner and the current time is shown... -
Page 22: Programme Selection
This section explains how to select television and radio programmes on your UFD 170. The description of the functions assumes that the UFD 170 has been connected and turned on properly. Programme selection works in exactly the same way in TV and radio mode. -
Page 23: Tv / Radio Channel List
Programme Selection TV / Radio Channel List An alternative method of selecting a different programme is to press key, which opens the channel list. At the top left is a “+” for the complete list. In the column below it, you will see details of the channel name, the channel number and whether the programme is a favourite, locked or encrypted. -
Page 24: Selecting Tv/Radio Programmes By Number
Programme Selection Selecting TV/Radio Programmes by Number Example: Switching from a TV Programme to a Radio Programme You can select a different programme while a programme is being shown. To enter the programme number, use the number keys You want to select the programme “DSF”... -
Page 25: Common Interface
Store your card and PIN code securely when not in use! The Common Interface (CI) on the UFD 170 is suitable for the use of two CA (Conditional Access) modules. These two CI slots are located to the bottom right of the front of the unit. - Page 26 Common Interface Note: The illustrations below depend on the specifi c module and Smartcard and are therefore only examples. key takes you to the menu generated by the CA module: From this menu, your card and your PIN code allow you to access various programmes from your pay TV provider.
-
Page 27: Information For Conax, Seca, Viaccess And Cryptoworks Users
Common Interface Information for Conax, SECA, Viaccess and CryptoWorks Users Note that with monthly activation intervals, the programme providers have different procedures for activating pay TV cards. Activation may therefore be a few days before or after the beginning of a new month. During this activation period, the CA module and Smartcard must be in the CI slot, and the receiver must be turned on a set to the booked pay TV channel. -
Page 28: Timer Settings
Timer Settings Do not forget the “Status” setting! You can use the timer to ensure that a programme is recorded at the correct time with a video or DVD recorder. A total of 14 timers are provided, which you can set to different programmes or start/end times. -
Page 29: Vps Signal
Timer Settings Note: VPS Signal If you have pre-programmed an On Air Download (software or channel On Air Download ( On Air Download (software or channel list download) using the timer, all subsequent timer settings are ignored after a successful download. Note that most channels do not include a VPS signal in their digital TV signals. -
Page 30: Audio Settings
Stereo and Two-Channel Sound Playback Use the keys on the UFD 170 remote control to set the desired volume on the receiver. A bar is shown, which indicates the set volume: The set sound playback method can be seen from the channel message, which you can view using the alignment of the sound wave symbols). -
Page 31: Turning Off The Sound - Mute
Audio Settings AC 3 Note: Turning Off the Sound - Mute The following audio settings are possible: Soundtrack 1 of 2 Audio mode Stereo Digital output MPEG stereo The receiver has an audio output for AC 3 format (Dolby Digital). This gives you the opportunity to bring cinema quality sound into your living room. -
Page 32: Programme Overview (Epg)
Programme Overview (EPG) EPG (Electronic Programme Guide) The EPG ( ) gives you an overview of the programmes broad- cast on the current transponder you are receiving, including cast on the current transponder you are receiving, including their time and duration. -
Page 33: Epg Timer Programming
Programme Overview (EPG) EPG Timer Programming Within the programme overview, the next programmes on the currently selected channel, with their time and duration (if transmitted in the EPG). The length of the programme list depends on the relevant programme provider and can cover several days. ... -
Page 34: Managing Channel List/Channels
Managing Channel List/Channels Selecting the Last Programmes Received The channel (programme) settings made in the factory can be changed in the “Programme List” menu. The menu is opened using key in TV or radio mode. A channel is selected using key in TV or radio mode. -
Page 35: Favourite Channel
You can save several different channels in a list. The UFD 170 thus allows several family members to save their preferred channels, and to select them conveniently at all times. -
Page 36: Renaming The Favourite Lists
Managing Channel List/Channels Renaming the Favourite Lists You can give the individual favourite lists the names of your choice (e.g. Sport, to group together all channels that broadcast sport). However, you can alternatively use the names of the different users (e.g. -
Page 37: Selecting A Favourite Channel From A Favourite List
Managing Channel List/Channels Selecting a Favourite Channel from a Favourite List Undoing Favourite Selection To select a favourite channel from one of the fi ve favourite lists, you must fi rst press the key (for the channel list) and then mode). -
Page 38: Channel List Mode (Favourite, Satellite, Alphabetical)
Managing Channel List/Channels Channel List Mode (Favourite, Satellite, Alphabetical) To select the channel list mode, press (for the mode). The following screen appears: The channel list mode allows you to determine what you want to see in the channel list. You can choose between: - “Free only”... -
Page 39: Complete Channel List
Managing Channel List/Channels Complete Channel List You do not need to worry about the settings for the “Favourites” and “Alphabetical” options. The complete channel list (maximum variety of programmes) can be viewed using the following setting: Press to switch to the channel list and then press ... -
Page 40: Sorting Channels
Managing Channel List/Channels Sorting Channels Deleting Channels Take care when deleting channels. Deleted channels permanently deleted and can only be retrieved by carrying out a new satellite search. You can sort the channels to meet your own requirements. Sorting involves moving channels in the channel list. ... -
Page 41: Adding Channels Manually
Managing Channel List/Channels Adding Channels Manually Attention: This function is only required for channels that are not broadcast to the DVB standard. All channels that comply with the standard are recognised and saved by the automatic search. Attention: You can only select satellites that are available in the installation menu. -
Page 42: Adding/Deleting Satellites
Setting Up Satellites Note: If the UFD 170 is being operated in conjunction with the Kathrein turntable, nothing may be changed in this list. Changes to this list would result in the assignment being lost and the turntable would not longer be able to fi... -
Page 43: Deleting Satellites
Adding/Deleting Satellites Note: Deleting Satellites You can now make entries corresponding to your receiving system You can now make entries corresponding to your receiving system You can now make entries corresponding to your receiving system in the relevant positions using the cursor keys ( the number keys. -
Page 44: Password And Child Protection
Password and Child Protection Note: Password Factory Setting Setting the Password and Child Protection You can use a password to lock your satellite receiver against unauthorised access by third parties. This protects the receiver against changes to its reception settings by unauthorised persons. At the same time, you can activate a child protection function, which locks selected programmes. -
Page 45: Child Protection (Locking A Channel)
“Alphanumeric Assignment of Remote Control Number Keys” section. The factory setting is “UFD 170”. This completes all the settings to secure and identify your satellite receiver. If you have forgotten your password, you must contact your dealer, who will be able to unlock your receiver for you. - Page 46 Password and Child Protection When a locked channel is selected, the following message appears: This channel can only be viewed after entering the password using the number keys.
-
Page 47: Setting System Parameters
Setting System Parameters Child Protection System Information You should not change the following settings without a good reason, as they are factory settings or operating settings that are tailored to your receiving system. New settings are only required if the receiving system is changed. The selected menus, sub-menus and positions, as well as the parameters to be set, are each highlighted in colour. -
Page 48: Local Time/Timer
Setting System Parameters Local Time/Timer Help for the selected item is available by pressing key. Press the key again to exit the Help menu. need correct the “Summer- time” setting. keys to go to the “day- light savings time”... -
Page 49: Screen
Setting System Parameters Screen A/V Mode Here, you can use the display. - P/S (Pan/Scan) = Full screen for 4:3 sets (caution: margins are cropped!) - Letterbox display - This setting enforces the widescreen format for a 4:3 set ... -
Page 50: Installation Menu
“Installation Menu” and then pressing the If the UFD 170 is being operated in conjunction with the Kathrein turntable, nothing may be changed in the “LNB Confi guration” menu. Changes to these settings would result in the assignment being lost, and the turntable would not longer be able to fi... -
Page 51: Operation
Installation Menu Changing the Oscillator Frequency Operation Standby However, the input frequency range for the receiver is in the range 950 to 1250 MHz. The high frequencies are therefore converted into a lower frequency using the oscillator frequency (LO frequency/L.O. = local oscillator, “LNB local oscillator”). -
Page 52: Diseqc™1 Setting
Installation Menu Note: DiSEqC™1 Setting This setting necessary for caravan operation. DiSEqC™2 Setting This setting necessary for caravan operation. To date, the LNB supply voltage of 14/18 V and the 22 kHz signal (superimposed on the LNB supply voltage) have been suffi cient for signal selection for most applications. -
Page 53: Antenna Setup
Installation Menu Antenna Setup This setting necessary for caravan operation. Operation with antenna rotor / positioner (DiSEqC™1.2) This setting necessary for caravan operation. This menu is exclusively intended for service purposes and be used to align the antenna in an emergency, if no measuring instruments are ... -
Page 54: Satellite Search
Installation Menu Satellite Search Note: In the “Satellite Search” menu, you can set the receiver to search for channels on a satellite of your choice or on all satellites that can be received. In this menu, you can use the individual menu options and make the settings with the ... -
Page 55: Changing/Searching For/Deleting Transponders
Installation Menu Changing/Searching for/Deleting Transponders If you want to change your system over to a new satellite, you must manually enter at least one recognised transponder. The transponder number specifi ed in brackets is an internal reference number for the receiver and has nothing to do with the transponder number of the satellite. -
Page 56: Diseqc Tm [Ufo] Setup
Installation Menu DiSEqC [UFO] Setup Press the key to exit this menu and switch to the channel previously highlighted in colour. key takes you back to this menu, where you can search for additional transponders. After an unsuccessful search, you will see the message “Error”. All new channels are added to the end of the existing channel list. -
Page 57: 22 Khz Signal
Installation Menu 22 kHz Signal Tone Burst and DiSEqC Switching states for setting: 22 kHz Signal -----------> High/Low Tone Burst -----------> Pos. A/B: 22 kHz High 22 kHz Pos. 1 Tone Burst Pos. 2 Tone Burst DiSEqC DiSEqC Repeat You should only make changes in this menu if the receiver is connected to a different receiving system with different properties or if changes have been made to the receiving system. -
Page 58: Ufo ® Mini
The return path of the coaxial cable is used for control and The return path of the coaxial cable is used for control and communication between the receiver and the Kathrein UFO ® system. If the receiver is operated in a UFO ® micro receiving system, system. -
Page 59: Software And Programme List Update
Installation Menu Software and Programme List Update After the “Show Info” request, you will see an information screen, which you can exit using the key. Due to the digital technology, you can carry out updates of the software and programme list for your receiver via satellite. The “Software Download”... - Page 60 You can also download the updates from the Internet. The address is: http://w http://www.kathrein.de First click on “Service” and then on “Software and Download”. Select “Receiver”. The page provides instructions for the procedure.
-
Page 61: Connection Diagram
Connection can be via cinch cable (not included) Supplied with connection already communication between receiver and control unit in UFD 170 Connection via cable for infrared receiver supplied SAT-IF connection option if UFD 170 is intended for stationary use (e.g. in an apartment) required... -
Page 62: Sat-Zf Connection
The coaxial cable coming from the antenna is connected to the SAT-IF input on the UFD 170. The SAT-IF output on the UFD 170 control unit is already connected to the SAT-IF input on the UFD 170 receiver with the coaxial cable supplied. -
Page 63: Important Information On The Turntable Before Setup
UFD 170 and the turntable. All settings on the UFD 170 are made using the remote control. Before setting up your satellite system, make sure that the location allows a free view to the satellite positions to the South and is not shadowed by trees or other obstructions. -
Page 64: Alignment (Satellite Search)
The antenna is aligned automatically. After turning on the UFD 170, the turntable automatically moves to the last channel received and the associated satellite position (e.g. ARD/ASTRA). -
Page 65: Manual Correction
Alignment (Satellite Search) Manual Correction After successful fi ne-tuning, the following message appears for a few seconds: The set position (the satellite found) is saved. At the margins of the footprints of a satellite (e.g. after a slight change of position), it may be necessary for you to manually correct the setting (not normally required). - Page 66 Alignment (Satellite Search) The new co-ordinates are not assigned to the satellite until you have saved the satellite position in the “HDP menu”. After successfully correcting the settings, use the move to “Save” and confi rm with You can use the key to exit the menu.
-
Page 67: Change Of Location
Change of Location For slight changes of location, the antenna can fi nd the satellite very quickly. After a change of location, the antenna moves to the last position selected. After initialisation, you will therefore see the following display (example, as it depends on the position last selected): If no signal is found at the last position, the following message appears: If you still want to aim at the satellite, press... -
Page 68: Reset/Park
”, all satellite positions previously saved ”, all satellite positions previously saved ” UFD 170 control unit are deleted. However, the satellite data in the receiver in the receiver component of the UFD 170 is retained. in the receiver component of the UFD 170 is retained. -
Page 69: Park
Reset/Park Park You have three options for “parking” the antenna. The antenna can be moved to the park position by pressing twice. Press to switch to the main menu and use the keys to select the “HDP Antenna Setup” option. Pressing takes you to the HDP menu, where you can use the keys to go to the “Reset/Park”... -
Page 70: Special Messages For Turntable
You can continue to operate the sytem, but there may be communication errors between the UFD 170 and the turntable (e.g. for satellite search). The antenna should not be moved during recharging, to prevent peak loads when turning on. - Page 71 Special Messages for Turntable Note: If this screen does not appear automatically, you can call it up manually using the key. key. Press to restart the search. If the search is unsuccessful again, e.g. due to very poor weather or because you are in a marginal area, reset the search mode from “Standard”...
-
Page 72: Turntable Unit Software Download
Turntable Unit Software Download If the vehicle is not jacked up during the search process, and people are moving around inside it, the satellite is likely to be not found or the signal is likely to be lost due to the movements of the vehicle. - Page 73 Do not turn off the system during the download. The next message you see will be “HDP Programme Sending”. The software is transferred to the control unit in the UFD 170. For safety reasons, two software versions are saved, so that if one version fails or if there is a download error, an alternative software version will be available for operation of the turntable.
-
Page 74: Manual Lowering To Park Position
Manual Lowering to Park Position Safety Instructions In case of a defect in the electronic control, the fl at antenna can be returned to park position (horizontal position) manually. You can drive to the nearest workshop with the extended anten- na at a moderate speed, but take into account the added vehicle height. -
Page 75: Manual Retraction
Manual Lowering to Park Position Manual Retraction A plastic cover is located in the centre of the axis (see arrow). Lever this off with a narrow slotted screwdriver. Behind the cover is an M8 hexagon head screw. Unscrew it using a socket wrench, size 13 mm. After removing the M8 screw, a further thread can be seen. -
Page 76: Service
Service OSD language: TV type: Picture format: AV mode: Satellite: (High) L.O. 1: 9750 (Low) L.O. 2: 10600 Operation: Standby ™ DiSEqC ™ DiSEqC ™ DiSEqC menu 22 kHz: Tone Burst: ™: DiSEqC ™ DiSEqC repeat: ® mini: ® micro: Additional settings: German _________... -
Page 77: Glossary
Glossary Audio output AV programme slot Azimuth CA module Decoder DiSEqC™ Dolby Digital Eb/No Eb/No ratio Elevation FBAS LED display Mute Oscillator frequency (L.O.) Pay TV PCMCIA Receiver SAT-IF signal Scart cable Standby S-VHS Symbol rate Timer function Transponder VCR Connection Viterbi rate Sound output on the receiver Preferred programme slot on TV set for Scart input... -
Page 78: Brief Technical Glossary
Brief Technical Glossary DiSEqC™ DiSEqC™ components Dolby Digital DVB-MPEG 2 Eb/No ratio DiSEqC™ (Digital Satellite Equipment Control) is a communication system between a satellite receiver (master) and the peripheral satellite components (slaves), such as LNBs, multi-switches, rotating antenna systems. It is a single master/multi-slave system, i.e. there is only ever one master in the satellite system. - Page 79 Brief Technical Glossary Programme package Symbol rate Transponder Video bit rate Viterbi rate The programme package for a digital transponder normally includes several TV and radio programmes. Each programme package has a fi xed assignment for the transponder transmission frequency, for polarisation (horizontal or vertical), for the symbol rate and for the Viterbi rate or error rate.
- Page 80 Internet: http://www.kathrein.de KATHREIN-Werke KG • Anton-Kathrein-Straße 1 - 3 • PO Box 10 04 44 • D-83004 Rosenheim • Germany • Telephone +49 80 31 1 84-0 • Fax +49 80 31 1 84-3 06...
Need help?
Do you have a question about the UFD 170 and is the answer not in the manual?
Questions and answers