Table of Contents
Advertisement
Quick Links
Advertisement
Table of Contents

Related Manuals for Allnet ALL0258


Summary of Contents for Allnet ALL0258
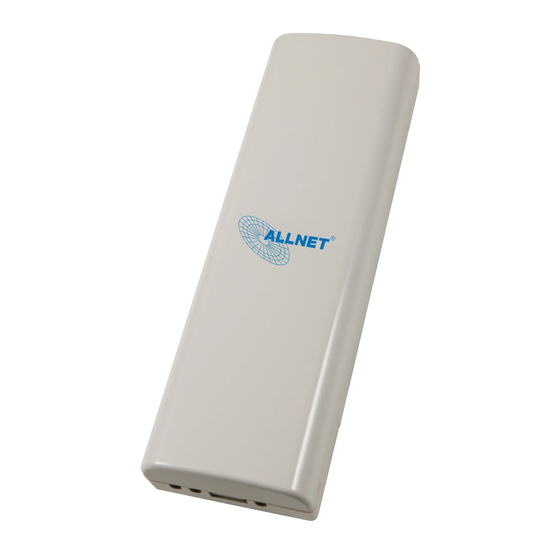
- Page 1 ALL0258 Wireless Outdoor Access Point & Client Bridge User’s Manual V1.0...
-
Page 2: Table Of Contents
...........................27 ETTINGS 4.5.6 .............................27 CLIENT BRIDGE OPERATING MODE..................28 ..........................28 OGGING ............................29 TATUS 5.2.1 ............................29 5.2.2 .........................30 ONNECTION TATUS 5.2.3 ..........................31 YSTEM ............................31 YSTEM 5.3.1 ........................31 YSTEM ROPERTIES 5.3.2 IP S ..........................32 ETTINGS 5.3.3 ......................32 PANNING ETTINGS ALLNET GmbH – www.allnet.de... - Page 3 6.6.3 ............57 ACKUP ESTORE ESET TO FACTORY DEFAULT SETTINGS 6.6.4 ........................58 IRMWARE PGRADE 6.6.5 ...........................59 ETTINGS 6.6.6 .............................60 APPENDIX A – SPECIFICATIONS ......................61 APPENDIX B – FCC INTERFERENCE STATEMENT.................64 APPENDIX C - DECLARATION OF CONFORMITY ................65 ALLNET GmbH – www.allnet.de...
-
Page 4: Introduction
Initial Version 1 Introduction ALL0258 is a long range outdoor wireless Access Point / Client Bridge that operates in both 5GHz and 2.4GHz frequency. It provides high bandwidth up to 54Mbps with Super Mode (SuperA/G) and features high transmitted output power as well as superior sensitivity. -
Page 5: Features
Firmware Upgrade Upgrading firmware via web browser, setting are reserved after upgrade Reset & Backup Reset to factory default. User can export all setting into a file via WEB MIB I, MIB II(RFC1213) SNMP V1, V2c ALLNET GmbH – www.allnet.de... -
Page 6: Package Contents
Open the package carefully, and make sure that none of the items listed below are missing. Do not discard the packing materials, in case of return; the unit must be shipped in its original package. 1* Wireless 802.11a/b/g Outdoor Device(ALL0258) 1* PoE Injector (EPE-1212) 1* Power Adaptor(24V/0.6A) 1* CD with User’s Manual... -
Page 7: Applications
Network managers implement wireless LANs to provide backup for mission-critical applications running on wired networks. h) Training/Educational facilities Training sites at corporations and students at universities use wireless connectivity to ease access to information, information exchanges, and learning. ALLNET GmbH – www.allnet.de... -
Page 8: Understanding The Hardware
2 Understanding the Hardware 2.1 Hardware Installation Place the unit in an appropriate location after conducting a site survey. Plug one end of the Ethernet cable into the Network port of the PoE injector and another end into your PC/Notebook. Plug one end of another Ethernet cable to AP/Bridge port of the PoE injector and the other end into you cable/DSL modem (Internet) Insert the DC-inlet of the power adapter into the 24V port of the PoE injector... -
Page 9: Mounting Kits
TCP/IP settings of your PC/Notebook. 1. In the control panel, double click Network Connections and then double click on the connection of your Network Interface Card (NIC). You will then see the following screen. ALLNET GmbH – www.allnet.de... - Page 10 For Example: PC IP address: 192.168.1.10 PC subnet mask: 255.255.255.0 4. Click on the OK button to close this window, and once again to close LAN properties window. ALLNET GmbH – www.allnet.de...
-
Page 11: Switching Between Operating Modes
After logging in, you will see the graphical user interface of the device. Click on the System Properties link under the System navigation drop- down menu. Select and operating mode from the list (Access Point, Client Bridge, or Client Router) and then click on the Apply button. ALLNET GmbH – www.allnet.de... -
Page 12: Access Point Operating Mode
Status: Displays the overall status, connection status, and event log. System: This menu includes the system properties, IP and Spanning Tree settings. Wireless: This menu includes status, basic, advanced, and security. Management: This menu includes the admin setup, SNMP, firmware upgrade, and save/restore backup. ALLNET GmbH – www.allnet.de... -
Page 13: Status
MAC Address, Wireless MAC Address and Current Time are displayed in the ‘System’ section. LAN IP Address, Subnet Mask, Default Gateway and DHCP Client are displayed in the ‘LAN’ section. In the ‘Wireless section, the frequency, channel is displayed. ALLNET GmbH – www.allnet.de... -
Page 14: Wireless Client List
Click on the Wireless Client List link under the Status drop-down menu. This page displays the list of Clients that are associated to the Access Point. The MAC addresses and signal strength for each client is displayed. Click on the Refresh button to refresh the client list ALLNET GmbH – www.allnet.de... -
Page 15: System Log
This page allows you to switch the operating mode of the device, as well as specify a name and select the operating region. Device Name: Specify a name for the device (this is not the SSID), Country/Region: Select a country from the drop-down list. ALLNET GmbH – www.allnet.de... -
Page 16: Ip Settings
IP Address: Specify an IP address IP Subnet Mask: Specify the subnet mask for the IP address Default Gateway: Specify the IP address of the default gateway. Click on the Apply button to save the changes. ALLNET GmbH – www.allnet.de... -
Page 17: Spanning Tree Settings
Click on the Apply button to save the changes. Wireless Click on the Wireless link on the navigation drop-down menu. You will then see four options: wireless network, wireless MAC filter, WDS link settings, and wireless advanced settings. Each option is described below. ALLNET GmbH – www.allnet.de... -
Page 18: Wireless Network
200%. Please be aware that Turbo Mode works only with other Turbo Mode supported devices. Channel: Select a channel from the drop-down list. The channels available are based on the country’s regulation. ALLNET GmbH – www.allnet.de... -
Page 19: Wireless Security - Wep
Default Key: You may use up to four different keys for four different networks. Select the current key that will be used. Key 1-4: You may enter four different WEP keys. Click on the Apply button to save the changes. ALLNET GmbH – www.allnet.de... -
Page 20: Wireless Security - Wpa-Psk, Wpa2-Psk, Wpa-Mixed
Passphrase: Specify a passphrase that is shared amongst the Access Points and clients. Group Key Update Interval: Specify the number of seconds after which the Access Point will probe the client for the passphrase. Click on the Apply button to save the changes. ALLNET GmbH – www.allnet.de... -
Page 21: Wireless Security - Wpa, Wpa2
RADIUS Secret: Enter the shared password of the RADIUS server. Group Key Update Interval: Specify the number of seconds after which the Access Point will probe the client for the secret. Click on the Apply button to save the changes. ALLNET GmbH – www.allnet.de... -
Page 22: Wireless Mac Filter
This table lists the blocked or allowed MAC addresses; you may delete selected MAC address or delete all the addresses from the table by clicking on the Delete button. Click on the Apply button to save the changes. ALLNET GmbH – www.allnet.de... -
Page 23: Wireless Advanced Settings
802.g devices then it is recommended to enable this feature so that the 802.11b devices will not degrade the performance of 802.11g devices. WMM: Enable wireless Quality of Service Distance (1-30km): Specify a distance between 1 and 30Km. Click on the Apply button to save the changes. ALLNET GmbH – www.allnet.de... -
Page 24: Management
SNMP allows messages (called protocol data units) to be sent to various parts of a network. Upon receiving these messages, SNMP-compatible devices (called agents) return data stored in their Management Information Bases. . ALLNET GmbH – www.allnet.de... -
Page 25: Backup/Restore, Reset To Factory Default Settings
This option is used to save the current settings of the device in a file on your local disk or load settings on to the device from a local disk. This feature is very handy for administrators who have several devices that need to be configured with the same settings. ALLNET GmbH – www.allnet.de... -
Page 26: Firmware Upgrade
Note: The upgrade process may take about 1 minute to complete. Do not power off the device during this process as it may crash the device and make it unusable. The device will restart automatically once the upgrade is complete. ALLNET GmbH – www.allnet.de... -
Page 27: Time Settings
Ethernet and Wireless interface. This log can be referred when an unknown error occurs on the system or when a report needs to be sent to the technical support department for debugging purposes. ALLNET GmbH – www.allnet.de... -
Page 28: Client Bridge Operating Mode
Status: Displays the overall status, connection status, and event log. System: This menu includes the system properties, IP and Spanning Tree settings. Wireless: This menu includes status, basic, advanced, and security. Management: This menu includes the admin setup, SNMP, firmware upgrade, and save/restore backup. ALLNET GmbH – www.allnet.de... -
Page 29: Status
MAC Address, Wireless MAC Address and Current Time are displayed in the ‘System’ section. LAN IP Address, Subnet Mask, Default Gateway and DHCP Client are displayed in the ‘LAN’ section. In the ‘Wireless section, the frequency, channel is displayed. ALLNET GmbH – www.allnet.de... -
Page 30: Connection Status
Click on the Connection Status link under the Status drop-down menu. This page displays the current status of the network, including network type, SSID, BSSID, connection status, wireless mode, current channel, security, data rate, noise level and signal strength. ALLNET GmbH – www.allnet.de... -
Page 31: System Log
5.3.1 System Properties Click on the System Properties link under the System drop-down menu. This page allows you to switch the operating mode of the device, as well as specify a name and select the operating region. ALLNET GmbH – www.allnet.de... -
Page 32: Ip Settings
Click on the Apply button to save the changes. 5.3.3 Spanning Tree Settings Click on the Spanning Tree link under the System drop-down menu Spanning-Tree Protocol is a link management protocol that provides path redundancy while preventing undesirable loops in the network. ALLNET GmbH – www.allnet.de... -
Page 33: Wireless
Click on the Apply button to save the changes. 5.4 Wireless Click on the Wireless link on the navigation drop-down menu. You will then see three options: wireless network, wireless security, and wireless advanced settings. Each option is described below. ALLNET GmbH – www.allnet.de... -
Page 34: Wireless Network
Site Survey: Click on the Site Survey button in order to scan the 2.4GHz frequency for devices that broadcast their SSID. Click on the BSSID link to connect to the Access Point. Click on the Refresh button to re-scan the frequency. ALLNET GmbH – www.allnet.de... -
Page 35: Wireless Security
Key Length: Select a key format from the drop-down list. 64bit-hex keys require 10 characters, where as 128-bit keys require 26 characters. A hex key is defined as a number between 0 through 9 and letter between A through F. ALLNET GmbH – www.allnet.de... -
Page 36: Wireless Security - Wpa-Psk, Wpa2-Psk
Click on the Wireless Advanced Settings link. On this page you can configure the advanced settings to tweak the performance of your wireless network. Options available are: data rate, transmit power, fragmentation threshold, RTS threshold, protection mode and distance. ALLNET GmbH – www.allnet.de... -
Page 37: Management
Click on the Apply button to save the changes. 5.5 Management Click on the Management link on the navigation drop-down menu. You will then see six options: administration, SNMP settings, backup/restore settings, firmware upgrade, time settings, and log. Each option is described below. ALLNET GmbH – www.allnet.de... -
Page 38: Administration
SNMP allows messages (called protocol data units) to be sent to various parts of a network. Upon receiving these messages, SNMP-compatible devices (called agents) return data stored in their Management Information Bases. . ALLNET GmbH – www.allnet.de... -
Page 39: Backup/Restore, Reset To Factory Default Settings
Revert to factory default settings: Click on the Factory Default Settings button to reset the device to the default settings. Please wait while the device restart and then access the device using the default IP address: 192.168.1.1 ALLNET GmbH – www.allnet.de... -
Page 40: Firmware Upgrade
5.5.5 Time Settings Click on the Time Settings link under the Management menu. This page allows you to configure the time on the device. You may do this manually or by connecting to a NTP server. ALLNET GmbH – www.allnet.de... -
Page 41: Log
Log Server IP Address: Specify the IP address of the server that will receive the system log. Local Log: Choose to enable or disable the local log. Click on the Apply button to save the changes. ALLNET GmbH – www.allnet.de... -
Page 42: Client Router Operating Mode
6 Client Router Operating Mode 6.1 Logging In To configure the device through the web-browser, enter the IP address of the device (default: 192.168.1.1) into the address bar of the web-browser and press Enter. Make sure that the device and your computers are configured on the same subnet. -
Page 43: Status
DHCP Server are displayed in the ‘LAN’ section. In the ‘Wireless section, Operation Mode, Wireless Mode, SSID, Security, Channel are displayed. The ‘WAN” section displays the MAC address, Connection Type, Interface, IP Address, and Subnet Mask. ALLNET GmbH – www.allnet.de... -
Page 44: Dhcp Client Table
Click on the Connection Status link under the Status drop-down menu. This page displays the current status of the network, including network type, SSID, BSSID, connection status, wireless mode, current channel, security, data rate, noise level and signal strength. ALLNET GmbH – www.allnet.de... -
Page 45: System Log
(records) events of possible interest in its internal memory. If there is not enough internal memory for all events, logs of older events are deleted, but logs of the latest events are retained. ALLNET GmbH – www.allnet.de... -
Page 46: System
Click on the Apply button to save the changes. 6.4 Router Click on the Router link on the navigation drop-down menu. You will then see three options: WAN settings, LAN settings, and VPN Pass Through. Each section is described in detail below. ALLNET GmbH – www.allnet.de... -
Page 47: Wan Settings
1492 bytes for a PPPoE connection. If the router's MTU is set too high, packets will be fragmented downstream. If the router's MTU is set too low, the router will fragment packets unnecessarily and in ALLNET GmbH – www.allnet.de... -
Page 48: Wan - Static Ip
ISP provides you with a dedicated IP address (which does not change as DHCP). Internet Connection Type: Select the Static IP from the drop-down list. Account Name: Specify an account name if your ISP has provided you with one. ALLNET GmbH – www.allnet.de... -
Page 49: Wan - Pppoe
Click on the Apply button to save the changes. 6.4.1.3 WAN – PPPoE The WAN interface can be configured as PPPoE. This type of connection is usually used for a DSL service and requires a username and password to connect. ALLNET GmbH – www.allnet.de... - Page 50 Domain Name Service: Select Get Automatically from ISP if the ISP will provide the DNS address, if not, select Use these DNS servers and specify the primary and secondary DNS server IP address. Click on the Apply button to save the changes. ALLNET GmbH – www.allnet.de...
-
Page 51: Lan Setting
IPSec Pass Through: Place a check in this box if you would like to enable this pass through. IPSec is a VPN protocol used to implement secure exchange of packets at the IP layer. Click on the Apply button to save the changes. ALLNET GmbH – www.allnet.de... -
Page 52: Wireless
Site Survey: Click on the Site Survey button in order to scan the 2.4GHz frequency for devices that broadcast their SSID. Click on the BSSID link to connect to the Access Point. Click on the Refresh button to re-scan the frequency. ALLNET GmbH – www.allnet.de... -
Page 53: Wireless Security
MAC address filter policies that may have been set. All authentication packets are transmitted without encryption. Shared Key sends an unencrypted challenge text string to any device attempting to communicate with the Access Point. The device ALLNET GmbH – www.allnet.de... -
Page 54: Wireless Security - Wpa-Psk, Wpa2-Psk
Passphrase: Specify a passphrase that is shared amongst the Access Points and clients. Click on the Apply button to save the changes. ALLNET GmbH – www.allnet.de... -
Page 55: Wireless Advanced Settings
802.g devices then it is recommended to enable this feature so that the 802.11b devices will not degrade the performance of 802.11g devices. WMM: Enable wireless Quality of Service Distance (1-30km): Specify a distance between 1 and 30Km. Click on the Apply button to save the changes. ALLNET GmbH – www.allnet.de... -
Page 56: Management
Remote Management Port: Specify a port for remote management. For example, if you specify 8080, then you will need to specify <IP address>:<port> 192.168.1.1:8080 to connect to the web interface of the device. Click on the Apply button to save the changes. ALLNET GmbH – www.allnet.de... -
Page 57: Snmp Settings
This option is used to save the current settings of the device in a file on your local disk or load settings on to the device from a local disk. This feature is very handy for administrators who have several devices that need to be configured with the same settings. ALLNET GmbH – www.allnet.de... -
Page 58: Firmware Upgrade
IP address: 192.168.1.1 6.6.4 Firmware Upgrade Click on the Upgrade Firmware link under the Management menu. This page is used to upgrade the firmware on the device. Make sure that downloaded the appropriate firmware from your vendor. ALLNET GmbH – www.allnet.de... -
Page 59: Time Settings
Manually Set Date and Time: Specify the date and time Automatically Get Date and Time: Select the time zone from the drop down list and then specify the IP address of the NTP server. Click on the Apply button to save the changes. ALLNET GmbH – www.allnet.de... -
Page 60: Log
Log Server IP Address: Specify the IP address of the server that will receive the system log. Local Log: Choose to enable or disable the local log. Click on the Apply button to save the changes. ALLNET GmbH – www.allnet.de... -
Page 61: Appendix A - Specifications
-93 dBm @ -88dBm @ 6Mbps, -92 dBm @ 6Mbps, 1Mbps -70dBm @ 54Mbps -75 dBm @ 54Mbp -91 dBm @ 11Mbps Available transmit power (Average power) ETSI Frequency Power Frequency Power 5.150~5.350 5.150~5.350 28dBm@6~24Mbps 28dBm@6~24Mbp 26dBm@36Mbps ALLNET GmbH – www.allnet.de... - Page 62 Multi-Function Gigabit Wireless-N Client Bridge Version 1.0 IEEE802.11a IEEE802.11a 24dBm@48Mbps 26dBm@36Mbps 22dBm@54Mbps 24dBm@48Mbps 22dBm@54Mbp 28dBm@6~24Mbp 28dBm@6~24Mbps 5.470~5.725 5.470~5.725 26dBm@36Mbps 26dBm@36Mbps 24dBm@48Mbps IEEE802.11a IEEE802.11a 24dBm@48Mbps 22dBm@54Mbps 22dBm@54Mbps 28dBm@6~24Mbp 28dBm@6~24Mbps 5.725~5.825 5.725~5.825 26dBm@36Mbps 26dBm@36Mbps 24dBm@48Mbps IEEE802.11a IEEE802.11a 24dBm@48Mbps 22dBm@54Mbps 22dBm@54Mbps 28dBm@6~24Mbp 2.412~2.462 28dBm@6~24Mbps 2.412~2.472 26dBm@36Mbps...
- Page 63 Multi-Function Gigabit Wireless-N Client Bridge Version 1.0 Wireless Channel Selection (Setting varies by countries) Transmission Rate 11 a/b/g:54, 48, 36, 24, 18, 12, 11, 9, 6, 5.5, 2, 1 Mbps Super Mode : 108 Mbps Long distance transmission : 1km to 30km (Ack timeout) Transmit power table Signal Strength indication using LEDs PPPoE(CR mode)
-
Page 64: Appendix B - Fcc Interference Statement
Multi-Function Gigabit Wireless-N Client Bridge Version 1.0 Appendix B – FCC Interference Statement Federal Communication Commission Interference Statement This equipment has been tested and found to comply with the limits for a Class B digital device, pursuant to Part 15 of the FCC Rules. These limits are designed to provide reasonable protection against harmful interference in a residential installation. -
Page 65: Appendix C - Declaration Of Conformity
The conformity to the above directive is indicated by the CE sign on the device. The ALLNET ALL0258 Wireless Outdoor Access Point & Client Bridge conforms to the Council Directive of 2006/95/EC. This equipment meets the following conformance standards:...
Need help?
Do you have a question about the ALL0258 and is the answer not in the manual?
Questions and answers