Table of Contents
Advertisement
Quick Links
Download this manual
See also:
Using Manual
Advertisement
Table of Contents

Related Manuals for Elektron MonoMachine SFX-6


Summary of Contents for Elektron MonoMachine SFX-6
-
Page 2: Limited Warranty
Limited warranty Elektron synthesizers are sold with one year full warranty.This warranty covers all malfunctions that may occur from normal use. Damage caused by careless handling (improper voltage connected, exposure to damp, abuse etc.) is not covered. The unit can only be returned for repair after agreement from Elektron. Customer covers cost of shipping of malfunctioning unit from customer to Elektron. -
Page 3: Table Of Contents
INTRODUCTION......................1-1 CONVENTIONS IN THIS MANUAL..................... 1-1 THE PHILOSOPHY OF THE MONOMACHINE ............1-2 KEEP IN MIND ............................ 1-2 HIGHLIGHTS ............................1-2 USER INTERFACE AND CONNECTORS..............1-3 FRONT / MAIN CONTROL PANEL ..................... 1-3 KEYBOARD INTERFACE, SFX-6......................1-5 REAR CONNECTORS ........................1-6 ADDITIONAL REAR CONNECTORS, SFX-6..................1-7 RACK MOUNT KIT (SFX-60MKII ACCESSORY)................ - Page 4 AMPLIFIER ENVELOPE....................... 1-25 DISTORTION..........................1-26 TRACK VOLUME.......................... 1-27 PAN............................... 1-28 PORTAMENTO ..........................1-28 FILTER PAGE ............................ 1-28 BASIC FILTER CONTROLS ......................1-29 FILTER ENVELOPE ........................1-30 FILTER TRACKING ........................1-30 EFFECTS PAGE ..........................1-31 EQ..............................1-31 SAMPLE RATE REDUCTION....................... 1-31 DELAY ............................
- Page 5 TRIGLESS TRIGS ........................1-58 PITCHLESS TRIGS........................1-58 ADDITIONAL SEQUENCER FEATURES ..............1-60 THE ARPEGGIATOR......................... 1-60 ARPEGGIATOR BASIC SETTINGS ..................... 1-60 ARPEGGIATOR ENVELOPE TRIGGING SWITCHES..............1-61 ARPEGGIATOR RHYTHM AND OFFSET TRACK ..............1-62 TRANSPOSE............................. 1-62 SWING............................... 1-63 THE SWING TRACK ........................1-64 SLIDE ..............................
- Page 6 SYSEX RECEIVE ......................... 1-94 DIGIPRO MANAGER (MONOMACHINE SFX-60 MKII ONLY) ............1-96 RECEIVE WAVEFORMS ......................1-97 SEND WAVEFORMS........................1-99 ERASE WAVEFORMS........................ 1-100 RENAME WAVEFORMS ......................1-101 MIDI SEQ ............................1-102 MIDI SEQ SETTINGS ........................1-102 EARLY STARTUP MENU ..................1-103 TEST MODE ............................
- Page 7 VO-6 ..............................A-8 VO-6 TUTORIAL..........................A-9 GND MACHINES ....................... A-10 GROUND “GND” ..........................A-10 SINE WAVE “SIN” ..........................A-10 NOISE “NOIS” ...........................A-10 FX MACHINES......................A-11 THRU ..............................A-11 REVERB ............................A-11 CHORUS ............................A-12 DYNAMIX ............................A-12 DYNAMIX TUTORIAL........................A-13 RING MODULATOR ..........................A-13 APPENDIX B: MIDI CONTROL REFERENCE MONOMACHINE MIDI SPECIFICATION ..................B-1 NOTE ON &...
-
Page 9: Introduction
This symbol is used to caution you to protect your hearing (once). Monomachine SFX-6/SFX-60/SFX-60MKII USER’S MANUAL for operating system version 1.21. This manual (rev E) is copyright © 2001-2009 Elektron Music Machines MAV AB. All reproduction without written authorization is strictly prohibited. -
Page 10: The Philosophy Of The Monomachine
THE PHILOSOPHY OF THE MONOMACHINE THE PHILOSOPHY OF THE MONOMACHINE Synthesizers are available in many different types and forms. Nevertheless, for most part they follow the norm how a synthesizer of its era is expected to be. Development for musi- cal tools generally comes in the form of new synthesis techniques or an increase in polyph- ony, memory or other quantitative elements. -
Page 11: User Interface And Connectors
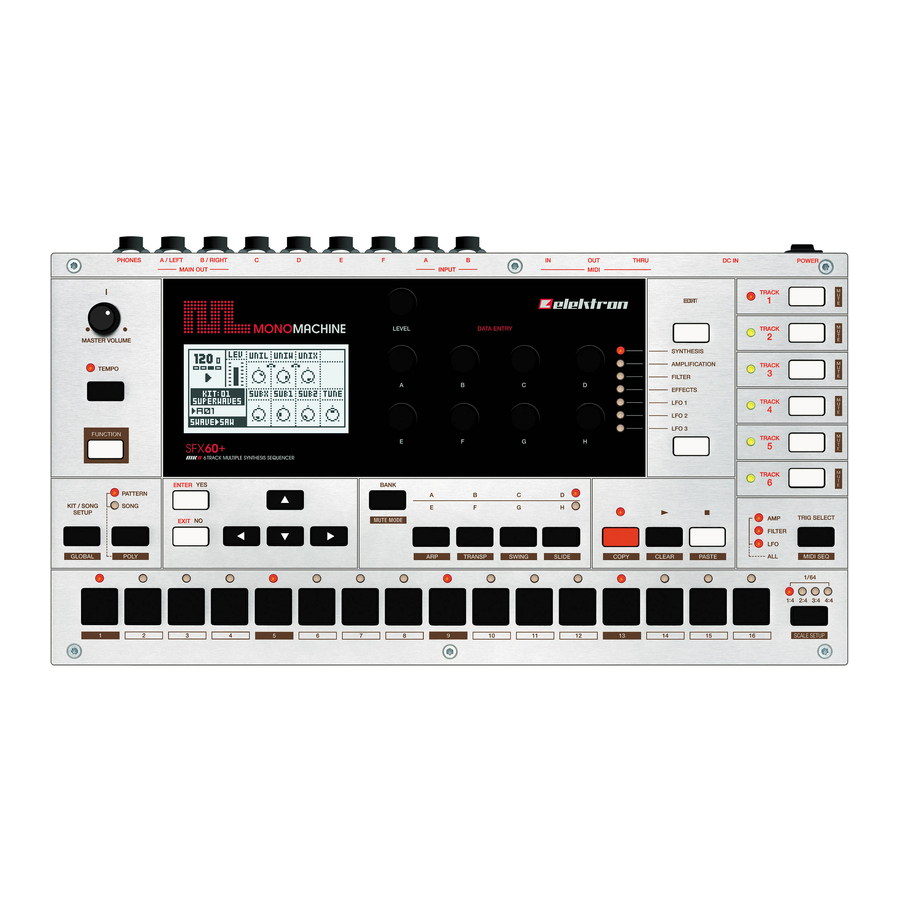
USER INTERFACE AND CONNECTORS USER INTERFACE AND CONNECTORS FRONT / MAIN CONTROL PANEL The Monomachine SFX-60 MKII front panel / SFX-6 main control panel: Master volume control. Sets the volume for the main output and the headphone jack. The LCD graphical interface display. LEVEL knob. - Page 12 USER INTERFACE AND CONNECTORS [TRIG] keys 1 to 16. Main functions of these keys are as keyboard for trigging notes, and for editing notes in GRID RECORDING mode. They are also used for choosing pat- terns, if pressed while holding one of the [BANK] keys. When functioning as a keyboard, the notes are played with velocity 80.
-
Page 13: Keyboard Interface, Sfx-6
USER INTERFACE AND CONNECTORS KEYBOARD INTERFACE, SFX-6 Joystick, for real-time expression control. The joystick can individually control parame- ters for all tracks. Keyboard, for real-time playing and for use in the GRID RECORDING and LIVE RECORDING modes. [MULTI TRIG] key, used for toggling the MULTI TRIG mode. The current state of the MULTI TRIG mode is being indicated by the <MULTI TRIG>... -
Page 14: Rear Connectors
USER INTERFACE AND CONNECTORS REAR CONNECTORS Power On/Off switch. Power in. • Caution! Use only an Elektron-approved power supply with your Monomachine SFX-60 MKII. It allows the unit to be used all over the globe without the need of voltage converters. If you need a new power supply the specifications are 6VDC, 3A, 5.5x2.5mm (2.5mm inner diameter) DC power plug (power at center), ungrounded 2 prong inlet (IEC320-C8). -
Page 15: Additional Rear Connectors, Sfx-6
ADDITIONAL REAR CONNECTORS, SFX-6 AC 115/230V 50/60Hz Input with integrated fuse holder and spare fuse storage. Caution! Although the Monomachine SFX-6 can accept both 115 and 230 Volts • main current, both the voltage selector and the fuse need to be matched to the voltage. -
Page 16: Care Instructions
USER INTERFACE AND CONNECTORS Switch all units on. If you do not have any previous experience of the Monomachine we suggest that you fol- low the “QUICK START” on page 10. CARE INSTRUCTIONS To ensure many years of trouble free operation, please follow the advice below: •... -
Page 17: The Lcd User Interface
THE LCD USER INTERFACE THE LCD USER INTERFACE The center of the Monomachine SFX-6/SFX-60MKII editing is the LCD graphical interface display. The interface screen for the SYNTHESIS page is printed below: The current tempo. This will show “EXT” when synced to external tempo. -
Page 18: Quick Start
+1/-1. When pressed, the step length is higher, allowing quicker adjustments. This guide assumes you have a Monomachine SFX-6 Keyboard or SFX-60MKII tabletop module with a MIDI keyboard connected. If you have a SFX-60MKII you need to take care to set the midi keyboard to play on the correct MIDI channel. -
Page 19: Playing In Multi Trig Mode
QUICK START PLAYING IN MULTI TRIG MODE Select a pattern, ranging from A01-D16. All the Monomachine presets are located in this range. Make sure the sequencer is stopped. Enter MULTI TRIG mode. On SFX-6 press the [MULTI TRIG] key and check that the <MULTI TRIG>... -
Page 20: Overview Of Live Recording Mode
QUICK START Choose to active a track using the [TRACK] keys. Below is a screen shot of how the SYNTHESIS page could look like after selecting a track. Press a [TRIG] key to add a note trig. A note trig is indicated by a red <TRIG> LED. Pressing the same [TRIG] key once more removes the note trig. - Page 21 QUICK START In LIVE RECORDING mode, you can lock parameters by turning a knob while recording. Parameters can be locked for any parameter and track. To lock parameters for a new track, select that track with the [TRACK] button and repeat the steps above. To remove a single lock in GRID RECORDING mode, press and hold the [TRIG] key and click the knob connected to the parameter you wish to remove.
-
Page 22: Monomachine Overview
MONOMACHINE OVERVIEW MONOMACHINE OVERVIEW The sound generating structure of the Monomachine differs in many ways from what is common for contemporary sound synthesizers and sequencers. The SFX-6/SFX-60MKII offers six tracks of audio synthesis/FX, effects and sequencing. All six tracks can be equipped with a sound generating or sound effecting machine of your choice, Track Effect engine including amplifier envelope, LP/BP/HP filter, synchronised tape-style delay, three LFO’s and the most refined step sequencer. - Page 23 MONOMACHINE OVERVIEW FIGURE 1. Monomachine sound synthesis overview...
-
Page 24: Monomachine Synthesis Arrangement
MONOMACHINE SYNTHESIS ARRANGEMENT MONOMACHINE SYNTHESIS ARRANGEMENT The basic sound generating unit in the Monomachine is called a machine. Each machine is designed for generating sounds from a specific technique or method, such as analogue style pulse, SID MOS 6581 or dynamic FM. The sound generating machines allow you to get many different starting points with varied sound characteristics. -
Page 25: Monomachine Kits
MONOMACHINE SYNTHESIS ARRANGEMENT MONOMACHINE KITS The Monomachine does not arrange sounds in what is commonly referred to as “patches”. The Monomachine equivalence of a “patch” depends on which way you are using it. • If you use the six tracks as individual synthesizers, or in POLY mode, then you could see a kit as carrying six “patches”. -
Page 26: Loading A Kit
MONOMACHINE SYNTHESIS ARRANGEMENT LOADING A KIT Open the KIT window by pressing the [KIT] key and select the LOAD icon using the [ARROW] keys. Press [ENTER/YES] to open the LOAD KIT window. The window presents a list of the kits stored in memory. Use the [UP] and [DOWN] keys to choose among the 128 kit slots. -
Page 27: Undo Kit
MONOMACHINE SYNTHESIS ARRANGEMENT Use the arrow keys to move to the “SAVE” icon. Press [ENTER/YES] to open the KIT SAVE menu. The screen presents a list of the kits stored in memory. Use the [UP] and [DOWN] keys to choose from the 128 kit slots. Press [ENTER/YES] to select the slot where you want to save your kit. -
Page 28: Copy Kit
MONOMACHINE SYNTHESIS ARRANGEMENT You can load the “UNDO KIT” to restore your most recent unintentionally lost kit. This can be useful when accidentally changing pattern and the kit is changed so that your unsaved changes are lost. When you have restored your kit using the undo kit, don’t forget to save COPY KIT When in the KIT SAVE or KIT LOAD menus you can copy and paste kits. -
Page 29: Kit Editing
MONOMACHINE SYNTHESIS ARRANGEMENT • It is also possible to undo this operation. To undo the action, hold the function [FUNCTION] button and press the [PLAY] button. The message saying “UNDO KIT” indicates that the clear operation has been undone. KIT EDITING You can either create your kit from scratch, or modify an existing one and then save it to a new position. -
Page 30: Copy Machine
MONOMACHINE SYNTHESIS ARRANGEMENT Press [RIGHT] once to move the focus to the MACHINE column. Select the machine using [UP] and [DOWN]. Finally you need to press the [ENTER/YES] key to confirm your selection. The Mono-synth and the machine currently assigned to the track are indicated by •... -
Page 31: Clear Machine
MONOMACHINE SYNTHESIS ARRANGEMENT • Once the machine is copied into the copy buffer, it can be pasted many times to several tracks or kits. It will stay in the buffer until it is replaced by a new one. See section “SUPER COPY”, on page 53 for a variant of the copy operation. •... -
Page 32: Parameter Editing
MONOMACHINE SYNTHESIS ARRANGEMENT PARAMETER EDITING Each Monomachine track offers up to 56 parameters for the sound generation and effects. They are divided into seven pages with at most eight parameters in each. The sound generating machines form their sound from one page of up to eight parameters, called the SYNTHESIS parameters. -
Page 33: Track Effects
TRACK EFFECTS TRACK EFFECTS The track effects are independent effects systems, available to the six tracks as extensions to the machine synthesis. This chapter is a reference to all the functions you will find on the AMPLIFICATION, EFFECT and FILTER pages. The stereo track effects are applied to the sound signal as described in the figure below: LEVEL This parameter is available from all DATA pages. -
Page 34: Distortion
TRACK EFFECTS AMP-trig can be controlled individually from the sequencer, see section “TRIG TRACKS”, on page 57 for more information. ATK (attack). This parameter controls how long time the envelope takes to reach full level. HOLD (hold) specifies the amount of time the signal is held at full level. DEC (decay) dictates the amount of time it takes for the audio signal to completely fade out after the HOLD phase has been passed. -
Page 35: Track Volume
TRACK EFFECTS audio level decline, and if the audio level would decrease when Q is raised, it would feel like a loss of bass and a weaker sound. Always leaving full headroom would result in decreased signal quality, with increased noise. Therefore we allow you to adjust the distortion to allow for the headroom your sound needs. -
Page 36: Pan
TRACK EFFECTS Here the panning for the stereo output is controlled. It operates in stereo when needed (balance), for example when effecting FX Machines. The default value is center. PAN (pan) positions the sound in the stereo field. A value of -64 will pan the sound hard left, a value of + 63 will pan the sound hard right. -
Page 37: Basic Filter Controls
TRACK EFFECTS BASIC FILTER CONTROLS The track effect system offers a resonant 24dB low/high/band-pass filter. The parameters are untraditional, giving the user control of both the low and high filter cut-offs, as well as a variable gap band-pass filter. BASE (filter base) controls the base filter cut-off frequency. When WDTH is set to its max- imal value, the BASE parameter functions as the cut off parameter of a high-pass filter. -
Page 38: Filter Envelope
TRACK EFFECTS FILTER ENVELOPE The filter envelope is trigged every time a FILTER-trig is received. This normally happens when a key on the keyboard or one of the [TRIG] keys has been pressed, or played from the sequencer or received over MIDI. The FILTER-trig can be controlled individually from the sequencer, see section “TRIG TRACKS”, on page 57 for more information. -
Page 39: Effects Page
TRACK EFFECTS EFFECTS PAGE In the EFFECTS page you find the controls for the 1-band EQ, sample rate reduction, and the tempo-synchronised tape-style delay. Using the 1-band parametric EQ, you can boost or reduce a certain frequency band. EQF (EQ frequency) sets the frequency that will be affected by the EQG parameter. EQG (EQ gain) parameter controls how much the EQ will boost (gain) or reduce the signal around the EQF frequency. -
Page 40: Delay
TRACK EFFECTS DELAY The delay of the Monomachine is a single tap delay with real-time adjustable delay time. Some of its functionality can resemble tape loops and solid state CCD delays. The delay time is always synchronised to the global tempo setting. DSND (delay send) controls the level of sound that will be sent to the delay loop. - Page 41 TRACK EFFECTS FIGURE 5. The function of the delay DELAY SEND LEVEL: DSND=DELAY SEND DELAY FEEDBACK: DELAY FILTER: DBAS=FILTER BASE DFB=DELAY FEEDBACK DWID=FILTER WIDTH • For using the delay for delay-line style sound sculpturing, try setting DTIM very low together with a DFB value above 32. Then play around with the delay filter set- tings.
-
Page 42: Low Frequency Oscillators
LOW FREQUENCY OSCILLATORS LOW FREQUENCY OSCILLATORS Each of the 6 tracks in the Monomachine offers 3 interlaced low frequency oscillators (LFO’s), which can be used to modulate any track parameter. A typical application of an LFO is to let it sweep a filter cut-off frequency. The 18 interlaced LFO’s offer 11 waveforms and 5 trig modes. - Page 43 LOW FREQUENCY OSCILLATORS SPD (speed) is a linear controller that sets a base speed that is multiplied with the MULT parameter, always in relation to the master tempo. The use of both a speed controller and a multiplier allows a very wide range of speeds, but still provides a high degree of control. To get the finest resolution keep the MULT parameter set as low as possible.
- Page 44 LOW FREQUENCY OSCILLATORS • If you select the same destination for two different LFO tracks their outputs will be added, making advanced layered LFO’s possible. You can create complex modulations by letting an LFO control a parameter of • another one. In the Monomachine you can sequence LFO-trig separately from other trigs.
-
Page 45: Additional Kit Settings
ADDITIONAL KIT SETTINGS ADDITIONAL KIT SETTINGS This chapter deals with all kit settings not covered in the previous chapters. ASSIGN This menu allows the joystick, note velocity and note position tracking to be assigned to up to two parameters of choice. This can allow for a lot of dynamic depth of the sound with lit- tle effort. -
Page 46: Joystick
ADDITIONAL KIT SETTINGS The copy, clear, paste and undo commands are available in the ASSIGN menu. • Press [FUNCTION] + [REC], [PLAY] and [STOP] to conduct these operations. All tabs are copied as a whole, for easy transformation to other tracks or kits. JOYSTICK The first two to four tabs contain the parameters for the joystick. -
Page 47: Key Tracking
ADDITIONAL KIT SETTINGS KEY TRACKING The Key Tracking is connected to the note index from the last key pressed. For example, if C-1 was pressed, the key tracking value will be low, and if C-8 was pressed it would reach almost its maximum value. -
Page 48: Multi Trig
ADDITIONAL KIT SETTINGS PORTAMENTO (portamento has two options. ALWAYS means the portamento will always be active, gliding between all notes played. ONLY LEGATO makes the portamento active only when playing overlapped so called legato notes. LEGATO TRIG MODES The three parameters at the bottom of the window control which of the AMP, FILTER and LFO trigs will be active for notes played legato. - Page 49 ADDITIONAL KIT SETTINGS ALL TRK (all track) makes the multi trig channel control all six tracks at once. Note events received on the multi trig channel will be distributed to all six tracks for parallel mono operation. The joystick controllers, velocity and key tracking will control all tracks simultaneously, as assigned in the Assign window (see page 37).
-
Page 50: Multi Env
ADDITIONAL KIT SETTINGS SEQ TRNSP (sequencer transpose) makes a sequence start and transposes the sequence for the first note received on the multi trig channel. Subsequent notes will only transpose the sequence and trig the multi envelope, so that the sequence loop is never broken. - Page 51 ADDITIONAL KIT SETTINGS PORT (portamento) sets the amount time it will take the for pitch of the sequence to slide between two different notes. • Sound played on the individual tracks while the multi trig is active will be under the influence of the multi envelope, so the sound level might be lower than usual.
-
Page 52: The Pattern Sequencer
THE PATTERN SEQUENCER THE PATTERN SEQUENCER The pattern step sequencer is a central part of the Monomachine sound. It is designed to be an inspirational tool for pattern based music, or a component in the creation of dynamic multi-track monophonic sounds. The sequencer is designed both for live and studio use. -
Page 53: Pattern Chaining
THE PATTERN SEQUENCER PATTERN CHAINING You can use pattern chaining to cue up patterns to be played after one another in a loop, like a simple live sequencer for patterns. In pattern mode, hold a [BANK] button and then press the [TRIG] key for the pattern you want to be first in the chain. As long as you keep the first [TRIG] key down, subsequent [TRIG] keys pressed will add patterns to the end of the chain. -
Page 54: Composing A Pattern
THE PATTERN SEQUENCER The third parameter is the tempo multiplier. There are four possible settings, “1X”, “2X”, “3/4X” and “3/2X”. 2X allows a pattern to be played back at twice the global tempo. 3/4X allows a pattern to be played back at three quarters of the global tempo. 3/2X will play back a pattern twice as fast as the 3/4X setting. - Page 55 THE PATTERN SEQUENCER Enter GRID RECORDING mode by pressing the [RECORD] key. The <RECORD> LED above the key should now be firmly lit. You can press [PLAY] if you prefer to listen to the pattern playing while composing. It will loop over and over, until you press [STOP] to stop the playback or [PLAY] to pause it.
-
Page 56: Live Recording
THE PATTERN SEQUENCER • In the Monomachine, you work directly in the pattern memory. There is no need to save patterns. If you wish to keep the pattern intact you will have to copy it to another pattern before you begin editing it. See section “PATTERN COPY”, on page 52 for more information on copying patterns. -
Page 57: Step Recording
THE PATTERN SEQUENCER STEP RECORDING The third method of recording notes differs a bit from the other two methods as data is input on a step by step basis. You can input notes from the keyboard and the [TRIG] keys Begin with following the instruction in section “RECORDING PREPARATIONS”, on page 46. -
Page 58: Track Page Copy
THE PATTERN SEQUENCER Hold and press the [TRIG] key you whose content you want to clear. Then press [PLAY] to clear the note. The message “CLEAR NOTE LOCKS” will appear. The clear note lock operation can be undone by performing the clear note operation one more time. -
Page 59: Track Copy
THE PATTERN SEQUENCER Make sure you are in GRID RECORDING mode. When you are on the track you wish to clear, press and hold [SCALE SETUP]. Then press [PLAY] to clear the track. The message “CLEAR PAGE” will appear. The clear track page operation can be undone by holding the [SCALE KEY] and •... -
Page 60: Clear Track
THE PATTERN SEQUENCER CLEAR TRACK While in GRID RECORDING mode, it is possible to clear a track. Make sure you are in GRID RECORDING mode. The <RECORD> LED should be lit. When you are on the track you wish to clear, press and hold [FUNCTION]. Then press [PLAY] to clear the track. -
Page 61: Clear Pattern
THE PATTERN SEQUENCER • The paste pattern operation can be undone by holding the [FUNCTION] key and then pressing the [STOP] key. A message saying “UNDO PATTERN” will be shown in the display. CLEAR PATTERN It is also possible to completely clear a pattern of all its content. Make sure you are not in GRID RECORDING mode. -
Page 62: Super Clear
THE PATTERN SEQUENCER • Melody copy is a special copy function which copies all pitch data from the track, but excludes parameter locks and machine selection and settings. Use this to transport a melody between tracks you are using different machines for. •... -
Page 63: The Tempo Screen
THE PATTERN SEQUENCER THE TEMPO SCREEN The tempo screen is opened by pressing the [TEMPO] key. From here you can use the LEVEL knob to change the current tempo in integer steps. The [UP] and [DOWN] arrow keys change the decimal part of the tempo. Holding [FUNCTION] while editing the tempo will delay the change of tempo until you release the [FUNCTION] key. -
Page 64: Parameter Locks
THE PATTERN SEQUENCER • The tempo is not stored in patterns or kits. However, songs can store tempo changes. PARAMETER LOCKS One major advantage of the Monomachine is the straightforward method to lock parameter settings to specific trigs steps. These snapshots are called parameter locks. A lock is a snapshot of a parameter setting. -
Page 65: Parameter Locks In Live Recording Mode
THE PATTERN SEQUENCER note copy. Then hold the [TRIG] key for the step you want to paste the trig to, and press [STOP] to perform the paste note operation. In GRID RECORDING mode, you can verify which steps have parameter locks by •... -
Page 66: Trigless Trigs
THE PATTERN SEQUENCER Traditionally synthesizers retrig all envelopes when a NOTE ON event (a key pressed on the keyboard) occurs. In the Monomachine NOTE ON events can be split up, allowing you to trig the amplitude envelope (AMP trig),filter envelope (FILTER trig) or the LFO’s (LFO trig) at any step of the sequence. - Page 67 THE PATTERN SEQUENCER FIGURE 7. Trig track illustrations...
-
Page 68: Additional Sequencer Features
ADDITIONAL SEQUENCER FEATURES ADDITIONAL SEQUENCER FEATURES THE ARPEGGIATOR Each track of the Monomachine (including the MIDI sequencer tracks) offers an advanced arpeggiator. The arpeggiator is a note processor that generates rhythmic note patterns from the arpeggiator settings and notes played. Most commonly arpeggiators are used for making automated real-time monophonic cycled notes based on the chord played. -
Page 69: Arpeggiator Envelope Trigging Switches
ADDITIONAL SEQUENCER FEATURES added to the cycle by pressing and releasing keys while still at least one key is pressed. This way you can build up large note-cycles quickly in auto-play sequencer style. The arpeggiator stops when all keys are released. PLAY (play direction) selects between five modes of arpeggiator playback. -
Page 70: Arpeggiator Rhythm And Offset Track
ADDITIONAL SEQUENCER FEATURES • It can be useful to turn all envelope trigging off for fast arpeggiato speeds, and allow the envelopes to give the impression of the arpeggiated chord as one sound. • If you are using a trigged LFO for a slow modulation of a parameter it can be use- ful to turn off LFO Envelope Trigging in the arpeggiator to let the LFO modulate without being restarted for each note. -
Page 71: Swing
ADDITIONAL SEQUENCER FEATURES Select the track you want to edit the transpose settings for using the [TRACK] keys. TRACK (track transpose) sets the individual track transpose in semitones for the selected track. The parameter is controlled with DATA ENTRY knob A. PAT (pattern transpose) controls the transpose setting for the full pattern. -
Page 72: The Swing Track
ADDITIONAL SEQUENCER FEATURES maximal value is 80%. The swing amount parameter is the same for all the tracks of the pattern. Each track however has its own swing track. Green <TRIG> LED’s indicate the steps that will be time-shifted by swing, and the [TRIG] keys are used to switch their state. -
Page 73: Slide
ADDITIONAL SEQUENCER FEATURES SLIDE The default behavior for parameter locks is that the value changes exactly when the step is played. By using the slide function, the parameter value changes made by parameter locks can be slid smoothly between the locked values. The slide tracks are saved as part of the pattern. -
Page 74: The Mute Mode
ADDITIONAL SEQUENCER FEATURES FIGURE 9. Slide illustration SLIDE ILLUSTRATION. NORMAL (UNLOCKED) PARAMETER VALUE = 0 NOTE TRIGS SLIDE- TRACK PARAM. LOCK PARAM. OUTPUT THE MUTE MODE Track muting is normally performed by pressing the [TRACK] keys while holding [FUNC- TION]. The Monomachine offers an additional interface for controlling the track muting. When one hand operation is preferred, or when you want simultaneous access to both the internal and the MIDI sequencer mute tracks at once, the MUTE window is the solution. -
Page 75: Minimising The Mute Window
ADDITIONAL SEQUENCER FEATURES In addition to the <TRIG> LED’s, the Mute-state is indicated in the MUTE window. Boxes means that the track is un-muted, and a dash means it is muted. The <TRACK> LED’s will also be updated. If you press the [TRIG] keys while holding [FUNCTION] the mute change is held until [FUNCTION] is released. -
Page 76: Poly Mode
ADDITIONAL SEQUENCER FEATURES POLY MODE In normal operation the Monomachine offers six tracks of multitimbral monophonic sound synthesis. Ensemble machines (see Appendix A for more information) can be used to make up to four notes chords using only one track, but for using the other machines poly- phonically you need to enter the POLY mode. -
Page 77: The Midi Sequencer
THE MIDI SEQUENCER THE MIDI SEQUENCER Each of the six internal sequencer tracks of the Monomachine sequencer is teamed with a MIDI sequencer track for controlling external MIDI gear. The six MIDI sequencer tracks are part of each pattern and operate individually, although with a few connections with the inter- nal tracks since the LFO’s are shared between the internal tracks and the MIDI sequencer tracks. -
Page 78: The Main Midi Sequencer Interface
THE MIDI SEQUENCER THE MAIN MIDI SEQUENCER INTERFACE LEN (note length) sets the maximum time the note will be played until a NOTE OFF is sent. Notes can also be interrupted with NOTE OFF trigs (set by pressing a [TRIG] key while holding [FUNCTION]). - Page 79 THE MIDI SEQUENCER sequencer tracks. Read more about how to configure the MIDI output of the inter- nal sequencer in section “CONTROL OUT1”, on page 89. The Monomachine makes distinction between MIDI sent out of the unit and MIDI • received.
-
Page 80: The Song Mode
THE SONG MODE THE SONG MODE The Monomachine song sequencer is a tool for setting up sequences of patterns. Each song row can have unique settings for selected parameters such as pattern start, offset and length, repeats, tempo, mute information, and transposes. The song mode can be used for making a fully arranged song or for setting up looped sets of patterns for live use. -
Page 81: Save Song
THE SONG MODE SAVE SONG Open the SONG window by pressing the [KIT/SONG] key. Use the [LEFT] and [RIGHT] keys to move to the SAVE icon. Press [ENTER/YES] to call the SAVE SONG menu. In the menu, you find a list of the songs stored in memory. Use the [UP] and [DOWN] keys to choose among the 24 song slots. -
Page 82: Song Play
THE SONG MODE • Accurate playback of a previous song depends on the patterns it uses being unchanged since saving. Otherwise, the song will sound different. SONG PLAY To start playing a song, make sure that you are in SONG mode, and that a song is pres- ently loaded or created. -
Page 83: Song Editing
THE SONG MODE SONG EDITING The song editor is where the song is built. Here patterns are assigned to the song. The behavior of the patterns is also set in the song editor. Press the [KIT/SONG] key to open the SONG window. Move the cursor to the EDIT icon using the [ARROW] keys. -
Page 84: Song Edit Transport
THE SONG MODE TRN (transpose) sets a pattern transpose for the song row. Use the LEVEL knob to control the value. By pressing [ENTER/YES] you enter the SONG TRACK TRANSPOSE window, where individual transpose can be set for the tracks. If an individual song track transpose is set for a row, it is indicated by a bold “T“... -
Page 85: Song Loops
THE SONG MODE SONG LOOPS Song loops are a useful tool when creating a song. By using this command you can limit the number of rows and make the structure of the song clearer. They can also be used for setting up pattern loops in order to extend the limit of maximum 64 steps per pattern. -
Page 86: Song Track Transpose
THE SONG MODE the song transport controls as described in “SONG EDIT TRANSPORT” on page 76 to select a new position to start from. SONG TRACK TRANSPOSE Here the transpose settings for the patterns in a song are controlled. By pressing [ENTER/YES] in the transpose column of the EDIT SONG window you reach the SONG TRACK TRANSPOSE menu. - Page 87 THE SONG MODE Reach it by pressing [ENTER/YES] in the SONG EXTRA column in the EDIT SONG window.. From here you can set the mutes for the song row. Use the [TRIG] keys 1 to 6 to set the mute mask for the internal tracks, and [TRIG] keys 9 to 14 for the MIDI sequencer tracks. A muted track will be displayed as a “-”...
-
Page 88: Monomachine Routing
MONOMACHINE ROUTING MONOMACHINE ROUTING The Monomachine offers a flexible routing system for addressing the audio outputs, as well as using the audio inputs and routing between the synthesis and FX machines. Most of the routing is controlled from the EDIT KIT window. Please check section “ASSIGNING A MACHINE TO A TRACK”, on page 21 for information on how to find, open and manoeuvre it. -
Page 89: Using The Audio Inputs
MONOMACHINE ROUTING USING THE AUDIO INPUTS Audio can be routed from the external inputs and be effected with both track effects and FX machines. The audio inputs are available to the FX machines found in the Monosynth named “FX”. Follow the steps below to assign Press the [KIT/SONG SETUP] key to open the KIT window. -
Page 90: Neighbour Routing
MONOMACHINE ROUTING • All track effects, the LFO’s and the sequencer are still at your hands when using the audio inputs! Set up six tracks with various track effect settings, LFO settings and use the sequencer on top of this, and you have a unique and powerful effects processor. -
Page 91: Mix Bus Routing
MONOMACHINE ROUTING machine in NEIBOR mode to the track after, and all the track effects of the second track will be applied after the first one. Just remember to turn off the outputs of the first track. • NEIBOR mode is good for quick FX routing, when no more than one track need to be fed into the FX. -
Page 92: Routing Mode Ab=Mix
MONOMACHINE ROUTING In the example above the two first tracks are sent on the AB bus, and are thus effected by the FX machine on track 3. Track 4 and 5 are sent to the CD mix bus. Track 6 is an FX machine with input taken from the CD Mix bus, which now contains the mixed signal of track 4 and 5. - Page 93 MONOMACHINE ROUTING The example above visualises how a global routing configuration of 6xMONO configures the outputs. Like all machines, the FX machines need to be trigged before they make any • sound. The track effects are active as always, so if you want the sound to go through without decaying you need to set the DEC and REL parameters to their maximum values (127).
-
Page 94: Global Settings
GLOBAL SETTINGS GLOBAL SETTINGS The Monomachine offers 8 individual slots for storing global settings. The multiple global slots are useful for using the unit in different settings. You can have one setup for studio use and another for the live set, or maybe different setups for different parts of the live set. The items listed below are available in the GLOBAL menu. -
Page 95: Global Routing
GLOBAL SETTINGS Select the AUDIO in the GLOBAL menu. Then select MASTER TUNE using the [ARROW] keys and press [ENTER/YES]. Use [UP]/[DOWN] keys to set the integer part, and [RIGHT]/[LEFT] keys to set the frac- tion. The default value is 440.0 HZ. GLOBAL ROUTING In this menu one of three audio routing selections can be set. -
Page 96: Midi Channels
GLOBAL SETTINGS clock, Start, Stop) and Song Pointer Position. It is also ready for a large number of control methods to fit in a wide range of environments. MIDI CHANNELS Here the MIDI channel setup of the Monomachine is found. Select CONTROL in the GLOBAL menu. -
Page 97: More On The Monomachine Midi Functionality
PROGRAM CHANGE can be disabled for MIDI input and output. See section “CONTROL OUT2”, on page 90 for more information. The Monomachine SFX-6 joystick sends pitch-bend for right and left directions, CTRL CHANGE 1 (mod wheel) for the upward direction and CTRL CHANGE 2 (breath control) for the downward direction. -
Page 98: Control Out2
GLOBAL SETTINGS The available selections for all the parameters are: INT - Only internal control, no external MIDI data will be sent. • OUT - No internal control, only external MIDI data will be sent. • INT+OUT - Internal control, and MIDI data will be sent. •... -
Page 99: Multi Map Edit
GLOBAL SETTINGS main screen shows “EXT”. If no clock signal is received, the Monomachine will fall back to its internal tempo after a few seconds. When a clock signal is received again the Monoma- chine will be synced to the external tempo. TRANSPORT (transport) controls if the Monomachine should respond to MIDI Start, Stop and Song Pointer Position. -
Page 100: File
GLOBAL SETTINGS OFS LEN (offset and length) is where the playback start and range of a pattern can be adjusted. The OFS column can set a start point for the pattern to begin to play and loop. The LEN column sets a maximum length of the pattern. Note; the offset need to be set for the LEN parameter to be accessible. - Page 101 GLOBAL SETTINGS PAT+KIT - Only the patterns and their associated kits, as selected in the RANGE tab, • will be sent. SONG+PAT+KITS - The songs specified in the RANGE tab, together with their associ- • ated patterns and kits, will be sent. RANGE (range) is where the range for the KIT, PAT+KIT and SONG+PAT+KIT transfer methods is set.
-
Page 102: Sysex Receive
GLOBAL SETTINGS To perform the send, press [ENTER/YES]. You will see a sysex message counter on the bottom of the screen indicating how many sysex messages have been sent of the total amount of messages. SYSEX send mode “ALL” may take several minutes to complete, because of the •... - Page 103 GLOBAL SETTINGS ing on the positions you specify. If you specify KIT 03 and receive four kits, positions 3 to 6 will be written over no matter where the kits received were originally placed. VERF - The SYSEX data received is only verified to be correct, they are not stored in •...
-
Page 104: Digipro Manager (Monomachine Sfx-60 Mkii Only)
GLOBAL SETTINGS Press [ENTER/YES] to start receiving data. A message displaying “WAITING...” shows up in the menu. Initiate the data send from the sending device. A counter will display how many messages have been received, and, if you have a bad transmission, how many erroneous messages that have been received and ignored. -
Page 105: Receive Waveforms
GLOBAL SETTINGS port section of the Elektron homepage. Supported formats are wav and aiff. Waveforms are sent and received via MIDI. Select FILE in the GLOBAL menu. Then select DIGIPRO MGR using the [ARROW] keys and press [ENTER/YES]. Use the [UP] and [DOWN] keys to choose the different options in the MODE column. Use the [RIGHT] and [LEFT] keys to move between the MODE and POS NAME columns. - Page 106 GLOBAL SETTINGS When all waveforms have been sent to the Monomachine, press [EXIT/NO]. “WRITING WAVEFORMS” will be displayed on the screen. The transfer is now complete. If the waveforms sent to the Monomachine are newly made, after being converted • to a syx file in C6, they will be stored starting from position 1 when using the ORG method of receival.
-
Page 107: Send Waveforms
GLOBAL SETTINGS • Note that user waveforms previously stored at the positions you send new wave- forms to will be overwritten. You can always exit the state where the Monomachine is waiting to receive wave- • forms. When the screen shows “WAITING...”, just press the [EXIT/NO] key. Use the TM-1 MIDI interface available from Elektron for up to 10x the normal MIDI •... -
Page 108: Erase Waveforms
GLOBAL SETTINGS Put the receiving device into a waiting state, ready to receive data. Press [ENTER/YES] to make the Monomachine send the waveform. The screen will indicate that a waveform has been sent. It is not possible to send factory waveforms. If you try to do so, the message “NOT •... -
Page 109: Rename Waveforms
GLOBAL SETTINGS When in the DIGIPRO MGR, choose ERASE and then press the [RIGHT] arrow key to move the focus to the POS NAME column. Choose the waveform you want to erase by pressing the [UP] and [DOWN] keys. Press [ENTER/YES]. A prompt will appear on the screen as seen below. Press [ENTER/YES] to erase the waveform. -
Page 110: Midi Seq
GLOBAL SETTINGS • Pressing the [FUNCTION] while in the WAVEFORM NAME window key gives access to the “high score” selection method, in which you see all characters at the same time. Keep the [FUNCTION] key held while navigating using the [ARROW] keys. -
Page 111: Early Startup Menu
EARLY STARTUP MENU EARLY STARTUP MENU To access this menu, hold the [FUNCTION] key while powering up the Monomachine. From here you can perform a variety of maintenance tasks. To choose the different alterna- tives, press the corresponding [TRIG] key. TEST MODE To enter this mode, press the first [TRIG] key. -
Page 112: Midi Upgrade
EARLY STARTUP MENU MIDI UPGRADE By choosing this option, the Monomachine prepares itself to receive an OS upgrade via MIDI. Check that all MIDI cables are connected correctly. Load the new OS in an appropriate computer program capable of sending sysex files. We recommend the program C6 which can be found on the Elektron website. - Page 113 EARLY STARTUP MENU • If you have installed OS 1.07 or above you will experience the speed of the Ele- ktron TurboCharge protocol. You will need to have the MIDI IN port of the receiv- ing machine connected to the MIDI OUT port of the transmitting machine and vice versa for this to function.
-
Page 114: Technical Information
TECHNICAL INFORMATION TECHNICAL INFORMATION SPECIFICATIONS SFX-60MKII SOUND CONTROL SEQUENCER ELECTRICAL SPECIFICATIONS 6 internal sequencer tracks. Impedance balanced audio outputs: 6 exernal MIDI sequencer tracks Main out level: +15dBu 128 x 64 step patterns Assignable outs level: +10dBu 24 songs Ω Output impedance: 100 unbalanced Supports swing, slide and accent... -
Page 115: Differences Between The Mki And Mkii Models
DIFFERENCES BETWEEN THE MKI AND MKII MODELS DIFFERENCES BETWEEN THE MKI AND MKII MODELS There exist a number of hardware differences between the MKI and MKII models of the Monomachine. Below is a compilation of the most important differences. DESIGN The height of the SFX-60MKII is 63mm including rubber feet and knobs. -
Page 116: Credits
CREDITS CREDITS PRODUCT DESIGN AND DEVELOPMENT Anders Andersson Magnus Forsell Anders Gärder Daniel Hansson David Möllerstedt Danjel Rydén Henrik Sallander Fredrik Åhfeldt INDUSTRIAL DESIGN Thomas Ekelund Jesper Kouthoofd ADDITIONAL DESIGN Göran Finnberg Charlie Storm USER’S MANUAL Thomas Ekelund Daniel Hansson Jon Mårtensson FACTORY DEFAULT SOUND DESIGN Pattern A01-A15... -
Page 117: Contact Information
CONTACT INFORMATION CONTACT INFORMATION ELEKTRON SUPPORT support@elektron.se ELEKTRON WEBSITE http://www.elektron.se POSTAL ADDRESS Elektron Music Machines MAV AB Erik Dahlbergsgatan 3 SE-411 26 Gothenburg Sweden... - Page 118 CONTACT INFORMATION...
-
Page 119: Appendix A: Machine Reference
Appendix A: MACHINE REFERENCE In this section all the Mono-synths of the Monomachine are introduced, including specifications for individual machines. SUPERWAVE SAW ILLUSTRATION BASE PITCH OSC. SUPERWAVE UNISON OSC. SuperWave takes its inspiration from the analogue world. It gives warm and thick EXTENDED UNISON OSC. -
Page 120: Superwave Pulse "Swave-Pulse
SUBX controls a square wave suboscillator, the PWAD parameter from the PW position located one octave below the base pitch. each time a note is played. SUB1 controls a sine sub oscillator, located TUNE (tune) sets the tune of the oscillator. one octave below the base pitch. -
Page 121: Sid
WAVE (waveform) selects the basic wave- form to be used. The available waveforms are: - TRIANGLE SAW - SAW TOOTH PULS - PULSE - MIXED The Mono-synth SID is based on the synthe- NOIS - NOISE sis of the legendary SID chip, found in the Commodore 64. -
Page 122: Digipro
SYNC (hard sync) offers the following selec- tions: - Hard Sync is turned off SFRQ - Hard Sync is active, frequency from SFRQ PRCH - H. Sync is active, frq from previous channel DIGIPRO If SYNC is set to SFRQ, the source fre- DigiPRO offers raw digital waveforms, which quency is taken from the SFRQ parameter. -
Page 123: Digipro Doubledraw "Dpro-Ddrw
A total of 24 percussive sounds are available TIME (glide time) sets the interpolation time in the BeatBox. The sounds fill two octaves when a waveform is changed. If set to 0 the starting at C-3 and are repeated for the waveform change will be instant.The higher octaves above and under with adjusted pitch. -
Page 124: Fm+Static "Fm+Stat
FM+STATIC “FM+STAT” FM+STATIC is the most versatile of the FM+ machines, and the best bet for successful FM synthesis. FM+ is 21st century FM synthesis. It imple- ments world class frequency modulation algorithms that address the complexity prob- lem normally associated with FM. All three FM+ machines are based around a number of custom made FM blocks. -
Page 125: Fm+Parallell "Fm+Par
TONE (tone) is a general controller for the FM+DYNAMIC “FM+DYN” FM frequencies generated in the system. FM+DYNAMIC is the wildest of the FM+ High settings introduce more high frequency machines, where the frequencies are set harmonic contents. continuously instead of using the listed fre- quency. - Page 126 CLEN (consonant length) controls how long the selected consonant will be pronounced. CVOL (consonant volume) controls the vol- ume of the consonant. Using this parameter it is possible to change the dynamics of the speech, for instance making the pro- VO is inspired by classic voice modelling grammed words sound more or less emo- methods using formant synthesis.
-
Page 127: Vo-6 Tutorial
VO-6 TUTORIAL In GRID RECORDING mode, set a trig on Getting words out of the VO-6 is pretty step 1. Hold it while clicking the knobs for straight forward once you get to know it. In VOC1, VOC2, CONS and CLEN, so that this section we offer a short tutorial to get you these parameters get locked. -
Page 128: Gnd Machines
generated when the parameter is set to its max value. GND MACHINES TUNE (tune) sets the tune of the oscillator. The GND synthesis consists of three machines with very basic functionality. They can be used for adding extra tonality to other sounds. -
Page 129: Fx Machines
REVERB The reverb machine is a specially designed FX MACHINES version of the Elektron Gate reverb. It offers a characteristic gated reverb known from the The FX machine group differs from the other Machinedrum. machines of the Monomachine in that they do not generate any sound by themselves. -
Page 130: Chorus
CHORUS DYNAMIX The Chorus machine implements a 2 x 3 tap The Dynamix dynamics processor can be stereo chorus. used for increasing the overall sound level of a track or pattern. It can also be used to enhance or reduce transients. DEL (delay) controls the delay time of the taps. -
Page 131: Dynamix Tutorial
DYNAMIX TUTORIAL RING MODULATOR This is just a general overview of one way The ring modulator of the Monomachine you can approach the Dynamix processor. allows you to ringmodulate an incoming sig- No exact parameter values can be given as nal with an internal carrier oscillator. - Page 132 A-14 Appendix A: MACHINE REFERENCE...
-
Page 133: Appendix B: Midi Control Reference
Appendix B: MIDI CONTROL REFERENCE All Data Entry parameters of the Monomachine are accessible by both MIDI control change messages and NRPN MIDI messages. This appendix lists the full MIDI implementation of the Monomachine, except SYSEX mes- sages. MONOMACHINE MIDI SPECIFICATION The Monomachine uses up to 6 midi channels starting from the Base channel for the internal sequencer and to control the six tracks of sound generation. -
Page 134: Control Change Messages
+------+----------------+--------------+---------------------------+-----+-----+ | NOTE | MIDI Channel Mode | Action | Trn | Rec | +------+----------------+--------------+---------------------------+-----+-----+ | ON Multi Trig All Track | Distributed to track 1-6 +------+----------------+--------------+---------------------------+-----+-----+ | OFF Multi Trig All Track | Distributed to track 1-6 +------+----------------+--------------+---------------------------+-----+-----+ | ON Multi Trig Split Key | Distributed... - Page 135 +---------+--------------------------------------------------------+-----+-----+ | 3d | Track 1 - Amp Vol +---------+--------------------------------------------------------+-----+-----+ | 3e | Track 1 - Amp Pan +---------+--------------------------------------------------------+-----+-----+ | 3f | Track 1 - Amp Portamento +---------+--------------------------------------------------------+-----+-----+ | 48 | Track 1 - Filter Base +---------+--------------------------------------------------------+-----+-----+ | 49 | Track 1 - Filter Width +---------+--------------------------------------------------------+-----+-----+ | 4a | Track 1 - Filter HPQ...
- Page 136 +---------+--------------------------------------------------------+ | MIDI base channel + 1: +---------+--------------------------------------------------------+ | Same as MIDI Base Channel + 0, | but exchange Track 1 to Track 2 +---------+--------------------------------------------------------+ +---------+--------------------------------------------------------+ | MIDI base channel + 2: +---------+--------------------------------------------------------+ | Same as MIDI Base Channel + 0, | but exchange Track 1 to Track 3 +---------+--------------------------------------------------------+ +---------+--------------------------------------------------------+...
-
Page 137: Nrpn Mapping
NRPN MAPPING NRPN Received on MIDI base channel + 0: +---------+----+-----------+---------------------------------------+-----+-----+ | Hi | Lo | Val | Parameter | Trn | Rec | +---------+----+-----------+---------------------------------------+-----+-----+ | 00 | YY | ZZ | Track 1 CTRL-parameter YY to val ZZ +---------+----+-----------+---------------------------------------+-----+-----+ | 01 | YY | ZZ | Track 2 CTRL-parameter YY to val ZZ... -
Page 138: Other Midi Messages
OTHER MIDI MESSAGES PITCH BEND MESSAGES ------------------- MIDI base channel + 0: +---------+--------------------------------------------------------+-----+-----+ | Track 1 - Pitchbend +---------+--------------------------------------------------------+-----+-----+ MIDI base channel + 1: +---------+--------------------------------------------------------+-----+-----+ | Track 2 - Pitchbend +---------+--------------------------------------------------------+-----+-----+ MIDI base channel + 2: +---------+--------------------------------------------------------+-----+-----+ | Track 3 - Pitchbend +---------+--------------------------------------------------------+-----+-----+ MIDI base channel + 3: +---------+--------------------------------------------------------+-----+-----+... -
Page 139: Appendix C: Sysex Reference
Appendix C: SYSEX REFERENCE This appendix lists all Monomachine SFX-6/SFX-60/SFX-60 MKII SYSEX messages available for external control. Conventions: SYSEX kit sysex dump: Data printed with a $ sign is written in hexadecimal format. MIDI Byte | Purpose Data printed with a % sign is written in a binary bitfield ------------+---------------------------- format. - Page 140 SYSEX load pattern: b , BUS EF MIDI Byte | Purpose c , BUS CD ------------+---------------------------- d , BUS AB (SYSEX init)| $57 | Load pattern ID e:0 , NEIGHBOR %0aaaaaaa | Load pattern %aaaaaaa (0 to 127) e:1 , INP A $f7 | SYSEX end e:2 , INP B e:3 , INP A+B...
- Page 141 SYSEX unused: SYSEX song request: MIDI Byte | Purpose MIDI Byte | Purpose ------------+---------------------------- ------------+---------------------------- (SYSEX init)| (SYSEX init)| $6a | Song request ID $62 | None %000aaaaa | send song %aaaaa (0 to 23) $f7 | SYSEX end $f7 | SYSEX end SYSEX unused: SYSEX unused: MIDI Byte | Purpose...
- Page 142 SYSEX set status: SYSEX turbomidi speed answer MIDI Byte | Purpose MIDI Byte | Purpose ------------+---------------------------- ------------+---------------------------- (SYSEX init)| (SYSEX init)| $71 | Set status ID $11 | Speed answer ID %00aaaaaa | Set parameter %aaaaaa to ... %aaaaaaaa | bit 0 = speed 2, bit 1, = speed 3.3... %0bbbbbbb | ...
- Page 143 SYSEX turboMIDI speed test 2 (master) MIDI Byte | Purpose ------------+---------------------------- (SYSEX init)| $16 | Speed test 2 (master) ID $f7 | SYSEX end SYSEX turboMIDI speed result 2 (slave) MIDI Byte | Purpose ------------+---------------------------- (SYSEX init)| $17 | Speed test 2 (result) ID $f7 | SYSEX end After reception of “speed result 2”...
- Page 144 Appendix C: SYSEX REFERENCE...
-
Page 145: Index
INDEX DATA PAGES Amplification page Effects page Filter page Lfo pages ARPEGGIATOR 60 DELAY 32 Envelope trigging DIGIPRO MANAGER Mode Erase waveforms Octave jump Receive waveforms Play Rename waveforms Range Send waveforms Rhythm and offset DISTORTION 26 Speed EARLY START UP MENU 103 CLEAR EDIT Arpeggiator... - Page 146 Velocity MKI specifications MKII specifications LFO 34 LIVE RECORDING 48 RACK MOUNT KIT 7 LOAD RECORDING Grid recording Live recording Step recording MASTER TUNE 86 RESET MIDI Empty Auto track channel Factory Base channel Soft Channel span ROUTING 80 Control in Audio inputs Control out 1 Fx machines...
- Page 147 Tempo sync UNDO TEMPO SYNC 90 Arpeggiator clear TEST MODE 103 Arpeggiator paste TRACK EFFECTS 25 Amplifier envelope Machine clear Basic filter controls Machine paste Delay Parameter lock clear Distortion Pattern clear Pattern copy Filter Slide clear Level Slide paste Song clear Portamento Song paste...
- Page 148 INDEX...
Need help?
Do you have a question about the MonoMachine SFX-6 and is the answer not in the manual?
Questions and answers