Polaris 2008 Defense MVRS 800 6X6 Owner's Manual
Hide thumbs
Also See for 2008 Defense MVRS 800 6X6:
- Owner's manual (147 pages) ,
- Owner's manual (143 pages) ,
- Owner's manual (139 pages)
Table of Contents
Advertisement
Quick Links
Advertisement
Table of Contents

Related Manuals for Polaris 2008 Defense MVRS 800 6X6


Summary of Contents for Polaris 2008 Defense MVRS 800 6X6
- Page 2 Pantone 4645CVC Polaris Defense Contact Information Web: www.polarisdefense.com E-mail: information@polarisdefense.com Phone: 866-468-7783 Part No. 9921652 Rev 01 Printed in USA...
- Page 3 We believe Polaris sets a standard of excellence for all utility and recre- ational vehicles manufactured in the world today. Many years of experi- ence have gone into the engineering, design, and development of your Polaris vehicle, making it one of the finest machines we’ve ever pro-...
- Page 4 POLARIS and POLARIS THE WAY OUT are registered trademarks of Polaris Indus- tries Inc. Copyright 2007 Polaris Sales Inc. All information contained within this publication is based on the latest product information at the time of publication. Due to constant...
-
Page 5: Table Of Contents
Maintenance ......59 Polaris Products..... . . 108 Troubleshooting . -
Page 6: Know Your Vehicle
KNOW YOUR VEHICLE As the operator of the vehicle, you are responsible for your personal safety, the safety of others, and the protection of our environment. Read and understand your owner's manual, which includes valuable informa- tion about all aspects of your vehicle, including safe operating proce- dures. -
Page 7: Safety
SAFETY Operator Safety WARNING Failure to follow the warnings contained in this manual can result in severe injury or death. This vehicle handles differently than other vehicles, such as motorcycles and cars. A collision or rollover can occur quickly, even during routine maneuvers like turning, or driving on hills or over obstacles, if you fail to take proper precautions. -
Page 8: Operator Safety
SAFETY Operator Safety The following signal words and symbols appear throughout this manual and on your vehicle. Your safety is involved when these words and sym- bols are used. Become familiar with their meanings before reading the manual. The safety alert symbol, on your vehicle or in this manual, alerts you to the potential for injury. - Page 9 SAFETY Operator Safety WARNING Serious injury or death can result if you do not follow these instructions and procedures, which are outlined in further detail within your owner's manual. • Read this manual and all labels carefully. Follow the operating proce- dures described.
- Page 10 Practice turning at slow speeds before attempting to turn at faster speeds. Never turn at excessive speeds. • Always have this vehicle checked by an authorized Polaris technician if it has been involved in an accident. • Never operate this vehicle on hills too steep for the vehicle or for your abilities.
- Page 11 SAFETY Operator Safety • Never modify this vehicle through improper installation or use of accessories. • Never exceed the stated load capacity for this vehicle. Cargo should be properly distributed and securely attached. Reduce speed and fol- low the instructions in this manual for hauling cargo or pulling a trailer.
-
Page 12: Equipment Modifications
Do not make any modifications to the vehicle. Polaris does not recommend that consumers install any equipment to the vehicle that may increase the speed or power of the vehicle, or make any other modifications to the vehicle for these purposes. - Page 13 SAFETY Operator Safety WARNING POTENTIAL HAZARD Stalling, rolling backwards while climbing a hill WHAT CAN HAPPEN Vehicle overturn HOW TO AVOID THE HAZARD Maintain a steady speed when climbing a hill. If you lose all forward speed: Apply the brakes. Engage the park brake after fully stopped.
- Page 14 SAFETY Operator Safety WARNING POTENTIAL HAZARD Operating this vehicle without proper instruction WHAT CAN HAPPEN Loss of control, accident HOW TO AVOID THE HAZARD The risk of an accident is greatly increased if the operator does not know how to operate the vehicle properly in different situations and on different types of terrain.
- Page 15 SAFETY Operator Safety WARNING POTENTIAL HAZARD Operating this vehicle after consuming alcohol or drugs WHAT CAN HAPPEN Could seriously affect your judgment. Could cause you to react more slowly. Could affect your balance and perception. Could result in an accident. HOW TO AVOID THE HAZARD Driving this vehicle requires your full attention.
- Page 16 SAFETY Operator Safety WARNING POTENTIAL HAZARD Operating on frozen bodies of water. WHAT CAN HAPPEN Severe injury or death can result if the vehicle and/or the operator fall through the ice. HOW TO AVOID THE HAZARD Never operate the vehicle on a frozen body of water. WARNING POTENTIAL HAZARD Failure to inspect the vehicle before operating...
- Page 17 SAFETY Operator Safety WARNING POTENTIAL HAZARD Failure to follow the minimum age recommendations for this vehicle WHAT CAN HAPPEN Serious injury or death (the child or others) HOW TO AVOID THE HAZARD Only persons with a valid driver's license should operate this vehicle. Even though a child may be within the age group for which some vehicles are recommended, he or she may not have the skills, abilities, or judgment needed to operate the vehicle safely and may be involved in a serious...
- Page 18 SAFETY Operator Safety WARNING Operating a damaged vehicle can result in an accident with serious injury or death. After any overturn or accident, have a qualified service technician inspect the entire machine for possible damage, including (but not limited to) brakes, throttle and steering systems.
- Page 19 SAFETY Fuel Safety WARNING Fuel is highly flammable and is explosive under certain conditions. Always exercise extreme caution whenever handling fuel. Always stop the engine when refueling. Always refuel outdoors or in a well ventilated area. Do not smoke or allow open flames or sparks in or near the refueling area or where fuel is stored.
-
Page 20: Features And Controls
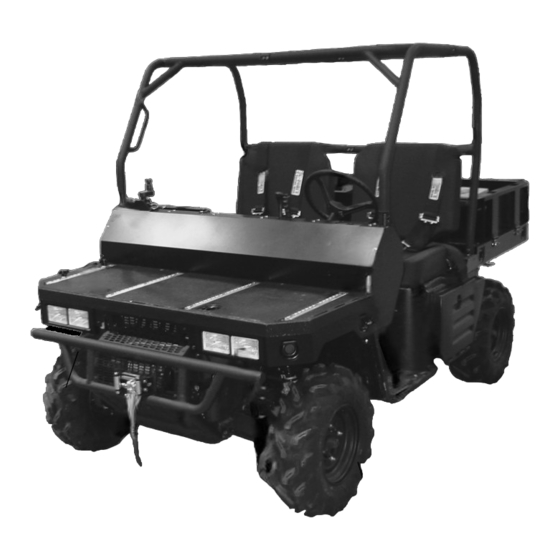
FEATURES AND CONTROLS Component Locations Frame Seat Steering Belts Wheel Seat Dash Panel Front Platform Storage Box (under seat) Battery (behind panel) Run-Flat Headlights Winch Tires Front Bumper/Brush Guard... -
Page 21: Component Locations
FEATURES AND CONTROLS Component Locations Cargo Tailgate Latch Release Tailgate Taillights Receiver CV Boot/Rear Hitch Air Box Caliper Muffler (Spark Arrestor) -
Page 22: Trailer Hitch Bracket
If you must operate the vehicle with flat tires, remove all cargo and towed loads from the vehicle. Do not exceed 50 miles (80 km) at 25 MPH (40 km/h). Have the tire(s) inspected by an authorized Polaris service technician as soon as possible and before further use. -
Page 23: Rear Box/Flatbed Conversion
FEATURES AND CONTROLS Rear Box/Flatbed Conversion The rear box panels can be Latches lowered to create a flatbed. Lower the tailgate panel first. 1. Remove the tailgate retainer cables from the box sides. 2. Release the tailgate latches and allow the tailgate to pivot down- ward. -
Page 24: Seat Belts
FEATURES AND CONTROLS Seat Belts This Polaris vehicle is equipped with four-point harness-style seat belts for the operator and passenger, and for accessory jump seat passengers. Inspect seat belts for wear, cuts or damage before each use of the vehi- cle. - Page 25 FEATURES AND CONTROLS Dash Panel Removal Remove the front dash panel to access electrical components, power receptacles, engine and clutch intake ducts and brake master cylinder. Refer to the illustration below. 1. Remove the 10 screws securing the panel to the frame. 2.
-
Page 26: Mode Button
FEATURES AND CONTROLS Console Brake Fluid Gear 12-Volt Access Selector Accessory Panel Park Brake Outlets Instrument Lever Gauge Switches Mode Winch Steering Passenger Button Remote Lock Grab Handle Receptacle Battery Switch Ignition Electrical Switch Lever Access Panel Auxiliary Outlets Each 12-volt accessory plug receptacle has a spade connection on the back that may be used to power an auxiliary light or other optional accessories or lights. -
Page 27: Steering Lock
FEATURES AND CONTROLS Console Slave Receptacles This vehicle is equipped with a system designed to assist in either recharging the battery or starting the engine of a vehicle that has a dis- charged battery. NOTE: When connecting a power source to a slave receptacle, always con- nect like polarities. -
Page 28: Gear Selector
NOTE: Maintaining shift linkage adjustment is important to assure proper transmission function. See your Polaris service technician if you expe- rience any shifting problems. CAUTION Do not attempt to shift the transmission while the vehicle is moving or damage to the transmission could result. - Page 29 FEATURES AND CONTROLS Switches Battery Switch The main battery switch is located on the dash at the left side of the steering wheel. If electrical components do not operate, reset the main battery switch. OFF/TRIP: Shuts down all electrical power to the vehicle ON/RESET: Restores electrical power to the vehicle...
- Page 30 FEATURES AND CONTROLS Switches Winch Switch Switch Headlight/Tail Light Blackout Switch IR Switch Switch Blackout Switch Activate To activate blackout mode (turn off all Blackout lights), press the top of the blackout rocker switch toward the dash. To deactivate blackout mode and allow operation of the headlights, press the Deactivate bottom of the rocker switch toward the...
-
Page 31: Winch Operation Switch
FEATURES AND CONTROLS Switches Winch Operation Switch Use this switch to operate the winch. Winch operation instructions can be found in the winch operation guide provided by the winch manufac- turer. Install the winch remote to the remote winch receptacle to operate the winch switch remotely. The remote is located in the tool pouch. -
Page 32: Brake Pedal
FEATURES AND CONTROLS Brake Pedal Depress the brake pedal to slow or Throttle stop the vehicle. Apply the brakes Brake Pedal while starting the engine. Pedal Throttle Pedal Push the pedal down to increase engine speed. Spring pressure returns the pedal to the rest position when released. -
Page 33: Park Brake Lever
This feature will not operate properly if the park brake connector or switch (under the dash) malfunctions or becomes disconnected, or if the switch has moved. Check for disconnection, then see your Polaris service technician promptly if this feature fails to operate properly. -
Page 34: Instrument Cluster
FEATURES AND CONTROLS Component Locations Instrument Cluster Your vehicle is equipped with an instrument cluster that senses vehicle speed from the right front wheel. The instrument cluster measures dis- tance in miles as well as time, hours of operation and engine RPM. Refer to page 24 for the location of the instrument cluster. -
Page 35: Rider Information Center
If the instrument cluster fails to illuminate, a battery over-voltage may have occurred and the instrument cluster may have shut off to protect the electronic speedometer. If this occurs, take the vehicle to your Polaris service technician for proper diagnosis. 1. Gear Indicator - This indicator displays gear shifter position. - Page 36 FEATURES AND CONTROLS Instrument Cluster Rider Information Center Standard Modes Use the yellow mode button located under the speedometer to toggle through the mode options. See page 24. Odometer Mode The odometer records the miles traveled by the vehicle. Trip Meter Mode The trip meter records the miles traveled by the vehicle on each trip if it's reset before each trip.
- Page 37 FEATURES AND CONTROLS Instrument Cluster Rider Information Center Diagnostic Mode The wrench icon will display when the gauge is in the diagnostic mode. To exit the diagnostic mode, turn the ignition switch off and on. Any movement of the tires will also cause the gauge to exit the diagnostic mode.
- Page 38 The gauge indicates whether or not current is flowing through the AWD coil (only on models with switchable AWD). This screen is for informa- tional purposes only. Please see a Polaris Defense service technician for all major repairs. Gear Circuit Diagnostic Screen This screen displays the resistance value (in ohms) being read at the gear switch input of the gauge.
-
Page 39: Programmable Service Interval
FEATURES AND CONTROLS Instrument Cluster Rider Information Center Diagnostic Mode Programmable service interval To enable or disable the service interval: 1. Enter the diagnostic mode. 2. Toggle to the service interval screen. 3. Press and hold the mode button for about seven (7) seconds, until either ON or OFF appears in the Rider Information Center, depend- ing on your preference. - Page 40 Downloading Codes The EFI diagnostic mode is for informational purposes only. Please see a Polaris Defense service technician for all major repairs. See page 39 for Blink Codes and Failure Descriptions. Use the follow- ing procedure to download blink codes (failure codes) from the EFI module.
- Page 41 FEATURES AND CONTROLS Instrument Cluster Rider Information Center Downloading Codes Blink Failure Description Code No RPM Signal Loss of Synchronization Barometric Pressure Sensor: Circuit Low Input Barometric Pressure Sensor: Circuit High Input TPS: Open or Short Circuit to Ground TPS: Short Circuit to Battery RAM Error: Defective ECU Engine Temp Sensor Circuit: Short to Ground Engine Temp Sensor Circuit: Open or Short to Battery...
-
Page 42: Operation
OPERATION Break-In Period The break-in period for this vehicle is the first twenty hours of opera- tion, or the time it takes to use the first two tanks full of fuel. No single action on your part is as important as a proper break-in period. Careful treatment of a new engine and drive components will result in more effi- cient performance and longer life for these components. -
Page 43: Pre-Ride Inspection
OPERATION Pre-Ride Inspection WARNING If a proper inspection is not done before each use, severe injury or death could result. Always inspect the vehicle before each use to ensure it's in proper operating condition. Item Remarks Page Brake system/pedal travel Ensure proper operation Brake fluid Ensure proper level... -
Page 44: Starting The Engine
OPERATION Starting the Engine WARNING Engine exhaust contains poisonous carbon monoxide and can cause loss of consciousness resulting in severe injury or death. Never run an engine in an enclosed area. CAUTION Operating the vehicle immediately after starting could cause engine damage. Allow the engine to warm up for several minutes before operating the vehicle. -
Page 45: Stopping The Engine
OPERATION Braking 1. Release the throttle pedal completely. 2. Press on the brake pedal evenly and firmly. NOTE: Practice starting and stopping (using the brakes) until you're familiar with the controls. NOTE: When the throttle pedal is released completely and the engine speed drops near an idle, the vehicle has no engine braking. -
Page 46: Driving Safely
OPERATION Driving Safely Driving Procedure 1. Sit in the driver's seat and fasten the seat belt. 2. After starting the engine and allowing it to warm up, apply the ser- vice brakes, and shift the transmission into gear. 3. Check your surroundings and determine your path of travel. 4. -
Page 47: Driving On Slippery Surfaces
OPERATION Driving Safely Driving on Slippery Surfaces When driving on slippery surfaces such as wet trails, loose gravel, or ice, be alert for the possibility of skidding and sliding. Under these con- ditions, follow these precautions: 1. Slow down when entering slippery areas. 2. -
Page 48: Driving Uphill
(15° maximum) unless you have received proper training from a certified training instructor. Contact a Polaris Defense representative (see page 1). 15° maximum 3. Keep both feet on the floor. 4. Proceed at a steady rate of speed and throttle opening. -
Page 49: Driving Downhill
OPERATION Driving Safely Driving on a Sidehill (Sidehilling) WARNING Crossing hillsides or turning on hills can result in loss of control or vehicle overturn, resulting in severe injury or death. Avoid crossing the side of a hill when possible. When unavoidable, exercise extreme caution. Avoid steep hills (15°... -
Page 50: Driving Through Water
After immersion, always take the vehicle to a Polaris Defense service technician for service. Do not start the engine! If it's impossible to bring the vehicle to a Polaris Defense service technician before starting the engine, perform the service outlined on page 93, and take... -
Page 51: Driving Over Obstacles
OPERATION Driving Safely Driving Over Obstacles Be alert! Look ahead and learn to read the terrain you're traveling on. Watch for hazards such as logs, rocks and low hanging branches. WARNING Severe injury or death can result if your vehicle suddenly comes in contact with a hidden obstacle. -
Page 52: Driving In Reverse
OPERATION Driving Safely Driving in Reverse Follow these guidelines when operating in reverse: 1. Back slowly. 2. Apply the brakes lightly for stopping. 3. Avoid turning at sharp angles. 4. Always avoid backing downhill. 5. Never open the throttle suddenly while backing. 6. -
Page 53: Parking On An Incline
OPERATION Driving Safely Parking on an Incline Avoid parking on an incline if possible. If it's unavoidable, follow these precautions: 1. Place the transmission in gear. 2. Apply the brakes. Turn the engine off. 3. Engage the park brake. 4. Block the rear wheels on the downhill side. WARNING A rolling vehicle can cause property damage and serious injury. -
Page 54: Hauling Cargo
OPERATION Driving Safely Hauling Cargo WARNING Hauling cargo improperly can alter vehicle handling and may cause loss of control or brake instability, which can result in serious injury or death. Always follow these precautions when hauling cargo: REDUCE SPEED AND ALLOW GREATER DISTANCES FOR BRAKING WHEN HAULING CARGO. - Page 55 OPERATION Driving Safely Hauling Cargo This vehicle has been designed to carry or tow specific capacities. Always read and understand the load distribution warnings listed on the warning labels and in the owner’s manual. Never exceed the following capacities. Model Maximum Capacity Cargo Box Front Rack...
-
Page 56: Dumping The Cargo Box
OPERATION Driving Safely Dumping the Cargo Box WARNING Operating the vehicle while the cargo box is raised could result in severe injury. The box could close unexpectedly and cause injury to the driver or passenger. The rear tires will also catch the rear of a raised box, damaging the vehicle and creating hazardous driving conditions. -
Page 57: Towing Loads
OPERATION Driving Safely Towing Loads WARNING Towing improperly can alter vehicle handling and may cause loss of control or brake instability, which can result in serious injury or death. Always follow these precautions when towing: Never load more than 150 lbs. (68 kg) tongue weight on the towing bracket. Do not operate the vehicle faster than 10 mph (16 km/h) when towing. -
Page 58: Parking The Vehicle
OPERATION Driving Safely Parking the Vehicle WARNING A rolling vehicle can cause property damage and serious injury. Always engage the park brake after stopping the engine. 1. Apply the brakes. Stop the vehicle on a level surface. 2. Turn the engine off. 3. -
Page 59: Disengaging Awd
Under certain conditions, it may be possible for the front gearcase to remain locked unnecessarily. This condition causes increased steering effort and some vehicle speed restriction. If the front gearcase remains locked after following these instructions, return the vehicle to a Polaris Defense service technician for service. 1. Stop the vehicle. -
Page 60: Locking The Differential
OPERATION All Wheel Drive (AWD) Locking the Differential CAUTION Damage to the differential can occur if it is engaged while the vehicle is traveling at high speeds or while the rear wheels are spinning. Slow the vehicle to nearly stopped before engaging the differential. Locking the differential in slippery or low traction conditions helps improve traction. -
Page 61: Maintenance
Inspect, clean, lubricate, adjust and replace parts as necessary. When inspection reveals the need for replacement parts, use genuine Polaris parts available from Polaris Defense. Record maintenance and service in the Maintenance Log beginning on page 113. -
Page 62: Maintenance Chart Key
Inspect; replace as needed main element Brake pad wear 10 H Monthly Inspect periodically Battery 20 H Monthly Check terminals; clean; test Perform these procedures more often for vehicles subjected to severe use. Have an authorized Polaris Defense service technician perform these services. - Page 63 100 H Also perform a break-in oil change at one month Oil filter change 100 H Replace with oil change Perform these procedures more often for vehicles subjected to severe use. Have an authorized Polaris Defense service technician perform these services.
- Page 64 Inspect periodically; adjust when parts are replaced Auxiliary brake (if Inspect daily; adjust as equipped) needed Headlight aim Adjust as needed Perform these procedures more often for vehicles subjected to severe use. Have an authorized Polaris Defense service technician perform these services...
-
Page 65: Lubrication Recommendations
Polaris Premium U-Joint Locate fittings and grease Lube (3 pumps maximum). See page Ball Joint Polaris Premium all Season Locate fitting (back side of Grease or grease conform- struts), grease with grease gun. ing to NLGI No. 2 See page 64. - Page 66 MAINTENANCE Lubrication Recommendations Prop Shaft U-Joints Ball Joint...
-
Page 67: Engine Oil
Periodic Maintenance Chart beginning on page 59. Always change the oil filter whenever changing oil. Polaris recommends the use of Polaris PS-4 PLUS Performance Syn- thetic 2W-50 4-cycle oil or a similar oil. See page 108 for the part num- bers of Polaris products. -
Page 68: Oil Check
MAINTENANCE Engine Oil Always check and change the oil at the intervals outlined in the Periodic Maintenance Chart beginning on page 59. Always use the recommended engine oil. Oil Check The oil dipstick and fill tube is located on the engine. 1. -
Page 69: Oil And Filter Change
MAINTENANCE Engine Oil Oil and Filter Change CAUTION Hot oil can cause serious burns to skin. Do not allow hot oil to contact skin. Always change the oil and filter at the intervals outlined in the Periodic Maintenance Chart beginning on page 59. Always change the oil filter whenever changing oil. -
Page 70: Gearcase Specification Chart
MAINTENANCE Engine Oil Oil and Filter Change 12. Remove the dipstick and fill the sump with two quarts (1.9 l) of rec- ommended oil. 13. Shift the transmission to neutral. 14. Apply the brakes. Engage the park brake. 15. Start the engine. Allow it to idle for one to two minutes. 16. - Page 71 Refer to the Gearcase Specifications Chart on page 68 for recommended lubricants, capacities and torque specifications. See page 108 for the part numbers of Polaris products. The fill plug is located at the rear of the vehicle. Oil Check 1.
- Page 72 MAINTENANCE Gearcases Transmission (Main Gearcase) Oil Change The drain plug is located on the bottom of the transmission. Access the drain plug through the drain hole in the skid plate. 1. Remove the fill plug. 2. Place a drain pan under the drain plug.
- Page 73 Refer to the Gearcase Specifications Chart on page 68 for recommended lubricants, capacities and torque specifications. See page 108 for the part numbers of Polaris products. The front gearcase fill plug is located on the right side of the front gear- case.
- Page 74 Refer to the Gearcase Specifications Chart on page 68 for recommended lubricants, capacities and torque specifications. See page 108 for the part numbers of Polaris products. The middle gearcase fill plug is located on the side of the gearcase. Oil Check 1.
-
Page 75: Rear Gearcase
Refer to the Gearcase Specifications Chart on page 68 for recommended lubricants, capacities and torque specifications. See page 108 for the part numbers of Polaris products. The rear gearcase fill plug is on the driver's side of the rear gearcase. - Page 76 MAINTENANCE Gearcases Rear Gearcase Oil Change 1. Remove the fill plug. 2. Place a drain pan under the drain plug. Remove the drain plug. 3. Drain the oil. Dispose of used oil properly. 4. Clean the drain plug. Reinstall the drain plug. Torque to specifica- tion.
-
Page 77: Spark Plugs
MAINTENANCE Spark Plugs CAUTION Using non-recommended spark plugs can result in serious engine damage. Always use Polaris-recommended spark plugs. Refer to the service manual for the recommended spark plug type for your vehicle. Torque spark plugs to specification. Plug Condition... -
Page 78: Spark Plug Condition
MAINTENANCE Spark Plugs Spark Plug Condition Normal Plug The normal insulator tip is gray, tan or light brown. There will be few combustion deposits. The electrodes are not burned or eroded. This indi- cates the proper type and heat range for the engine and the service. NOTE: The tip should not be white. -
Page 79: Cooling System
Polaris Premium 60/40 anti-freeze/coolant or a 50/50 mixture of high quality aluminum compatible anti-freeze/coolant and distilled water. Polaris Premium 60/40 is already premixed and ready to use. Do not dilute with water. See page 108 for the part numbers of Polaris prod- ucts. NOTE: Always follow the manufacturer's mixing recommendations for the freeze protection required in your area. - Page 80 Reinstall the cap. NOTE: If coolant must be added often, or if the overflow bottle runs completely dry, there may be a leak in the system. Have the cooling system inspected by a Polaris Defense service technician.
-
Page 81: Radiator Coolant Level
But if the overflow bottle has run dry, the level in the radiator should also be inspected. NOTE: Use of a non-standard pressure cap will not allow the recovery system to function properly. Contact Polaris Defense for the correct replacement part. - Page 82 MAINTENANCE Polaris Variable Transmission (PVT) System Belt slip is responsible for creating excessive heat that destroys belts, wears clutch components and causes outer clutch covers to fail. Switch to low range while operating at slower speeds to extend the life of the PVT components (belt, cover, etc.).
-
Page 83: Pvt System
• Always follow all recommended maintenance procedures. See a Polaris Defense service technician as outlined in the owner's manual. • This PVT system is intended for use on Polaris products only. Do not install it in any other product. • Always make sure the PVT housing is securely in place during operation. -
Page 84: Pvt Drying
Release the park brake and shift the transmission to the low- est available range. 9. Test for belt slippage. If the belt slips, repeat the process. 10. Take the vehicle to a Polaris Defense service technician for service as soon as possible. -
Page 85: Filter Systems
Fuel Filter The in-line fuel filter should be replaced by a Polaris Defense service technician after every 100 hours of operation and any time the fuel becomes contaminated with dirt or debris. Do not attempt to clean the... -
Page 86: Spark Arrestor
MAINTENANCE Spark Arrestor WARNING Failure to heed the following warnings while servicing the spark arrestor could result in serious injury or death. Do not perform service on the spark arrestor while the system is hot. Exhaust system temperatures can reach 1000° F. Allow components to cool sufficiently before proceeding. -
Page 87: Throttle System
Never start or operate this vehicle if it has a sticking or improperly operating throttle pedal. Immediately contact a Polaris Defense service technician for service if throttle problems arise. Always check the pedal for free movement and return before starting the engine and occasionally during operation. -
Page 88: Throttle Freeplay Adjustment
MAINTENANCE Throttle System Throttle Body/Idle RPM Idle RPM is preset by the manufacturer. If the engine idle speed is not satisfactory, please see a Polaris Defense service technician for adjust- ment. Throttle Freeplay Adjustment 1. Remove the seat. 2. Locate the throttle cable adjuster. - Page 89 MAINTENANCE Brakes The front and rear brakes are hydraulic disc type brakes activated by the brake pedal. See page 30. Brake Fluid Brake Fluid Inspect the brake system Reservoir routinely. Inspect the level of the brake fluid before each operation. Change the brake fluid every two years and any time the fluid becomes contaminated, the fluid...
-
Page 90: Brake Inspection
MAINTENANCE Brakes Brake Inspection 1. Check the brake system for fluid leaks. 2. Check the brake pedal for excessive travel or a spongy feel. 3. Check the friction pads for wear, damage and looseness. 4. Inspect the brake disc spline and pad wear surface for excessive wear. -
Page 91: Steering Wheel Inspection
2. Lightly turn the steering wheel left and right. 3. There should be 0.8"-1.0" (20-25 mm) of freeplay. 4. If there is excessive freeplay or strange noises, or the steering feels rough or "catchy," have the steering system inspected by an autho- rized Polaris Defense service technician. -
Page 92: Suspension Adjustment
MAINTENANCE Suspension Adjustment The rear suspension may be adjusted to provide a stiffer suspension if necessary. 1. Remove the top shock mounting bolts from the inside mounting holes. 2. Reposition the shocks to the outside mounting holes. 3. Reinstall the shock mounting bolts. Torque to 30 ft. lbs. (40 Nm). Outside Mounting Holes Inside Mounting Holes Rear Spring Adjustment... -
Page 93: Tire Tread Depth
MAINTENANCE Tires WARNING Operating your vehicle with worn tires will increase the possibility of skidding, loss of control and an accident, which could result in serious injury or death. Always replace tires when the tread depth measures 1/8" (3 mm) or less. Improper tire inflation or the use of non-standard size or type of tires may adversely affect vehicle handling, which could result in vehicle damage or personal injury. -
Page 94: Wheel Removal
Always ensure that all nuts are torqued to specification. Do not service axle nuts that have a cotter pin installed. See a Polaris Defense service technician. Wheel Removal 1. Apply the brakes. Stop the engine. Place the transmission in gear. -
Page 95: Vehicle Immersion
Take the vehicle to a Polaris Defense service technician before starting the engine. If it's impossible to take your vehicle to a Polaris Defense service tech- nician before starting it, follow the steps outlined below. -
Page 96: Headlight Lamp Replacement
MAINTENANCE Lights When servicing a halogen lamp, don't touch the lamp with bare fingers. Oil from your skin leaves a residue, causing a hot spot that will shorten the life of the lamp. WARNING Poor lighting while driving can result in severe injury or death. Headlight and taillight lenses become dirty during normal operation. -
Page 97: Headlight Beam Adjustment
MAINTENANCE Lights Headlight Beam Adjustment Mounting Bolt 1. Loosen the headlamp mounting bolt. 2. Tilt the headlamp upward or down- ward. 3. Tighten the bolt. Brake Lights When the brake pedal is depressed, the console brake light comes on. Check the brake light before each ride. 1. -
Page 98: Conventional Battery
MAINTENANCE Battery Your vehicle may have either a sealed battery, which requires little maintenance, or a conventional battery. A sealed battery can be identi- fied by its flat covers on the top of the battery. A conventional battery has six filler caps on the top of the battery. Conventional Battery Always keep battery terminals and connections free of corrosion. -
Page 99: Battery Removal
MAINTENANCE Battery WARNING Improperly connecting or disconnecting battery cables can result in an explosion and cause serious injury or death. When removing the battery, always disconnect the negative (black) cable first. When reinstalling the battery, always connect the negative (black) cable last. Battery Removal 1. -
Page 100: Battery Installation
MAINTENANCE Battery Battery Installation Using a new battery that has not been fully charged can damage the bat- tery and result in a shorter life. It can also hinder vehicle performance. Follow the battery charging instructions on page 100 before installing the battery. -
Page 101: Battery Storage
See page 100. NOTE: Battery charge can be maintained by using a Polaris Battery Tender charger or by charging about once a month to make up for normal self- discharge. Battery Tender can be left connected during the storage period, and will automatically charge the battery if the voltage drops below a pre-determined point. - Page 102 MAINTENANCE Battery Battery Charging (Conventional Battery) 1. Remove the battery from the vehicle to prevent damage from leak- ing or spilled electrolyte during charging. See page 97. 2. Charge the battery with a charging output no larger than 1/10 of the battery’s amp/hr rating.
- Page 103 MAINTENANCE Battery Battery Charging (Sealed Battery) NOTE: Always verify battery condition before and 1-2 hours after the end of charging. Charge Time State of Voltage Action (Using constant current Charge charger @ standard amps specified on top of battery) 100% 12.8-13.0 volts None, check at 3 None required...
-
Page 104: Cleaning And Storage
Certain products, including insect repellents and chemicals, will damage plastic surfaces. Do not allow these types of products to contact the vehicle. The best and safest way to clean your Polaris vehicle is with a garden hose and a pail of mild soap and water. -
Page 105: Polishing The Vehicle
• Labels and decals • Electrical components and wiring NOTE: If warning and safety labels are damaged, contact Polaris Defense for free replacement. Grease all zerk fittings immediately after washing. Allow the engine to run for a while to evaporate any water that may have entered the engine or exhaust system. -
Page 106: Storage Tips
Make any necessary repairs and clean the vehicle as recommended. See page 102. Stabilize the Fuel (MVRS 700 only) 1. Fill the fuel tank. 2. Add Polaris Carbon Clean Fuel Treatment or Polaris Fuel Stabilizer. Follow the instructions on the container for the recommended amount. NOTE:... -
Page 107: Battery Maintenance
6. If Polaris fuel system additive is not used, fuel tank, fuel lines, and injectors should be completely drained of gasoline. Battery Maintenance See pages 99-101 for storage and charging procedures. -
Page 108: Removal From Storage
4. Check all the points listed in the Daily Pre-Ride Inspection section on page 41. NOTE: Tightness of the bolts, nuts and other fasteners should be checked by an authorized Polaris Defense service technician. 5. Lubricate at the intervals outlined in the Periodic Maintenance Chart beginning on page 59. WARNING Engine exhaust contains poisonous carbon monoxide and can cause loss of consciousness or death. -
Page 109: Transporting The Vehicle
MAINTENANCE Transporting the Vehicle Follow these procedures when transporting the vehicle. 1. Stop the engine. 2. Place the transmission in gear. 3. Apply the brakes. Engage the park brake. 4. Secure any items that could be lost during transporting, especially the fuel cap, the oil dipstick and the seat. -
Page 110: Polaris Products
2871329 Dielectric Grease (Nyogel 2872073 Chain Lube, Aerosol (6.25 oz.) 2872348 Chain Lube, Aerosol (16 oz.) Additives / Miscellaneous 2871326 Carbon Clean Plus (12 oz.) 2872189 DOT 4 Brake Fluid 2871956 Loctite 565 Thread Sealant 2871076 Polaris Battery Tender Charger... -
Page 111: Troubleshooting
See a Polaris Defense service technician. Poor engine performance Check for fouled plugs or foreign material in fuel tank or fuel lines. See a Polaris Defense service technician. Slippage from failure to Always warm up the belt by operating below 30 mph for... - Page 112 Inspect plugs and replace if necessary No spark to spark plug Inspect plugs and replace if necessary Water or fuel in crankcase See a Polaris Defense service technician immediately Low battery voltage Recharge the battery to 12.8 VDC Mechanical failure...
- Page 113 Solution Poor quality or low octane fuel Replace with recommended fuel Incorrect ignition timing See a Polaris Defense service technician Incorrect spark plug gap or heat range Set gap to specs or replace plugs Engine Runs Irregularly, Stalls or Misfires...
- Page 114 Incorrect fuel Replace with fresh recommended fuel Clogged air filter Inspect and clean or replace Other mechanical failure See a Polaris Defense service technician Overheated engine Clean radiator screen and core, clean engine exterior, see a Polaris Defense ser- vice technician...
-
Page 115: Maintenance Log
MAINTENANCE LOG Use the following chart to record periodic maintenance. DATE MILES (KM) TECHNICIAN SERVICE PERFORMED / COMMENTS OR HOURS... - Page 116 MAINTENANCE LOG DATE MILES (KM) TECHNICIAN SERVICE PERFORMED / COMMENTS OR HOURS...
- Page 117 MAINTENANCE LOG DATE MILES (KM) TECHNICIAN SERVICE PERFORMED / COMMENTS OR HOURS...
-
Page 118: Index
INDEX Numerics 12-Volt Jump-Start Capable System 25 Cable Tension, Park Brake ..88 Cap, Fuel ..... . 21 Capacity, Weight . - Page 119 INDEX Drive Belt Wear ....109 Gear Circuit Diagnostics..36 Drivetrain Break-In....40 Gear Selector .
- Page 120 Main Gearcase Lubrication ..69 Polaris Products ....108 Main Gearcase Oil Change ..70 Polishing the Vehicle.
- Page 121 INDEX Service Interval Indicator ..36-37 Tachometer ....34, 36 Service Interval Programming ..37 Throttle Freeplay Adjustment.
Need help?
Do you have a question about the 2008 Defense MVRS 800 6X6 and is the answer not in the manual?
Questions and answers