Table of Contents
Advertisement
Advertisement
Table of Contents
Troubleshooting

Related Manuals for Modecom MC-4220


Summary of Contents for Modecom MC-4220
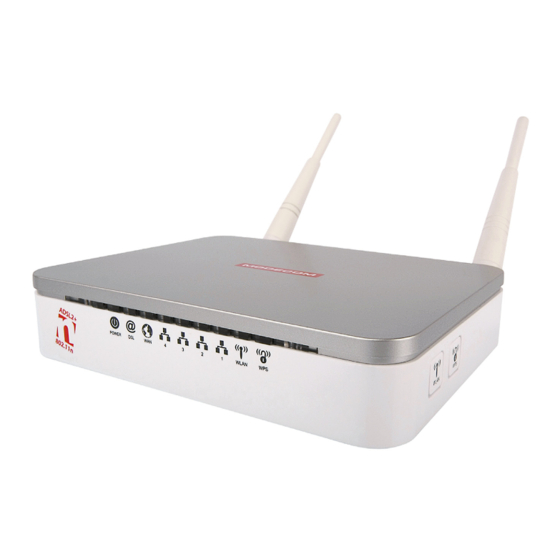
- Page 1 MC-4220 802.11n WLAN ADSL2+ Router user’s manual MODECOM...
-
Page 2: Table Of Contents
Configuring your Bridged DSL connection Configuring your 1483 MER by DHCP Configuring your 1483 MER by Fixed IP ATM Settings ADSL Settings Local Network Configuration Changing the LAN IP address and subnet mask Adding the Secondary LAN IP address and subnet mask www.modecom.eu... - Page 3 802.11n WLAN ADSL2+ Router DHCP Settings DHCP Server Configuration DHCP Relay Configuration DHCP None Configuration DNS Configuration DHCP Server Configuration - Attain DNS Automatically DHCP Server Configuration - Set DNS Manually Overview of Dynamic DNS Dynamic DNS Configuration – DynDNS.org IP/Port Filtering IP/Port Filtering MAC Filtering...
- Page 4 TR-069 Config TR-069 Configuration Statistics Interfaces ADSL Configuring your Computers Configuring Ethernet PCs Assigning static Internet information to your PCs IP Addresses, Network Masks, and Subnets IP Addresses Subnet masks Troubleshooting Troubleshooting Suggestions Diagnosing Problem using IP Utilities Glossary www.modecom.eu...
-
Page 5: Device Requirements
802.11n WLAN ADSL2+ Router Introduction Congratulations on becoming the owner of the Wireless ADSL2+ Router. You will now be able to access the Internet using your high-speed DSL connection. This User Guide will show you how to connect your Wireless ADSL2+ Router, and how to customize its configuration to get the most out of your new product. -
Page 6: Using This Document
In addition to this document, your package should arrive containing the following: 1. Wireless ADSL2+ Router 2. CD-ROM containing the online manual and Easy Setup software 3. Power Supply 4. Ethernet Cable 5. Standard Phone Cable 6. Quick Installation Guide www.modecom.eu... -
Page 7: Front Panel
802.11n WLAN ADSL2+ Router Front Panel The front panel contains lights called Light Emitting Diodes (LEDs) that indicate the status of the unit. Front Panel and LEDs Label Color Function POWER green On: device is powered on Off: device is powered off green On: DSL link reaches showtime, which means that your device has successfully connected to your ISP’s DSL network. -
Page 8: Rear Panel
802.11n WLAN ADSL2+ Router Rear Panel The rear panel contains a Restore Defaults button, the ports for the unit’s data and power connections. Rear Panel Connections Right Panel Connections www.modecom.eu... -
Page 9: Connecting Your Device
802.11n WLAN ADSL2+ Router Figure 1: Bottom Side for Reset button Label Function LINE Connects the device to a telephone port in the wall of your home/ office for DSL communication RESET Pressing this button restores the factory default configuration on your device LAN 4/3/2/1 Connects the device via Ethernet to up to four PCs on your LAN ANETENNA ANETENNA... -
Page 10: Configuring Ethernet Pcs
LAN hub/switch (if applicable), and the Wireless ADSL2+ Router. WARNING The diagram below illustrates the hardware connections. The layout of the ports on your device may vary from the layout shown. Refer to the steps that follow for specific instructions. Overview of Hardware Connections www.modecom.eu... -
Page 11: Easy Setup
802.11n WLAN ADSL2+ Router Step 1. Connect the Telephone cable to ADSL line Connect one end of the provided phone cable to the port labeled LINE on the rear panel of the device. Connect the other end to your wall phone port. Step 2. - Page 12 802.11n WLAN ADSL2+ Router Easy setup configuration completed. Now you are ready to Surf the Internet!!! www.modecom.eu...
- Page 13 802.11n WLAN ADSL2+ Router 1483 Bridged IP LLC • After selecting the Protocol : 1483 Bridged IP LLC: • Enter VPI/VCI which was given by Telecom or by your Internet Service Pro- vider (ISP). • Click Setup. Easy setup configuration completed. Now you are ready to Surf the Internet!!!
- Page 14 (ISP). • From the Type ratio, click Fixed IP. • Enter Local IP Address / Subnet Mask / Remote IP Address which was given by Telecom or by your Internet Service Provider (ISP). • Click Setup. Easy setup configuration completed. Now you are ready to Surf the Internet!!! www.modecom.eu...
- Page 15 802.11n WLAN ADSL2+ Router 1483 MER LLC DHCP • After selecting the Protocol : 1483 MER LLC: • Enter VPI/VCI which was given by Telecom or by your Internet Service Pro- vider (ISP). • From the Type ratio, click DHCP. •...
-
Page 16: Getting Started With The Web Pages
Internet Explorer, Netscape or Mozilla Firefox.From any of the LAN computers, launch your web browser, type the following URL in the web address (or location) box, and press [Enter] on your keyboard: http://10.0.0.2 The Status homepage for the web pages is displayed: 10.0.0.2 Homepage www.modecom.eu... - Page 17 802.11n WLAN ADSL2+ Router The first time that you click on an entry from the left-hand menu, a login box is displayed. You must enter your username and password to access the pages. A login screen is displayed: ••••••••••••• Login screen Enter your user name and password.
-
Page 18: Testing Your Setup
Follow the instructions to change them if necessary. If you are unfamiliar with these settings, try using the device without modification, or contact your ISP for assistance. www.modecom.eu... -
Page 19: Overview
802.11n WLAN ADSL2+ Router We strongly recommend that you contact your ISP prior to changing the default configuration. WARNING Option Default Setting Explanation/Instructions LINE Port IP Ad- Unnumbered inter- This is the temporary public IP ad- dress face: dress of the WAN port on the device. 10.0.0.2 It is an unnumbered interface that is replaced as soon as your ISP assigns... -
Page 20: Internet Access Settings
802.11n WLAN ADSL2+ Router 10.0.0.2 Overview page The information displayed on this page is explained in detail in the following sec- tions. Internet access settings This section displays details of the settings that allow your device to access the Internet. These details include: www.modecom.eu... -
Page 21: About Wireless Adsl2+ Router
Your firmware version details contain information about the software program run- ning on your device. From time to time, MODECOM may update or add new features to this firmware. They then make the latest updated version available to you via the Internet. - Page 22 Select the appropriate channel from the list provided to cor- respond with your network settings. You shall assign a differ- ent channel for each AP to avoid signal interference. Radio Power (mW) The maximum output power: 15mW, 30mW or 60mW. www.modecom.eu...
-
Page 23: Advanced Settings
802.11n WLAN ADSL2+ Router Function Button Description Associated Show Active Wireless Client Table Clients This table shows the MAC address, transmission, receiption packet counters and encrypted status for each associated wireless client. Apply Changes Click to save the rule entry to the configuration. Reset Discard your changes and reload all settings from flash memory. - Page 24 Auto-Fallback feature. Auto- Fallback will negotiate the best possible connection speed between the AP and a wireless client. The default setting is Auto. Function Button Description Apply Changes Click to save the rule entry to the configuration. www.modecom.eu...
-
Page 25: Security
802.11n WLAN ADSL2+ Router Security This page allows you setup the wireless security. Turn on WEP or WPA by using Encryption Keys could prevent any unauthorized access to your wireless network. To access the Wireless Network Security page: From the left-hand Wireless menu, click on Security. The following page is dis- played: Field Description... - Page 26 WEP aims to provide security by encrypting data over radio waves so that it is pro- tected as it is transmitted from one end point to another. However, it has been found that WEP is not as secure as once believed. • From the Encryption drop-down list, select WEP setting. www.modecom.eu...
- Page 27 802.11n WLAN ADSL2+ Router • Click Set WEP Key button. • Enter your user name and password. The first time you log into the program, use these defaults: User Name: admin Password: administrator • From the Key Length drop-down list, select 64-bit or 128-bit setting. • From the Key Format drop-down list, select ASCII (5 characters), Hex (10 char- acters), ASCII (13 characters) or Hex (26 characters) setting.
- Page 28 In the “Personal” mode, the most likely choice for homes and small offices, a pass phrase is required that, for full security, must be longer than the typical 6 to 8 character passwords users are taught to employ. 1. From the Encryption drop-down list, select WPA(TKIP), WPA2(AES) or WPA2 Mixed setting. www.modecom.eu...
- Page 29 802.11n WLAN ADSL2+ Router 2. Click on the ratio of Personal (Pre-Shared Key). 3. From the Pre-Shared Key Format drop-down list, select Passphrase or Hex (64 characters) setting. 4. Enter the Pre-Shared Key depending on selected Passphrase or Hex (64 charac- ters). 5. Click on Apply Changes button to confirm and return. 6.
-
Page 30: Access Control
Access Point. When ‘Deny Listed’ is selected, these wireless clients on the list will not be able to connect the Access Point. To access the Wireless Network Access Control page: From the left-hand Wireless menu, click on Access Control. The following page is displayed: www.modecom.eu... -
Page 31: Allow Listed
802.11n WLAN ADSL2+ Router Allow Listed 1. If you choose ‘Allowed Listed’, only those clients whose wireless MAC address- es are in the access control list will be able to connect to your Access Point. 2. From the Wireless Access Control Mode drop-down list, select Allowed Listed setting. - Page 32 1. From the Wireless Access Control Mode drop-down list, select Deny Listed setting. 2. Enter the MAC Address. 3. Click Add button. 4.Change setting successfully! Click on OK button to confirm and return. 5. The MAC Address that you created has been added in the Current Access Control List. www.modecom.eu...
-
Page 33: Wps
802.11n WLAN ADSL2+ Router Introduction of WPS Although home Wi-Fi networks have become more and more popular, users still have trouble with the initial set up of network. This obstacle forces users to use the open security and increases the risk of eavesdropping. Therefore, WPS is designed to ease set up of security-enabled Wi-Fi networks and subsequently network man- agement (Wi-Fi Protected Setup Specification 1.0h.pdf, p. - Page 34 Gateway, it will start to seek WPS AP. Once users apply the same method on regis- trar side, Wireless Gateway will receive the wireless profile upon successfully doing the registration protocol. Then Wireless Gateway will associate with an AP. www.modecom.eu...
- Page 35 802.11n WLAN ADSL2+ Router Instructions of AP’s and Client’s operations At this state, AP is transparent to users. If users want to configure a station or any device that is capable of being an enrollee, they have to enter device’s PIN into an external registrar and choose an appropriate wireless profile.
-
Page 36: Operations Of Ap - Ap Being An Enrollee
UPnP. Here, users do not need to do any action on AP side. They just need AP’s device PIN and enter it into registrar. An example from Vista WCN will be given. 1. From the left-hand Wireless -> WPS menu. The following page is displayed: 2. Make sure AP is in un-configured state. www.modecom.eu... - Page 37 802.11n WLAN ADSL2+ Router 3. Plug the Ethernet cable into AP’s LAN port and make sure the IP connection is valid with Vista. 4. Make sure WCN is enabled. Users may need to enable it at the first time. They could open the “Control Panel”, click “Classic View“, open “Administrative Tools”, double click “Services”, ”, a User Account Control pop up and click “Continue“, edit properties of “Windows Connect Now”, choose the “Startup type”...
- Page 38 802.11n WLAN ADSL2+ Router 7. Click on “Turn on network discovery and file sharing“ www.modecom.eu...
- Page 39 802.11n WLAN ADSL2+ Router 8. Click on “No, make the network that I am connected to a private network“ 9. AP’s icon will show up. Double click on it. 10. Users could also Click “Add a wireless device” if the icon is not there. Click “next”.
- Page 40 802.11n WLAN ADSL2+ Router 11. Enter AP’s Self-PIN Number and click “next”. 12. Choose a name that people who connect to your network will recognize. www.modecom.eu...
- Page 41 802.11n WLAN ADSL2+ Router 13. Enter the Passphrase and then click Next. 14. A User Account Control screen pops up, click Continue. 15. AP is successfully configured by WCN.
- Page 42 16. Finally, AP will become configured (see WPS Status). The authentication al- gorithm, encryption algorithm, and key assigned by WCN will be displayed below “Current Key Info”. 17. The SSID field of Wireless Basic Settings page will also be modified with the value assigned by WCN. www.modecom.eu...
-
Page 43: Operations Of Ap - Ap Being A Registrar
802.11n WLAN ADSL2+ Router Operations of AP - AP being a registrar AP mode Whenever users enter station’s PIN into AP’s Wi-Fi Protected Setup page and click “Start PIN”, AP will become a registrar. Users must start the PIN method on the sta- tion side within two minutes. - Page 44 802.11n WLAN ADSL2+ Router 7. If the device PIN is correct and the WPS handshake is successfully done on the station side, User’s Wi-Fi Protected status will be shown as below. www.modecom.eu...
- Page 45 802.11n WLAN ADSL2+ Router 8. If the device PIN is correct and the WPS handshake is successfully done, AP’s Wi-Fi Protected Setup page will be shown as below. Other pages such as Wireless Basic Settings page and Wireless Security Setup page will also be updated appropriately as described in previous sections. In this case, AP is in un-configured state before the station initiates the WPS handshake.
- Page 46 802.11n WLAN ADSL2+ Router 4. Users must start the PBC method on the station side within two minutes. 5. Users must start the PBC method on the station side within two minutes. www.modecom.eu...
- Page 47 802.11n WLAN ADSL2+ Router 6. If the device PCB and the WPS handshake is successfully done on the station side, User’s Wi-Fi Protected status will be shown as below. 7. If the device PIN is correct and the WPS handshake is successfully done, AP’s Wi-Fi Protected Setup page will be shown as below.
-
Page 48: Internet Access
ISP. Enable/Disable the Access Concentrator option. Either enter the WAN IP or select the option to automatically WAN IP Settings obtain IP address. Check as applicable the following two options: • Enable NAT • Add default Route www.modecom.eu... -
Page 49: Types Of Internet Access
802.11n WLAN ADSL2+ Router To configure Broadband Username and Password, enter the user name and password details. Also set the session estab- lishment condition as one of the following: Broadband User- • Continuous name and Pass- • Connect on demand. Enter the minutes after which the word session must be disconnected, if no activity takes place. - Page 50 3. Select the Encapsulation determined by your ISP. 4. From the Channel Mode drop-down list, select PPPoE setting. 5. Enter User Name/Password provided by your ISP. Type them in the relevant boxes. 6. If you are happy with your settings, click Add www.modecom.eu...
-
Page 51: Configuring Your Pppoa Dsl Connection
802.11n WLAN ADSL2+ Router 7. Your configuration is complete. 8. Now you are ready to Surf the Internet !!! Configuring your PPPoA DSL connection If your ISP’s Internet service uses PPPoA you need to set up a PPP login account. The first time that you login to the Internet, your ISP will ask you to enter a username and password so they can check that you are a legitimate, registered Internet service user. -
Page 52: Configuring Your Bridged Dsl Connection
WAN menu, click on Channel Config. The following page is displayed: • Enter VCI and VPI setting determined by your ISP. • Select the Encapsulation determined by your ISP. • From the Channel Mode drop-down list, select 1483 Bridged setting. • If you are happy with your settings, click www.modecom.eu... -
Page 53: Configuring Your 1483 Mer By Dhcp
802.11n WLAN ADSL2+ Router • Now you can load your PPPoE Client Software onto your PC. • Now you can load your PPPoE Client Software with user name and password which determined by your ISP onto your PC. Configuring your 1483 MER by DHCP •... -
Page 54: Configuring Your 1483 Mer By Fixed Ip
Local IP Address, Subnet Mask and Remote IP Address which was given by Telecom or by your Internet Service Provider (ISP). • If you are happy with your settings, click • Your configuration is complete. • Now you are ready to Surf the Internet !!! www.modecom.eu... -
Page 55: Atm Settings
802.11n WLAN ADSL2+ Router ATM Settings • The page is for ATM PVC QoS parameters setting. The DSL device support 4 QoS mode —CBR/rt-VBR/nrt-VBR/UBR. • From the left-hand WAN menu, click on Channel Config. The following page is displayed: Field Description Virtual Path Identifier. This is read-only field and is selected on the Select column in the Current ATM VC Table. -
Page 56: Adsl Settings
See section “Admin” for save details. Undo Discard your settings. ADSL Settings The ADSL setting page allows you to select any combination of DSL training modes. From the left-hand WAN menu, click on ADSL Settings. The following page is displayed: www.modecom.eu... - Page 57 802.11n WLAN ADSL2+ Router Field Description ADSL modula- Choose prefered xdsl standard protocols. tion G.lite : G.992.2 Annex A G.dmt : G.992.1 Annex A T1.413 : T1.413 issue #2 ADSL2 : G.992.3 Annex A ADSL2+ : G.992.5 Annex A AnnexL Option Enable/Disable ADSL2/ADSL2+ Annex L capability.
-
Page 58: Local Network Configuration
Changing the LAN IP address and subnet mask From the left-hand LAN menu, click on LAN. The following page is displayed: 10.0.0.2 From the left-hand Services menu, click on DHCP Settings. 10.0.0.2 10.0.0.33 10.0.0.254 10.0.0.2 Change the IP Pool Range and then click Apply Changes button. www.modecom.eu... - Page 59 802.11n WLAN ADSL2+ Router 10.0.0.2 10.0.0.4 10.0.0.5 10.0.0.2 Change setting successfully! Click OK button. From the left-hand LAN menu, click on LAN. Type a new IP Address and Subnet Mask. Click Apply Changes. The primary IP address is being changed to 10.0.0.2 netmask 255.255.255.0. Then Please go to http://10.0.0.2 to continue.
- Page 60 Web browser, you will be disconnected. You must open a new connection by entering your new LAN IP address as the URL. Note From the left-hand Admin menu, click on Commit/Reboot. The following page is displayed: Commit/Reboot page Click on OK. www.modecom.eu...
-
Page 61: Adding The Secondary Lan Ip Address And Subnet Mask
802.11n WLAN ADSL2+ Router The System is Restarting ... Adding the Secondary LAN IP address and subnet mask • From the left-hand LAN menu, click on LAN. • Check on Secondary IP. • Type the Secondary IP Address and Subnet Mask. •... -
Page 62: Dhcp Settings
You can configure your network and DSL device to use the Dynamic Host Configu- ration Protocol (DHCP). This page provides DHCP instructions for implementing it on your network by selecting the role of DHCP protocol that this device wants to play. www.modecom.eu... -
Page 63: Dhcp Server Configuration
802.11n WLAN ADSL2+ Router There are two different DHCP roles that this device can act as: DHCP Serve and DHCP Relay. When acting as DHCP server, you can setup the server parameters at the DHCP Server page; while acting as DHCP Relay, you can setup the relay at the DHCP Relay page. - Page 64 “Admin” for save details. Undo Discard your changes. • Change setting successfully! Click OK button. • From the left-hand Admin menu, click on Commit/Reboot. The following page is displayed: Commit/Reboot page • Click on • The System is Restarting ... www.modecom.eu...
-
Page 65: Dhcp Relay Configuration
802.11n WLAN ADSL2+ Router DHCP Relay Configuration • From the left-hand Services menu, click on DHCP Settings. • From Services check ratio, click on DHCP Relay Mode. • Type DHCP server IP Addresses for DHCP Relay. • Click on Apply Changes. Field Description DHCP Server Specify the IP address of your ISP’s DHCP server. - Page 66 Type exit to close the command window. Linux a. Bring up a shell. b. Type pump -r to release the lease. c. Type pump to renew the lease. • From the left-hand Admin menu, click on Commit/Reboot. The following page is displayed: Commit/Reboot page • Click on www.modecom.eu...
-
Page 67: Dhcp None Configuration
802.11n WLAN ADSL2+ Router • The System is Restarting ... DHCP None Configuration • From the left-hand Services menu, click on DHCP Settings. • From Services check ratio, click on None Mode. • Click on Apply Changes. Function Button Description Apply Changes Set new DHCP server configuration. New parameters will take effect after save into flash memory and reboot the system. - Page 68 Type exit to close the command window. Linux a. Bring up a shell. b. Type pump -r to release the lease. c. Type pump to renew the lease. • From the left-hand Admin menu, click on Commit/Reboot. The following page is displayed: Commit/Reboot page • Click on www.modecom.eu...
-
Page 69: Dns Configuration
802.11n WLAN ADSL2+ Router • The System is Restarting ... DNS Configuration There are two submenus for the DNS Configuration: DNS Server and Dynamic DHCP Server Configuration - Attain DNS Automatically • From the left-hand Services menu, click on DNS -> DNS Server. •... - Page 70 See section “Admin” for save details. Reset Selected Discard your changes. • Change setting successfully! Click OK button. • From the left-hand Admin menu, click on Commit/Reboot. The following page is displayed: Commit/Reboot page • Click on The System is Restarting ... www.modecom.eu...
-
Page 71: Dhcp Server Configuration - Set Dns Manually
802.11n WLAN ADSL2+ Router DHCP Server Configuration - Set DNS Manually • From the left-hand Services menu, click on DNS -> DNS Server. • From check ratio, click on Attain Set DNS Manually. • Enter the IP Address of DNS. • Click on Apply Changes. Field Description Attain DNS Select this item if you want to use the DNS servers obtained by Automatically... -
Page 72: Overview Of Dynamic Dns
This will result in non-accessibility of this host on the Internet. Dynamic DNS service allows to keep mapping of a dynamic IP address of such host to a static hostname. Dynamic DNS services are provided by many websites. The host needs www.modecom.eu... - Page 73 802.11n WLAN ADSL2+ Router to register with some website and get a domain name. When the IP address of the host changes, it just needs to send a message to the website that’s providing dynam- ic DNS service to this host. For this to work, an automated update client needs to be implemented.
-
Page 74: Dynamic Dns Configuration - Dyndns.org
Check this item to enable this registration account for the DNS server. DDNS provider There are two DDNS providers to be selected in order to register your device with: DynDNS and TZO. A charge may occurs depends on the service you select. www.modecom.eu... - Page 75 802.11n WLAN ADSL2+ Router Hostname Domain name to be registered with the DDNS server. Username User-name assigned by the DDNS service provider. Password Password assigned by the DDNS service provider. Function Button Description Click Add to add this registration into the configuration. Modify Click Modify to modify this registration into the configuration.
- Page 76 Click Modify to modify this registration into the configuration. Remove Select an existing DDNS registration by clicking the radio button at the Select column of the Dynamic DNS Table. Click Remove button to remove the selected registration from the configuration. • Configure Dynamic DNS setting successfully! www.modecom.eu...
-
Page 77: Ip/Port Filtering
802.11n WLAN ADSL2+ Router • From the left-hand Admin menu, click on Commit/Reboot. The following page is displayed: Commit/Reboot page • Click on • The System is Restarting ... IP/Port Filtering Firewall contains several features that are used to deny or allow traffic from pass- ing through the device. - Page 78 The destination IP address assigned to the traffic on which filtering is applied. Destination Subnet Mask Subnet-mask of the destination IP. Destination Port Starting and ending destination port numbers. Function Button Description Apply Changes Click to save the rule entry to the configuration. www.modecom.eu...
-
Page 79: Mac Filtering
802.11n WLAN ADSL2+ Router Delete Selected Delete selected filtering rules from the filter table. You can click the checkbox at the Select column to select the filtering rule. Delete All Delete all filtering rules from the filter table. MAC Filtering The MAC filtering feature allows you to define rules to allow or deny frames through the device based on source MAC address, destination MAC address, and traffic direction. - Page 80 Select column to select the filtering rule. Delete All Delete all filtering rules from the filter table. • From the left-hand Admin menu, click on Commit/Reboot. The following page is displayed: • Click on • The System is Restarting ... www.modecom.eu...
-
Page 81: Port Forwarding
802.11n WLAN ADSL2+ Router Port Forwarding Your device has built in advanced Security features that protect your network by blocking unwanted traffic from the Internet. If you simply want to connect from your local network to the Internet, you do not need to make any changes to the default Security configuration. -
Page 82: Configuring Custom Applications
Your application provider or games manufacturer should provide you with these details. Port Forwarding for FTP In this example configuration, a custom application called FTP Server using TCP port 21 is created. www.modecom.eu... - Page 83 802.11n WLAN ADSL2+ Router • From the left-hand Services menu, click on Port Forwarding. The following page is displayed: • From the Port Forwarding check ratio, check on Enable • Click Apply Changes • Type the Local IP Address for your FTP Server. •...
- Page 84 You can click the checkbox at the Select column to select the forwarding rule. Delete All Delete all forwarding rules from the forwarding table. 10.0.0.33 • Configure Port Forwarding setting successfully! • From the left-hand Admin menu, click on Commit/Reboot. The following page is displayed: • Click on www.modecom.eu...
- Page 85 802.11n WLAN ADSL2+ Router • The System is Restarting ... Port Forwarding for HTTP In this example configuration, a custom application called HTTP Server using TCP port 80 is created. • From the left-hand Services menu, click on Port Forwarding. The following page is displayed:...
- Page 86 Click to change the setting of default actions to the configuration. Delete Selected Delete the selected port forwarding rules from the forwarding table. You can click the checkbox at the Select column to select the forwarding rule. Delete All Delete all forwarding rules from the forwarding table. www.modecom.eu...
- Page 87 802.11n WLAN ADSL2+ Router • Configure Port Forwarding setting successfully! 10.0.0.33 • From the left-hand Admin menu, click on Commit/Reboot. The following page is displayed: • Click on The System is Restarting ... Deleting custom applications • From the left-hand Services menu, click on Port Forwarding. •...
- Page 88 802.11n WLAN ADSL2+ Router • Click Delete Selected. The Port Forwarding setting has been deleted completely. • From the left-hand Admin menu, click on Commit/Reboot. The following page is displayed: • Click on • The System is Restarting... www.modecom.eu...
-
Page 89: Url Blocking
802.11n WLAN ADSL2+ Router URL Blocking The URL Blocking is the web filtering solution. The firewall includes the ability to block access to specific web URLs based on string matches. This can allow large numbers of URLs to be blocked by specifying only a FQDN (such as tw.yahoo.com). The URL Blocking enforce a Web usage policy to control content downloaded from, and uploaded to, the Web. - Page 90 URL Blocking check ratio, check on Enable • Click Apply Changes • Type the FQDN in the FQDN field. • Click • Configure URL Blocking of FQDN setting successfully! • From the left-hand Admin menu, click on Commit/Reboot. The following page is displayed: www.modecom.eu...
-
Page 91: Configuring Url Blocking Of Keyword
802.11n WLAN ADSL2+ Router • Click on Configuring URL Blocking of Keyword • From the left-hand Services menu, click on Firewall -> URL Blocking. The fol- lowing page is displayed:... - Page 92 Delete the selected keyword from the keyword Filtering table. You Keyword can click the checkbox at the Select column to select the filtered keyword. • From the URL Blocking check ratio, check on Enable • Click Apply Changes • Type the Keyword in the Keyword field. • Click www.modecom.eu...
-
Page 93: Domain Blocking
802.11n WLAN ADSL2+ Router • Configure URL Blocking of Keyword setting successfully! • From the left-hand Admin menu, click on Commit/Reboot. The following page is displayed: • Click on Domain Blocking The firewall includes the ability to block access to specific domain based on string matches. - Page 94 Select column to select the Blocked domain. • From the URL Blocking check ratio, check on Enable • Click Apply Changes • Type the Keyword in the Keyword field. • Click • Configure Domain Blocking setting successfully! www.modecom.eu...
-
Page 95: Dmz
802.11n WLAN ADSL2+ Router • From the left-hand Admin menu, click on Commit/Reboot. The following page is displayed: • Click on A demilitarized zone (DMZ) is a host or small network that acts as neutral ground between the inside and outside network. It contains information that is useful to users of both the inside and outside network. - Page 96 DMZ Host check ratio, check on Enable • Type the IP Address in the DMZ Host IP Address field. • Click Apply Changes 10.0.0.33 • Configure DMZ Host setting successfully! Click • From the left-hand Admin menu, click on Commit/Reboot. The following page is displayed: • Click on www.modecom.eu...
-
Page 97: Upnp
802.11n WLAN ADSL2+ Router UPnP UPnP is an architecture for pervasive peer-to-peer network connectivity of intel- ligent appliances, Wireless devices, and PCs of all form factors. It is designed to bring easy-to-use, flexible, standards-based connectivity to ad-hoc or unmanaged networks whether in the home, in a small business, public spaces, or attached to the Internet. - Page 98 UPnP check ratio, check on Enable • Select a WAN Interface from the WAN Interface drop-down list. • Click Apply Changes • Configure DMZ Host setting successfully! Click • From the left-hand Admin menu, click on Commit/Reboot. The following page is displayed: • Click on www.modecom.eu...
-
Page 99: Upnp Control Point Software On Windows Me
802.11n WLAN ADSL2+ Router UPnP Control Point Software on Windows ME To install the control point software on Windows ME: 1. In the Control Panel, select “Add/Remove Programs”. 2. In the “Add/Remove Programs Properties” dialog box, select the “Windows Set- up”... - Page 100 If you are using Windows XP, select: • “Universal Plug and Play”. If you are using Windows XP SP1, select: • “Internet Gateway Device discovery and Control Client”. • “Universal Plug and Play”. If you are using Windows XP SP2, select: www.modecom.eu...
-
Page 101: Rip
802.11n WLAN ADSL2+ Router • “Internet Gateway Device discovery and Control Client”. • “UPnP User Interface”. 6. Reboot your system. Once you have installed the UPnP software and you have rebooted (and your net- work includes the IGD system), you should be able to see the IGD controlled device on your network. - Page 102 Indicate the RIP version this interface will use when it sends its route information to other devices. Function buttons for the Description second setting block in this page Add a RIP entry and the new RIP entry will be display in the table www.modecom.eu...
-
Page 103: Arp Table
802.11n WLAN ADSL2+ Router Delete Selected Entry Delete a selected RIP entry. The RIP entry can be selected on the Select column of the RIP Config Table. ARP Table This ARP Table shows a list of learned MAC addresses. ARP Table From the left-hand Advance menu, click on ARP table. -
Page 104: Routing
You may need to define routes if your home setup includes two or more networks or subnets, if you connect to two or more ISP services, or if you connect to a remote corporate LAN. Routing From the left-hand Advance menu, click on Routing. The following page is dis- played: www.modecom.eu... - Page 105 802.11n WLAN ADSL2+ Router Fields on the first setting Description block Enable Check to enable the selected route or route to be added. Destination The network IP address of the subnet. The destination can be specified as the IP address of a subnet or a specific host in the subnet.
-
Page 106: Snmp
UDP protocol on port 161 to communicate between clients and servers. The DSL device can be managed locally or remotely by SNMP protocol. 10.0.0.254 SNMP From the left-hand Advance menu, click on SNMP. The following page is dis- played: www.modecom.eu... -
Page 107: Port Mapping
802.11n WLAN ADSL2+ Router Fields on the first setting Description block System Description System description of the DSL device. System Contact Contact person and/or contact information for the DSL device. System Name An administratively assigned name for the DSL device. System Location The physical location of the DSL device. System Object ID Vendor object identifier. - Page 108 3.Click “Apply Changes” button to save the changes. Function Description buttons Apply Save SNMP configuration. New configuration will take effect after saving into Changes flash memory and rebooting the system. See section “Admin” for details. www.modecom.eu...
-
Page 109: Ip Qos
802.11n WLAN ADSL2+ Router IP QoS The DSL device provides a control mechanism that can provide different priority to different users or data flows. The QoS is enforced by the QoS rules in the QoS table. A QoS rule contains two configuration blocks: Traffic Classification and Action. The Traffic Classification enables you to classify packets on the basis of various fields in the packet and perhaps the physical ingress port. -
Page 110: Remote Access
The Remote Access function can secure remote host access to your DSL device from LAN and WLAN interfaces for some services provided by the DSL device. From the left-hand Advance menu, click on Remote Access. The following page is displayed: www.modecom.eu... -
Page 111: Others
802.11n WLAN ADSL2+ Router Fields Description Check/un-check the services on the LAN column to allow/un-allow the services access from LAN side; and “WAN”: Check/un-check the services on the WAN column to allow/un- allow the services access from WAN side. WAN Port This field allows the user to specify the port of the corresponding service. - Page 112 Fields Description Host Address The IP address you want to ping. Function buttons Description To start the ping command • Type the IP Address in the Host Address field. • Click • Now you could see the result below: www.modecom.eu...
-
Page 113: Atm Loopback
802.11n WLAN ADSL2+ Router ATM Loopback In order to isolate the ATM interface problems, you can use ATM OAM loopback cells to verify connectivity between VP/VC endpoints, as well as segment endpoints within the VP/VC. ATM uses F4 and F5 cell flows as follows: −F4: used in VPs −F5: used in VCs An ATM connection consists of a group of points. -
Page 114: Adsl
ADSL This page shows the ADSL diagnostic result. Click Start button to start the ADSL diagnostic. • From the left-hand Diagnostic menu, click on ADSL. The following page is displayed: • Click Start button to start the ADSL diagnostic. www.modecom.eu... -
Page 115: Diagnostic Test
802.11n WLAN ADSL2+ Router Diagnostic T est The Diagnostic Test page shows the test results for the connectivity of the physical layer and protocol layer for both LAN and WAN sides. • From the left-hand Diagnostic menu, click on Diagnostic Test. The following page is displayed: •... -
Page 116: Commit/Reboot
IMPORTANT! Do not turn off your modem or press the Reset button while this procedure is in progress. Commit/Reboot • From the left-hand Admin menu, click on Commit/Reboot. The following page is displayed: Commit/Reboot page • Click on • The System is Restarting ... www.modecom.eu... -
Page 117: Backup/Restore
802.11n WLAN ADSL2+ Router Backup/Restore You can save the current configuration of your Router to a file on your computer. This is highly recommended before you change any configuration settings on the Router or before you upgrade your firmware. Backup settings •... -
Page 118: Restore Settings
This configuration has been set by MODECOM for you, and contains the basic settings that you can use without having to make extensive changes to the configuration. -
Page 119: Software Reset
802.11n WLAN ADSL2+ Router to the original factory configuration, you can do so by resetting the device to factory defaults. If you reset your device to factory defaults, all previous configuration changes that you have made are overwritten by the factory default configuration. Note Software Reset: •... -
Page 120: Password
If you are happy with these settings, click Apply Changes. You will see following page that the new user has been displayed on the Currently Defined Users. You need to login to the web pages using your new username and new password. www.modecom.eu... - Page 121 802.11n WLAN ADSL2+ Router • Administration Password • Click • Enter new User name and Password. • Click Apply. 10.0.0.2 Login page...
-
Page 122: Firmware Update
About firmware versions Firmware is a software program. It is stored as read-only memory on your device. MODECOM is continually improving this firmware by adding new features to it, and these features are saved in later versions of the firmware. - Page 123 802.11n WLAN ADSL2+ Router Manual Update Installation section (Note that if you are using certain browsers (such as Opera 7) the Browse button is labeled Choose.) • Use the Choose file box to navigate to the relevant directory where the firm- ware version is saved. •...
- Page 124 802.11n WLAN ADSL2+ Router MODECOM MC-4220 ADSL Router 10.0.0.2 • Click on www.modecom.eu...
-
Page 125: Acl Configuration
802.11n WLAN ADSL2+ Router • Please wait for 1 minute to let the system reboot. ACL Configuration This page is used to configure the IP Address for Access Control List. If ACL is enabled, just these IP address that in the ACL Table can access CPE. Here you can add/delete IP Address. - Page 126 802.11n WLAN ADSL2+ Router Check on Enable. • From the Interface drop-down list, select LAN. • Enter the IP Address and the Subnet Mask. • Click Add. 10.0.0.34 • From the ACL Capability ratio, select Enable. • Click Apply Changes. 10.0.0.34/24 www.modecom.eu...
-
Page 127: Time Zone
802.11n WLAN ADSL2+ Router From the left-hand Admin menu, click on Commit/Reboot. The following page is displayed: • Click on Commit and Reboot. • Click on • The System is Restarting ... Time Zone Certain systems may not have a date or time mechanism or may be using inac- curate time/day information. - Page 128 Click to save the setting of default actions to the configuration. Select your own Time Zone from the Time Zone Select drop-down list. • Check on Enable SNTP client update. • You can select the SNTP Server from the drop-down list or add association list using IP Address. • Click on Apply Change. www.modecom.eu...
- Page 129 802.11n WLAN ADSL2+ Router • SNTP Server Configuration page • Configure SNTP setting successfully! Click • From the left-hand Admin menu, click on Commit/Reboot. The following page is displayed: • Click on Time GMT +/- Daylight Saving Description Daylight Saving End Zone offset Start...
- Page 130 Last Sunday March Last Sunday October +200 at 2:00am at 2:00am Israeli Stan- First Friday April at First Friday September +200 dard 2:00am at 2:00am First Friday of Septem- +300 Israeli Daylight 1st April at 2:00am ber at 2:00am www.modecom.eu...
- Page 131 802.11n WLAN ADSL2+ Router +300 Baghdad 1st April at 2:00am 1st October at 2:00am +330 Iran 21st March 23rd September Last Sunday March Last Sunday in Octo- USZ3 +400 Russian Volga at 2:00am ber at 2:00am Last Sunday of Last Sunday October USZ4 +500 Russian Ural...
-
Page 132: Tr-069 Config
TR-069 is a protocol for communication between a CPE and Auto-Configuration Server (ACS). The CPE TR-069 configuration should be well defined to be able to communicate with the remote ACS. TR-069 Configuration • From the left-hand Admin menu, click on TR-069 Config. The following page is displayed: TR-069 Configuration page www.modecom.eu... -
Page 133: Statistics
802.11n WLAN ADSL2+ Router ACS Field Description ACS URL. For example, http://10.0.0.1:80 https://10.0.0.1:443 User Name The username the DSL device should use when connecting to the ACS. Password The password the DSL device should use when connecting to the ACS. Periodic Inform When this field is enabled, the DSL device will send an Inform Enable... -
Page 134: Adsl
This page shows the ADSL line statistic information. • From the left-hand Statistics menu, click on ADSL. The following page is dis- played: • To display updated statistics showing any new data since you opened this page, click Refresh. www.modecom.eu... -
Page 135: Configuring Your Computers
802.11n WLAN ADSL2+ Router Configuring your Computers This appendix provides instructions for configuring the Internet settings on your computers to work with the Wireless ADSL2+ Router. Configuring Ethernet PCs Before you begin By default, the Wireless ADSL2+ Router automatically assigns the required Inter- net settings to your PCs. - Page 136 Select Network Component Type dialog box, select Protocol, and then click Add… • Select Microsoft in the Manufacturers box. • Select Internet Protocol (TCP/IP) in the Network Protocols list, and then click • You may be prompted to install files from your Windows Me installation CD or www.modecom.eu...
- Page 137 802.11n WLAN ADSL2+ Router other media. Follow the instructions to install the files. • If prompted, click OK to restart your computer with the new settings. • Next, configure the PCs to accept IP information assigned by the Wireless ADSL2+ Router: •...
-
Page 138: Assigning Static Internet Information To Your Pcs
You have obtained one or more public IP addresses that you want to always associate with specific computers (for example, if you are using a computer as a public web server). • You maintain different subnets on your LAN (subnets are described in Ap- pendix B). www.modecom.eu... -
Page 139: Ip Addresses, Network Masks, And Subnets
802.11n WLAN ADSL2+ Router Before you begin, you must have the following information available: • The IP address and subnet mask of each PC • The IP address of the default gateway for your LAN. In most cases, this is the address assigned to the LAN port on the Wireless ADSL2+ Router. - Page 140 = 192-223: Class C (field1 values not shown are reserved for special uses) • A host ID can have any value except all fields set to 0 or all fields set to 255, as those values are reserved for special uses. www.modecom.eu...
-
Page 141: Subnet Masks
802.11n WLAN ADSL2+ Router Subnet masks A mask looks like a regular IP address, but contains a pattern of bits that tells what parts of an IP address are the network ID and what parts are the host ID: bits set to 1 mean “this bit is part of the network ID” and bits set to 0 mean Definition “this bit is part of the host ID.”... -
Page 142: Troubleshooting Suggestions
ISP that the Internet. the address configured on the Wireless ADSL2+ Router is correct, then You can use the ping utility, to test con- nectivity with your ISP’s DNS server. Web pages www.modecom.eu... -
Page 143: Diagnosing Problem Using Ip Utilities
802.11n WLAN ADSL2+ Router Problem Troubleshooting Suggestion If you have not changed the password from the default, try using “admin” the user ID and “administrator“ as pass- word. Otherwise, you can reset the device to the default I forgot/lost my user ID configuration by pressing the Reset Default button on the or password. - Page 144 Click OK. A Command Prompt window displays with a bracket prompt (>). At the prompt, type the name of the Internet address that you are interested in, such as www.microsoft.com. The window will display the associate IP address, if known, as shown below: www.modecom.eu...
-
Page 145: Glossary
802.11n WLAN ADSL2+ Router Using the nslookup Utility There may be several addresses associated with an Internet name. This is com- mon for web sites that receive heavy traffic; they use multiple, redundant servers to carry the same information. To exit from the nslookup utility, type exit and press [Enter] at the command prompt. - Page 146 A DHCP relay is a computer that forwards DHCP data be- tween computers that request IP addresses and the DHCP server that assigns the addresses. Each of the Wireless ADSL2+ Router’s interfaces can be configured as a DHCP relay. See DHCP. www.modecom.eu...
- Page 147 802.11n WLAN ADSL2+ Router DHCP server Dynamic Host Configuration Protocol server A DHCP server is a computer that is responsible for assigning IP addresses to the computers on a LAN. See DHCP. digital Of data, having a form based on discrete values expressed as binary numbers (0’s and 1’s).
- Page 148 Internet The global collection of interconnected networks used for both private and business communications. intranet A private, company-internal network that looks like part of the Internet (users access information using web browsers), but is accessible only by employees. See TCP/IP. www.modecom.eu...
- Page 149 802.11n WLAN ADSL2+ Router IP address Internet Protocol address The address of a host (computer) on the Internet, consisting of four numbers, each from 0 to 255, separated by periods, e.g., 209.191.4.240. An IP address consists of a network ID that identifies the particular network the host belongs to, and a host ID uniquely identifying the host itself on that network.
- Page 150 PPP called PPPoA and PPPoE. See PP- PoA, PPPoE. PPPoA Point-to-Point Protocol over ATM One of the two types of PPP interfaces you can define for a Virtual Circuit (VC), the other type being PPPoE. You can de- fine only one PPPoA interface per VC. www.modecom.eu...
- Page 151 802.11n WLAN ADSL2+ Router PPPoE Point-to-Point Protocol over Ethernet One of the two types of PPP interfaces you can define for a Virtual Circuit (VC), the other type being PPPoA. You can de- fine one or more PPPoE interfaces per VC. protocol A set of rules governing the transmission of data.
- Page 152 NAT can translate packets to the correct destination. You can specify whether you want to carry out address replace- ment, and if so, whether to replace addresses on TCP pack- ets only, UDP packets only, or both. www.modecom.eu...
- Page 153 802.11n WLAN ADSL2+ Router twisted pair The ordinary copper telephone wiring used by telephone companies. It contains one or more wire pairs twisted togeth- er to reduce inductance and noise. Each telephone line uses one pair. In homes, it is most often installed with two pairs. For Ethernet LANs, a higher grade called Category 3 (CAT 3) is used for 10BASE-T networks, and an even higher grade called Category 5 (CAT 5) is used for 100BASE-T networks.
- Page 154 A web site typically consists of web pages that contain text, graphics, and hyperlinks. See hyperlink, web page. World Wide Web Also called (the) Web. Collective term for all web sites any- where in the world that can be accessed via the Internet. www.modecom.eu...
- Page 155 802.11n WLAN ADSL2+ Router...
- Page 156 MODECOM S.A. 00-124 Warszawa, Rondo ONZ 1. www.modecom.eu Copyright© 2010. MODECOM S.A. All rights reserved. MODECOM Logo is a registered trademark of MODECOM S.A. MODECOM www.modecom.eu...
Need help?
Do you have a question about the MC-4220 and is the answer not in the manual?
Questions and answers