Table of Contents
Advertisement
Advertisement
Table of Contents

Subscribe to Our Youtube Channel
Related Manuals for JAWA Dandy MJ50


Summary of Contents for JAWA Dandy MJ50
-
Page 2: Introduction
DANDY MJ50 Operation and Maintenance Manual Dear friends, you have become the owners of Dandy 50 motorcycle that was manufactured in MotorJikov, a joint stock company, in Českě Budějovice, Czech Republic. This late type of two-seat motorcycle has renewed interrupted tradition in manufacturing of Stadion mopeds that were the top products of Czech motorcycle industry in their time. -
Page 3: Table Of Contents
8.13. Rear Wheel Brake Check and Adjustment Table of Contents 8.14. Excessive Effect of Brakes Introduction 8.15. Rear Stop Light Switch 8.16. Front Stop Light Switch Table of Contents 8.17. Chain Tightening 8.18. Chain Cleaning Technical Data 8.19. Front Wheel Mounting and Dismantling 3.1. -
Page 4: Technical Data
3. Technical Data 3.1. Engine Type SACHS 50/5 AKF SACHS 50 S SACHS 50/5 AKF I * SACHS 50/5 AKF. ** SACHS 50/5 AKF I. ** Number of cylinders Cylinder bore/Piston stroke 38 mm/44 mm Cylinder capacity 49.9 ccm Compression ratio 11.5:1 10:1 Engine max. -
Page 5: Electric Equipment
Wheel dimensions Front rim 1.6x 17" Rear rim 1.6x17" Tyre dimensions Front tyre MICHELIN 2.75"x17" METZELER 2.75"x17" SAVA 2.75 x17” Rear tyre MICHELIN 3.0"x17" METZELER 3.0"x17` SAVA 2.75 x17" BARUM * 90/90 x 17" * (only combined with front wheel tyre, e.g. SAVA) Tyre pressure Front tyre a) solo... -
Page 6: Other Data
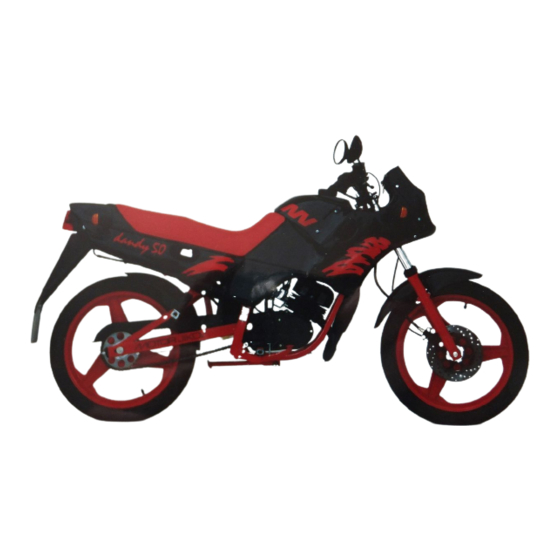
Rear absorber a) Oil AMG 10 b) Volume 100 ccm Front disk brake a) Brake fluid Synthol HD-205 Classification DOT 3 b) Volume 40 ccm 3.5. Other Data Dimensions Length 1,950 mm Width 700 mm Height 1,070 mm Seat height 800 nini Wheel base 1,320 mm... - Page 7 Figure 2 Motorcycle Description 1 - Rear foot rest 2 - Rear light 3 - Oil tank 4 - Rear direction light 5 - Fuel tank 6 - Clutch lever 7 - Rear-view mirrors 8 - Brake lever 9 - Front bonnet 10 - front direction light 11 - Engine 12 - Carburetter...
-
Page 8: Technical Description
4. Technical Description The motorcycle is designed for operation on roads, but its design also enables to use it in a light terrain. The 50 ccm engine is carried by the cradle-shaped double frame welded from steel sections (round, square and rectangular cross sections), which design ensures high overall stiffness of the motorcycle and guarantees safe drive. -
Page 9: Familiarization With Motorcycle Before Drive
5. Familiarization with motorcycle before Drive Before first drive it is necessary to familiarize himself with the motorcycle thoroughly and to carry out check of the whole motorcycle according to Section 6. 5.1 Electric Switch Control Switch Box The switch box controls ignition and lighting Position 0 - Electric circuits are opened and it is possible to withdraw the key. -
Page 10: Brake Control
5.2. Brake Control Two independent brakes serve for safe stopping of the motorcycle. The machine is equipped with the disk brake on the front wheel, and the drum brake on the rear one 1. Front Brake Control The front disk brake is operated by right hand. using the lever located on the right side of the handlebars (See Figure 8). -
Page 11: Fuel Cock Control
5.5. Fuel Cock Control The fuel cock has 3 positions - open, closed, and reserve, and at the same time it cleans the fuel. OFF - The cock does not let fuel flow through it in this position (Return always to this position after stopping the engine). -
Page 12: Machine Locking
5.9. Machine Locking It is possible to secure the motorcycle against unauthorized use by locking the lock located on the right side of the steering head (Figure 15). Lock the machine by insertion of the key into the lock, turning the key to the right, insertion of the lock inside, turning the key to the left and its withdrawal. - Page 13 For motorcycles with separated lubrication of the engine (engines SACKS 50/5 AKF I, AKF SI). Open the fuel tank closure by its turning to the right and refuel the tank with the petrol prescribed. Open the oil tank closure (for separated lubrication of the engine) and refill the tank with the oil prescribed.
-
Page 14: Motorcycle Check Before Drive
6. Motorcycle Check Before Drive 6.1. Brake Check 1. Brake Lever and Brake Pedal Check correct functions of the front brake lever and rear brake pedal. If the functions are not acceptable, make necessary adjustments (see Section 8.12, 8.13). 2. Brake Fluid Check the amount of the brake fluid in the tank on the right side of the handlebars. -
Page 15: Driving The Motorcycle
7. Driving the Motorcycle The driver must own a licence for driving small motorcycles and meet all requirements according to valid regulations and the highway code. When driving it is unconditionally necessary for the driver and pillion-rider to use protective crash helmets. -
Page 16: Motorcycle Stopping
Correct placing of loads on your motorcycle is important for its control, braking, and other manoevring, and it can affect the safety of drive. Do not transport freely attached things that could move during drive and change the balance suddenly. Never overload the motorcycle;... -
Page 17: Lubrication And Maintenance Schedule
8.1. Lubrication and Maintenance Schedule Before After Putting In Case of Work Description and Scope every 3,000 km 6,000 km into Need 1,000 km Operation Screws and nuts Tighten all screws and nuts (See Section 8.2.) Driving chain Check tightening of the chain. Clean and grease it by the spray for chains. -
Page 18: Torques
Before After Putting In Case of Work Description and Scope every 3,000 km 6,000 km into Need 1,000 kni Operation Clutch and its adjustment Check its function and adjust or replace it, if need be. (See Section 3.11.) Telescopic fork Functional check or replacement, if need be. -
Page 19: Table Of Lubricants
8.3. Table of Lubricants Used Grease (Viscosity Class) Gear box SAE 80 W MOGUL TRANS 80 API GL-4 TRYSK GYROL 80W/90 MADIT PP 80 CASTROL EP 80 SHELL Spirax EP (MA) Bowden cables MOGUL TS Lever pins SAE 80 W MOGUL TRANS 80 API GL-4 TRYSK GYROL 8OW/90... -
Page 20: Fuel Cock Cleaning
8.6. Fuel Cock Cleaning The fuel cock has a built-in filter element that cleans fuel before the carburetter inlet. If it would have been clogged, the fuel could not get into the engine in required amount. Type: Bonneted design Disconnect the electric installation from the front direction lights, and dismantle the lights by releasing and unscrewing the fastening nuts. -
Page 21: Carburetter Check
8.8. Carburetter Check The carburerter is an important component of to engine, and its adjustment requires special skills and special service equipment. Most of operations at adjusting would be carried out in a special sertiice. Check of the Carburetter Fuel Screen In case of need or after 6,000 km it is recommended to carry out the check of ;uel screen in the carburetter. -
Page 22: Clutch Check And Adjustment
8.11. Clutch Check and ,Adjusment Any damage to the Bowden cable causes corrosion of the cable and stranded wire, which could prevent from its motion. It can result in dangerous situations. Therefore, if the cable is damaged mechanically, replace the whole cable immediately by a new one. If the clutch stranded wire hardly moves in the Bowden cable, lubricate the cable with thin oil. -
Page 23: Front Wheel Brake Check And Adjustment
8.12. Front Wheel Brake Check and Adjustment It is recommended to have the following work made by a special service. For the front wheel hydraulic brake, the brake plates are self-adjusting. Due to wet, dirty or wear the brake plates can become hardly movable in the disk brake yoke body after long use. Clean the brake plates and contact surfaces in the yoke body. -
Page 24: Rear Wheel Brake Check And Adjustment
8.13. Rear Wheel Brake Check and Adjustment Rear Wheel Brake Maintenance It is recommended to have the following operations made by a special service. The brake maintenance requires only its regular adjustment and cleaning and check of its lining thickness and condition (roughly once or twice a year, or at worse effect of the brake) Cleaning will remove dirty;... -
Page 25: Rear Stop Light Switch
8.15. Rear Stop Light Switch The stop light switch must be set in such a way that the stop light goes on immediately at the start of the brake control lever travel. It is not possible to adjust the stop light switch. Replace it, if need be, or contact the special service. 8.16. -
Page 26: Chain Cleaning
8.18. Chain Cleaning First dismantle the right cover of the engine. Release the wheel axle nut and chain tighteners. Then disconnect the chain coupling link (Figure 36). withdraw the chain from the engine block, and take it out of the gear by moving the wheel a slight amount. -
Page 27: Steering Bearing Clearance Check
8.22. Steering Bearing Clearance Check Move the telescopic fork arms forward and back. There must be no clearance in the steering bearings. If there is a clearance in the bearings, proceed in following way. 8.23. Wheel Bearing Check If there is a clearance in the front or rear wheel bearings, or if the wheel does not turn smoothly and easily, have the bearings checked in the special service. -
Page 28: Lamp Replacement
8.27. Lamp Replacement Front Headlight Type: bonneted design Check and / or replace the lamps in the following way: Dismantle the rear protective cover of the headlight, release the securing spring, and remove the lamp closure. Dismantle the lamps of the main headlight and clearance light and check them. Replace them, if need Lamp type: Main headlight: 12V 35/35W Clearance light: 12V 5W Mounting is carried out in the reverse order. -
Page 29: Battery Check
8.29. Battery Check Good condition of the battery influences correct function of all electric equipment. Therefore take special care of the battery. The battery is placed in the box under the double-seat, and is accessible after unlocking and lifting the seat up. The battery is delivered charged. -
Page 30: Electric Installation Diagram
8.30. Electric Installation Diagram Electrical equipment location and wire identification... -
Page 31: Care Of The Motorcycle
9. Care of the Motorcycle Regular and special care helps to maintain the motorcycle in appropriate technical state, and guarantees its safe use, without expensive repairs that should have occured if you neglect the regular maintenance. The regular prescribed care of the motorcycle is also the presupposition of guarantee claims in case of failures, if any. -
Page 32: Fuel Saving
Recommendations After a longer drive it is recommended to clean the aluminium parts of the motorcycle by a cleaning agent or to brush them, wash with water, dry them and apply an anticorrosive protection by a preservative agent. 9.4. Fuel Saving Have the damaged brakes repaired immediately.
Need help?
Do you have a question about the Dandy MJ50 and is the answer not in the manual?
Questions and answers