
Related Manuals for JAWA B


Summary of Contents for JAWA B
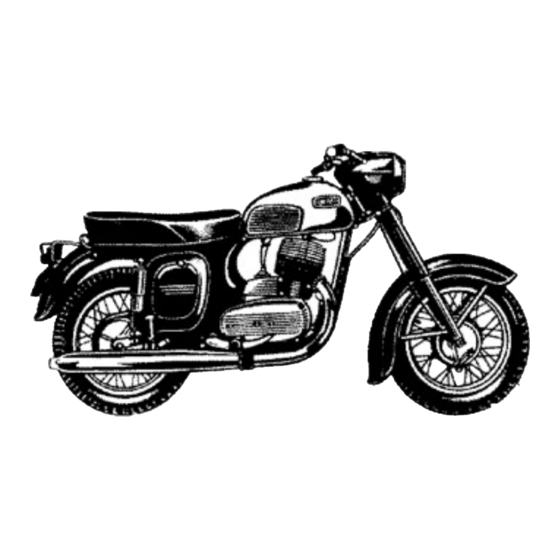
- Page 1 Specification and Operator's Manual WITH SPECIAL REFERENCE TO SERVICING AND ROUTINE MAINTENANCE OF MOTORCYCLES YEZDI 250 cc MODEL ‘B’ JAWA 250 cc MODEL 353/04 Manufacturers IDEAL JAWA (INDIA) PRIVATE LTD., MYSORE 570 002, SOUTH INDIA...
-
Page 5: Table Of Contents
INDEX I SPECIFICATION AND OPERATOR'S MANUAL Page 1. Technical data 2. Description of motorcycle 3. Electrical equipment description 4. Running a new motorcycle 5. Servicing instructions 6. What should be avoided II MAINTENANCE 1. Cleaning the motorcycle 2. Lubricating the motorcycle 3. - Page 6 LIST OF ILLUSTRATIONS 1. JAWA 250 c.c..model 353/04 24. Removing the front wheel 1a. Yezdi Model 'B’ 25. Taking out the rear wheel spindle 2. Engine 250 c.c - sectional view 26. Dismantling the chaincase 3. Plan of the Motorcycle 27.
-
Page 7: Technical Data
12 BHP (YEZDI - 13 BHP) Fuel consumption at steady 60 km.p.h 3 litres/100 km (37 m.p.h) (93 m.p.gallon) Fuel tank capacity 13.5 litres (Jawa); 14.5 litres (Yezdi) Maximum speed 105 km.p.h (65 m.p.h) Maximum climbing ability (fully laden) Dimensions of motorcycle... - Page 8 Fig. 2. Engine 250 c. c.- sectional view...
- Page 9 Fig .3. Plan of the Motorcycle...
-
Page 10: Description Of Motorcycle
2. DESCRIPTION OF MOTORCYCLE The 250 c.c is a solo motorcycle suitable for carrying one or two persons. The power unit is a two-stroke, air-cooled petrol engine with inverted scavenging. The engine has a quiet run, well balanced within its extent of revolutions, without vibration and is capable of lively acceleration. - Page 11 as the engine starts running the lever returns automatically into the horizontal position. The power transmission is by means of chains. The primary chain is enclosed by the L.H. crankcase cover and runs in oil bath. The final or secondary drive chain which connects the gear box sprocket to the rear chain wheel is also fully enclosed by means of a chain case and this arrangement makes the chain last much longer.
- Page 12 The handlebars of 22 mm (55/64 in.) outer diameter have a width of 670 mm (263/8 in.). They are of one piece, the clutch and front brake cables being adjustable by means of grub screws at the handlebar levers. The front suspension consists of a telescopic fork with hydraulic dampers. It is of the straight slider type with two cylindrical coil springs.
-
Page 13: Electrical Equipment Description
3. DESCRIPTION OF TECHNICAL EQUIPMENT Ignition and lights are effected by an A. C. Magdynamo. The magdynamo is a small alternator in which rotor (permanent magnet) while rotating in fixed coils of the stator induces the current required for the ignition of the mixture as well as for the lights and the charging of the battery. - Page 14 The switch box is built into the headlamp and distributes the magneto and battery current to the accessories. The terminal plate (at the bottom) of the switch box has the following terminal numbers Number 11 for ignition - connected to terminal No. 11 of magdynamo base plate. “...
-
Page 15: Handlebars
SWITCH KEY POSITIONS POSITION 1 Engine not running. Key rammed or partly inserted. All appliances horn and stop-light arc off. Day riding Key inserted. Ignition and charging circuits commit & accept fully. POSITION 2 Night riding in town. Key fully inserted Ignition and charging circuits connected, Pilot Light and Tail Lamp on. -
Page 17: Stop Switch
Other Electrical Accessories: The Head lamp is fitted with a 12V-35/35 W double filament bulb with Ba 20d Socket. The pilot bulb 6 V - I.5 W with Ba 9s socket is also fitted in the head lamp. Tail lamp bulb - 6 V 5 W Stop light bulb - 6 V 8 W The electric Horn 6 V - 2 Amps fitted under the head lamp is fed by the battery and is operated by a push button on the dip switch. -
Page 18: Running A New Motorcycle
4. RUNNING A NEW MOTORCYCLE When taking over a new machine and before making the first trip the customer is advised to check the equipment of the motorcycle as well as the oil level in the gearbox and in the front suspension dampers. The oil level in the gear box can be checked by the oil level inspection hole closed by the oil level screw M6 x 8. - Page 19 25 – 42 km. p.h. (16-26 m.p.h.) 4th gear … … … 35 – 60 km. p.h. (22-37 m.p.h.) b) Table showing speed to be maintained and carburetter setting with reference to mileage. Carburetter setting Kms (miles) Tolerated covered Maximum Needle...
-
Page 20: Servicing Instructions
e) Change the oil in the gearbox after the first 500 km. (300 miles). Repeat this operation after 1500 km. (900 miles). See Part II, Para 2, "Lubricating the Motorcycle". f) After the first 1000 km. (600 miles) change damper oil in front fork dampers. See Part II, para 2 "Lubricating the Motorcycle". - Page 21 Check and see that the gear is in the neutral position (between the bottom and the second gear). b) Open the fuel tap. close the carburetter air intake by turning the air cleaner strangler and flood the carburetter by pressing down the tickler pin. (Flooding and air intake closing should be carried out only if the engine is cold).
-
Page 22: Butterfly Air Valve
Note : If the motorcycle has not been in use for a considerable period the clutch plates may be stuck. It is recommended to test the clutch before starting the engine. Engage the bottom gear, push the motorcycle and declutch two to three times. If the clutch operation is correct shift to neutral. -
Page 23: What Should Be Avoided
40 km p.h. upwards (25 m.p.h. onwards) b) When slowing down to a stop, close the throttle, declutch, put on the brakes and shift the gear lever into the "neutral position" between the bottom and second gear. Only then release the clutch lever. During short stops (on corssroads, etc.) shift the gear lever into bottom gear and keep the clutch lever depressed. -
Page 24: Cleaning The Motorcycle
II. MAINTENANCE 1. CLEANING THE MOTORCYCLE The simple smooth lines of the motorcycle make it easy to clean. Use plenty of water for washing the machine, preferably with a sponge. Wash with paraffin parts that have been soiled with oil and dust. When washing take care to keep the carburetter, headlamp and brakes clear of water. -
Page 25: Lubricating The Motorcycle
contact with the liquids mentioned. The tail lamp, made of polysterene. has to be particularly protected from contact with the mentioned liquids which have a damaging effect. 2. LUBRICATING THE MOTORCYCLE The engine is lubricated automatically by adding oil to the fuel at a rate of 1:20 (in the ratio of 1:16 during running in period). - Page 26 Fig. 12. Draining the oil from the gearbox The clutch runs in an oil bath (oil from the gearbox). The telescopic front fork dampers: After the first 100 km. (600 miles) drain the damper oil from both front fork legs after having first unscrewed the drain plug (14).
- Page 27 X-100 Motor (a) 2,3 drops with oil can (b) Control Cables G.P.50 Motor Oil 50 (b) Disconnect cables; clean; lubricate and refit Oil 50 8000 (a) Steering Head Bearing Balls Mobil Multi (a) Loosen stem; clean balls; repack and re-tighten...
- Page 28 11), at least once every 8000 km. (5,000 miles). Note for YEZDI: The pivoted rear fork for Yezdi Model 'B' is lubricated with the aid of a grease gun through the grease nipple provided on the LH, side of the...
- Page 29 Fig. 13 Removing the chain connecting link Fig. 14 Adjusting the brake...
-
Page 30: Adjusting The Brakes
3. ADJUSTING THE BRAKES The motorcycle full width hub brakes are well dimensioned and are fully shielded against water penetration which would reduce their efficiency. The brakes require only occasional adjustment when the brake shoe lining is worn (excessive brake lever stroke). - Page 31 attention is called to the fact that oil, petrol and strong sunshine are harmful to the tyres. Examine the tyres from time to time and remove any foreign matter, such as sharp gravel, glass etc., struck in the tyre pattern. Check the tyre valves for leakage by unscrewing the valve cap and moistening the valve.
- Page 32 the rim hole and secure it by its nut (do not tighten). Slip on the cover side over the rim edge beginning opposite the valves hold it in the rim recess and work with tyre lever gradually on both sides towards the valve. Proceed carefully in order not to damage the tube by pinching it between the cover and rim edges.
-
Page 33: Adjusting The Chain
Fig. 17. Adjusting the chain 5. ADJUSTING THE CHAIN Slacken the rear wheel spindle, i.e. the spindle securing nut on the L. H. side and the chainwheel sleeve nut on the R. H. side (slightly tap the spindle as well as the sleeve nut). Then slacken the chain tensioning front lock nuts and tighten evenly the rear adjuster nuts. -
Page 34: Adjusting The Clutch
Screw the hand clutch adjusting screw on the handlebars slightly thus releasing the clutch lever. b) Clean with petrol or paraffin any dirt from the automatic clutch cam (6) and the clutch roller (5). c) With your left hand take hold of the automatic clutch roller (5) and move it towards the cam and back. -
Page 35: Carburettor
e) Adjust the hand declutching by means of the hand clutch adjusting screw on the handlebars so that the handlebar clutch lever has a little free movement, f) Smear both the automatic clutch cam (6) and the roller (5) slightly with grease. Fig. -
Page 36: Adjusting The Clutch
itself by heavy engine running, dark smoke coming out of the exhaust pipe, while the inside of the carburetter becomes black. Fig. 20 Adjusting the clutch 4. Automatic clutch adjusting screw 5. Automatic clutch roller 6. Automatic clutch cam The idling speed of the engine (with fully closed throttle) can be adjusted by extending or shortening of the throttle cable and by securing the throttle valve by not letting it down to its bottom limit with the throttle valve screw (oblique screw located on the carburetter body side). - Page 37 speed passages should be cleaned by passing a fine horse hair through them, sever use wire or hard tools to clean the jet as this might damage the delicate jet hole. The Idling jet (2) is screwed in from the right above the pilot air screw (3). To clean the jet unscrew screw (2) and blow the jet through.
-
Page 38: Electrical Equipment Maintenance
Carburetter setting Main Idling Needle Pilot air screw Position slackened by For running-in notch ½ turn from top After running-in notch ½ turn from top Fig. 21. Carburetter. flange type Carburetter 1 - Closing screw 2926 SBD for the 250 c.c. model 2 - Idling jet 3 - Pilot air screw 8. -
Page 39: Removing The Fuse
(indicator with thread M 14 x1.25, a special feeler gauge or a straight piece of wire). b) Find the T.D.C. of the cylinder by rotating the crankshaft to the right (direction of rotation of the running engine). - Page 40 c) In this position set the contact breaker points gap (by means of the adjusting screw) between 0.3 and 0.4 mm. (0.012 and 0.016 inch) using a feeler gauge. d) By rotating the crankshaft to the left (i.e. in the opposite direction of engine rotation) bring the piston down by 2.5 to 4 mm.
-
Page 41: Decarbonisation
If the motorcycle is not in use for any length of time, remove the battery, store it in a dry place and give it as much care as you would if it were in operation, i.e. check the density, top up with distilled water and recharge. It is advisable, at least every 2 months, to discharge it by one half down to 1.8V per cell and recharge it to its full capacity using 0.5 Amps current on both occasions. -
Page 42: Exhaust Silencer - Sectional View
Remove the carbon from the piston, cylinder head and exhaust ports by careful scraping, At the same time remove carbon deposits from piston ring grooves (preferably with an old broken piston ring). When replacing the piston rings fit the rings into the same grooves in which they were before being removed. Having scraped off the carbon, polish the parts in question and before reassembling wash them in clean petrol or paraffin. -
Page 43: Removing The Front Wheel
III. DISMANTLING AND ASSEMBLING WITHOUT THE AID OF SPECIAL TOOLS 1. REMOVING THE FRONT WHEEL Slacken the brake cable, unscrew the spindle nut and remove the spring washer. Slacken the tightening screw on the L.H. slider bottom end. Remove the spindle and the wheel. -
Page 44: Removing The Rear Wheel
Fig. 26. Dismantling the chaincase 2. REMOVING THE REAR WHEEL Release the rear brake cable, unscrew the spindle nut, remove the spring washer and pull out the spindle to the right hand side. Remove the brake reaction bracket on the L.H. side, slide the wheel off the rubber blocks (coupling of the chain wheel) and inclining the motorcycle to one side remove the wheel. -
Page 45: Removing The Chaincase And The Chain
3. REMOVING THE CHAINCASE AND THE CHAIN To make the dismantling of the chaincase easier remove the rear wheel and the R. H. crankcase cover. Disconnect both chaincase halves and open the chaincase (Warning! - First remove the split pin from the screw.) Rotate the chain so that the connecting link reaches the rear chainwheel release the clip and remove the connecting link using pliers or a screwdriver. - Page 46 of the splines driver remove the bearing circlip. From the opposite side push the other bearing using a piece of tube until the unlocked bearings fall out. Push the remaining bearing out to the opposite side and remove the spacer. Warning! Before removing the front wheel bearings the hub cover (of the splined driver) should be removed first.
-
Page 47: Rear Wheel
Fig.28. Rear wheel - sectional view... -
Page 48: Front Wheel
Fig.29. Front wheel - sectional view... -
Page 49: Removing The Cylinder Head And Barrel
Disconnect the exhaust pipe, unscrew the four nuts holding the cylinder head to the cylinder barrel and remove the cylinder head. By means of the kickstarter bring the pistons into the B.D.C, position and push the cylinder barrel upwards. -
Page 50: Replacing The Piston Rings
8. REMOVING THE CARBURETER a) Disconnect the fuel pipe where it joins the fuel tank. b) Loosen the carburetter cover unscrewing the fastening nut off the mixing chamber. c) Remove the cover and slacken the flange fastening nuts. -
Page 51: Dismantling The Clutch
9. DISMANTLING THE CLUTCH After removing the L. H. crankcase cover the clutch can be dismantled. Preferably use the double ended spanner (10) to press in the cups which hold the lock pins. Press in the cups one after other and remove the pins in the same order (three times). -
Page 53: Dismantling The Steering Head And Fork Legs
Remove the top nacelle after releasing the catches inside the nacelle and unscrewing the speedometer drive union nut. Remove the bottom nacelle after removing the handlebars (see pars 12), disconnecting the leads and the clutch cable, unscrewi ng t h e s t ee r i n g h e a d n u t ( 4 1 ) a n d u n s c r e w i ng t h e p l u g screws (32). -
Page 54: Bearing Balls
bearing balls. Push the steering head column downwards and then the bottom bearing can be lubricated. When completely dismantling the fork unscrew the nut fully; unscrew the valves from the fork tube top portion; slacken and remove the steering lug and stem pinch bolts, and push out one after the other the fork legs and the steering head column, To remove the front suspension dampers from fork legs, unscrew the drain plug '14' (Ref. -
Page 55: Removing The Dual Seat
The handlebars are fastened by two clamps locked by four screws and two nuts M 8. Four spring washer complete the set The handlebars can be removed after easing the headlamp rim with reflector and after removing the top nacelle (para 10), and slackening the clamp locking screws. -
Page 56: Dismantling The Rear Suspension
16. DISMANTLING THE REAR SUSPENSION Having unscrewed two screws M 8 remove the suspension unit from its brackets in the frame and pivoted rear fork. As compared to the former the new type damper has increased damping efficiency and is so designed that no topping up with oil is required. -
Page 57: Pivoted Fork
Fig. 40 Pivoted rear fork bushing - sectional view 1. Pivoted rear fork 7. Fork pin 2. Bush 8. Nut 3. Rubber seal 9. Locking bolt with nut Lubricating Pipe 4. Bolt 11. Screw M8X55 5 Thrust washer 6. Cup 17. -
Page 58: Removing The Battery
8. REMOVING THE BATTERY Open the L. H. side box and remove the fuse case from its holder thus disconnecting one lead and disconnect the order lead (earthing + pole) by unscrewing the nut (10) and pushing the washer off the earthing screw. Pull down the securing strap and remove the battery. -
Page 59: Removing The Engine From Frame
Note: The right is reserved to effect modifications caused by development in the illustrations or specifications in this Manual. IDEAL JAWA - Mysore, India... -
Page 60: Defects, Causes And Remedies
IV. DEFECTS, CAUSES AND REMEDIES Trouble Location Remedy Engine overheated. Wait until engine has cooled do not run at high revolutions. Plug points glow, faulty Replace sparking plug. sparking plug. Cylinder head clogged with Remove cylinder head and decarbonise. carbon. Over-advanced ignition. - Page 61 Trouble Location Remedy Engine overheated. Let the engine cool and keep it at low revolutions. Insufficient Lubrication Take care that petroil is mixed properly at ratio 20 to 1 (16:1 during running-in). Throttle cable broken. Replace throttle cable. Air leak between Replace gasket.
- Page 62 Trouble Location Remedy Empty fuel tank. Transfer fuel reserve and re- fuel at the earliest convenience. Fuel tap off. Turn fuel tap on. Fuel filter above the-tap Unscrew the fuel tap and clean clogged. the filter. Chocked fuel pipe or screen in Remove and blow the fuel carburetter.
-
Page 63: Two-Stroke Engine Operation
TWO-STROKE ENGINE OPERATION The two-stroke petrol engine is particularly suitable for motorcycles, having few moving parts it is subjected to less wear and consequently is more reliable in operation, its working action is accomplished in a single crankshaft revolution (i.e. two piston strokes). 1. -
Page 64: Two-Stroke Engine Operation Diagram
Fig. 42 Two-stroke engine operation diagram... - Page 65 Printed by: PRINTOKRAFT, Bombay – 400 057 at The Book Centre Ltd. Sion East, Bombay – 400 0022 20000-7/77...
Need help?
Do you have a question about the B and is the answer not in the manual?
Questions and answers