Table of Contents
Advertisement
Quick Links
Advertisement
Table of Contents

Related Manuals for Teltonika GH1200


Summary of Contents for Teltonika GH1200
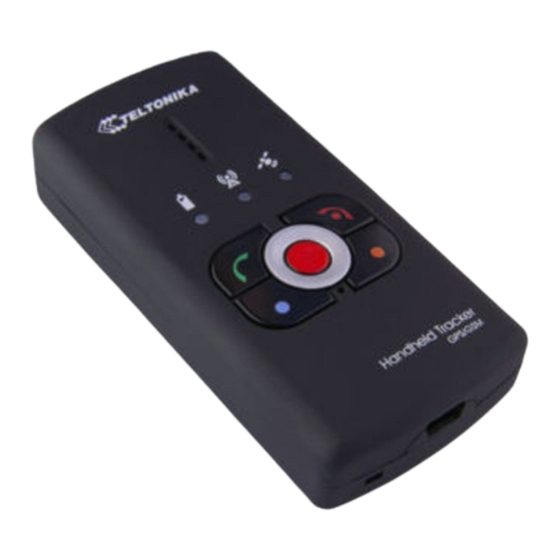
- Page 1 Handheld GPS/GSM Tracker GH1200 User Manual v1.02...
-
Page 2: Table Of Contents
Table of Contents About Document............................4 Short Description..........................4 Legal Notice............................4 Contacts..............................4 Package Contents............................5 Device Assembling ............................5 Device Characteristics ..........................5 Functional Parts of Device ......................... 6 Indication of the device ........................7 Button pushing indication ......................... 8 Short Introduction to Device Functions .................... - Page 3 10.5 GPRS Menu Group..........................37 10.6 APN Menu Group..........................37 10.7 Server Menu Group..........................38 10.8 SMS Menu Group..........................38 10.9 Keyboard Menu Group ........................39 10.10 Alarm Menu Group ........................40 10.11 Silent Call Menu Group.......................41 10.12 Call Menu Group..........................41 Technical support..........................43 Changes Log Sheet ..........................44...
-
Page 4: About Document
All rights reserved. Reproduction, transfer, distribution or storage of parts or all of the contents in this document in any form without the prior written permission of TELTONIKA Ltd is prohibited. Other product and company names mentioned herein may be trademarks or trade names of their respective owners. -
Page 5: Package Contents
2. Package Contents GH1200 is supplied in a carton with all contents which are needed for the connection to a PC and normal work handling: GH1200 device 3.7V Li-Ion battery Cable „USB – mini USB“ CD with User’s Guide, Drivers and Software... -
Page 6: Functional Parts Of Device
2 – USB port Connect the mini USB cable to the device and to the PC to configure GH1200 and to charge the battery 3 – Key lock To lock the keyboard move the arrow to ; to unlock move the arrow 4 –... -
Page 7: Indication Of The Device
Indication of the device In order to detect in which mode the device is working you need to determine the LED indicators state. Please read the „Power“ LED indications state description if „Power“ LED is on or blinking.. If „GSM“ LED is on or blinking you need to read „GSM“ LED indications state description. -
Page 8: Button Pushing Indication
Note – in stand by mode the device acts differently. About its indications please read „Device in Stand by Mode“. Connecting to GSM network – LED blinks slowly. The Indicator period “On” is longer than the Indicator period “Off”. Note – in stand by mode the device acts differently. About its indications please read „Device in Stand by Mode“. -
Page 9: Short Introduction To Device Functions
6. Short Introduction to Device Functions Alarm Function Alarm Function - sends the alarm messages to more than one set phone number. When the Alarm is activated, the GPS receiver, which tries to track the coordinate, is turned on. Calculated coordinates together with an Alarm message are sent to several earlier set phones numbers. -
Page 10: Call Function
Modem Emulation Function GH1200 can be connected to the PC through the USB port and after activating „Modem Emulation” function, it can be used as normal GSM/GPRS USB modem. When this function is activated the device can be controlled by AT commands. -
Page 11: Geo-Fence Function
“not available” (N/A). Silent Call Function „Silent Call“– is a function, when a call is activated without any local GH1200 user interaction. Please send a SMS to the GH1200 to activate this function (message “SPY“). GH1200 receives this message and compares the sender number with the numbers in the “SMS Request Authorized phone... -
Page 12: Nmea Function
PC through the USB port. As soon as the cable is unplugged – the function automatically turns off. When the function is activated GH1200 gives its NMEA code, which is recognized by the digital maps for navigation. To connect to digital maps you need to set the correct speed. -
Page 13: Software Installation
reconnect attempt the device switches to stand by mode and the indicator turns on (Chapter Indication of the Device). If the SIM Card will be inserted later, the device has to be restarted. Software Installation Minimal system requirements: Operating system: MS Windows 2000 SP3 or MS Windows XP SP1 http://www.microsoft.com Disc space:... -
Page 14: Introduction To The Gps Assistant Software
8. Introduction to the GPS Assistant Software To run this program, please activate the „GH1200 GPS Assistant“ link. When the program is loaded, the main desktop with different zones is displayed:... - Page 15 Display field of chosen menu E Status field F Picture 8.1. „GPS Assistant“ program desktop In field A you can choose between the three main groups: i. Maps – digital maps that display coordinates of the device; ii. SMS – operations with SMS (sending, receiving, forming); iii.
- Page 16 Picture 8.3. Users’ description field Field C consists of buttons that show the most common menu directories. Their meanings are displayed when the mouse cursor is placed above the icon. Picture 8.4. Control buttons field Field D displays additional control buttons accordingly to the chosen menu group. Picture 8.5.
-
Page 17: Show Location On Map
Picture. 8.6. Main functions setting field Field F displays the connection information of the devices. Picture 8.7. Display field of external devices Show Location on Map You can view the device coordinates received after request or Alarm in the map with the help of the program „GPS Assistant“. -
Page 18: Edit User's Data
Edit User’s Data When the device is connected to the PC for the first time, the program will ask if you want to register the user (Chapter 8.2 Complete functionality), in such way you create the user, the data can be configured later. - Page 19 Click „Copy Track“. (The arrow placed on the right side of Copy Track button allows to choose data which you want to copy to the PC. ( „Track Log“ – track data; „Regular Points“ – GPS receiver connection data; „Alarm Points“ – data select upon „Alarm” signals.) Note: If - in copy progress - an error window (picture.
-
Page 20: Import Settings File
Sending NMEA If you want to connect GH1200 to the digital map and see its location in real time you should set NMEA data sending baud rate to be similar like in the digital map. Where to set NMEA baud rate of device you can find by pressing “Configuration”... - Page 21 Another possible way is to send a SMS message with configuration command, profile number, settings group and parameters to the GH1200 by a mobile phone (message text example: CFG1;TRACK:2,60;) The program “GPS Assistant” can form you a sending text. Each setting group in the profile has a “Configuration Thought SMS“...
-
Page 22: Pin Code
PIN Code If you are inserting a SIM card with an active PIN code request into the GH1200, it will not be able connect to the GSM network. Therefore you need to remove the PIN code. In order to do this are two possibilities: Either you can remove the PIN code by using a standard mobile phone via its security settings. -
Page 23: Keyboard Settings
8.10 Keyboard Settings Device have six buttons, functionality of each button can be configured. Each button can have two functions. About functionality of buttons please read chapter Device functionality. To set first function of the key make next steps: Setting first function of key 1. -
Page 24: Setting Call Function
b. 1<space>< telephone number > - will be activated MN? function More details are in chapter (Special Request). c. 2<space>< telephone number > - will be activated GEO? function. More details are in chapter (Special Request). d. 3<space>< telephone number > - will be activated LIVE? function. More details are in chapter (Special Request). -
Page 25: Simple Device Configuration
With a left mouse button double-click on the “GPS Assistant„ icon the main Assistant program window will open. Connect the GH1200 to the PC and wait until the PC recognizes the device. Click “Connect“ in “User“ field. If the device is connected to the program for the first time, the following window will... - Page 26 Time zone User name of the Device melody device Ring level of the device Speaker level of the device Enable GPS Choose “Fix” module setting Choose “Tracking” setting Choose “Geo- Fencing” setting It is recommended to tick all the boxes in Configuration Wizard window if the parameters are set for the first time.
- Page 27 Set track logging Set the track duration point update interval Enable and name the Geo- Fence zone In the Geo-Fence wizard window you can activate up to ten zones and dedicate names to them. To make a full configuration of the settings, you have to use “Detailed device parameters “(10.3 Geo-Fence menu group) settings.
- Page 28 Enable GSM module Select SMS settings Select Alarm settings Select Silent Call settings Select Call settings When you set up the settings for the first time, it is recommended to tick all boxes in the GSM Wizard window. In this case you will be able to see the default settings and get to know the device functionality.
- Page 29 Set Alarm sending method. Set time for sending Alarm messages. Set Alarm messages sending period. Select to receive or not a Create a list of users who notification about will be able to get Alarm battery level messages If you set the “Alarm“ message sending via GPRS, then you need to configure GPRS settings by clicking “GPRS Settings“.
- Page 30 Enable Silent Call function Form numbers list that will be able to use the function by sending an SMS request „SPY“ Tick if you want to receive a minute notification during To disable auto answering, the voice untick the box. conversation Set incoming calls from everybody...
- Page 31 You can choose whether to write the settings into the device or to save them into a file for the later usage on the last window “Configuration Wizard”. “Write to Device” will be inactive if GH1200 will not be connected to the PC.
-
Page 32: Simple Mobile Configuration
Simple Mobile Configuration Connect the device to the PC and run the program “GPS Assistant“. Click “Connect” and enter the settings following the “Configuration Wizard“. With these settings you will be able to make a phone call to four set numbers and receive a phone call from any number. Configuration Wizard –... -
Page 33: Simple Gps Data Saver
Simple GPS Data Saver Connect the device to the PC and run the program “GPS Assistant“. Click “Connect” and enter the settings following the “Configuration Wizard“. With these settings you will be able to collect the track history and later view it on your PC with the program “GPS Assistant“. Configuration Wizard –... -
Page 34: Description Of Device Parameters
10. Description of Device Parameters Detailed device setting can be done by SMS messages or with the help of the “GPS Assistant” program, while connected to the PC through the USB port. In the buttons menu group of the program, click ”Configuration“. The main configuration window “Main“... -
Page 35: Track Menu Group
Time How Long 0-9999[180] Time period for how long the GPS receiver is trying to GPS Trying Get calculate the coordinates Position [sec] Fix Update Interval 0-65535 Sets the update interval for fixing the coordinates [min] Fix Keep Time [sec] 0-65535 Time period for calculating the coordinates before saving or sending... -
Page 36: Gsm Menu Group
Enable Geo-Fence Enable Geo-Fence function Function Zone Name [---] Zone name GF Centre Latitude +/- 0- Geo-Fence zone centre latitude [deg] 180.000000 GF Centre +/- 0- Geo-Fence zone centre longitude Longitude [deg] 90.000000 GF Radius [m] 0-65535 Geo-Fence zone radius GF Fence Thickness 0-9999 Geo-Fence zone thickness... -
Page 37: Gprs Menu Group
10.5 GPRS Menu Group Parameter Value Description [default] LED Settings GPRS Enable Enable GPRS Time How Long 0-9999 Time period for modem connection to the GPRS Modem Trying [120] Connect GPRS [sec] Dial Number [*99#] Phone number to enable GPRS Data Send Period Data sending period via GPRS [min]... -
Page 38: Server Menu Group
10.7 Server Menu Group Parameter Value Description [default] LED Settings Server IP address [---] Server IP address Server port 0-65535 Server port number [---] Local port 0-65535 Local port number [---] User name [---] Connection to the server user name Password [---] Connection to the server password... -
Page 39: Keyboard Menu Group
10/3 SMS Request [---] Phone numbers that can send SMS commands to the Authorized phone device (five numbers can be set) numbers 10.9 Keyboard Menu Group Each button is configured separately. Button parameters: Parameter Value Description [default] Keyboard Settings 12/1 Enable 0-1 [1] Enable each button... -
Page 40: Alarm Menu Group
10.10 Alarm Menu Group Parameter Value Description [default] Alarm Settings 14/1 Enable fall detection Fall detection Fall Timeout Time value, when the Alarm message is being sent after fall detection and is not moving for a longer time period than set Enable moving status Movement detection detection... -
Page 41: Silent Call Menu Group
10.11 Silent Call Menu Group Parameter Value Description [default] Silent Call Settings 15/1 Silent Call Function 0-1 [0] Enable Silent Call function 10.12 Call Menu Group Parameter Value Description [default] Call (1) 17/1 Function [Function] The selected function will be activated when call is received from phone number as configured. - Page 42 Track:on, Track:off) Call (2) 17/1 Function [Function] The selected function will be activated when call is received from phone number as configured. 17/2 Phone number: [+Number] The phone number which will activate the selected function. 17/3 Function data: [ + number Phone/server number to which device will contact or or server send requested information, related to selected...
-
Page 43: Technical Support
If you have faced some problems using the device, which you are not able to solve by yourself, you are always welcome to address our technical support department by e-Mail . We will be support@teltonika.lt glad to help you. -
Page 44: Changes Log Sheet
12. Changes Log Sheet Date version Comments number June 12, 2007 1.00 Corrected. June 12, 2007 1.00 Changed first page picture. Corrected dimensions. Chapter 4 Device June 13, 2007 1.00 Characteristics Added chapters 6.3 Special Request, 8.10 Keyboard June 20, 2007 1.02 Settings and 10.12 Call Menu Group...
Need help?
Do you have a question about the GH1200 and is the answer not in the manual?
Questions and answers