Table of Contents
Advertisement
Quick Links
Download this manual
See also:
Instruction Manual
Advertisement
Table of Contents

Subscribe to Our Youtube Channel
Related Manuals for Baumatic TEL06SS


Summary of Contents for Baumatic TEL06SS
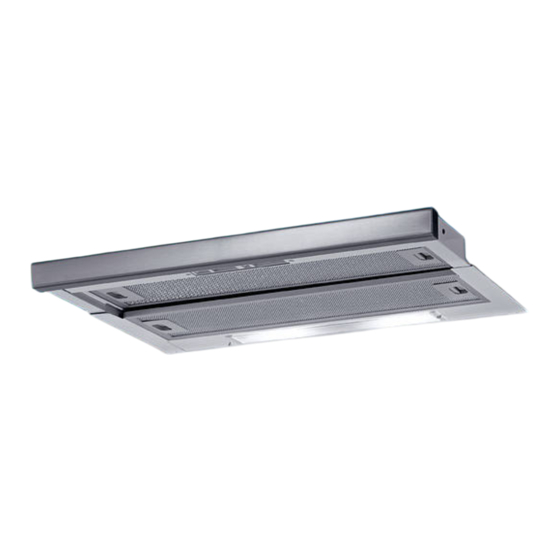
- Page 1 TEL06SS Cooker Hood...
- Page 2 User Manual for your Baumatic TEL06SS Cooker Hood NOTE : This User Instruction Manual contains important information, including safety & installation points, which will enable you to get the most out of your appliance. Please keep it in a safe place so that it is easily available for future reference.
-
Page 3: Table Of Contents
CONTENTS YOUR COOKER HOOD’S SPECIFICATIONS ….……………..………….3 IMPORTANT SAFETY INFORMATION……………………………….…4-5 CARING FOR THE ENVIRONMENT…………………………………………6 USING YOUR COOKER HOOD………………………………..……………..7 MAINTAINING AND CLEANING YOUR COOKER HOOD ……….8-10 INSTALLATION INSTRUCTIONS ……………………….……...….11-12 ELECTRICAL CONNECTION……………11 INSTALLING THE COOKER HOOD……12 TROUBLESHOOTING ……………………………………………13 CONDITIONS OF GUARANTEE……………………………………………14 CONTACT DETAILS…………………………………………………………..15 DD 26/10/06... -
Page 4: Your Cooker Hood's Specifications
Optional Extra: 1 x Pair of ST1 Carbon filters for air recirculation. NOTE: PLEASE NOTE THAT YOUR BAUMATIC COOKER HOOD CAN BE USED EITHER IN RECIRCULATION MODE OR IN EXTRACTION MODE. TO USE THE HOOD IN RE-CIRCULATION MODE, YOU WILL NEED TO FIT THE CARBON FILTER. -
Page 5: Important Safety Information
Important Safety Information: Please Read this before installing & using. Any installation work must be DO NOT SET YOUR * NOTE - carried out by a qualified COOKER HOOD LESS THAN electrician or competent person. 700mm ABOVE YOUR COOKER! The hood must be installed in o When installed between accordance with the installation adjoining wall cabinets,... -
Page 6: Important Safety Information
Important Safety Information: Please Read this before installing & using. o Ensure the ducting for the extractor function ventilation measures are has the same diameter as being observed. Note the outlet hole all the that it removes odours way through. from your room, not Keep young children from steam. -
Page 7: Caring For The Environment
Environmental Note Note : Before discarding an old appliance, switch off and disconnect it from the power supply. Cut off and render any plug useless. Cut the cable off directly behind the appliance to prevent misuse. This should be undertaken by a competent person. CONFORMITY TO W.E.E.E. -
Page 8: Using Your Baumatic Cooker Hood
Using your Baumatic Cooker Hood: To use your cooker hood: 1) Make sure it has been properly installed. 2) Find the CONTROL PANEL. It is located centrally on the hood’s front surface, on the underside of the unit. 3) The CONTROL PANEL contains two rows of switches. These perform separate functions. -
Page 9: Maintaining And Cleaning Your Cooker Hood
Cleaning your Baumatic Cooker Hood: Before cleaning, always ensure that you have IMPORTANT: switched your cooker hood OFF at the omni-polar switch, set at the wall from the cable: Cleaning Clean the external parts with Be sure to replace the... - Page 10 Maintenance - Cleaning the Anti-grease Filters First remove the grille by pulling down on it. Undo the side catches. You can now clean the anti-grease filter grilles. Soak them for about one hour in hot water with a grease-loosening detergent then rinse off th oroughly with hot water.
- Page 11 Maintenance – Changing the Light Bulb and Carbon Filter Changing the LIGHT BULB isconnect the hood from the power supply. Access the lamp area. Please note that you will have to take off the grease grille at the back to access the lamp area. Always replace burnt-out bulbs with olive-shaped 40 Watt bulbs After replacing the bulb, put the grease grille back.
-
Page 12: Electrical Connection
INSTALLATION INSTRUCTIONS - Electrical Before inst allation and usage, read all the ins ructions and make sure t hat the voltage (V) and the frequency (Hz) indicat on the identif ication plate (found inside your Cooker Hood) and all the data inside the appliance are exactly t same as th e voltage a nd frequency in your ho... -
Page 13: Installation Instructions
CCESSORIES: - 1 SPACER - 4 SCREWS -RAWLPLUGS Your Baumatic Cooker Hood should only be fitted into the underside of a dedicated cabinet / kitchen unit. D O NOT position i t any less than 700 mm cm) above the hob or let other cabinets o rha g the hob. -
Page 14: Troubleshooting
Troubleshooting If something has gone wrong with your Cooker Hood, checking against this chart might keep you from having to call for service. Symptom Solution • Check that the hood is connected to the electricity supply. The cooker hood will not start! •... -
Page 15: Conditions Of Guarantee
Baumatic appliance. * In addition, your appliance is covered by a 5 year parts warranty. Baumatic Ltd will provide free of charge the parts required to repair the appliance, only if they are fitted by a Baumatic engineer, for any defect that arises due to faulty materials or workmanship within a period of 5 years from the original purchase date. -
Page 16: Contact Details
Baumatic Ltd Make-up for your kitchen Headquarters Baumatic Ltd. Baumatic Buildings, 6 Bennet Road, Reading, Berkshire RG2 0QX, United Kingdom Sales Te hone +44 118 3 6900 Sale +44 118 1 0035 Service Telephone +44 118 933 6911 Service Fax...
Need help?
Do you have a question about the TEL06SS and is the answer not in the manual?
Questions and answers