Table of Contents
Advertisement
Quick Links
Advertisement
Table of Contents

Subscribe to Our Youtube Channel
Related Manuals for Albrecht Tectalk Smart + Series


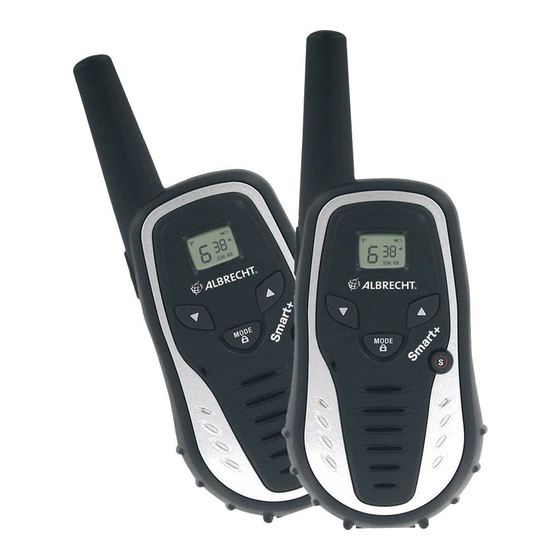
Summary of Contents for Albrecht Tectalk Smart + Series
- Page 1 Tectalk Smart + Series User Manual...
-
Page 2: Table Of Contents
Contents Safety Warning ..........3 Equipment and Accessories Supplied ..3 Powering the Transceiver......4 Installation the Batteries ......4 Charge Information........5 LCD-Display ..........5 Control Buttons..........6 Power – On/-Off........6 PTT-Button (Push-To-Talk) ....6 Up-Button ..........7 Down-Button......... -
Page 3: Safety Warning
When recharging Nickel Metal Hydride (NiMH) batteries with the supplied Albrecht-charger or wall adapter, use only the supplied or Albrecht-approved rechargeable NiMH batteries. Use of the Albrecht-charger with other brands of accumulators is not recommended, as accumulator charging times will vary with different brands. -
Page 4: Installation The Batteries
Alkaline Batteries shall not be used, because Alkaline batteries do not meet the requirements for keeping the maximum output power more stable for the whole operating time). The charging time is typically 12-15 hours. You can charge one or both radios at the same time with the supplied desk charging cradle. -
Page 5: Charge Information
Charge Information For charging of rechargeable batteries, only the supplied CE- approved AC adaptor shall be used in compliance with the following specifications: * INPUT : AC 230V 50Hz 30mA * OUTPUT : DC 6V 200mA Do not operate the radio during battery charging ! LCD-Display:... -
Page 6: Control Buttons
Control Buttons (1) Power on-off Button Press and hold the POWER on/off button for at least 2 seconds. You will hear a confirming melody to indicate the unit is on. To turn the unit off, press and hold the button for at least 2 seconds. (2) Push-To-Talk (PTT) Button Pressing and holding this button will allow you to speak to any transceiver that is set to the same channel and... -
Page 7: (3) Up Button
release the PTT Button to allow reception of incoming signals. Whenever the button is pressed, the transmit icon ( ) will appear. When receiving an incoming signal, the Recieve ( ) icon will appear. The PTT button can also be used as a two-way call ringer. Pressing the button twice quickly will call another party on the same channel. -
Page 8: Channel-Selection
• The CTCSS subcode (01-38) will be displayed on the LCD panel if the CTCSS tone frequency function is enabled (not oF). Channel Selection • From standby mode, press the MODE button once; the channel number flashes. • Press the Up or down button briefly to move to the desired channel number. -
Page 9: Roger Beep
To enable the VOX operation: • From standby mode, press the MODE button 3 times unitil the VOX icon (vox) appears with on or oF. • Press the Up or Down button to select the VOX on or oF as desired. -
Page 10: Call Ringer
• Press the PTT button momentarily to confirm selection. Call Ringer The transceiver provides a transmit call ring melody to alert other users of an incoming call. From standby mode, pressing the PTT button twice in quick succession will transmit the call ringer melody. To select the call ringer tone : •... -
Page 11: Channel Scan Operation
a signal is received, the scan is interrupted and will return to scan mode approximately 5 seconds after the interruption. To enable the channel scan mode: • From standby mode, momentarily press the Power On/Off Button; SCAN will appear on the LCD display. •... -
Page 12: 10. Notes For Good Communication
2. The radio has been designed to maximize performance and improve transmission range in the field. To avoid interference, it is recommended that you do not use the units closer than 2 meters away from each other. 3. To increase battery life, use the SCAN feature only where necessary. -
Page 13: Troubleshooting
Troubleshooting If you have problems with your Tectalk Smart +, reset your unit by turning it off and removing the batteries. And re-insert the batteries and turn the unit on again. Check the battery power level since in many cases low batteries cause problems such as no transmission, weak receiving signal and low sound. -
Page 14: Ctcss Tone Subcode Table
CTCSS Tone Subcode Table Freq. No Freq. No. Freq. No. Freq. 67.0 11 97.4 136.5 192.8 71.9 12 100.0 141.3 203.5 74.4 13 103.5 146.2 210.7 77.0 14 107.2 151.4 218.1 79.7 15 110.9 156.7 225.7 82.5 16 114.8 162.2 233.6 85.4 17 118.8... -
Page 15: European 2 Years Warranty
Disposal of defective electronic items The European WEEE Directive does not any more allow to dispose any used electronic items via household trash bins. The local communities will provide containers for disposal of electronic waste. Please use these facilities, it will be Your contribution to proper recycling of electronic material, and it is free of charge for You! European 2 years warranty... -
Page 16: Ce Declaration
CE Declaration of Conformity PMR 446 Two-Way-Radio Albrecht Tectalk Smart + This radio complies to all relevant European Standards and Regulations for PMR 446 radio service. This radio may be used only in EU and other states applying the R&TTE directive of the European Community.
Need help?
Do you have a question about the Tectalk Smart + Series and is the answer not in the manual?
Questions and answers