Table of Contents
Advertisement
Advertisement
Table of Contents

Related Manuals for Polyprint TEXJET


Summary of Contents for Polyprint TEXJET
- Page 1 TEXJET Digital Textile Garment Printer Operation Manual...
- Page 2 Polyprint S.A. The information in this manual is for informational use only, is subject to change without notice and should not be construed as a commitment by Polyprint S.A. Polyprint S.A. assumes no responsibility or liability for any errors or inaccuracies that may appear in this document.
-
Page 3: Table Of Contents
Guidelines for Storage and Handling of the Inks 3.9. How to apply the different platens Software 4.1. System requirements 4.2. Driver Installation 4.3. RIP Installation Troubleshooting Printer Specification Declaration of Conformity Warranty Terms and Conditions POLYPRINT SA – TEXJET OPERATION MANUAL V6.4 EN - 3 -... -
Page 4: Introduction To Texjet
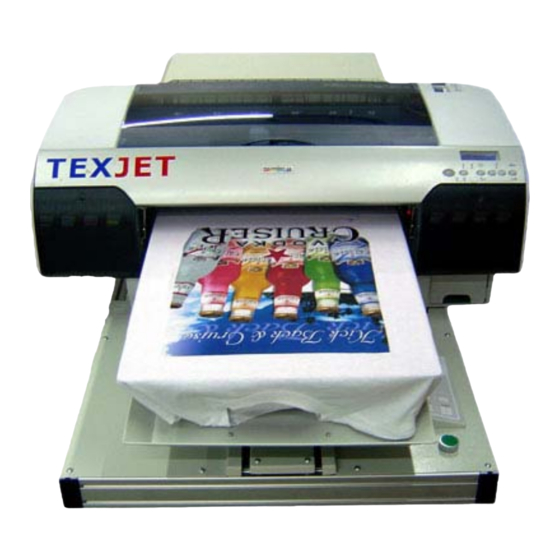
1. Introduction to TexJet The TexJet is an inkjet printer that has been made to print on almost any type of garment or fabric material as cottons, polyester, wool, leather etc, depending on the inks that are used (Pigment, Disperse, Acid, and Reactive). The TexJet normally uses pigment inks, which are more convenient to work with the most types of garment. -
Page 5: Safety Instructions
80% none condensing. power cord. The printer is not made for kids, Always keep ink cartridges out of but only for professionals the reach of children POLYPRINT SA – TEXJET OPERATION MANUAL V6.4 EN - 5 -... - Page 6 We repute that by the time of issuing the present instructions manual, the contents are correct. We reserve the right to modify without any notice, the specifications and performances of the product and the present manual. POLYPRINT SA – TEXJET OPERATION MANUAL V6.4 EN - 6 -...
-
Page 7: Hardware
80 GB disc space recommended USB2 interface 2 USB ports free (for dongle and printer) The system requirements are for using the Texjet Rip software Power cable: Use the type of power source indicated on this products label Connect the power cable to a standard 220V or either to 110V (for U.S.A.) Data cable: Use the USB cable to connect the machine to the computer. - Page 8 Printer and accessories TEXJET printer Short USB cable Chip Reseter 2 Power cables RIP software CD, profiles and drivers USB Dongle Epson driver CD 8 Cartridges with accessories POLYPRINT SA – TEXJET OPERATION MANUAL V6.4 EN - 8 -...
- Page 9 • Protection paper, package 500 sheets dimension 40Χ60cm. • Software for spotting images: * • Photoshop version 7 and higher to spot images *Necessary to work with this product. POLYPRINT SA – TEXJET OPERATION MANUAL V6.4 EN - 9 -...
- Page 10 • All other parts 12 Months Excluded from the warranty are consumable parts as Consumables: • Pump • Wiper • Damper • Cap • Flushing box • Waste tank POLYPRINT SA – TEXJET OPERATION MANUAL V6.4 EN - 10 -...
- Page 11 1. TEXJET operation panel 2. Epson operation panel 3. T - Shirt plate 4. Waste tank 5. Top cover 6. Back cover 7. Cartridge Slot 8. Ink lever 9. Plate guide POLYPRINT SA – TEXJET OPERATION MANUAL V6.4 EN - 11 -...
- Page 12 21. Automatic plate height adjustment 22. Plate height limit LED 23. Manual Plate Eject Button 24. Manual Plate Insert Button 25. Eject Button 26. IN Button 27. Green IN Button POLYPRINT SA – TEXJET OPERATION MANUAL V6.4 EN - 12 -...
-
Page 13: Unpacking, Assembling And Setting Up The Printer
T-Shirt plate comes out, doesn’t exceed the size of the table where the printer is placed. • Make sure that the table is level and can support the weight of the printer. POLYPRINT SA – TEXJET OPERATION MANUAL V6.4 EN - 13 -... - Page 14 CYAN INK PD201 MAGENTA MAGENTA PD202 YELLOW YELLOW PD203 LIGHT BLACK WHITE INK PD205 LIGHT CYAN WHITE INK PD205 LIGHT MAGENTA WHITE INK PD205 LIGHT LIGHT BLACK WHITE INK PD205 POLYPRINT SA – TEXJET OPERATION MANUAL V6.4 EN - 14 -...
- Page 15 Make sure that the plate guide (9) is clear Connect the power cable and switch on the printer by pressing the button • (10) on the Epson panel. POLYPRINT SA – TEXJET OPERATION MANUAL V6.4 EN - 15 -...
- Page 16 Nozzle Check on paper or transparent polyester After the Powerful Cleaning is performed, move the plate to the front • position by pressing button (25) and place a piece of paper on the plate. POLYPRINT SA – TEXJET OPERATION MANUAL V6.4 EN - 16 -...
- Page 17 If the colors do not look like the picture, and you notice that some of • them are missing, perform the “Powerful Cleaning” one more time. Nozzle Check POLYPRINT SA – TEXJET OPERATION MANUAL V6.4 EN - 17 -...
-
Page 18: User Handling Of The Printer
Once the plate height is defined for a kind of T-shirt a readjustment is not • necessary until the T-shirt type changes. Ready to print: When the printer shows the message “READY” on the • display you are ready to print. POLYPRINT SA – TEXJET OPERATION MANUAL V6.4 EN - 18 -... - Page 19 When FLASHING SLOW the F1 function is enabled and there are no copies o When OFF the F1 function is disabled and there are no copies POLYPRINT SA – TEXJET OPERATION MANUAL V6.4 EN - 19 -...
-
Page 20: The Preparation Of The Black Textile
This is helping for a better application of the coating. Dry it for 30 seconds under a heat press with high pressure between 180-150ºC with heat resistant paper over it (we recommend Texjet Sheets). It will also press the fabric fibres flat to give a good printing surface. Make sure the textile is completely dry before printing. -
Page 21: Fixation Of The Textile
2,5min at 180ºC or 3,5min at 150 ºC. Note: Some garments may burn or turn yellow under high temperatures like 180ºC. In such cases take advice on the following temperature and time diagram. POLYPRINT SA – TEXJET OPERATION MANUAL V6.4 EN - 21 -... -
Page 22: Maintenance
This is an expensive investment and in order to get the most out of it please take time to learn about simple steps that will keep your garment printer reliable and productive. POLYPRINT SA – TEXJET OPERATION MANUAL V6.4 EN - 22 -... -
Page 23: Basic Maintenance
2. Move the print head out of its parking position by pressing the purple lever 3. Clean the wiper using a cotton bud and cleaning fluid 4. Clean the sealing of the cap using a bud and cleaning fluid POLYPRINT SA – TEXJET OPERATION MANUAL V6.4 EN - 23 -... - Page 24 9. Perform a normal cleaning by pressing the menu button for 3 seconds 10. When cleaning is finished, open the top cover 11. As before, move the print head again out of its parking position, by pressing the purple lever POLYPRINT SA – TEXJET OPERATION MANUAL V6.4 EN - 24 -...
- Page 25 12. Fill the capping using cleaning fluid 13. Move the print head manually into the parking position 14. Raise both ink levers to the up position while the printer is switched off POLYPRINT SA – TEXJET OPERATION MANUAL V6.4 EN - 25 -...
- Page 26 5. Send a printout with white ink in an A4 size. Print again until the white comes out Printing after a week maintenance 1. Shake all white ink cartridges 2. Perform 1 powerful cleaning. If white still doesn’t come bright enough perform another one. POLYPRINT SA – TEXJET OPERATION MANUAL V6.4 EN - 26 -...
- Page 27 Place the inks cleaner in the cap station of the printer, afterwards the end of your work, in order to keep the Printhead wet POLYPRINT SA – TEXJET OPERATION MANUAL V6.4 EN - 27 -...
-
Page 28: Transporting The Printer
Avoid places subject to rapid changes in temperature and humidity. Also keep this product away from direct sunlight, strong light, or heat sources. o Avoid places subject to shocks and vibrations. POLYPRINT SA – TEXJET OPERATION MANUAL V6.4 EN - 28 -... - Page 29 Operate the machine in an environment with a temperature range of 10-30 degrees Celsius. The humidity must be between 20-80% none condensing. o The printer is not made for kids, but only for professionals POLYPRINT SA – TEXJET OPERATION MANUAL V6.4 EN - 29 -...
-
Page 30: Guidelines For Storage And Handling Of The Inks
10 and 30 degrees Celsius. Special Guidelines for Storage and Handling for PD200 Inks The Polyprint PD200 white Ink and cleaning solution will provide excellent results when stored and handled properly. The following storage and handling practices are required to ensure consistent quality and performance... - Page 31 Remove the white ink from the system and flush out the print head with distilled water or flushing solution. The print head should remain filled with distilled water or flushing solution until printer is ready to be refilled with white ink. POLYPRINT SA – TEXJET OPERATION MANUAL V6.4 EN - 31 -...
-
Page 32: How To Apply The Different Platens
8 countersunk hex 2,5mm screws 2,5mm Alen metric wrench tool Then remove the long interface bracket by loosen the 2 hex screws and place instead the short interface bracket. POLYPRINT SA – TEXJET OPERATION MANUAL V6.4 EN - 32 -... - Page 33 Place second short interface bracket to the correct position. Se the photo Place the mini plate and the adapter plate on position. POLYPRINT SA – TEXJET OPERATION MANUAL V6.4 EN - 33 -...
- Page 34 The Polo plate includes the following items. 1 Polo plate 4 countersunk hex 2,5mm screws 2,5mm Alen metric wrench tool Unscrew the long interface bracket and place it at lower position POLYPRINT SA – TEXJET OPERATION MANUAL V6.4 EN - 34 -...
- Page 35 Place the Polo plate over the 2 long interface brackets and screw the 4 countersunk hex screws. Universal plate The Polo plate includes the following items. 1 Universal plate 4 countersunk hex 2,5mm screws 2,5mm Alen metric wrench tool POLYPRINT SA – TEXJET OPERATION MANUAL V6.4 EN - 35 -...
- Page 36 Place the Universal plate over the 2 long interface brackets and screw the 4 countersunk hex screws. Standard plate (max) The Standard plate includes the following items. 1 Standard plate 4 countersunk hex 2,5mm screws 2,5mm Alen metric wrench tool POLYPRINT SA – TEXJET OPERATION MANUAL V6.4 EN - 36 -...
- Page 37 Place the Standard plate over the 2 long interface brackets and screw the 4 countersunk hex screws. POLYPRINT SA – TEXJET OPERATION MANUAL V6.4 EN - 37 -...
- Page 38 1 frame system 4 bold hex 3mm screws 3mm Alen metric wrench tool Place the frame system over the 2 long interface brackets and screw the 4 bold hex screws. POLYPRINT SA – TEXJET OPERATION MANUAL V6.4 EN - 38 -...
-
Page 39: Software
Intel Core 2 Duo, 2GHz min, 4 GB RAM min 80 GB disc space required The system requirements are for using the Texjet Rip software. Note: Do not connect the printer with the USB cable to the computer, before installing the Epson 4880 printer driver... -
Page 40: Driver Installation
Do not connect the printer with the USB cable to the computer, before installing the Epson 4880 printer driver Install to the computer, the printer driver for Epson 4880 from the Polyprint RIP Software CD or the Epson driver CD. Follow the instructions on the wizard. -
Page 41: Rip Installation
Texjet RIP Software Installation Tip! These instructions are valid for all Microsoft Windows operating systems. The Texjet RIP software cannot run on Macintosh or Linux based operating systems. The Windows Vista and Windows 7 users must log-on as administrators before installing. - Page 42 5. In the setup type window, click on the ‘complete’ installation and then ‘Next’. 6. Now you are ready to install the RIP software. Just click ‘install’ and wait for the wizard to finish. POLYPRINT SA – TEXJET OPERATION MANUAL V6.4 EN - 42 -...
- Page 43 7. When the installation finishes you should be able to see the window below. Click ‘Finish’ to end the installation. Have in mind that afterwards you must restart your computer in order for the new software to take effect. POLYPRINT SA – TEXJET OPERATION MANUAL V6.4 EN - 43 -...
-
Page 44: Troubleshooting
When working with vector images in Corel Draw, always work in CMYK mode and while exporting the file into TIFF uncheck the Apply ICC Profile option and save it as CMYK to obtain the given colors from the printer. POLYPRINT SA – TEXJET OPERATION MANUAL V6.4 EN - 44 -... - Page 45 The biggest part of your TexJet is to check for is the capping station. Make sure this ALWAYS stays clean. The print head uses this to dock when the printer is not in use to ensure the print heads do not dry out.
- Page 46 The plate is in front position for placing garment. The printer is not ready. Place your garment and press the IN button to send the plate back to ready position. This is a normal function. POLYPRINT SA – TEXJET OPERATION MANUAL V6.4 EN - 46 -...
-
Page 47: Printing Problems
There is a communication error between your TexJet and your computer. Make sure you don't have any jobs in the printqueue or Epson Queue's TexJet in printer and faxes, if you do, delete them. Then power down your TexJet & unplug the power & let it set unplugged for about 30 seconds. - Page 48 Not leveled printer has as result not leveled cartridges. This can also have an effect on the “pressure” in the system. Check your printer if it is well leveled. The dampers are faulty or exceeded their period of time. Order replacement dampers Faulty cartridges Change cartridges POLYPRINT SA – TEXJET OPERATION MANUAL V6.4 EN - 48 -...
- Page 49 Cancel the job from the computer in this order (TexJetRIP, the printqueue and the Epson’s queue TexJet in printer and faxes). Press the reset button on the TexJet until ready is on the display. Check on the computer if the jobs are deleted. Press the reset button on the TexJet again. Push the eject button to move the plate to the front.
- Page 50 When switching on the printer, on the plate panel, the power led is Flashing. Switch off the printer. Remove the power cable for 1min and pull it back again. If this happens again contact your dealer. POLYPRINT SA – TEXJET OPERATION MANUAL V6.4 EN - 50 -...
-
Page 51: Printer Specification
These specs are for the machine only. For ink and pretreatment consult the guidelines for storage and handling of the inks. Fixation Inks must be fixed at 160-170ºC 2-5min using heat press or dryer POLYPRINT SA – TEXJET OPERATION MANUAL V6.4 EN - 51 -... - Page 52 • Heat tunnel Equipment for dark shirt printing: • Electrical spray gun (Wagner 550w recommended). Protection paper, package 500 sheets dimension 40Χ60cm. • *Necessary to work with this product. POLYPRINT SA – TEXJET OPERATION MANUAL V6.4 EN - 52 -...
-
Page 53: Declaration Of Conformity
Serial Number: Year of construction: 2011 We declare by means of Giorgos Beglopoulos , delegated by the company Polyprint S.A., that the overhead described machine if installed, maintained and used in according to the operating and maintenance instructions in the operating manual, is conform with the fundamental safety and health requirements of the directive “machines”... -
Page 54: Warranty Terms And Conditions
This limited warranty covers only the replacement of defective parts and inks and does not include labour or other costs caused by the damage. POLYPRINT will offer warranty replacement only to official dealers trained on this equipment. Start of warranty period: The warranty period starts upon delivery of the machine.
Need help?
Do you have a question about the TEXJET and is the answer not in the manual?
Questions and answers