Table of Contents
Advertisement
Advertisement
Table of Contents

Related Manuals for Polyprint TEXJET PLUS


Summary of Contents for Polyprint TEXJET PLUS
- Page 1 TEXJET PLUS Digital Textile Garment Printer Users Manual...
- Page 2 No part of this publication may be reproduced mechanically or electronically or in any form without the prior written permission of Polyprint S.A. The information in this manual is for informational use only, is subject to change without notice and should not be construed as a commitment by Polyprint S.A.
-
Page 3: Table Of Contents
Guidelines for Storage and Handling of the Inks How to apply the different platens Software System requirements Driver Installation Texjet RIP software installation Troubleshooting Printer Specification Declaration of Conformity Warranty Terms and Conditions Polyprint S.A – Texjet plus operation manual English V1.9 - 3 -... -
Page 4: Introduction To Texjet Plus
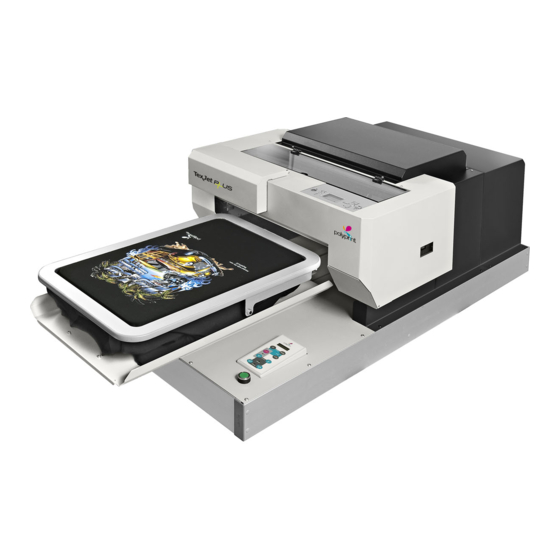
The Texjet Plus is an inkjet printer that has been made to print to many type of garment or fabric material as cottons, polyester, wool, leather etc. The Texjet Plus uses water based pigment inks, which work with the most types of garment. -
Page 5: Safety Instructions
If you are using an extension cord make sure the power ampere rate does not exceed the cord ampere rate of the product Polyprint S.A – Texjet plus operation manual English V1.9 - 5 -... - Page 6 Do not dismantle the ink cartridges. This could damage the Printhead. Do not touch the IC chip on the cartridges. Do not spill liquid on it. This will affect the normal printing operations Polyprint S.A – Texjet plus operation manual English V1.9 - 6 -...
- Page 7 Do not attempt to service this product yourself Do not modify the product without prior consent of POLYPRINT SA. Contact your local dealer in case you need help The product should not be disposed into the normal household waste stream Do not discard the inks into any sewers, into any body of water, or on the ground.
-
Page 8: Unpacking The Printer
• Remove the carton box by lifting it above the level of the printer: Lift the product by 2 or more persons out of the box due to heavy weight (~80kg). Polyprint S.A – Texjet plus operation manual English V1.9 - 8 -... -
Page 9: Working Space
2. Slowly take the tray out manually 3. Remove the screw no2 4. When finished, put the screw no1 back to its place and tighten the screw no2 onto the yellow bar. Polyprint S.A – Texjet plus operation manual English V1.9 - 9 -... -
Page 10: Hardware
2 power cables EU and UK standards 1 Ethernet cable Polyprint DVD with USB Dongle 1 mohair roller 5 Funnels 1 pipette 5 Transparent films for nozzle check 2 swabs for maintenance Polyprint S.A – Texjet plus operation manual English V1.9 - 10 -... -
Page 11: Extra Equipment
• Electrical liquid spray gun (Wagner 550W) • Protection paper, package 500 sheets dimension 40Χ60cm. Software for spotting images: • Photoshop version 7 and higher to spot images Polyprint S.A – Texjet plus operation manual English V1.9 - 11 -... -
Page 12: Name And Location Of The Components
7. Right arrow (also ‘menu’ button. Press it for 3’’ for normal head cleaning) 8. Down arrow 9. Enter button (press it to select the respective option when prompted) Polyprint S.A – Texjet plus operation manual English V1.9 - 12 -... - Page 13 With Shift: disable the automatic table movement for the dark t-shirts LED lights Error/Status/Copies/Limit indicators. The keyboard is only activated when the ‘Status’ LED light remains always ON. Polyprint S.A – Texjet plus operation manual English V1.9 - 13 -...
- Page 14 Shift Operation) Press ‘Shift’ and within 10’’ press any other button. This procedure will enable the 1 function line on the button and the respective attributes. Polyprint S.A – Texjet plus operation manual English V1.9 - 14 -...
-
Page 15: Assembling And Setting Up The Printer
-Step 2: Remove the original Epson chip from the original Epson cartridge (of the same respective color): -Step 3: Install the original Epson chip in its dedicated place on the refillable cartridge. Polyprint S.A – Texjet plus operation manual English V1.9 - 15 -... - Page 16 The auto-reset chip resets itself. The user only has to release the cartridge via the push-button and then put it back inside. The respective icon on the display showing the ink level should be full. Polyprint S.A – Texjet plus operation manual English V1.9 - 16 -...
-
Page 17: Maintenance Tank Chip Resetting Procedure
*If instead of “ready” message, the “NON-GENUINE” message appears at the panel display, then follow the panel instructions. For more details refer to Panel instruction for “NON- GENUINE” message bellow. Polyprint S.A – Texjet plus operation manual English V1.9 - 17 -... -
Page 18: Panel Instruction For "Non-Genuine" Message
Matt Black (MK) Black Photo Black (PK) Black Light Black (LK) White Light Light Black (LLK White Cyan (C) Cyan Magenta (M) Magenta Light Cyan (LC) White Polyprint S.A – Texjet plus operation manual English V1.9 - 18 -... -
Page 19: How To Fill And Refill The Cartridges
2. Place the cartridge so that the supply hole is facing up. This is done to avoid ink spilling from the cartridge. Insert the syringe containing the ink and repeat to the point where the ink has filled up about 90% of the cartridge: Polyprint S.A – Texjet plus operation manual English V1.9 - 19 -... - Page 20 4. Lastly, before inserting the cartridge into the printer’s respective slot, make sure that you have removed completely the air supply rubber seal: Polyprint S.A – Texjet plus operation manual English V1.9 - 20 -...
- Page 21 2. Use the funnel provided with the printer to fill the cartridge with its respective ink. It is advised that the level doesn’t exceed 90% of the maximum capacity. Polyprint S.A – Texjet plus operation manual English V1.9 - 21 -...
- Page 22 3. After completion of the refilling procedure, put the rubber seal back to its place and it is make sure that it is fully inserted. Also, make sure to remove entirely the air supply rubber seal. Polyprint S.A – Texjet plus operation manual English V1.9 - 22 -...
-
Page 23: Cable Connection Interface
USB2 interface. If you use an inappropriate cable or connect peripheral devices between the printer and the computer, the connection may become unstable. Polyprint S.A – Texjet plus operation manual English V1.9 - 23 -... -
Page 24: Start-Up And Ink Loading
Power Cleanings, perform a nozzle check. If the nozzle check isn’t perfect, perform one or two more Power Cleanings, until the nozzle check looks like the one in Picture 1. Picture 3 Polyprint S.A – Texjet plus operation manual English V1.9 - 24 -... -
Page 25: User Handling Of The Printer
Ready to print: When the printer shows the message “READY” on the display you are ready to print. Always shake the white ink cartridges before starting up the printer daily. Polyprint S.A – Texjet plus operation manual English V1.9 - 25 -... -
Page 26: Light Indications On The Texjet Plus
When FLASHING SLOW the function 1 is enabled and there are no copies o When OFF there is no function enabled and there are no copies Polyprint S.A – Texjet plus operation manual English V1.9 - 26 -... -
Page 27: The Preparation Of The Black Textile
Dry it for 30 seconds under a heat press with high pressure between 180-150ºC with heat resistant paper over it (we recommend Texjet plus Sheets). It will also press the fabric fibres flat to give a good printing surface. Make sure the textile is completely dry before printing. -
Page 28: Fixation Of The Textile
Ink fixation for dark textiles: Time / Temperature The dark printed fabric should get heated or heat pressed (with pressure), for at least 2,5min at 180ºC or 3,5min at 150 ºC, with heat resistant paper (we recommend TexJet Plus Sheets) over the fabric. -
Page 29: Maintenance
These two parts are the only ones that come in contact with the print head itself. 7. After having finished the cleanings, fill the capping station with cleaning liquid. Polyprint S.A – Texjet plus operation manual English V1.9 - 29 -... - Page 30 10. After the above procedure is finished, on the printers display the “Ready” message should show up. 11. Now you can switch off the printer. Polyprint S.A – Texjet plus operation manual English V1.9 - 30 -...
-
Page 31: Weekly Maintenance
4. Move the print head by hand to the far left side of the printer, so that you can have free access to the cap station and the wiper. Using the cleaning solution liquid and a swab, clean the rubber frame of the cap station as shown below: Polyprint S.A – Texjet plus operation manual English V1.9 - 31 -... - Page 32 6. After having finished the cleanings, fill the capping station with cleaning liquid. This will ensure that the Printhead will remain wet over long period. Polyprint S.A – Texjet plus operation manual English V1.9 - 32 -...
- Page 33 (far right position). Move the release knob to the opposite direction the arrow indicates (clock-wise) until the print head can’t be moved any more (print head lock position). Make sure that the print head can’t move at all. Polyprint S.A – Texjet plus operation manual English V1.9 - 33 -...
-
Page 34: Monthly Maintenance
Move it anti-clockwise (to the direction of the arrow) until you can move the print head by hand. Move the print head by hand to the far left side of the printer, so that you can have free access on the carriage area. Polyprint S.A – Texjet plus operation manual English V1.9 - 34 -... - Page 35 Printhead surface bellow. Clean only the area around the Printhead as shown in the picture bellow. The shinny area that mirrors should not been touched or scratched. Polyprint S.A – Texjet plus operation manual English V1.9 - 35 -...
- Page 36 (far right position). Move the release knob to the opposite direction the arrow indicates (clock-wise) until the print head can’t be moved any more (print head lock position). Make sure that the print head can’t move at all. Polyprint S.A – Texjet plus operation manual English V1.9 - 36 -...
-
Page 37: Month And 1 Year Maintenance
Clean thoroughly all cartridges and valves from remaining and dried out ink. Exchange broken parts and put fresh ink in to the cartridges. Polyprint S.A – Texjet plus operation manual English V1.9 - 37 -... -
Page 38: Transporting The Printer
Before moving the printer to other position, empty the maintenance tank from the remaining ink Always put the printer into a place where the lighting is sufficient Place this product near a wall outlet where the plug can be easily unplugged Polyprint S.A – Texjet plus operation manual English V1.9 - 38 -... -
Page 39: Guidelines For Storage And Handling Of The Inks
Do not discard the inks into any sewers, into any body of water, or on the ground. Special Guidelines for Storage and Handling for PD200 Inks The Polyprint PD200 white Ink and cleaning solution will provide excellent results when stored and handled properly. The following storage and handling practices are required to ensure... -
Page 40: How To Apply The Different Platens
8 countersunk hex 2,5mm screws 2,5mm Alen metric wrench tool Then remove the long interface bracket by loosen the 2 hex screws and place instead the short interface bracket. Polyprint S.A – Texjet plus operation manual English V1.9 - 40 -... - Page 41 Polyprint S.A. Texjet+ Place second short interface bracket to the correct position. Se the photo Place the mini plate and the adapter plate on position. Polyprint S.A – Texjet plus operation manual English V1.9 - 41 -...
- Page 42 The Polo plate includes the following items. 1 Polo plate 4 countersunk hex 2,5mm screws 2,5mm Alen metric wrench tool Unscrew the long interface bracket and place it at lower position Polyprint S.A – Texjet plus operation manual English V1.9 - 42 -...
- Page 43 Place the Polo plate over the 2 long interface brackets and screw the 4 countersunk hex screws. Universal plate The Polo plate includes the following items. 1 Universal plate 4 countersunk hex 2,5mm screws 2,5mm Alen metric wrench tool Polyprint S.A – Texjet plus operation manual English V1.9 - 43 -...
- Page 44 Polyprint S.A. Texjet+ Place the Universal plate over the 2 long interface brackets and screw the 4 countersunk hex screws. Polyprint S.A – Texjet plus operation manual English V1.9 - 44 -...
- Page 45 1 Standard plate 4 countersunk hex 2,5mm screws 2,5mm Alen metric wrench tool Place the Standard plate over the 2 long interface brackets and screw the 4 countersunk hex screws. Polyprint S.A – Texjet plus operation manual English V1.9 - 45 -...
- Page 46 1 frame system 4 bold hex 3mm screws 3mm Alen metric wrench tool Place the frame system over the 2 long interface brackets and screw the 4 bold hex screws. Polyprint S.A – Texjet plus operation manual English V1.9 - 46 -...
-
Page 47: Software
Corel Draw, Adobe Illustrator and Adobe Photoshop. Most of these CDs or DVDs are focused on the screen printing process, but again, they have excellent sections on how to create designs, how to deal with poor quality original artwork and more. Polyprint S.A – Texjet plus operation manual English V1.9 - 47 -... -
Page 48: Driver Installation
Do not connect the printer with the USB cable to the computer before installing the Epson 3880 printer driver. Select accordingly to your computer platform the file found in the driver folder of the Polyprint RIP Software DVD. Run the installation. Follow the instructions of the wizard. - Page 49 Polyprint S.A. Texjet+ 3) Start the setup 4) Choose the correct printer and press OK Polyprint S.A – Texjet plus operation manual English V1.9 - 49 -...
- Page 50 6) During the installation, a pop up security window may appear asking you if you agree to install the drivers on your oparating system. Press INSTALL THIS DRIVER SOFTWARE ANYWAY Polyprint S.A – Texjet plus operation manual English V1.9 - 50 -...
- Page 51 Texjet+ 7) The installation continues 8) in this step connect the USB cable and wait until you system recognizes the printer. Ensure that the printer is switched ON. Polyprint S.A – Texjet plus operation manual English V1.9 - 51 -...
- Page 52 9) After the installation of the driver is complete, a massage will show you that the printer is ready to use. 10) Click OK in the confirmation message Polyprint S.A – Texjet plus operation manual English V1.9 - 52 -...
-
Page 53: Texjet Rip Software Installation
2. Enter your name and organization in the window below and click ‘Next’. 3. You must click on ‘Accept the terms in the license agreement’ and ‘next’ afterwards, in order to continue. Polyprint S.A – Texjet plus operation manual English V1.9 - 53 -... - Page 54 5. In the setup type window, click on the ‘complete’ installation and then ‘Next’. 6. Now you are ready to install the RIP software. Just click ‘install’ and wait for the wizard to finish. Polyprint S.A – Texjet plus operation manual English V1.9 - 54 -...
- Page 55 8. Now you can start up the RIP software. For this texjet plus printer you have to use the texjet plus v2 driver in the RIP software for proper operation Polyprint S.A –...
-
Page 56: Troubleshooting
The biggest part of your Texjet plus is to check for, is the capping station. Make sure this ALWAYS stays clean. The print head uses this to dock when the printer is not in use to ensure the print heads do not dry out. - Page 57 The plate is in front position for placing garment. The printer is not ready. Place your garment and press the HOME button to send the plate back to ready position. This is a normal function. Polyprint S.A – Texjet plus operation manual English V1.9 - 57 -...
- Page 58 Polyprint S.A. Texjet+ PRINTING PROBLEMS Problem: When sending a print command to the Texjet plus printer the Print Head moves like it is printing but no ink sprays out. Causes and Solutions: The printer needs head cleaning. Do head cleaning and printing nozzle checks until a decent nozzle check is achieved.
- Page 59 Always check height of print head prior to printing. Clean the capping station on a regular basis. Clean debris from print head daily. Keep your printer leveled. Don’t fill too much the ink cartridges. Polyprint S.A – Texjet plus operation manual English V1.9 - 59 -...
- Page 60 It has been noted that if the maintenance tank’s level is below 50%, then the “load paper” message may appear more often. Make sure that the maintenance tank is above 50%, otherwise reset it. Polyprint S.A – Texjet plus operation manual English V1.9 - 60 -...
- Page 61 If the error still persists it could be caused by an over tight movement belt of the tray or tray movement problem. Please contact the service personnel Polyprint S.A – Texjet plus operation manual English V1.9 - 61 -...
-
Page 62: Printer Specification
These specs are for the machine only. For ink and pretreatment consult the guidelines for storage and handling of the inks. Fixation Inks must be fixed at 160-170ºC 2-5min using heat press Polyprint S.A – Texjet plus operation manual English V1.9 - 62 -... -
Page 63: Declaration Of Conformity
Year of construction: 2011 We declare by means of Giorgos Beglopoulos , delegated by the company Polyprint S.A., that the overhead described machine if installed, maintained and used in according to the operating and maintenance instructions in the operating manual, is conform with the fundamental safety and health requirements of the directive “machines”... -
Page 64: Warranty Terms And Conditions
This limited warranty covers only the replacement of defective parts and inks and does not include labor or other costs caused by the damage. POLYPRINT will offer warranty replacement only to official dealers trained on this equipment. Start of warranty period: The warranty period starts upon delivery of the machine.
Need help?
Do you have a question about the TEXJET PLUS and is the answer not in the manual?
Questions and answers