Table of Contents
Advertisement
Advertisement
Table of Contents

Related Manuals for Polyprint TEXJET4260


Summary of Contents for Polyprint TEXJET4260
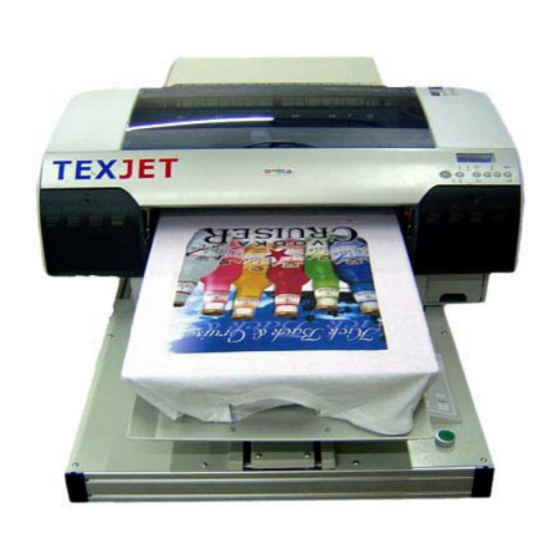
- Page 1 TEXJET4260/GJET/SUPERJET Digital Textile Garment Printer Operation Manual...
- Page 2 Polyprint S.A. The information in this manual is for informational use only, is subject to change without notice and should not be construed as a commitment by Polyprint S.A. Polyprint S.A. assumes no responsibility or liability for any errors or inaccuracies that may appear in this document.
-
Page 3: Table Of Contents
4.4.1. User handling of the Software 4.4.2. Choosing the right printenvironment 4.4.3. Spotting images 4.5. Printjob cancellation 4.6. Color Management 5. Troubleshooting 6. Printer Specification 7. Declaration of Conformity 8. Warranty Terms and Conditions POLYPRINT SA – TEXJET OPERATION MANUAL V4 EN - 3 -... -
Page 4: Introduction To Texjet
The printer has been modified to work with the PolyPrintRIP software which is included with your TexJet. The printer could work with other RIP software’s, but only with special settings and under special conditions. Polyprint cannot guarantee a 100% compatibility with other software’s. -
Page 5: Safety Instructions
10-30 degrees Celsius. the printing media may destroy the The humidity must be between 20- print head. 80% none condensing. POLYPRINT SA – TEXJET OPERATION MANUAL V4 EN - 5 -... - Page 6 We repute that by the time of issuing the present instructions manual, the contents are correct. We reserve the right to modify without any notice, the specifications and performances of the product and the present manual. POLYPRINT SA – TEXJET OPERATION MANUAL V4 EN - 6 -...
-
Page 7: Hardware
40 GB disc space recommended USB2 interface 2 USB ports free (for dongle and printer) The system requirements are for using the Polyprint Rip software Power cable: Use the type of power source indicated on this products label Connect the power cable to a standard 220V or either to 110V (for U.S.A.) Data cable: Use the USB cable to connect the machine to the computer. - Page 8 Printer and accessories TEXJET printer Short USB cable Chip Resetter Power cables RIP software CD, profiles and drivers USB Dongle Epson driver CD 8 Cartridges with accessories POLYPRINT SA – TEXJET OPERATION MANUAL V4 EN - 8 -...
- Page 9 Liquid spray gun (airbrush, air pump sprayer, fine mist power sprayer), the spray gun should be a high volume low pressure model. • Protection paper, package 500 sheets dimension 40Χ60cm. Software for spotting images: • Photoshop to spot images POLYPRINT SA – TEXJET OPERATION MANUAL V4 EN - 9 -...
- Page 10 • All other parts 12 Months Excluded from the warranty are consumable parts as Consumables: • Pump • Wiper • Damper • Cap • Flushing box • Waste tank POLYPRINT SA – TEXJET OPERATION MANUAL V4 EN - 10 -...
- Page 11 1. TEXJET operation panel 2. Epson operation panel 3. T-Shirt plate 4. Waste tank 5. Top cover 6. Back cover 7. Cartridge Slot 8. Ink lever 9. Plate guide POLYPRINT SA – TEXJET OPERATION MANUAL V4 EN - 11 -...
- Page 12 21. Automatic plate height adjustment 22. Plate height limit LED 23. Manual Plate Eject Button 24. Manual Plate Insert Button 25. Eject Button 26. Start Button 27. Green Start Button POLYPRINT SA – TEXJET OPERATION MANUAL V4 EN - 12 -...
-
Page 13: Unpacking The Printer
T-Shirt plate comes out, doesn’t exceed the size of the table where the printer is placed. • Make sure that the table is level and can support the weight of the printer. POLYPRINT SA – TEXJET OPERATION MANUAL V4 EN - 13 -... - Page 14 LIGHT BLACK BLACK INK P104 WHITE INK PD205 LIGHT CYAN CYAN P101 WHITE INK PD205 LIGHT MAGENTA MAGENTA P102 WHITE INK PD205 LIGHT LIGHT BLACK YELLOW P103 WHITE INK PD205 POLYPRINT SA – TEXJET OPERATION MANUAL V4 EN - 14 -...
- Page 15 Make sure that the plate guide 9 is clear Connect the power cable and switch on the printer by pressing the button • 10 on the Epson panel. POLYPRINT SA – TEXJET OPERATION MANUAL V4 EN - 15 -...
- Page 16 If the colors do not look like the picture, and you notice that some of • them are missing, perform the “Powerful Cleaning” one more time. Nozzle Check POLYPRINT SA – TEXJET OPERATION MANUAL V4 EN - 16 -...
-
Page 17: User Handling Of The Printer
Do these steps until you get “ready” on the Epson Panel display. Once the plate height is defined for a kind of T-shirt a readjustment is not • necessary until the T-shirt type changes. POLYPRINT SA – TEXJET OPERATION MANUAL V4 EN - 17 -... -
Page 18: The Preparation Of The Black Textile
To activate this function, press and the number 1. To cancel this function press and 4. When activated, the yellow led is flashing. The buttons must be pressed for 1sec. POLYPRINT SA – TEXJET OPERATION MANUAL V4 EN - 18 -... -
Page 19: Fixation Of The Textile
Ink fixation for white and pastel colored textiles: Time / Temperature The white and pastel colored fabric should get heated or head pressed (without pressure) for at least 2,5min at 170ºC or 3,5min at 150 ºC. POLYPRINT SA – TEXJET OPERATION MANUAL V4 EN - 19 -... - Page 20 This is an expensive investment and in order to get the most out of it please take time to learn about simple steps that will keep your garment printer reliable and productive. POLYPRINT SA – TEXJET OPERATION MANUAL V4 EN - 20 -...
-
Page 21: Daily Maintenance
3. Move the print head out of its parking position by pressing the purple lever 4. Clean the wiper using a cotton bud and cleaning fluid 5. Clean the sealing of the cap using a bud and cleaning fluid POLYPRINT SA – TEXJET OPERATION MANUAL V4 EN - 21 -... - Page 22 1. Fill the capping using cleaning fluid 2. Move the print head manually into the parking position 3. Raise both ink levers to the up position while the printer is switched off. POLYPRINT SA – TEXJET OPERATION MANUAL V4 EN - 22 -...
- Page 23 POLYPRINT SA – TEXJET OPERATION MANUAL V4 EN - 23 -...
-
Page 24: Weekly Maintenance
3. Empty all the ink cartridges and perform a last powerful cleaning until the tubes are empty. 4. Switch of the printer and remove the power gable and the data cable. POLYPRINT SA – TEXJET OPERATION MANUAL V4 EN - 24 -... - Page 25 Place the inks cleaner in the cap station of the printer, afterwards the end of your work, in order to keep the printhead wet POLYPRINT SA – TEXJET OPERATION MANUAL V4 EN - 25 -...
-
Page 26: Transporting The Printer
Also keep this product away from direct sunlight, strong light, or heat sources. o Avoid places subject to shocks and vibrations. o Keep this product away from dusty areas. POLYPRINT SA – TEXJET OPERATION MANUAL V4 EN - 26 -... - Page 27 Operate the machine in an environment with a temperature range of 10-30 degrees Celsius. The humidity must be between 20-80% none condensing. o The printer is not made for kids, but only for professionals POLYPRINT SA – TEXJET OPERATION MANUAL V4 EN - 27 -...
-
Page 28: Guidelines For Storage And Handling Of The Inks
10 and 30 degrees Celsius. Special Guidelines for Storage and Handling for PD200 Inks The Polyprint PD200 white Ink and cleaning solution will provide excellent results when stored and handled properly. The following storage and handling practices are required to ensure consistent quality and performance... - Page 29 Remove the white ink from bulk system and flush out the print head with distilled water or flushing solution. The print head should remain filled with distilled water or flushing solution until printer is ready to be refilled with white ink. POLYPRINT SA – TEXJET OPERATION MANUAL V4 EN - 29 -...
- Page 30 6 hexagonal 2,5mm screws First of all remove from the standard plate the 4 hexagonal 2,5mm screws. Then remove the 2 horizontal metal pieces by loosen the 4 hexagonal 2,5mm screws. POLYPRINT SA – TEXJET OPERATION MANUAL V4 EN - 30 -...
- Page 31 T-Shirt polo plate In the shipment for the T-Shirt Mini plate should be. 1 plate 42x60 1 sticker tape There are 2 options to place the polo plate. POLYPRINT SA – TEXJET OPERATION MANUAL V4 EN - 31 -...
- Page 32 4 corners at the bottom of the polo plate. Just place the polo plate over the standard plate you have fixed. • Unscrew the plate you have fixed and screw the polo plate like the standard plate. POLYPRINT SA – TEXJET OPERATION MANUAL V4 EN - 32 -...
-
Page 33: Software
Pentium IV, 2GHz min, 512 MB RAM min 40 GB disc space required The system requirements are for using the Polyprint Rip software. Note: Do not connect the printer with the USB cable to the computer, before installing the Epson 4800 printer driver... - Page 34 3. Plug the other end of the cable into the USB interface connector of the computer, After connecting the printer and the computer with the USB cable, see “Software Installation” POLYPRINT SA – TEXJET OPERATION MANUAL V4 EN - 34 -...
-
Page 35: Driver Installation
Do not connect the printer with the USB cable to the computer, before installing the Epson 4800 or 4880 printer driver Install to the computer, the printer driver for Epson 4800 or 4880 from the Polyprint RIP Software CD or the Epson driver CD. Follow the instructions on the wizard. Press ok... -
Page 36: Software Installation Version12
This installation describes the Polyprint Version 12 • Installation Place the Polyprint RIP Software CD if not already done, o Go to the Polyprint RIP folder and run the Setup. Press Run Next POLYPRINT SA – TEXJET OPERATION MANUAL V4 EN... - Page 37 Confirm yes Insert user name and company name Insert destination folder POLYPRINT SA – TEXJET OPERATION MANUAL V4 EN - 37 -...
- Page 38 Select dongle version Wait o Do not place the USB dongle until the dongle driver have been installed The computer would ask you to install the dongle driver. Confirm yes POLYPRINT SA – TEXJET OPERATION MANUAL V4 EN - 38 -...
- Page 39 Wait until it’s finished o After some time the computer will confirm to put the USB dongle. Press ok o Place the Dongle. Press ok o Finish the installation. Select language POLYPRINT SA – TEXJET OPERATION MANUAL V4 EN - 39 -...
- Page 40 The computer would ask you for the License code. o Insert the License code for your dongle key. This code will be sent to you via e-mail or included in the CD case of Polyprint RIP software. POLYPRINT SA – TEXJET OPERATION MANUAL V4 EN...
- Page 41 • Import Printenvironments: Insert the printenvironments. o After lunching Polyprint RIP for the first time, the RIP Software will inform you that no printenvironment is selected. Without printenvironment, the RIP software will proceed to add a new one. Click cancel o Do not add a new one.
- Page 42 • Create a printqueue: o From the Polyprint RIP menu go to tools and lunch the printqueue manager. Select printqueue manager b. Follow the instructions of the printqueue wizard. You have to create a new printqueue. Next POLYPRINT SA – TEXJET OPERATION MANUAL V4 EN...
- Page 43 Next Next Browse to spool directory POLYPRINT SA – TEXJET OPERATION MANUAL V4 EN - 43 -...
- Page 44 Make new Folder with the name printqueue “c:\printqueue” and click ok C:\printqueue o For port selection add a new port. Go to windows printer and select the Epson 4800 (TexJet). POLYPRINT SA – TEXJET OPERATION MANUAL V4 EN - 44 -...
- Page 45 Select add Select windows printer Select the TexJet and click ok o Give a name to the printqueue (printqueue) (Please use only Latin vocabulary) and finish the installation. Give printqueue POLYPRINT SA – TEXJET OPERATION MANUAL V4 EN - 45 -...
- Page 46 Select finish POLYPRINT SA – TEXJET OPERATION MANUAL V4 EN - 46 -...
- Page 47 At the left side of the print settings menu, select port and on the right side you have to change the selection from “print device” to “printqueue”. Also select the created spool directory. “c:\printqueue” in the scroll down window. Select printqueue POLYPRINT SA – TEXJET OPERATION MANUAL V4 EN - 47 -...
- Page 48 “42cm width” and to “60cm height”. Edit media size 42x60 o Do this set up for all printenvironments to ensure right function. POLYPRINT SA – TEXJET OPERATION MANUAL V4 EN - 48 -...
-
Page 49: Software Installation Version13
This installation described is for the Version 13 Place the Polyprint RIP Software CD if not already done, o Go to the Polyprint RIP folder and run the Setup. The Version should be at least the 13_0_1_3374 POLYPRINT SA – TEXJET OPERATION MANUAL V4 EN... - Page 50 POLYPRINT SA – TEXJET OPERATION MANUAL V4 EN - 50 -...
- Page 51 After Lunching the RIP for the first time a password is requested. You’ll get this password via e-mail or written on your CD case. In any case you can request it directly from Polyprint. POLYPRINT SA – TEXJET OPERATION MANUAL V4 EN - 51 -...
-
Page 52: Setting Up The Software
Choose import and import them from the CD folder printenvironments. After the printenvironments have been imported it’s necessary to check the printer port and the media size on the settings for each printenvironment. POLYPRINT SA – TEXJET OPERATION MANUAL V4 EN - 52 -... - Page 53 If there is no printer defined create a new. Give a name for it. Example “TexJet” Select add and then windows printer. Choose your printer “TexJet”, installed in printer and faxes. “Epson Stylus 4880” Select browse to define a folder for your spool files POLYPRINT SA – TEXJET OPERATION MANUAL V4 EN - 53 -...
- Page 54 Create the folder in a drive with enough space for example c:\spool. Then click OK. Also check the media size to be selected at 42cm width and 60cm height. After this, the software setup is finished. You can start using the software POLYPRINT SA – TEXJET OPERATION MANUAL V4 EN - 54 -...
-
Page 55: User Handling Of The Software
Now you are ready to prepare the job on the Computer using the RIP software. • Launch the Polyprint RIP and the print client software if not done so. • Import an Image in to the Polyprint RIP, from the Menu>File>Import... - Page 56 Consider that after centering the image you have to add 1,3cm at the horizontal because the plate has 1,3cm gap from the printable area. POLYPRINT SA – TEXJET OPERATION MANUAL V4 EN - 56 -...
- Page 57 You have to consider that the software will print the white on the image background too. POLYPRINT SA – TEXJET OPERATION MANUAL V4 EN - 57 -...
- Page 58 +p to print • On the print window just select the copies(1,2…) you want and click ok to start printing POLYPRINT SA – TEXJET OPERATION MANUAL V4 EN - 58 -...
-
Page 59: Spotting Images
Select: Spot Color Solidity: 100%. Save the file as TIFF or Photoshop DCS 2.0 (eps) Check Spot Colors Change the print environment to “Spot white” and select the passes. POLYPRINT SA – TEXJET OPERATION MANUAL V4 EN - 59 -... -
Page 60: Printjob Cancellation
In the settings for the input profiles RGB, select “keep embedded profiles” and Adobe 1998 RBG. CMYK not checked and none. In the options of the job composer (Polyprint rip) POLYPRINT SA – TEXJET OPERATION MANUAL V4 EN - 60 -... -
Page 61: Troubleshooting
CMYK. Always use the embedded profile from your device of your image. Polyprint RIP uses its own printer profiles to ensure the best printed quality. On the photo image has been attached another ICC Profile from its embedded. - Page 62 There is a communication error between your TexJet and your computer. Make sure you don't have any jobs in the Polyprint RIP or Epson Queue's, if you do, delete them. Then power down your TexJet & unplug the power & let it set unplugged for about 30 seconds. Power back on and try again.
- Page 63 Prevention: Always double check the settings for Polyprint RIP prior to sending a print job to actually print. Clean the Encoder Strip as needed depending on your production rate. Keep TexJet as clean as possible and perform normal maintenance. Check the communication between the computer and printer.
-
Page 64: Printing Problems
Make sure always to stop your printjob in the correct way without leaving any printjobs in the printqueue Problem: There is horizontal banding across print (in one or all colors). POLYPRINT SA – TEXJET OPERATION MANUAL V4 EN - 64 -... - Page 65 Check your printer if it is well leveled. The dampers are faulty or exceeded their period of time. Order replacement dampers Faulty cartridges, call technical support. POLYPRINT SA – TEXJET OPERATION MANUAL V4 EN - 65 -...
- Page 66 TexJet in printer and faxes). Press the reset button on the TexJet until ready is on the display. Check on the computer if the jobs are deleted. Press the reset button on the TexJet again. Push the eject button to move the plate to the front. POLYPRINT SA – TEXJET OPERATION MANUAL V4 EN - 66 -...
- Page 67 When switching on the printer, on the plate panel, the power led is in not on and there is no signal tone. Switch off the printer. Remove the power cable for 1min and pull it back again. If this happens again contact your dealer. POLYPRINT SA – TEXJET OPERATION MANUAL V4 EN - 67 -...
-
Page 68: Printer Specification
• Rip Software for digital print on the garment. • Possibility to upgrade the software for use on other printers or large format plotters. *Necessary to work with this product. POLYPRINT SA – TEXJET OPERATION MANUAL V4 EN - 68 -... - Page 69 0,3mm nozzle. • Protection paper, package 500 sheets dimension 40Χ60cm. *Necessary to work with this product. **Necessary to work with this product only if the ink set is PD200 POLYPRINT SA – TEXJET OPERATION MANUAL V4 EN - 69 -...
-
Page 70: Declaration Of Conformity
Year of construction: 2007 We declare by means of Giorgos Beglopoulos , delegated by the company Polyprint S.A., that the overhead described machine if installed, maintained and used in according to the operating and maintenance instructions in the operating manual, is conform with the fundamental safety and health requirements of the directive “machines”... -
Page 71: Warranty Terms And Conditions
This limited warranty covers only the replacement of defective parts and inks and does not include labour or other costs caused by the damage. POLYPRINT will offer warranty replacement only to official dealers trained on this equipment. Start of warranty period: The warranty period starts upon delivery of the machine.
Need help?
Do you have a question about the TEXJET4260 and is the answer not in the manual?
Questions and answers