Table of Contents
Advertisement
Quick Links
Advertisement
Table of Contents

Related Manuals for Baumatic BWC605SS


Summary of Contents for Baumatic BWC605SS
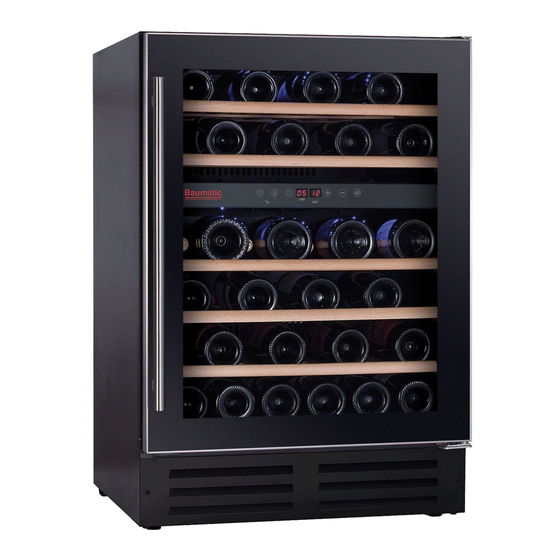
- Page 1 BWC605SS 60 cm 46 Bottle dual temperature wine cabinet INSTRUCTION MANUAL...
- Page 2 USER MANUAL FOR YOUR BAUMATIC BWC605SS 60 cm 46 Bottle dual cabinet temperature wine cabinet NOTE : This User Instruction Manual contains important information, including safety & installation points, which will enable you to get the most out of your appliance. Please keep it in a safe place so that it is easily available for future reference, for you or any person not familiar with the operation of the appliance.
-
Page 3: Table Of Contents
Product specifications 7 - 8 Description of the appliance Product features Control panel Description of the product features Using your Baumatic wine cabinet 10-13 Before switching on During first use Turning the appliance on and off Unlocking the control panel... -
Page 4: Environmental Note
This should be undertaken by a competent person. Disable the door lock to make sure that children cannot get stuck inside the appliance. o The packaging materials that Baumatic uses are environmentally friendly and can be recycled. o Please discard all packaging material with due regard for the... -
Page 5: Important Safety Information
Important safety information Your safety is of the utmost importance to Baumatic. Please make sure that you read this instruction booklet before attempting to install or use the appliance. If you are unsure of any of the information contained in this booklet, please contact the Baumatic Advice Line. - Page 6 Child safety o Packaging material should be kept away from children. o Children should not be allowed to touch the controls or play with the appliance. General safety o Do not pull on the power supply cable to remove the plug from your mains supply socket.
-
Page 7: Specifications Of Your Wine Cabinet
Specifications of your wine cabinet Dimensions of appliance Height: 870 - 890 mm Width: 595 mm Depth: 570 mm ** Please refer to the installation instructions for specific information on the size of aperture that you will require. o Gross capacity: 145 litres o Net capacity: 143 litres... -
Page 8: Description Of The Appliance
Description of the appliance Product features Right Top Hinge Exterior Cabinet Door Handle Control Panel Deep Shelf Shallow Shelf Front Vent Adjustable Foot... -
Page 9: Control Panel
Control panel The control panel is located in the middle of the appliance. Description of the product features Control panel o The control panel is located in the middle of the appliance, behind the glass door. This means it is easy to set the temperature of the appliance and see what temperature the appliance is set to. -
Page 10: Using Your Baumatic Wine Cabinet
Using your Baumatic wine cabinet Before switching on o Make sure that it has been installed by a suitably qualified person, information contained Baumatic’s installation instructions. o After delivery, wait for eight hours before connecting the appliance to your mains supply. This will allow any refrigerant gasses that may have been disturbed during the transportation process to settle. -
Page 11: During First Use
During first use IMPORTANT: When you use the wine cabinet for the first time or restart the appliance after it has been turned off for a long time, there could be a few degrees variance between the temperature you select and the one indicated on the LED display. -
Page 12: The Interior Light
The interior light o When the control panel is unlocked, you can use the light button to switch the interior light on and off. o The light will remain on unless it is turned off manually by pressing the light button. Setting the temperature o The temperature setting for the upper zone is adjustable within the range of 5°C - 12°C / 41°F - 54°F. -
Page 13: Loading The Wine Cabinet
Loading the wine cabinet IMPORTANT: Your appliance is ideally suited to store 0.75 litre Bordeaux style wine bottles. While it can store larger bottles, you must make sure that they do not prevent the door from shutting properly. o Always check that you can close the door without it fouling on a wine bottle, before shutting it. -
Page 14: Storing Your Wines
Storing your wines The chart below indicates the ideal storage temperatures for different types of wine:- Temperature Temperature Type of wine (Celsius) (Fahrenheit) Red wine (*) 15.5 – 18.5°C 59.9 – 65.3°F White wine (**) 10 - 15°C 50 – 59°F Sparkling 7.2 –... -
Page 15: Wine Storage Problems
o Special stoppers that keep wine sparkling and Champagne bubbling for one or two days after opening, can be bought at most good wine shops. o When stored correctly, white wines can keep well for up to two years. Full bodied reds will age well for ten years and dessert wines will age well for up to twenty years. -
Page 16: Cleaning And Maintenance
Slight effervescence in still wine- this isn’t really a problem with the way the wine has been stored, but as a result of incomplete malolactic fermentation before the wine was bottled. A good way to get rid of the effervescence is to let the wine breathe. Alternatively you can use a bottle vacuum device, after about five minutes the effervescence will vanish. -
Page 17: Defrosting
o After washing the appliance, wipe over the area that you have cleaned with a damp cloth and then dry it thoroughly. o When cleaning is complete, dry your hands and then reconnect the plug to your mains supply. efrosting o Defrosting occurs automatically inside of the wine cabinet during operation. -
Page 18: Moving Your Wine Cabinet
o Make sure the shelves are fully engaged before loading any bottle into the cabinet. Pull the shelves out all the way to the STOP position and push them back in several times to make sure the shelves are properly engaged. oving your wine cabinet you need to move your wine cabinet to another location you should follow the steps outlined below. -
Page 19: Installation
Installation IMPORTANT: Before installation and usage read all the instructions and make sure that the voltage (V) and the frequency (Hz) indicated on the rating plate are exactly the same as the voltage and frequency in your home. The rating plate can be found on the front left edge of the inside of the w ine cabinet. -
Page 20: Positioning
The green and yellow wire must be connected to the terminal marked “E” (earth), or by the earth symbol, or coloured green and yellow. o When the connection is completed, no stray strands or cut wire should be present. The cord clamp must be secured over the outer sheath. -
Page 21: Built-In Installation
Built-in installation o Your wine cabinet can be used as a freestanding or a built in unit. The clearances shown in the above drawing should be followed for both types of installation. o In particular the depth dimension must be observed. o IMPORTANT: The vent at the base of the appliance is for ventilation. -
Page 22: Adjusting The Height And Levelling Off Your Wine Cabinet
Adjusting the height and levelling off your wine cabinet o The appliance is equipped with adjustable feet, so that the height may be adjusted to level the cabinet on uneven floor surfaces. o We recommend that two people carry out this procedure. o The height must be adjusted prior to building the appliance into the housing unit and it should be set at such a height that the top panel of the appliance fits exactly below the kitchen worktop. -
Page 23: Installing The Handle
Installing the handle o Remove the door gasket on the side you wish to install the handle. You can see two designated holes for handle installation. o Install the handle tightly as shown in the diagram above with the two screws, lock washers and flat washers provided. o Replace the door gasket. - Page 24 o Remove the right top hinge and right lower hinge. Right Top Hinge Right Lower Hinge o Pull out the 6 Plastic Caps at the front left corner of the cabinet. And move them all to the right side. Right Lower Hinge o Take the left top hinge and left lower hinge from the plastic bag that contained this manual then install them in the...
- Page 25 Insert the Support Rod into the Left Lower Hinge hole of the door Left Lower Hinge o Install the door to the left hinge side by tightening the Support Rod with the 2 screws. Support Rod Screws IMPORTANT: Check that the door opens and shuts correctly, without fouling, after you have completed the door reversal process.
-
Page 26: Troubleshooting
IMPORTANT: DO NOT HEAT THE DOOR SEAL ON ANYTHING BUT THE LOWEST HEAT SETTING, OR HEAT THE SEAL FOR A LONG PERIOD OF TIME. OTHERWISE DAMAGE MAY BE CAUSED TO THE DOOR SEAL, WHICH WOULD NOT BE RECTIFIED UNDER THE GUARANTEE FREE OF CHARGE. IMPORTANT: WHEN YOU HAVE REVERSED THE DOOR OF THE APPLIANCE, IF YOU HAVE PLACED THE APPLIANCE ON ITS BACK, YOU MUST WAIT FOR 8 HOURS BEFORE SWITCHING THE... - Page 27 Or any installation other than the one specified by Baumatic Ltd. has been completed. Please refer to the conditions of guarantee that appear on the warranty card that you receive with the appliance.
-
Page 28: Baumatic Consumables
BC005 Stainless Steel Cleaner and Protector (250ml) o BC007 E-Cloth – General Purpose Cloth o BC008 Microwave Cover To order a Baumatic consumable product please call 0123 5437 244 and quote the product code. You can also order online from eshop.baumatic.co.uk... -
Page 29: Technical Data
Technical Data Manufacturer BAUMATIC Model Number BWC605SS Product Category 2 – Refrigeration-cellar, Cellar and wine storage appliances Energy Efficiency Class (1) Annual Energy Consumption (2) 248 kWh Storage Volume of Fridge 143 litres Compartment Storage Volume of Freezer Compartment Star Rating Coldest Storage Temperature 5°C... -
Page 31: Contact Details
United Kingdom Baumatic Ltd., Czech Republic Baumatic Buildings, Baumatic CR s.r.o. 6 Bennet Road, Lípovà 665 Reading, Berkshire 460 01 Liberec 4 RG2 0QX Czech Republic United Kingdom +420 483 577 200 Sales Telephone www.baumatic.cz (0118) 933 6900 Sales Fax... - Page 32 www.baumatic.com...
Need help?
Do you have a question about the BWC605SS and is the answer not in the manual?
Questions and answers