Table of Contents
Advertisement
Advertisement
Table of Contents

Related Manuals for Baumatic BWC300SS


Summary of Contents for Baumatic BWC300SS
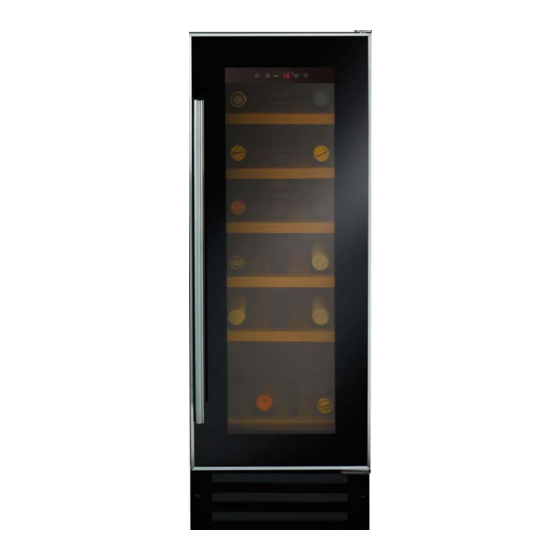
- Page 1 BWC300SS 30 cm 18 Bottle built- in wine cabinet...
- Page 2 USER MANUAL FOR YOUR BAUMATIC BWC300SS 30 cm 18 Bottle built-in wine cabinet NOTE : This User Instruction Manual contains important information, including safety & installation points, which will enable you to get the most out of your appliance. Please keep it in a safe place so that it is easily available for future reference, for you or any person not familiar with the operation of the appliance.
-
Page 3: Table Of Contents
Description of the appliance 8-10 Product features Control panel Description of the product features 9-10 Using your Baumatic wine cabinet 10-13 Before switching on During first use Switching on the appliance and setting the temperature 11-12 Changing between Fahrenheit and Celsius... -
Page 4: Environmental Note
This should be undertaken by a competent person. Disable the door lock to make sure that children cannot get stuck inside the appliance. o The packaging materials that Baumatic uses are environmentally friendly and can be recycled. o Please discard all packaging material with due regard for the... -
Page 5: Important Safety Information
Important safety information Your safety is of the utmost importance to Baumatic. Please make sure that you read this instruction booklet before attempting to install or use the appliance. If you are unsure of any of the information contained in this booklet, please contact the Baumatic Advice Line. - Page 6 Child safety o Packaging material should be kept away from children. o Children should not be allowed to touch the controls or play with the appliance. General safety o Do not pull on the power supply cable to remove the plug from your mains supply socket.
-
Page 7: Specifications Of Your Wine Cabinet
Specifications of your wine cabinet Dimensions of appliance Dimensions of aperture* Height: 875 mm Height: 870 - 890 mm Width: 300 mm (min) Width: 295 mm Depth: 590 mm (min) Depth: 570 mm o Gross capacity: 58 litres o Net capacity: 56 litres o Bottle capacity: 18 x 0.75 litre Bordeaux style wine bottles... -
Page 8: Description Of The Appliance
o Tempered glass door o Stainless steel door frame and handle o Designed to store wine at its optimum temperature between 5°C - 22°C. * Please refer to the installation instructions for more specific information on the size of aperture that you will require. IMPORTANT: When you install your appliance it is important to bear in mind its climatic rating. -
Page 9: Control Panel
Control panel The control panel is located in the middle of the appliance. 1) ON / OFF control button 2) Light control button 3) Temperature display 4) Temperature plus button 5) Temperature minus button Description of the product features Control panel o The control panel is located at the top of the appliance, behind the glass door. -
Page 10: Using Your Baumatic Wine Cabinet
For easy access to the bottles stored, pull the shelves out approximately 1/3 of the way. Using your Baumatic wine cabinet Before switching on o Make sure that it has been installed by a suitably qualified... -
Page 11: During First Use
During first use IMPORTANT: When you use the wine cabinet for the first time or restart the appliance after it has been turned off for a long time, there could be a few degrees variance between the temperature you select and the one indicated on the LED display. -
Page 12: Changing Between Fahrenheit And Celsius
IMPORTANT: When the temperature of the cabinet is changed, compressor works harder reach required temperature. During this time, the side panels of the wine cabinet can reach up to 45°C however they will cool down when the set temperature is reached. Changing between Fahrenheit and Celsius o You can select whether the temperature display shows Celsius or Fahrenheit. -
Page 13: Storing Your Wines
maximum storage number is based on standard 0.75 litre Bordeaux style wine bottles. o You can place 18 standard bottles in your appliance with 3 bottles on each shelf. Storing your wines The chart below indicates the ideal storage temperatures for different types of wine:- Type of wine Temperature... - Page 14 o Temperature stability is the most important factor when it comes to storing wine. o Exposure to light, vibrations or fluctuations in temperature and humidity can all cause wine to spoil. When properly stored, wines not only maintain their quality but many will actually improve in aroma, flavour and complexity as they mature.
-
Page 15: Wine Storage Problems
Wine storage problems Corking- a tiny percentage of bottled wine (about 1%) will suffer from this. The cork reacts with the wine and gives it a musty, unpleasant taste. It is the most common wine storage problem and is caused by harmless bacteria growing on the cork. -
Page 16: Cleaning And Maintenance
Cleaning and maintenance WARNING: PLEASE ENSURE THAT YOUR APPLIANCE IS DISCONNECTED FROM YOUR MAINS SUPPLY BEFORE ATTEMPTING TO CLEAN IT. o Do not clean the appliance by pouring water onto it or spraying water over it. o The interior of the wine cabinet should be cleaned periodically, using a solution of bicarbonate of soda and lukewarm water. -
Page 17: Removing The Shelves For Cleaning
o You should be careful to make sure that wine bottles do not touch the rear wall of the appliance, as this can interrupt the automatic defrosting process and deflect water into the base of your wine cabinet. Removing the shelves for cleaning o To remove any of the shelves from the rail compartment, move the shelf to the position where the notch of the wooden shelf is directly under the plastic post and lift the wooden shelf. -
Page 18: Power Failure
Power failure o Most power failures are corrected within a few hours and should not affect the temperature of your appliance if you minimise the number of times the door is opened. o If the power is going to be off for a longer period of time, you need to take the proper steps to protect the contents. -
Page 19: Electrical Connection
Electrical connection YOUR WINE CABINET IS INTENDED FOR FITTED AND PERMANENT INSTALLATION. We recommend that the appliance is connected by a qualified electrician, who is a member of the N.I.C.E.I.C. and who will comply with the I.E.E. and local regulations. o Your wine cabinet comes supplied with a 13 amp plug fitted. -
Page 20: Positioning
+16 to +32 degrees centigrade +18 to +38 degrees centigrade +18 to +43 degrees centigrade o Positioning the appliance requires two people in order to avoid injuries or damage to the appliance. o Your appliance should not be located in direct sunlight or exposed to continuous heat or extremes of temperature (e.g. -
Page 21: Built-In Installation
Built-in installation o Your wine cabinet can be used as a freestanding or a built in unit. If you are going to use it as a built in unit, then the dimensions shown in the diagram above will need to be followed. o In particular the depth dimension must be observed. -
Page 22: Adjusting The Height And Levelling Off Your Wine Cabinet
Adjusting the height and levelling off your wine cabinet o The appliance is equipped with adjustable feet, so that the height may be adjusted to level the cabinet on uneven floor surfaces. o We recommend that two people carry out this procedure. o The height must be adjusted prior to building the appliance into the housing unit and it should be set at such a height that the top panel of the appliance fits exactly below the kitchen worktop. -
Page 23: Installing The Handle
Installing the handle o Remove the door gasket on the side you wish to install the handle. You can see two designated holes for handle installation. o Install the handle tightly as shown in the diagram above with the two screws, lock washers and flat washers provided. o Replace the door gasket. - Page 24 o Be careful to support the glass door with both hands to prevent it dropping after removing the screws. o Pull down to remove the glass door and place it on a padded surface to prevent scratching it. o Remove the right top hinge and right lower hinge.
-
Page 25: Troubleshooting
o If the seal is not adhering to the cabinet properly, then you should either:- a) Use a warm damp cloth and manipulate the seal until it does adhere to the cabinet properly, all the way around the door. b) Use a hair dryer on its lowest heat setting and lightly heat the areas of the door seal that are not adhering correctly. - Page 26 Or any installation other than the one specified by Baumatic Ltd. has been completed. Please refer to the conditions of guarantee that appear on the warranty card that you receive with the appliance.
-
Page 27: Baumatic Consumables
BC005 Stainless Steel Cleaner and Protector (250ml) o BC007 E-Cloth – General Purpose Cloth o BC008 Microwave Cover To order a Baumatic consumable product please call 0123 5437 244 and quote the product code. You can also order online from eshop.baumatic.co.uk... -
Page 28: Contact Details
United Kingdom Baumatic Ltd., Baumatic Buildings, 6 Bennet Road, Czech Republic Reading, Berkshire Baumatic CR s.r.o. RG2 0QX Lípovà 665 United Kingdom 460 01 Liberec 4 Czech Republic Sales Telephone (0118) 933 6900 +420 483 577 200 Sales Fax (0118) 931 0035 www.baumatic.cz...
Need help?
Do you have a question about the BWC300SS and is the answer not in the manual?
Questions and answers