Table of Contents
Advertisement
Quick Links
Download this manual
See also:
User Manual
Advertisement
Table of Contents
Troubleshooting

Related Manuals for Haier GDG480BW


Summary of Contents for Haier GDG480BW
-
Page 1: Document Control
Order No. TL1206S003V1.1 Gas Dryer Model No.GDG480BW ©2008 Haier Washing Machine... -
Page 2: Table Of Contents
Service Manual Issue Rev. Order No. TL1206S003V1.1 Chapter 1: General Infromation 1-1. Table of Contents ......................Document control Chapter 1. General Information ................2 1-1. Table of Contents 1-2. General Guidelines 1-3. Caution and Warning symbols 1-4. Function indication symbols Chapter 2. -
Page 3: General Guidelines
Service Manual Issue Rev. Order No. TL1206S003V1.1 1-2. General Guidelines When servicing,observe the original lead dress.If a short circuit is found, replace all parts which are overheated or damaged by the short circuit.After servicing ,see to it that all the protective devices such as insulation barriers ,insulation papers shields are properly installed .Confirm that the screws, parts and wiring which were removed in order to service are put in the original positions, or whether there are the portions which are deteriorated around the service places serviced or not. -
Page 4: Chapter 2 Product Feature
Service Manual Issue Rev. Order No. TL1206S003V1.1 Chapter 2 Product Feature 2-1. Features (1). Lint Filter: All dryers come with a lint filter that needs to be cleaned before or after every use (read “Care and Cleaning Guide” Section). (2).Leveling Legs: Your dryer has four leveling legs which are located in the front and rear corners of your dryer. -
Page 5: Specification
Service Manual Issue Rev. Order No. TL1206S003V1.1 2-2. Specification GAS DRYER GDG480BW Brand Haier Color Availability White Electrical Requirements 120V/60Hz Amps Capacities:Drum Size (Cubic Foot) Painted Drum Type Motor Size (hp) Power Cord Included(Attached) ● Fuel Type Controls Rotary Control... -
Page 6: Chapter 3 Matters Needing Attention
Service Manual Issue Rev. Order No. TL1206S003V1.1 Chapter 3 Matters needing attention 3-1. Safety Before beginning installation, carefully read these instructions. This will simplify the installation and ensure the dryer is installed correctly and safely. NOTE: The electrical service to the dryer must conform with local codes and ordinances and the latest edition of the National Electrical Code, ANSI/ NFPA 70 or in Canada, CSA C22.1 Canadien Electrical Code Part 1. -
Page 7: Electrical Requirements
Service Manual Issue Rev. Order No. TL1206S003V1.1 Chapter 3 Matters needing attention 15. Do not place items exposed to cooking oils in your dryer. Items contaminated with cooking oil may contribute to a chemical reaction than could cause a load to catch fire. 16. -
Page 8: During Use
Service Manual Issue Rev. Order No. TL1206S003V1.1 Chapter 3 Matters needing attention 3-2. During Use EXHAUST SYSTEM REQUIREMENTS The following are specific requirements for proper and safe operation of your dryer. Failure to follow these instructions can create excessive drying times and fire hazards. -
Page 9: Gas Supply Requirements
Service Manual Issue Rev. Order No. TL1206S003V1.1 Chapter 3 Matters needing attention 6. In Canada, that the exhaust duct shall be 102 mm in diameter. In the United States, the required exhaust duct diameter; 7. The total length of flexible metal duct shall not exceed 2.4 m. The exhaust system should be inspected and cleaned a minimum of every 12 months with normal usage. -
Page 10: Understanding The Control Panel
Service Manual Issue Rev. Order No. TL1206S003V1.1 Chapter 4 Operational Guidance Understanding the Control Panel Temp Button: (1) ● Use to set drying temperatures.There are four available drying temperatures to choose from:High,Medium,Low and No Heat. Dry Level Button: (2) ● Used to set drying level.There are three available drying levels to choose from More,Normal and Less. Cycle Select Dial:(3) ●... -
Page 11: Chapter 5 Drying Mathods
Service Manual Issue Rev. Order No. TL1206S003V1.1 Chapter 5 Drying Mathods 5-1. Preparations before drying • Sort clothes of the same kind (cotton, synthetics, woolen) to dry. • Dark and light colored clothes should be separately dried. Fabrics prone to losing lint and those prone to adhering lint shall be separately dried. -
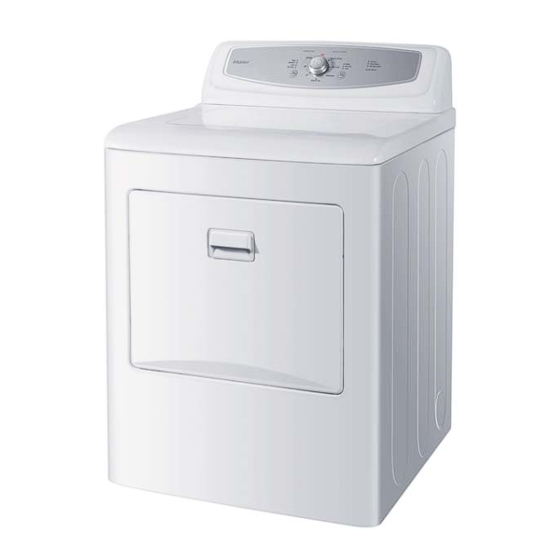
Page 12: Chapter 6 Appearance Brief Introduction
Service Manual Issue Rev. Order No. TL1206S003V1.1 Chapter 6 Appearance brief introduction 6-1. Name of parts 6-2. Net dimension - 12 -... -
Page 13: Chapter 7 Disassembly And Installation
Service Manual Issue Rev. Order No. TL1206S003V1.1 Chapter 7 Disassembly and Installation 7-1. Remove packing materials 1. Remove all packaging material. This includes the foam base and all adhesive tape holding the dryer accessories inside and outside. 2. Inspect and remove any remains of packaging, tape or printed materials before using the dryer. -
Page 14: Manufacation (Mobile) Home Installation
Service Manual Issue Rev. Order No. TL1206S003V1.1 7-5. Manufacation (mobile) home installation 1. Dryer MUST be exhausted outside (outdoors, not beneath the manufactured home) using metal ducting that will not support combustion. Metal ducting must be 4 inch (10.16 cm) in diameter with no obstructions. Rigid metal duct is preferred. -
Page 15: Manufactured (Mobile) Home Hold Down Kit
Service Manual Issue Rev. Order No. TL1206S003V1.1 Chapter 7 Disassembly and Installation 7-7. Installation Instructions Manufactured (Mobile) Home Hold Down Kit No.0030807988 IMPORTANT ARNING Installation must conform to current Manufactured Home Construction & Safety Standard (which is a Federal Regulation Title 24 CFR-Part 32-80) or when such standard is not applicable, with American National Standard for Mobile Homes. -
Page 16: Natural Gas To Lp Gas Conversion Kit
Service Manual Issue Rev. Order No. TL1206S003V1.1 Chapter 7 Disassembly and Installation Installation Instructions, Cont’d 6. Using the measurements from Step 4, install (2) Hold Down Brackets as shown 0030101225 in Figure 2 using (4) 0030101240 #10 X 1/2” Wood Screw. Note the correct bracket orientation. 7. - Page 17 Service Manual Issue Rev. Order No. TL1206S003V1.1 Chapter 7 Disassembly and Installation THE CONVERSION SHALL BE CARRIED OUT IN ACCORDANCE WITH THE REQUIREMENTS OF THE PROVINCIAL AUTHORITIES HAVING JURISDICTION AND IN ACCORDANCE WITH THE REQUIREMENTS OF THE CSA B149.1, INSTALLATION CODE. Important Note: Installation of this kit converts the dryer from use with Natural Gas to use with LP Gas for altitudes up to 4,500 feet above sea level.
- Page 18 Service Manual Issue Rev. Order No. TL1206S003V1.1 Chapter 7 Disassembly and Installation 5. Prop open the top cover and remove the two screws securing the front panel. (Figure 3) 6. While holding the outer rim of the drum, tip the front panel forward and away from the drum until it is no longer engaged.
-
Page 19: Gas Connections
Service Manual Issue Rev. Order No. TL1206S003V1.1 Chapter 7 Disassembly and Installation 18. Reinstall the drum and front panel. Tension the drum belt. 19. Connect electrical service and turn on gas supply to the dryer. 20. Check gas valve pressure as follows: a. -
Page 20: Connecting To The Gas Supply
Service Manual Issue Rev. Order No. TL1206S003V1.1 Chapter 7 Disassembly and Installation 7.Plug the power cord into a grounded outlet. NOTE: check to ensure power is circuit breaker/fuse box before plugging the power cord into the outlet. 8.Turn on the power at the circuit breaker/fuse box. Before operating the dryer, make sure the dryer area is clean and free from combustible materials, gasoline, and other flammable vapors. -
Page 21: Chapter 8 Wiring Circuit And Self Check
Service Manual Issue Rev. Order No. TL1206S003V1.1 Chapter 8 Wiring circuit and Self check 8-1. Wiring circuit White Back up Belt Thermostat Switch Thermal Gray Gray Gray Limiter Moter Yellow Door Computer Program Blue Switch Controller Yellow Igniter Valve Radiant Sensor High Limit Cycling... -
Page 22: Chapter 9 Error Display And Troubleshooting
Service Manual Issue Rev. Order No. TL1206S003V1.1 Chapter 9 Error Display and troubleshooting 9-1. Error Display tart the dryer the status lights is twinkling and the dryer no action Error message Door is not closed Troubleshooting Close the door Confirm that the door is closed Cut off the power. -
Page 23: Examination & Troubleshooting
Service Manual Issue Rev. Order No. TL1206S003V1.1 Chapter 9 Error Display and troubleshooting 9-2. Examination & Troubleshooting 9-2-1. Display nothing Troubleshooting: Repair power supply Measure the power supply ,is it exists 120V AC voltage Cut off the power. Check if the wire connecting wire unit and PCB is Connect the wire properly disconnection... -
Page 24: The Drum Rotates But The Dryer Have No Drying
Service Manual Issue Rev. Order No. TL1206S003V1.1 Chapter 9 Error Display and troubleshooting 9-2-3. The drum rotates but the dryer have no drying Troubleshooting: Check if the connecting the dryer to Connecting the dryer to the gas the gas supply and the gas shut-off valve is open, the gas supply accord supply, open the shut-off valve with the dryer’s requirements. -
Page 25: Too Much Noise In Drying
Service Manual Issue Rev. Order No. TL1206S003V1.1 Chapter 9 Error Display and troubleshooting 9-2-5. Too much noise in drying Troubleshooting: Switch on the power, push down the start button Search the root of the noise Reinstall the tensive arm If the noise from the tensive arm unit unit or replace the tensive or the belt arm unit and the belt. - Page 26 Sincere Forever Haier Group Haier Industrial Park, No.1, Haier Road 266101, Qingdao, China http://www.haier.com Printed in China...
Need help?
Do you have a question about the GDG480BW and is the answer not in the manual?
Questions and answers