
Related Manuals for Candy GO DC 68G


Summary of Contents for Candy GO DC 68G
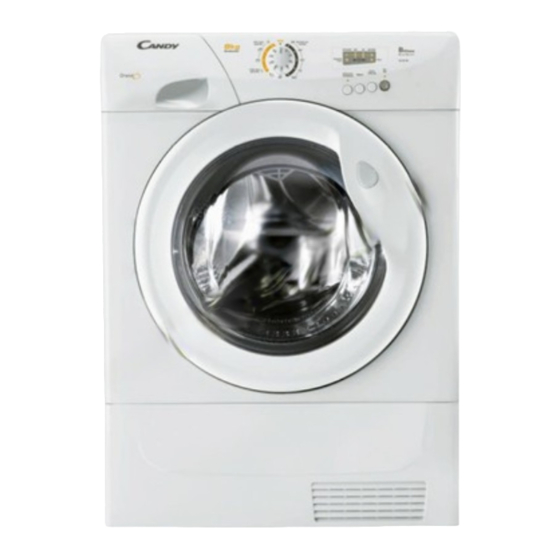
- Page 1 40005612Eng.qxd 07/07/2008 16:12 Page 1 ® Instruction Book GO DC 68G Condenser Tumble Dryer English Français...
-
Page 2: Table Of Contents
40005612Eng.qxd 07/07/2008 16:12 Page 2 English ..........2 Français . -
Page 3: Delivery Information
40005612Eng.qxd 07/07/2008 16:13 Page 3 Introduction Check that no damage has occurred to the Please read and follow these instructions carefully and operate machine during the machine accordingly. This transit. If it has, booklet provides important call for service by guidelines for safe use, GIAS. -
Page 4: Safety Reminders
40005612Eng.qxd 07/07/2008 16:13 Page 4 Safety reminders Installation ● Check that the product has no visible signs of damage before use. If damaged do not use and please call GIAS Service. ● Do not use adapters, multiple connectors and/or extensions. ●... -
Page 5: Environmental Issues
40005612Eng.qxd 07/07/2008 16:14 Page 5 tumble dryer. Clothes that are dripping wet should NOT be put into the dryer. ● Lighters and matches must not be left in pockets and NEVER use flammable liquids near the machine. ● Glass fibre curtains should NEVER be put in this machine. Skin irritation may occur if other garments are contaminated with the glass fibres. -
Page 6: Installation
40005612Eng.qxd 07/07/2008 16:14 Page 6 Installation Electrical requirements You may be charged for a Tumble dryers are supplied to operate at a service call if a voltage of 230V, 50 Hz single phase. Check that the supply circuit is rated to at least 10A. problem with Electricity can be extremely dangerous. -
Page 7: Ventilation
40005612Eng.qxd 07/07/2008 16:14 Page 7 Ventilation Adequate ventilation must be provided in the room where the tumble dryer is located to prevent gases from appliances burning other fuels, including open fires, being drawn into the room during operation of the tumble dryer. ●... -
Page 8: Preparing The Load
40005612Eng.qxd 07/07/2008 16:14 Page 8 Preparing the load Before using the tumble dryer for the first time: ● Please read this instruction book thoroughly. ● Remove all items packed inside drum. ● Wipe the inside of the drum and door with a damp cloth to remove any dust which may have settled in transit. -
Page 9: Sorting The Load
40005612Eng.qxd 07/07/2008 16:14 Page 9 Sort the load as follows: ● By care symbols These can be found on the collar or inside seam: Suitable for tumble drying. Tumble drying at high temperature. Tumble drying at low temperature only. Do not tumble dry. If the item does not have a care label it must be assumed that it is not suitable for tumble drying. -
Page 10: Drying Advice
40005612Eng.qxd 07/07/2008 16:14 Page 10 Drying advice Do not tumble dry: IMPORTANT: Do not dry articles Woollens, silk, delicate fabrics, nylon stockings, which have been delicate embroidery, fabrics with metallic decorations, garments with PVC or leather treated with a trimmings, training shoes, bulky items such as dry cleaning fluid sleeping bags, etc. -
Page 11: Controls And Indicators
40005612Eng.qxd 07/07/2008 16:22 Page 11 Controls and indicators EMPTY WATER COUNTDOWN FILTER CARE INDICATOR DISPLAY INDICATOR (Réservoir Plein) (Entretien Filtre) PROGRAMME ACRYLICS/ START START DELAY ON/OFF SELECTOR SYNTHETICS BUTTON BUTTON BUTTON BUTTON (Départ) (Départ (Marche (Séchage Différé) Arrêt) Délicat) Control panel and indicator lights Programme Selector –... -
Page 12: Door And Filter
40005612Eng.qxd 07/07/2008 16:14 Page 12 Door and Filter Opening the door Pull on handle to open the door. To restart the dryer, close the door and press Départ. WARNING! When the tumble dryer is in use the drum and door may be VERY HOT. Never stop a tumble dryer before the end of the drying cycle unless all items are quickly removed and... -
Page 13: Water Container
40005612Eng.qxd 07/07/2008 16:14 Page 13 Water Container The water removed from the laundry during the drying cycle is collected in a container at the bottom of the dryer. When the container is full the ‘Réservoir Plein’ indicator on the control panel will light, and the container MUST be emptied. -
Page 14: Condenser
40005612Eng.qxd 07/07/2008 16:14 Page 14 Condenser Important: Always switch off and remove the plug from the electricity supply before cleaning the condenser. To maintain the efficiency of the dryer regularly check that the condenser is clean. To remove the condenser Remove the kickplate (see page 13). - Page 15 40005612Eng.qxd 07/07/2008 16:14 Page 15 content, use the timed programmes. Set the programme between 30 and 75 minutes depending on the load size and dryness required, and select high or low heat depending upon the fabric type. If the sensor does not detect the item the dryer will only operate for 10 minutes before going into cooldown.
-
Page 16: Operation
40005612Eng.qxd 07/07/2008 16:14 Page 16 Operation Open the door and load the drum with laundry. Ensure that garments do not hinder closure of the door. Gently close the door pushing it slowly until you hear the door 'click' shut. Press the ‘Marche Arrêt’ button to switch on the dryer. The indicator will light up and the START indicator will flash. -
Page 17: Start Delay
40005612Eng.qxd 07/07/2008 16:14 Page 17 Start Delay WARNING! The ‘Départ Différé’ function allows the user to The drum, door delay the start of the drying cycle by 6 or 9 hours. and load may be When the function is first selected the display will show a delay of 6 hours, a subsequent press of very hot. -
Page 18: Troubleshooting
40005612Eng.qxd 07/07/2008 16:14 Page 18 Troubleshooting What might be the cause of... Defects you can remedy yourself Before calling GIAS Service for technical advice please run through the following checklist. A charge will be made if the machine is found to be working or has been installed incorrectly or used incorrectly. -
Page 19: Customer Service
40005612Eng.qxd 07/07/2008 16:14 Page 19 Customer Service Should there still be a problem with your dryer after completing all the recommended checks, please call GIAS Service for advice. They may be able to assist you over the telephone or arrange for a suitable appointment for an engineer to call under the terms of your guarantee. - Page 20 40005612Fre.qxd 09/07/2008 13:01 Page 20 Introduction ..........21 Informations sur la livraison .
-
Page 21: Introduction
40005612Fre.qxd 09/07/2008 13:01 Page 21 Introduction Vérifiez que la machine ne s’est pas détériorée en Veuillez lire et suivre ces instructions avec soin et utiliser la machine en transit. Si c’est le conséquence. Ce livret contient des cas, contactez GIAS instructions importantes sur la pour une opération sécurité... -
Page 22: Rappels De Sécurité
40005612Fre.qxd 09/07/2008 13:01 Page 22 Rappels de sécurité Installation ● Vérifiez que la machine ne présente aucun signe visible de détérioration avant de l’utiliser. En cas de détérioration, assurez-vous de ne pas l’utiliser et de contacter le service GIAS. ● N’utilisez pas d’adaptateurs, de multi-prises et/ou de rallonges. -
Page 23: Protection De L'environnement
40005612Fre.qxd 09/07/2008 13:02 Page 23 ● Les vêtements doivent être essorés en machine ou à la main avant d’être placés dans le sèche- linge. Les vêtements qui dégoulinent NE DOIVENT PAS être mis dans le sèche-linge. ● Enlevez les briquets et les allumettes des poches et veillez à ne JAMAIS utiliser de liquides inflammables à... -
Page 24: Installation
40005612Fre.qxd 09/07/2008 13:02 Page 24 Installation Besoins électriques Un appel de service peut vous Les sèche-linges sont prévues pour une tension monophasée de 230 V, 50 Hz. Vérifiez que la tension être facturé si la nominale du circuit d’alimentation est réglée sur 10 A défaillance de minimum. -
Page 25: Ventilation
40005612Fre.qxd 09/07/2008 13:02 Page 25 Ventilation La pièce où se trouve le sèche-linge doit avoir une ventilation adéquate de manière à ce que les gaz des appareils qui brûlent d’autres combustibles, y compris les cheminées, ne soient pas attirés dans la pièce pendant que le sèche-linge est en marche. -
Page 26: Préparation De La Charge
40005612Fre.qxd 09/07/2008 13:02 Page 26 Préparation de la charge Avant d’utiliser le sèche-linge pour la première fois : ● Veuillez lire ce manuel d’instruction en détail. ● Retirez tous les articles qui se trouvent à l’intérieur du tambour. ● Essuyez l’intérieur du tambour et de la porte avec un chiffon humide pour éliminer la poussière éventuelle qui aurait pu s’y infiltrer en transit. -
Page 27: Tri De La Charge
40005612Fre.qxd 09/07/2008 13:02 Page 27 Triez la charge comme suit : ● Par symbole de soin d’entretien Vous les trouverez sur le col ou la couture intérieure : Convient pour séchage en machine. Séchage à haute température. Séchage à basse température uniquement. Ne séchez pas en machine. -
Page 28: Conseils De Séchage
40005612Fre.qxd 09/07/2008 13:02 Page 28 Conseils de séchage Ne séchez pas en IMPORTANT : Ne machine : séchez pas les articles qui ont été Les lainages, la soie, les tissus délicats, les bas de nylon, traités avec un les broderies délicates, les tissus ayant des décorations liquide de métalliques, les vêtements avec des bordures en PVC ou nettoyage à... -
Page 29: Commandes Et Indicateurs
40005612Fre.qxd 09/07/2008 13:02 Page 29 Commandes et indicateurs INDICATEUR AFFICHEUR INDICATEUR RESERVOIR COUNTDOWN ENTRETIEN PLEIN FILTRE SELECTEUR DE BOUTON BOUTON BOUTON BOUTON PROGRAMMES SÉCHAGE DÉPART DÉPART MARCHE DÉLICAT DIFFÉRÉ ARRÊT Panneau de commande et témoins indicateurs Sélecteur de programmes – sélectionnez le programme requis Bouton et indicateur Marche/Arrêt –... -
Page 30: Porte Et Filtre
40005612Fre.qxd 09/07/2008 13:02 Page 30 Porte et filtre Ouverture de la porte Tirez sur la poignée pour ouvrir la porte. Pour remettre le sèche-linge en marche, fermez la porte et appuyez Départ. ATTENTION ! Lorsque le seche-linge est en cours d’utilisation, il se peut que le tambour et la porte soient TRES CHAUDS. -
Page 31: Réservoir D'eau
40005612Fre.qxd 09/07/2008 13:02 Page 31 Réservoir d’eau L’eau récupérée du linge pendant le cycle de séchage est recueillie dans un bac situé en bas du sèche-linge. Quand le réservoir est plein, l’indicateur ‘Réservoir Plein’ s’allume sur le panneau de commande et le réservoir DOIT ABSOLUMENT être vidé. -
Page 32: Condenseur
40005612Fre.qxd 09/07/2008 13:02 Page 32 Condenseur Important : Coupez toujours le courant et débranchez la prise avant de nettoyer le condenseur. Pour maintenir l’efficacité du sèche-linge, vérifiez régulièrement la propreté du condenseur. Pour retirer le condenseur Retirez la plaque de protection (voir page 31). Tournez les deux leviers de blocage dans le sens contraire des aiguilles d’une montre et retirez le condenseur. - Page 33 40005612Fre.qxd 09/07/2008 13:02 Page 33 utilisez les programmes à durée déterminée. Réglez le programme entre 30 et 75 minutes selon la taille de la charge et le degré de séchage voulu, et sélectionnez une température haute ou basse selon le type de tissu. Si le capteur ne détecte pas l’article, le sèche-linge ne fonctionnera que pendant 10 minutes avant de se mettre en mode refroidissement.
-
Page 34: Fonctionnement
40005612Fre.qxd 09/07/2008 13:02 Page 34 Fonctionnement Ouvrez la porte et chargez le sèche-linge de linge. Vérifiez qu’aucun vêtement n’entrave la fermeture de la porte. Fermez doucement la porte en la poussant lentement jusqu’à ce que vous entendiez un déclic. Appuyez sur le bouton Marche/Arrêt pour mettre le sèche-linge en marche. Le témoin s’allume et le témoin de START clignote. -
Page 35: Nettoyage Et Entretien De Routine
40005612Fre.qxd 09/07/2008 13:02 Page 35 Lorsque cette fonction est sélectionnée pour la première fois, l’afficheur indique un délai de 6 heures. Il convient ATTENTION ! d’appuyer une nouvelle fois sur le bouton pour repousser le délai à 9 heures. Il est possible que Pour lancer le programme, appuyez sur Départ. -
Page 36: Dépistage De Pannes
40005612Fre.qxd 09/07/2008 13:02 Page 36 Dépistage de pannes Qu’est-ce qui peut être à l’origine de... Défauts que vous pouvez rectifier vous-même Avant d’appeler le service GIAS pour obtenir des conseils, veuillez suivre la liste des vérifications ci-dessous. L’intervention sera facturée si la machine fonctionne correctement ou si elle a été... -
Page 37: Service Clientèle
40005612Fre.qxd 09/07/2008 13:02 Page 37 Service clientèle En cas de problème après avoir effectué toutes les inspections recommandées, veuillez contacter le Service. Il pourra vous aider par téléphone ou organiser la visite d’un technicien, en vertu des conditions de votre garantie. - Page 38 40005612Eng.qxd 07/07/2008 16:14 Page 20 40005612...
Need help?
Do you have a question about the GO DC 68G and is the answer not in the manual?
Questions and answers