Table of Contents
Advertisement
Advertisement
Table of Contents

Related Manuals for Sigma PC 15.11


Summary of Contents for Sigma PC 15.11
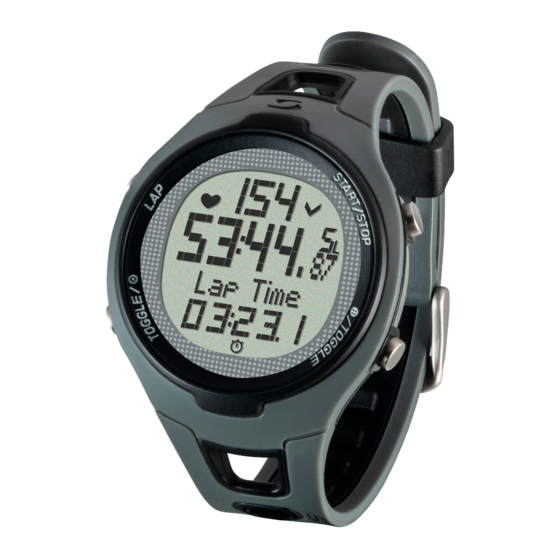
- Page 1 HEART RATE MONITOR PC 15.11 DEUTSCH ENGLISH FRANÇAIS...
-
Page 2: Table Of Contents
CONTENTS Foreword Packaging contents Safety guidelines Overview Activating the heart rate monitor Attaching the chest belt Before training Pressing and holding down buttons Overview of modes and functions 4.5.1 Sleep mode 4.5.2 Training mode 4.5.3 Lap view 4.5.4 Setting mode Setting mode Activating the setting mode Display setup... - Page 3 CONTENTS Training mode Activating the training mode Display setup Button assignment in the training mode Functions while training Starting a training session Interrupting a training session Ending a training session Training values after training Resetting the training values Training with laps Using lap training Summary of the last lap Lap view...
-
Page 4: Foreword
Walking and Nordic Walking k Hiking k Swimming (HR measurement only) The PC 15.11 heart rate monitor is a technically advanced instrument that measures your precise heart rate. Please read these instructions carefully to familiarize yourself with the many functions of your new heart rate monitor and prepare for their use. -
Page 5: Safety Guidelines
Do not press any buttons while under water. 4 OvERvIEW 4.1 ACTIvATING ThE hEART RATE MONITOR Before you can train with your new PC 15.11, you need to activate it. To do this, hold down the START/STOP button for 5 seconds. -
Page 6: Attaching The Chest Belt
For men, attach the belt just below the pectoral muscles. It must be possible to read the SIGMA logo at the front. For women, attach the belt just below the breast. It must be possible to read the SIGMA logo at the front. -
Page 7: Before Training
Before you can start training, you need to prepare the heart rate monitor in the following manner: 1. Put on the chest belt and the PC 15.11. 2. Activate the PC 15.11 by pressing any button. 3. The heart rate monitor automatically switches to training mode. -
Page 8: Pressing And Holding Down Buttons
4 OvERvIEW 4.3 BEFORE TRAINING 5. To finish training, simply press the START/STOP button. The stopwatch stops. To reset the values to zero, press and hold the START/STOP button. To exit the training mode, press and hold the TOGGLE (-) button. 4.4 PRESSING AND hOLDING DOWN BUTTONS The buttons on the heart rate monitor perform different actions depending on how long you press them:... -
Page 9: Overview Of Modes And Functions
4 OvERvIEW 4.4 PRESSING AND hOLDING DOWN BUTTONS The sleep mode will be displayed. Release the TOGGLE (-) button. 4.5 OvERvIEW OF MODES AND FUNCTIONS The heart rate monitor has three main modes (training mode, setting mode and sleep mode). You can switch between these modes by pressing and holding a button. -
Page 10: Sleep Mode
4 OvERvIEW 4.5.1 SLEEP MODE In sleep mode, only the time and date are displayed. To switch from sleep mode to training mode, press and hold down any button. 4.5.2 TRAINING MODE You will train in this mode. START/STOP k Laps/ k Stopwatch intervals TOGGLE... -
Page 11: Lap View
4 OvERvIEW 4.5.3 LAP vIEW The PC 15.11 can be used for lap training. The values for the individual laps are saved in the heart rate monitor. You can view the values in the lap view after and during your training. -
Page 12: Setting Mode
4 OvERvIEW 4.5.4 SETTING MODE This mode enables you to adjust the device settings. k Use the TOGGLE (+) button to scroll forward from the language to the zone alarm. k Use the TOGGLE (-) button to scroll backward from the zone alarm to the language. -
Page 13: Setting Mode
5 SETTING MODE 5.1 ACTIvATING ThE SETTING MODE Prerequisite: Your heart rate monitor must be in training mode (see section 4.5 “Overview of modes and functions”). Hold down the TOGGLE (+) button. The display will flash twice to indicate that the setting mode is now active. -
Page 14: Brief Guide To Device Settings
5 SETTING MODE 5.4 BRIEF GUIDE TO DEvICE SETTINGS Device settings such as language, gender, date of birth, weight, max. HR, contrast, button tones and zone alarm are all set in the same manner: Select the device setting, change the value and save the modified setting. -
Page 15: Setting The Date
5 SETTING MODE 5.5.2 SETTING ThE DATE Prerequisite: Your heart rate monitor must be in setting mode. Press the TOGGLE (+) button repeatedly until “Date” appears on the display. Press the START/STOP button. “Year” is displayed and below it the preset year flashes. Press the TOGGLE (-) or TOGGLE (+) button repeatedly to set the year. -
Page 16: Setting The Time
5 SETTING MODE 5.5.3 SETTING ThE TIME Example: Winter time has changed to summer time and you want to adjust the time on your heart rate monitor. Prerequisite: Your heart rate monitor must be in setting mode. Press the TOGGLE (+) button repeatedly until “Clock” appears on the display. -
Page 17: Setting The Gender
5 SETTING MODE 5.5.4 SETTING ThE GENDER Follow the steps described in section 5.4 “Brief guide to device settings”. This device setting is taken into account when calculating the maximum heart rate and calories. You should therefore ensure that you set this value correctly. 5.5.5 SETTING ThE DATE OF BIRTh Follow the steps described in section 5.4 “Brief guide to device settings”. -
Page 18: Setting The Training Zone
5 SETTING MODE 5.5.8 SETTING ThE TRAINING zONE You can choose from three training zones. The upper and lower limits for the zone alarm are determined by the zone that you select. Example: If you want to lose weight, select the “Fat Burn”. Prerequisite: Your heart rate monitor must be in setting mode. -
Page 19: Training With Training Zones
5 SETTING MODE 5.5.9 TRAINING WITh TRAINING zONES Your heart rate monitor has three training zones. The preset training zones “Fat Burn” and “Fit Zone” are calculated from the maximum heart rate. Each training zone has an upper and a lower heart rate limit. k Fat Burn This training is for the aerobic energy metabolism. - Page 20 5 SETTING MODE Press the START/STOP button. The set training zone is displayed. Use the TOGGLE (+) button to scroll to “Individual”. Press the START/STOP button. “Lower limit” is displayed. The registered value flashes. Press the TOGGLE (-) button repeatedly until the value is set to 120.
-
Page 21: Setting The Total Running Time
5 SETTING MODE 5.5.11 SETTING ThE TOTAL RUNNING TIME Example: You have bought a heart rate monitor and want to take the total running time of 5 hours and 36 minutes from your training diary. Prerequisite: Your heart rate monitor must be in setting mode. Press the TOGGLE (+) button repeatedly to scroll until ‘Total time’... -
Page 22: Setting The Total Calories
5 SETTING MODE 5.5.11 SETTING ThE TOTAL RUNNING TIME Press the START/STOP button. The setting is saved. 5.5.12 SETTING ThE TOTAL CALORIES Follow the steps described in section 5.5.11 “Setting the total running time”. 5.5.13 SETTING ThE CONTRAST Follow the steps described in section 5.4 “Brief guide to device settings”. -
Page 23: Training Mode
6 TRAINING MODE 6.1 ACTIvATING ThE TRAINING MODE To go to the training mode: k From sleep mode Press and hold any button. k From setting mode Press and hold the TOGGLE (+) button. 6.2 DISPLAY SETUP k Current heart rate and zone indicator (when using a training zone) k This line displays both the training time and the number of laps. -
Page 24: Button Assignment In The Training Mode
6 TRAINING MODE k Stopwatch stopped The stopwatch icon disappears. The function has a gray background and the stopwatch has stopped. 6.3 BUTTON ASSIGNMENT IN ThE TRAINING MODE START/STOP Press: Press: Start/stop Take the the stopwatch lap time Press and hold: Press and Set the training values hold:... -
Page 25: Starting A Training Session
6 TRAINING MODE 6.4 FUNCTIONS WhILE TRAINING Use the TOGGLE (-) or TOGGLE (+) buttons to select which function you want to see in the lower display area. Note: Calories, average and maximum heart rate are only calculated when the stopwatch is running. 6.5 STARTING A TRAINING SESSION Prerequisite: Your heart rate monitor must be in training mode. -
Page 26: Interrupting A Training Session
6 TRAINING MODE 6.6 INTERRUPTING A TRAINING SESSION You can pause and restart your training any time. Press the START/STOP button. The stopwatch icon disappears. The stopwatch stops. Press the START/STOP button again. The stopwatch icon reappears. The stopwatch restarts. 6.7 ENDING A TRAINING SESSION You have finished your training run and also want to end your training session on your heart rate monitor. -
Page 27: Training Values After Training
6 TRAINING MODE 6.8 TRAINING vALUES AFTER TRAINING Prerequisite: You must be in training mode. After training, you can view the measured values in the training mode at your leisure. Use the START/STOP, TOGGLE (-) and TOGGLE (+) buttons to scroll through the individual values. In addition to the current training values, the heart rate monitor also shows summed values such k Total time k Total calories... -
Page 28: Training With Laps
7 TRAINING WITh LAPS 7.1 USING LAP TRAINING Example: You regularly run two laps around a lake and want to do so in different times. The PC 15.11 lap training function enables you to determine the values for each lap. 1 Prerequisite: You must be in training mode. -
Page 29: Summary Of The Last Lap
7 TRAINING WITh LAPS 7.2 SUMMARY OF ThE LAST LAP If you press the LAP button, the current lap will be ended and a new lap automatically started. “Last lap” flashes on the display and a summary of the last lap is displayed for five seconds. -
Page 30: Activating The Lap View Mode
7 TRAINING WITh LAPS 7.3.1 ACTIvATING ThE LAP vIEW MODE Prerequisite: Your heart rate monitor must be in training mode. Hold down the LAP button. The display will flash twice to indicate that the lap view mode is now active. 7.3.2 DISPLAY SETUP k Lap number k Value... -
Page 31: Button Assignment For The Lap View
7 TRAINING WITh LAPS 7.3.3 BUTTON ASSIGNMENT FOR ThE LAP vIEW LAP 6 LAP 5 LAP 7 LAP 4 LAP 3 LAP 8 LAP 2 LAP 9 LAP 10 LAP 1 Average Hours heart rate since start Maximum Time heart rate since start Calories... -
Page 32: Displaying Values For Individual Laps
What happens if I remove the chest belt during training? The watch will no longer receive a signal. The screen will indicate “O” and after a short period of time the PC 15.11 will go into sleep mode. Does the SIGMA heart rate monitor completely switch off? No –... - Page 33 Are SIGMA heart rate monitors waterproof and can they be used for swimming? Yes – the PC 15.11 is watertight up to 3 ATM (corresponds to a test pressure of 3 bar). The PC 15.11 is suitable for swimming. Please note: Do not press the buttons underwater as water can enter...
-
Page 34: Maintenance And Cleaning
8 MAINTENANCE AND CLEANING 8.1 ChANGING ThE BATTERY A CR 2032 battery (ref. no. 00342) is used in the heart rate monitor and transmitter. Prerequisite: You have a new battery and the battery compartment tool. 1 Use the battery compartment tool to turn the cover anti-clockwise until the arrow points to OPEN. -
Page 35: Technical Data
9 TEChNICAL DATA 9 TEChNICAL DATA PC 15.11 k Battery type: CR2032 k Battery life: Average of 1 year k Accuracy of the clock: Higher than ± 1 second/day at an ambient temperature of 20°C. k Heart rate range: 40-240... - Page 36 HEART RATE MONITOR PC 15.11 SIGMA-ElEktro GmbH SIGMA SPort USA Dr. - Julius - Leber - Straße 15 North America D - 67433 Neustadt /Weinstraße 3487 Swenson Avenue Tel. + 49 (0) 63 21- 9120 - 0 St. Charles, IL 60174, U.S.A.
Need help?
Do you have a question about the PC 15.11 and is the answer not in the manual?
Questions and answers