Table of Contents
Advertisement
Available languages
Available languages
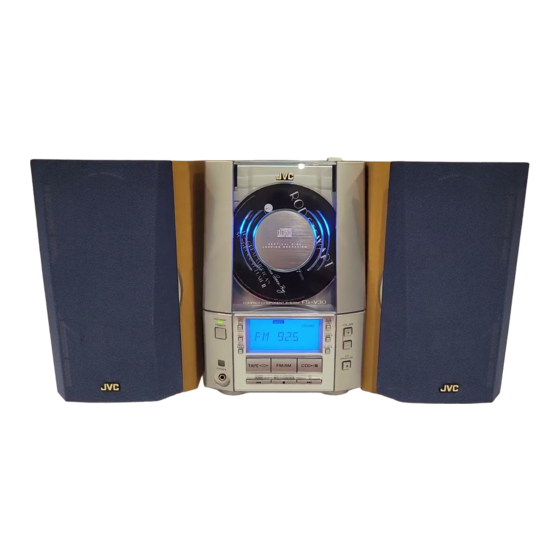
COMPACT COMPONENT SYSTEM
SYSTEME DE COMPOSANTS COMPACT
FS-V30
REMOTE CONTROL RM-RXFSV5
POWER
DIMMER
SLEEP
DISPLAY
FM MODE
MD/AUX
AUTO
AHB PRO
PRESET
CD
PROGRAM RANDOM
REPEAT
BASS
TREBLE
CANCEL
UP
SET
DOWN
TAPE
TUNER
CD
BAND
VOLUME
AUTO T APE SELECTOR
AUTO REVERSE
COMPACT
DIGITAL AUDIO
VERTICAL DISC
LOADING MECHANISM
FS-V30
COMPACT COMPONENT SYSTEM
STANDBY/ON
MD/
AUX
POWER
REC
REV.
MODE
TAPE
FM/AM
CD
PHONES
DOWN
MULTI CONTROL
UP
INSTRUCTIONS
MANUEL D'INSTRUCTIONS
T APE
AHB
PRO
VOLUME
TIMER
CLOCK
CD
OPEN/CLOSE
For Customer Use:
Enter below the Model No. and Serial No.
which are located either on the rear, bot-
tom or side of the cabinet. Retain this
information for future reference.
Model No.
Serial No.
GVT0032-001A
[J(C)]
Advertisement
Chapters
Table of Contents

Related Manuals for JVC FS-V30


Summary of Contents for JVC FS-V30
- Page 1 COMPACT COMPONENT SYSTEM SYSTEME DE COMPOSANTS COMPACT FS-V30 REMOTE CONTROL RM-RXFSV5 POWER DIMMER SLEEP DISPLAY FM MODE MD/AUX AUTO AHB PRO PRESET PROGRAM RANDOM REPEAT BASS TREBLE CANCEL DOWN TAPE TUNER BAND VOLUME AUTO T APE SELECTOR AUTO REVERSE T APE...
- Page 2 Mises en garde, précautions et indications diverses CAUTION RISK OF ELECTRIC SHOCK DO NOT OPEN CAUTION: TO REDUCE THE RISK OF ELECTRIC SHOCK, DO NOT REMOVE COVER (OR BACK). NO USER SERVICEABLE PARTS INSIDE. REFER SERVICING TO QUALIFIED SERVICE PERSONNEL. The lightning flash with arrowhead symbol, within an equilateral triangle is intended to alert the user to the presence of uninsulated...
- Page 3 For Canada/pour le Canada CAUTION: TO PREVENT ELECTRIC SHOCK, MATCH WIDE BLADE OF PLUG TO WIDE SLOT, FULLY INSERT. ATTENTION: POUR EVITER LES CHOCS ELECTRIQUES, INTRODUIRE LA LAME LA PLUS LARGE DE LA FICHE DANS LA BORNE CORRESPONDANTE DE LA PRISE ET POUSSER JUSQUAU FOND.
- Page 4 (Statement in accordance with the UL standards) 1) Read Instructions — Read carefully this instructions for your safe use before this appliance is installed, wire- connected, and operated. 2) Retain Instructions — For your future reference, retain this instruction. 3) Follow Instructions — Follow and obey all warnings, cautions and instructions marked on this appliance and this instruction.
-
Page 5: Table Of Contents
The controls and operations have been designed to make them very easy to use, freeing you to just enjoy the music. • With JVC’s COMPU PLAY you can turn on the System and automatically start the Radio, Cassette deck or CD Player with a single touch. -
Page 6: How To Put Batteries In The Remote Control
You need to point the Remote Control at the remote sensor on the System’s front panel. R6(SUM-3)/AA(15F) Remote sensor AUTO T APE SELECTOR AUTO REVERSE T APE COMPACT DIGITAL AUDIO VERTICAL DISC LOADING MECHANISM FS-V30 COMPACT COMPONENT SYSTEM STANDBY/ON VOLUME POWER TIMER REV. MODE CLOCK OPEN/CLOSE... -
Page 7: Connecting The Fm Antenna
CAUTION: Make all connections before plugging the System into an AC power outlet. Connecting the FM Antenna Rear Panel of the Unit OPTICAL DIGITAL OUT Connecting the AM Antenna Rear Panel of the Unit OPTICAL DIGITAL OUT CAUTION: To avoid noise, keep antennas away from the System, the connecting cord and the AC power cord. -
Page 8: Connecting The Speakers
CAUTION: Make all connections before plugging the System into an AC power outlet. Connecting the Speakers For each speaker, connect one end of the speaker wire to the speaker terminals on the back of the System. 1. Open each of the terminals and insert the speaker wires firmly, then close the terminals. 2. -
Page 9: Connecting The Ac Power Cord
COMPU PLAY The JVC’s COMPU PLAY feature lets you control the most frequently used System functions with a single touch. With One Touch Operation you can play a CD, a tape, turn on the radio, or listen to an external equipment at a single press of the play button for that function. -
Page 10: Common Operations
Common Operations REMOTE CONTROL RM-RXFSV5 DIMMER SLEEP POWER DIMMER DISPLAY FM MODE MD/AUX DISPLAY AUTO AHB PRO PRESET AHB PRO PROGRAM RANDOM REPEAT BASS TREBLE CANCEL BASS TREBLE DOWN TAPE TUNER BAND VOLUME +, – VOLUME Turning the Power On and Off Turning the System on –––––––––––––––... -
Page 11: Reinforcing The Bass Sound
Reinforcing the Bass Sound (AHB PRO) You can reinforce the bass sound to maintain rich, full bass at low volume (you can use this effect only for playback): To get the effect, press the AHB (Active Hyper Bass) PRO button. The BASS indicator lights up on the display. -
Page 12: Using The Tuner
Using the Tuner REMOTE CONTROL RM-RXFSV5 DIMMER SLEEP POWER DISPLAY FM MODE MD/AUX FM MODE AUTO AHB PRO PRESET AUTO PRESET PROGRAM RANDOM REPEAT BASS TREBLE CANCEL < > DOWN DOWN TUNER TAPE BAND TUNER BAND ¢ VOLUME When the System is in use, the display shows other items as well. For simplicity, only the items described in this section are shown here. -
Page 13: Presetting Stations Automatically
4 Press the UP, DOWN, > or < button within 5 seconds to select the preset number. UP or > button: Increases the preset number by 1. DOWN or < button: Decreases the preset number by 1. • When the > or < button is held down, the preset number changes rapidly. -
Page 14: Using The Cd Player
2 Place a CD, with its label side out as shown below. Press down on the portions around the CD’s center hole until you hear a click. COMPACT DIGITAL AUDIO VERTICAL DISC LOADING MECHANISM CD Cover FS-V30 COMPACT COMPONENT SYSTEM STANDBY/ON VOLUME POWER TIMER MODE CLOCK CD OPEN/... -
Page 15: Playing A Cd
Basics of Using the CD Player — Normal Play Playing a CD –––––––––––––––––––––––––– 1 Insert a CD. 2 Press the CD #/8 button. The first track of the CD begins playing. Track number Playback time • The track number that has already played disappears from the music calendar. -
Page 16: Repeating Tracks
Playing at Random The tracks will play in no particular order when you use this mode. Press the RANDOM button on the Remote Control. The RANDOM indicator lights up on the display, and tracks will be played in random order. To skip a track during playback, press the ¢... -
Page 17: Using The Cassette Deck (Listening To A Tape)
Using the Cassette Deck (Listening to a Tape) REMOTE CONTROL RM-RXFSV5 POWER DIMMER SLEEP DISPLAY FM MODE MD/AUX REV. MODE AUTO AHB PRO PRESET PROGRAM RANDOM REPEAT BASS TREBLE CANCEL DOWN TAPE @ # TUNER TAPE BAND ¢ VOLUME When the System is in use, the display shows other items as well. For simplicity, only the items described in this section are shown here. -
Page 18: Using The Cassette Deck (Recording)
Using the Cassette Deck (Recording) REMOTE CONTROL RM-RXFSV5 POWER DIMMER SLEEP DISPLAY FM MODE MD/AUX AUTO AHB PRO PRESET PROGRAM RANDOM REPEAT BASS TREBLE CANCEL DOWN TAPE @ # CD #8 TUNER TAPE BAND VOLUME When the System is in use, the display shows other items as well. For simplicity, only the items described in this section are shown here. -
Page 19: One Track Recording
CD Direct Recording Everything on the CD goes onto the tape in the order it is on the CD, or according to the order you have set in a program. 1 Insert a blank or erasable tape into the Cassette Deck. 2 Insert a CD. -
Page 20: Using External Equipment
Using External Equipment REMOTE CONTROL RM-RXFSV5 DIMMER SLEEP POWER DISPLAY FM MODE MD/AUX AUTO AHB PRO PRESET AHB PRO PROGRAM RANDOM REPEAT BASS TREBLE CANCEL BASS DOWN TUNER TAPE BAND VOLUME +, – VOLUME Listening to External Equipment You can listen to external equipment such as an MD recorder, turntable or other auxiliary equipment. -
Page 21: Using The Timers
Using the Timers REMOTE CONTROL RM-RXFSV5 POWER DIMMER SLEEP SLEEP POWER DISPLAY FM MODE MD/AUX AUTO AHB PRO PRESET POWER PROGRAM RANDOM REPEAT BASS TREBLE CANCEL DOWN TUNER TAPE BAND VOLUME The timers let you control listening and recording functions automatically. -
Page 22: Setting The Recording Timer
4 Select the music source. 1. Press the TIMER button on the Unit. “TUNER” flashes on the display. 2. Press the ¢ or 4 button to select the music source you want to listen to. The display changes as shown below. 5 Set the volume level. -
Page 23: Setting The Sleep Timer
7 Press the ¢ or 4 button until “TUNER” appears and the REC indicator lights up on the display. The display changes as shown below. 8 Set the volume level. 1. Press the TIMER button on the Unit. The current volume setting flashes on the display. 2. -
Page 24: Care And Maintenance
Care and Maintenance Handle your CDs carefully, and they will last a long time. Compact Discs • Only CDs bearing this mark can be used with this System. However, continued use of irregular shape CDs (heart-shape, octagonal, etc.) can damage the System. •... -
Page 25: Troubleshooting
Troubleshooting • If you are having a problem with your System, check this list for a possible solution before calling for service. • If you cannot solve the problem from the hints given here, or the System has been physically damaged, call a qualified person, such as your dealer, for service. -
Page 26: Specifications
Specifications FS-V30 (CA-FSV30 and SP-UXV30) Amplifier Output Power Input Sensitivity/Impedance (1 kHz) LINE IN (AUX) Output Sensitivity/Impedance (1 kHz) LINE OUT Optical out Speaker terminals Phones Cassette Deck Frequency Response Type I (Normal) Type II (CrO Wow and Flutter CD Player... -
Page 27: Caractéristiques
Les commandes et les opérations ont été revues pour les rendre plus faciles encore, vous laissant juste le plaisir de la musique. • Grâce à la fonction COMPU PLAY de JVC, vous pouvez mettre la chaîne sous tension et démarrer automatiquement la radio, la platine à cassettes ou le lecteur CD en activant une seule touche. -
Page 28: Pour Commencer
Dirigez la télécommande vers le capteur situé sur la face avant de la chaîne. R6(SUM-3)/AA(15F) Capteur de télécommande AUTO T APE SELECTOR AUTO REVERSE T APE COMPACT DIGITAL AUDIO VERTICAL DISC LOADING MECHANISM FS-V30 COMPACT COMPONENT SYSTEM STANDBY/ON POWER VOLUME TIMER REV. MODE CLOCK OPEN/CLOSE... -
Page 29: Raccordement De L'antenne Fm
ATTENTION: Effectuez tous les raccordements avant de brancher la chaîne dans une prise secteur. Raccordement de l’antenne FM Panneau arrière de l’appareil OPTICAL DIGITAL OUT Raccordement de l’antenne AM Panneau arrière de l’appareil OPTICAL DIGITAL OUT ATTENTION: Pour éviter les parasites, éloignez les antennes de la chaîne, des câbles de raccordement et du cordon d’alimentation secteur. -
Page 30: Raccordement Des Haut-Parleurs
ATTENTION: Effectuez tous les raccordements avant de brancher la chaîne dans une prise secteur. Raccordement des haut-parleurs Pour chaque haut-parleur, raccordez une extrémité du câble aux bornes de sortie des haut-parleurs situées au dos de la chaîne. 1. Ouvrez chacune des bornes et introduisez fermement les câbles des haut-parleurs, puis refermez les bornes. 2. -
Page 31: Compu Play
COMPU PLAY La fonction COMPU PLAY de JVC permet de commander les fonctions les plus utilisées de la chaîne à l’aide d’une seule touche. Les opérations à une seule touche permettent d’écouter un CD ou une cassette, d’allumer la radio, ou d’écouter des appareils externes en appuyant simplement sur la touche de lecture correspondant à... -
Page 32: Mise Sous Et Hors Tension
Opérations communes REMOTE CONTROL RM-RXFSV5 POWER DIMMER SLEEP DIMMER DISPLAY FM MODE MD/AUX DISPLAY AUTO AHB PRO PRESET AHB PRO PROGRAM RANDOM REPEAT BASS BASS TREBLE CANCEL TREBLE DOWN TUNER TAPE BAND VOLUME +, – VOLUME Mise sous et hors tension Mise sous tension de la chaîne ––––––... -
Page 33: Accentuation Des Sons Graves (Ahb Pro)
Accentuation des sons graves (AHB PRO) Vous pouvez à présent accentuer les sons graves pour conserver toute leur richesse à un faible volume (cet effet est uniquement disponible pour la lecture): Pour obtenir l’effet, appuyez sur la touche AHB (Active Hyper Bass) PRO. -
Page 34: Utilisation Du Tuner
Utilisation du tuner REMOTE CONTROL RM-RXFSV5 DIMMER SLEEP POWER DISPLAY FM MODE MD/AUX FM MODE AUTO AHB PRO PRESET AUTO PRESET PROGRAM RANDOM REPEAT BASS TREBLE CANCEL < > DOWN DOWN TAPE TUNER BAND TUNER BAND ¢ VOLUME Lorsque la chaîne est en lecture, d’autres fonctions sont aussi affichées. Dans un souci de simplicité, nous ne montrons ici que les fonctions décrites dans ce chapitre. -
Page 35: Changement Du Mode De Réception Fm
4 Appuyez sur la touche UP, DOWN, > ou < dans les 5 secondes qui suivent pour sélectionner le numéro de présélection. Touche UP ou >: Augmente le numéro de présélection d’une unité. Touche DOWN ou <: Diminue le numéro de présélection d’une unité. -
Page 36: Utilisation Du Lecteur Cd
Appuyez sur la partie voisine du centre du CD jusqu’à ce que vous entendiez un déclic. VERTICAL DISC LOADING MECHANISM Tiroir de CD FS-V30 COMPACT COMPONENT SYSTEM STANDBY/ON POWER VOLUME TIMER CLOCK... -
Page 37: Programmation De L'ordre De Lecture Des Plages
Utilisation du Lecteur CD — Lecture normale Lecture d’un CD –––––––––––––––––––––– 1 Placez un CD dans le tiroir. 2 Appuyez sur la touche CD #/8. La lecture de la première plage du CD commence. Numéro de plage • Le numéro de la plage qui a été lue disparaît de la liste des plages musicales. -
Page 38: Lecture En Ordre Quelconque
Lecture en ordre quelconque Lorsque ce mode est utilisé, les plages sont lues dans un ordre totalement aléatoire. Appuyez sur la touche RANDOM de la télécommande. L’indicateur RANDOM s’allume sur l’affichage et les plages sont reproduites dans un ordre aléatoire. Pour sauter une plage pendant la lecture, appuyez sur la touche ¢... -
Page 39: Reverse Mode
Utilisation de la platine à cassettes (Ecoute d’une cassette) REMOTE CONTROL RM-RXFSV5 DIMMER SLEEP POWER DISPLAY FM MODE MD/AUX REV. MODE AUTO AHB PRO PRESET PROGRAM RANDOM REPEAT BASS TREBLE CANCEL DOWN TAPE @ # TUNER TAPE BAND ¢ VOLUME Lorsque la chaîne est en lecture, d’autres fonctions sont aussi affichées. -
Page 40: Enregistrement Normal
Utilisation de la platine à cassettes (Enregistrement) REMOTE CONTROL RM-RXFSV5 POWER DIMMER SLEEP DISPLAY FM MODE MD/AUX AUTO AHB PRO PRESET REV. MODE PROGRAM RANDOM REPEAT TAPE @ # BASS TREBLE CANCEL DOWN CD #8 TAPE @ # TUNER TAPE BAND VOLUME Il est facile d’enregistrer sur une cassette à... -
Page 41: Enregistrement Direct De Cd
Remarques concernant l’utilisation du Reverse mode pour l’enregistrement Lors de l’enregistrement en Reverse mode, la chaîne s’arrête automatiquement lorsque la cassette arrive à la fin du sens Reverse 2. Pour enregistrer sur les deux faces d’une cassette, assurez-vous que la bande de la cassette défile vers l’avant 3, et que le témoin de sens de défilement de la bande indique également l’avant 3, avant de commencer l’enregistrement. -
Page 42: Utilisation D'appareils Externes
Utilisation d’appareils externes REMOTE CONTROL RM-RXFSV5 POWER DIMMER SLEEP DISPLAY FM MODE MD/AUX AUTO AHB PRO AHB PRO PRESET PROGRAM RANDOM REPEAT BASS BASS TREBLE CANCEL DOWN TUNER TAPE BAND VOLUME +, – VOLUME Utilisation d’appareils externes Vous pouvez écouter des appareils externes comme un lecteur de MD, un tourne-disques ou tout autre élément auxiliaire. -
Page 43: Utilisation Des Minuteries
Utilisation des minuteries REMOTE CONTROL RM-RXFSV5 DIMMER SLEEP POWER SLEEP POWER DISPLAY FM MODE MD/AUX AUTO AHB PRO PRESET POWER PROGRAM RANDOM REPEAT BASS TREBLE CANCEL DOWN TUNER TAPE BAND VOLUME Les minuteries permettent de programmer automatiquement les fonctions d’écoute et d’enregistrement. Mise à... -
Page 44: Réglage De La Minuterie D'enregistrement
4 Sélectionnez de la source de musique. 1. Appuyez sur la touche TIMER de l’appareil. L’indication “TUNER” clignote sur l’affichage. 2. Appuyez sur la touche ¢ ou 4 pour sélectionner la source de musique que vous voulez écouter. L’affichage change comme illustré ci-dessous. 5 Réglez du volume. -
Page 45: Réglage De La Minuterie Bonsoir
2. Appuyez sur la touche ¢ ou 4 de l’appareil pour régler l’heure à laquelle l’appareil doit s’éteindre. Appuyez sur la touche ¢ pour avancer l’heure et sur la touche 4 pour la retarder. Maintenez la touche enfoncée pour avancer ou retarder l’heure rapidement. Appuyez sur la touche TIMER pour ajuster les minutes. -
Page 46: Nettoyage De La Lentille
Entretien - Divers Prenez soin de vos CD afin d’assurer leur bon et long fonctionnement. Disques compacts • N’utilisez que les CD portant la marque ci- contre avec cet appareil. L’utilisation continue de CD de formes irrégulières (en forme de coeurs, octogonaux, etc.) risque cependant d’endommager le lecteur. -
Page 47: Dépistage Des Défaillances
Dépistage des défaillances • Si votre chaîne présente certaines défaillances, vérifiez la liste ci-dessous pour y trouver un remède possible avant d’appeler votre revendeur. • Si vous ne parvenez pas à résoudre le problème avec ces indications, ou si la chaîne a été endommagée, demandez l’intervention technique d’une personne qualifiée, comme votre revendeur. -
Page 48: Caractéristiques
Caractéristiques FS-V30 (CA-FSV30 et SP-UXV30) Amplificateur Puissance Sensibilité/Impédance d’entrée (1 kHz) LINE IN (AUX) 400 mV/48 k Sensibilité/Impédance de sortie (1 kHz) LINE OUT 260 mV/5,8 k Sortie optique –21 dBm - –15 dBm Bornes des haut-parleurs 4 Casque d’écoute 16 Platine à... -
Page 49: How To Locate Your Jvc Service Center
Sophisticated electronic products may require occasional service. Just as quality is a keyword in the engineering and production of the wide array of JVC products, service is the key to maintaining the high level of performance for which JVC is world famous. -
Page 50: Limited Warranty
WHAT WE WILL DO: If this product is found to be defective, JVC will repair or replace defective parts at no charge to the original owner. Such repair and replacement services shall be rendered by JVC during normal business hours at JVC authorized service centers. - Page 51 VICTOR COMPANY OF JAPAN, LIMITED EN, FR 0400MWMMDWJEM...
Need help?
Do you have a question about the FS-V30 and is the answer not in the manual?
Questions and answers
what type of cord does this unit use? I have misplace mine. Thank you
The JVC FS-V30 unit uses a supplied AC power cord for power connection, a signal cord (pin-plug x 2) for analog audio connections, and an optical digital cord (not supplied) for digital audio output.
This answer is automatically generated