
Related Manuals for JVC CA-FSXA1


Summary of Contents for JVC CA-FSXA1
- Page 1 COMPACT COMPONENT SYSTEM FS-XA1 Consists of CA-FSXA1 and SP-FSXA1 INSTRUCTIONS GNT0067-001A...
-
Page 2: Warnings, Cautions And Others
Warnings, cautions and others CAUTION To reduce the risk of electrical shocks, fire, etc.: 1. Do not remove screws, covers or cabinet. 2. Do not expose this appliance to rain or moisture. CAUTION — (Standby/on) button! Disconnect the mains plug to shut the power off completely (the STANDBY lamp goes off). - Page 3 This symbol is only (Business users) valid in the If you wish to dispose of this product, please visit our web page www.jvc-europe.com to European Union. obtain information about the take-back of the product. [Other Countries outside the European Union]...
-
Page 4: Safety Instructions
“SOME DOS AND DON’TS ON THE SAFE USE OF EQUIPMENT” This equipment has been designed and manufactured to meet international safety standards but, like any electrical equipment, care must be taken if you are to obtain the best results and safety is to be assured. Do read the operating instructions before you attempt to use the equipment. -
Page 5: Table Of Contents
Table of contents Introduction Special cautions ...2 Notes on handling... 2 Supplied accessories... 2 About discs...3 Playable disc types ... 3 Disc structure... 4 Description of parts ...5 Front panel... 5 Display window ... 5 Rear panel ... 5 Getting started Using the remote control ...6 Putting the batteries in the remote control ... -
Page 6: Special Cautions
Special cautions Notes on handling 7 Important cautions Installation of the system • Select a place which is level, dry and neither too hot nor too cold; between 5°C and 35°C. • Leave sufficient distance between the system and the •... -
Page 7: About Discs
About discs Playable disc types Discs you can play: Disc Type Mark (Logo) VIDEO AUDIO A U D I O SVCD DivX The “Playable” in the following list shows available disc types and recording formats. Disc type CD-R/-RW DVD-R Recording format –... -
Page 8: Disc Structure
About discs (continued) For MP3/WMA files • An off-the-shelf MP3 disc may be played in an order different from that indicated on the label attached to the disc. • The system supports MP3/WMA files recorded with a bit rate of 32 – 320 kbps and a sampling frequency of 16 kHz, 22.05 kHz, 24 kHz (WMA only), 32 kHz, 44.1 kHz, or 48 kHz. -
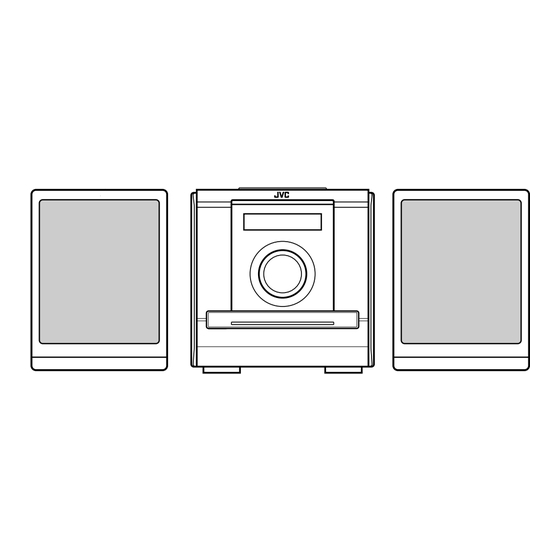
Page 9: Description Of Parts
Description of parts The numbers represent the page numbers. Front panel See “Display window” below. STANDBY lamp In the door AUX 1 PHONES * Connect headphones (not supplied) with a stereo mini plug. If the headphones are connected, the speakers and subwoofer will not produce any sound. Display window S V C DV D - A RESUME... -
Page 10: Using The Remote Control
Using the remote control The numbers represent the page numbers. 15, 17, 27 15, 31 14,18 19, 28 38, 39 33, 34 Putting the batteries in the remote control 13, 16 Remote control mode selector 15, 31 12, 14, 17, 18, 21 20, 23, 28 25, 26... -
Page 11: Operating The Tv Using The Remote Control
This page is for when operating your TV using the remote control of this product. Operating the TV using the remote control Setting the manufacturer’s code Slide the remote control mode selector to the TV side. Keep pressing down NOTE Keep pressing down TV until Step Press ENTER. -
Page 12: Connecting Up
Connecting up Connecting antennas Connecting AM loop antenna (supplied) Set up the AM loop antenna. Connect antenna cords. Main unit (rear panel) LOOP Connect the end of the antenna cord as shown above. Turn the AM loop antenna to the direction of the best radio reception. -
Page 13: Connecting Speakers
Connecting speakers There is no difference between the left and right speakers. Speaker terminal Speaker cord Speaker cord (supplied) SPEAKERS Without black line With black line Main unit (rear panel) Left speaker Right speaker (rear panel) (rear panel) CAUTION • DO NOT connect more than one speaker to one speaker terminal. -
Page 14: Connecting Other Devices
Connecting up (continued) Connecting other devices This page is for when connecting the main unit with other devices. Connecting subwoofer With an amplifier-built-in subwoofer (not supplied), you can enjoy a more dynamic bass sound. Refer to the manual of the subwoofer for details. Audio cord (not supplied) (If an audio cord comes with the amplifier-built-in subwoofer,... -
Page 15: Connecting With Tv
Connecting with a portable audio device Stereo mini plug cord (not supplied) In the door of the front panel AUX 1 • By using QP Link (Quick Portable Link), you can easily start playing back a portable audio device on this unit. See page 36 for details. •... -
Page 16: Playing Discs
Playing discs Playback • The power will be turned on when any of DVD/ CD 3, FM, AM, AUX, or 0 on the main unit and DVD/CD 3, FM, AM, AUX, or 0OPEN/CLOSE on the remote control is pressed while the power is off. -
Page 17: To Switch The Display
Display window during disc playback Ex.: When a DVD VIDEO is played S V C DV D Disc type Elapsed playing time Chapter number When a DVD VR is played back, PG (original program) /PL (play list) number is displayed. Ex.: When a DVD AUDIO is played S V C DV D - A... -
Page 18: Select An Item On The Disc By Using The Number Buttons
Playing discs (continued) Select an item on the disc by using the number buttons NOTE • Set the remote control mode selector to AUDIO before using the number buttons. • For a VCD or SVCD, this operation can be carried out when the disc is stopped, or during playback without the PBC function. -
Page 19: (One Touch Replay)
Playing back from a position 10 seconds before (One Touch Replay) Press during playback. NOTE • This function may not be available for some discs. • It is not possible to go back to the previous title. Slow Motion Playback Press SLOW or SLOW pause. -
Page 20: To Change The Brightness Of The Display Window (Dimmer)
Playing discs (continued) To change the brightness of the display window (DIMMER) Press DIMMER repeatedly. • Each time you press the button, the dimmer mode changes as follows: AUTO DIMMER:During the video source playback, the display window dims and the illumination automatically turns off. -
Page 21: Playback
Playback Display of an MP3/WMA disc is described here as an example. For a JPEG disc, read “track” as “file”. NOTE When playing a disc containing both MP3/WMA/ASF/ DivX/MPEG1/MPEG2 and JPEG files, set one of them to be played, then turn on the system again (page 29). Load a disc. -
Page 22: Resume Playback
Resume Playback NOTE Set the remote control mode selector to AUDIO before using the number buttons. This system can store the stop point, and when you start playback again by pressing DVD/CD 3 (even while on standby), it starts from the position where you have stopped—Resume Play. -
Page 23: Select The Scene To Be Played
Select the scene to be played NOTE Set the remote control mode selector to AUDIO before using the number buttons. Select the scene from the menu Press MENU/PL or TOP MENU/ PG while the disc is stopped or during playback •... -
Page 24: Designate The Time (Time Search)
Designate the time (Time search) Press ON SCREEN twice during playback The menu bar will be displayed (page 28). Press cursor 2 Press ENTER. Input the time number buttons (1-9, 0). Ex.: When you want to play a DVD VIDEO from the position of (0 hour) 23 minutes 45 seconds, press the buttons in the order:... -
Page 25: Playing The Disc In A Random Order (Random Playback)
Create a program following the description on the TV screen. Refer to “How to use the number buttons” (page 15). • The input content varies depending on the disc type. • DVD VIDEO: Titles and chapters • VCD, SVCD, CD: Tracks •... -
Page 26: Repeat Playback
Repeat Playback Refer to page 17 for Repeat Playback of MP3/ WMA/JPEG/ASF/DivX/MPEG1/MPEG2 files. SET/QP LINK Playing the title/chapter/ group/track/all tracks repeatedly (REPEAT) Press REPEAT during playback. • Each time you press the button, the Repeat mode and its indication change as follows: For DVD VIDEO Repeat items On the TV... -
Page 27: Playing The Designated Part Repeatedly (A-B Repeat Playback)
For CD/VCD/SVCD Repeat items On the TV On the display Current track TRACK All tracks Cancel NOTE • For a VCD and SVCD, the operation can be carried out only when the disc is stopped or during playback without the PBC function. •... -
Page 28: Other Convenient Functions
Other convenient functions SET/QP LINK Selecting the subtitles Press SUBTITLE during playback of a disc containing subtitles in several languages. Ex.: • Each time you press the button, the subtitle will be alternated between ON and OFF. Press cursor subtitle language. •... -
Page 29: Enlarging The Picture (Zoom)
Enlarging the picture (ZOOM) (only for moving image) Press ZOOM during playback or while paused. • Each time you press the button, the picture magnification will be changed. • For JPEG, you cannot change the picture magnification during slide-show playback. Select the portion you want to 5/K/2/3 see by using cursor... -
Page 30: Creating Realistic Sound (3D Phonic)
Other convenient functions (continued) Creating realistic sound (3D PHONIC) The two speakers produce an effect resembling surround-sound. Press 3D PHONIC during playback. Ex.: 3D PHONIC • Each time you press the button, the 3D PHONIC will be alternated as follows: ACTION : Suitable for action movies, sport programs or other lively... -
Page 31: Functions Specific To Dvd Audio
Functions specific to DVD AUDIO NOTE Set the remote control mode selector to AUDIO before using the number buttons. Advanced operations Playing the Bonus Group There are some DVD AUDIO discs with a special group, called “Bonus Group”, recorded. NOTE This operation can be carried out when “BONUS”... -
Page 32: Using The Menu Bar
Using the menu bar SET/QP LINK NOTE • Set the remote control mode selector to AUDIO before using the number buttons. • This operation can be carried out when there is a disc loaded. There are some functions that may not work while the disc is stopped. Press ON SCREEN twice. -
Page 33: Preferences
Preferences NOTE The playback status mark has the same meaning of the mark on the On-screen guide (page 15). The initial settings of the system can be changed according to the environment the system is used NOTE • Set the remote control mode selector to AUDIO before using the number buttons. -
Page 34: Audio
Preferences (continued) AUDIO Items Contents ( DIGITAL Select an output signal type from the AUDIO following in accordance with the device OUTPUT connected to the digital audio output terminal (AV amplifier, etc.). (See the table below for the preference items and output signal.) PCM ONLY: Device corresponding only to linear PCM. -
Page 35: Listening To The Radio
Listening to a radio broadcast NOTE Set the remote control mode selector to AUDIO before using the number buttons. Selecting a station Press FM or AM. Press 4/x to select the station (frequency). Automatic tuning: Hold down 4/x until the system starts searching, and then release the button. -
Page 36: Using The Rds
Using the RDS Using the RDS (Radio Data System) when receiving FM stations RDS allows FM stations to send an additional signal along with their regular program signals. For example, the stations send their station names, as well as information about what type of program they broadcast, such as sports or music, etc. -
Page 37: Listening To Radio
Searching for a program by PTY codes One of the advantages of the RDS service is that you can locate a particular kind of program from the preset channels (page 31) by specifying the PTY codes. To search for a program using the PTY codes NOTE Before you start operation;... - Page 38 Using the RDS (continued) Description of the PTY codes NEWS: News. AFFAIRS: Topical program expanding or enlarging upon the news — debate, or analysis. INFO: Programs the purpose of which is to impart advice in the widest sense. SPORT: Programs concerned with any aspect of sports.
- Page 39 To stop listening to the program selected by Enhanced Other Network Press TA/News/Info repeatedly again so that the program type indicator (TA/NEWS/INFO) goes off from the display window. The system exits from Enhanced Other Network standby mode and goes back to the previously selected station. How the Enhanced Other Network function actually works Case 1...
-
Page 40: Listening To The Sound Of Other Audio Device
Listening to the sound of other audio device Listening to the sound of external audio device Connect the other audio device to this system in advance (page 10). Press AUX. The source changes to AUX. Each time you press the button, the source changes between AUX 1 (front) and AUX 2 (rear). -
Page 41: Adjusting The Audio Input Level
Adjusting the audio input level If the sound from the audio device connected to the AUX 1 or AUX 2 jack is too loud or is too quiet when changing from another source to “AUX,” you can change the audio input level through the AUX 1 or AUX 2 jack (without changing the volume level). -
Page 42: Setting The Various Timer
Setting the Various Timer Setting the built-in clock Without setting the built-in clock, you cannot use any timers. • To exit from the clock setting, press CLOCK/ TIMER as required. • To correct a misentry during the procedure below, pressing CANCEL can return to the previous step. -
Page 43: Auto Standby
Press cursor 2/3 to select the playback source, then press SET/QP LINK. • Each time you press the button, the clock setting changes as follows: AUX 1 AUX 2 DISC • When selecting the tuner, press cursor 2/3 to select a preset channel. •... -
Page 44: Sleep Timer
Setting the Various Timer (continued) Sleep Timer When the time you specify elapses, the system will be turned off by itself. Press SLEEP. Each time you press the button, the time indicated on the display window on the main unit changes (in minutes). -
Page 45: Troubleshooting
Troubleshooting When you encounter a problem that seems to be a fault, check the following points before contacting your JVC service center. Power source 7 Power does not come on. • The power cord is not connected to the main unit or an AC outlet. -
Page 46: Language Codes
Troubleshooting (continued) About radio 7 The sound is noisy while receiving/Receiving is disabled. • The antenna is not connected correctly. → Connect the antenna correctly (page 8). Others 7 It is not possible to switch audio or subtitles between languages. •... -
Page 47: Specifications
Specifications General Power source: AC 230 V Power consumption: 25 W (in operation)/ 4.0 W(on standby/display on) 1.0 W (on standby/display off) Weight: 2.6 kg External dimensions 150 mm x 152.6 mm x 252.9 mm (W x H x D): DVD player Playable discs: DVD VIDEO, DVD AUDIO, VCD, SVCD, CD... - Page 48 2006 Victor Company of Japan, Limited 0406KTCMDWJSC...
Need help?
Do you have a question about the CA-FSXA1 and is the answer not in the manual?
Questions and answers