JVC FS-G5 Instructions Manual
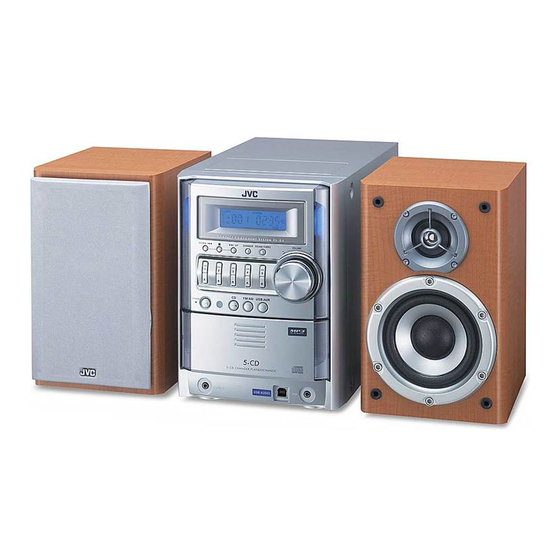
Compact component system consists of ca-fsg5 and sp-fsg5
Hide thumbs
Also See for FS-G5:
- Instructions manual (49 pages) ,
- Instructions manual (56 pages) ,
- Service manual (65 pages)
Table of Contents
Advertisement
Quick Links
JVC
COMPACT
COMPONENT
SYSTEM
FS"
G
5--Consists ofCA-FSG5 andSP-FSG5
\
\
m
io o oi
iiooSo
o
DIGITAL
AUDIO
INSTRUCTIONS
For Customer Use:
Enter below the Model No. and Serial No.
which are located either on the rear bot-
tom or side of the cabinet.
Retain this
information for future reference.
Model No.
Serial No.
LVT1349-OO1B
[J]
Advertisement
Table of Contents

Subscribe to Our Youtube Channel
Related Manuals for JVC FS-G5


Summary of Contents for JVC FS-G5
- Page 1 COMPACT COMPONENT SYSTEM FS" 5--Consists ofCA-FSG5 andSP-FSG5 io o oi iiooSo DIGITAL AUDIO For Customer Use: INSTRUCTIONS Enter below the Model No. and Serial No. which are located either on the rear bot- tom or side of the cabinet. Retain this information for future reference.
- Page 2 Connect the equipment into an outlet on a circuit different from that to which the receiver is connected. Consult the dealer or an experienced radio/TV technician for help. CAUTION Changes or modifications not approved by JVC could void the user's authority to operate the equipment.
- Page 3 Trade Name: which provides guidelines for proper grounding and, in particular, specifies that the cable ground shall be Responsible Party: JVC Americas Corp. connected to the grounding system of the building, Address: 1700 Valley Road, Wayne as close to the point of cable entry as practical.
- Page 4 IMPORTANT FOR LASER PRODUCTS 1 CLASS 1 LASER PRODUCT 2 CAUTION: Do not open the top cover. There are no user serviceable parts inside the unit; leave all servicing to qualified service personnel. 3 CAUTION:Visible and invisible laser radiation when open and interlock failed or defeated.
- Page 5 Introduction ............Precautions ................How to Read This Manual ..........Getting Started ........... Step 1: Unpack ..............Step 2: Prepare tire Remote Control ........Step 3: Hook Up ..............Before Operating the System ......Daily Operations--Playback ......Listening to the Radio ............Playing Back a Disc ............
- Page 6 • If you are not going to operate the System for an extended e ecautiOn period of time, unpklg the AC power cord fi'omthe wall outlet. Installation If auything goes wrong, unplug the AC power cord and • Install ill a place which is level, dry and neither too hot nor consult your dealer.
- Page 7 step pnp Q After unpacking, check to be sure that you have all the following items. The number in parentheses indicates quantity of each piece supplied. • FM autenua • AM loop antenua • Remote control • Batteries If any item is missing, consult your dealer immediately.
- Page 8 !_p_ N_ku_ii_i!lliiiliii iiiii!!_i '_i!li!i;i iiiiiii!_ _iiiiiiii _i!!i!!i!i_!! iil!lilil '¸_!iii!iiiiii i_i!!iiii' iiii!i!!!t_ ¸_i!iiiiiiiiii_ _i_i_ii_ ;lii!iiiii iillliiii_ _iiiii!_ i!lliiiliii iiiii!!iiii!;! i!!!!i!!!_ ilil!i!!!iiii_ ;lii!iiii_ ¸¸ ! !iliiiii!i!i ¸¸ i illlilil '¸_iii If you need more detailed information, see page 6. Illustrations of the input/output terminals below are typical examples.
- Page 9 FM antenna (supplied) '"' • Extend it so that you can obtain the best AM loop antenna (supplied) reception. Turn it until the best reception is obtained. Non-stripe...
- Page 10 To assembleand connectthe AM loopantenna To connect the AM loop antenna Make sure to conuect the wire correctly: Tile white end to To assemble the AM loop antenna AM EXT, the black end to GND. @ Hold Insert (3) Release_ •...
- Page 11 The indications on the display teach you a lot of things while you are operating the System. Before operating the System, be familiar with when and how the indicator illuminates on the display. [] j D sc tray nd caters •...
- Page 12 Turn on the power. Tile STANDBY lamp on tile main unit turns oft" • Without pressing STANDBY/ON V/I, tile System turns oil by pressing one of the source selecting Numeric buttons ill the next step. buttons_ Select the source. Playback automatically starts if tile selected source...
- Page 13 US[_iltg toiIh_Radi_}_:: :::::: To preset the stations _>>) Toselecttheband(FlVl o r AM) You call preset 30 FM and 15 AM stations. 1 Tune in to a station you want to preset. 2 Activate the preset number entry mode. FM _ AM q "3 F"...
- Page 14 To tune in to a preset station _>) To select a disc to be played back Select a band (FM OF AM). FM _ AM q Iltw,.. ,,..-_ litton.,, Select a preset number for the station you store. • You carl also use tbe .Q Q PRESET UP or PRESET DOWN.
- Page 15 trom th PG,, ;::; For IVlP3 playback According to the MP3 playback mode, I-<t</<< This System is equipped with a USB terminal on the front I=,._/_1_t or number buttons work for the group panel of the main unit. You can connect your PC to this selection or file track selection.
- Page 16 The USB drivers are installed automatically. • If the USB drivers are not installed automatically, To connectotherequipment install the USB drivers following tire instructions oil tire PC' s monitor. By using all stereo mini plug cord (not supplied), you can Check if the drivers are correctly...
- Page 17 Adlusli_ [he :vold_e, :;:;;;::: You carl adjust the vohune level from level 0 (VOL-MIN) iiiiiiil iiiiiiil level 31 (VOL-MAX). iiiiiiil _t_t'lll_ _'RIITI 1! I *IxlRII_tlTRIII OiOO VOLUME CLOCK/ ..TIMER To drop the volume in a moment _))) PRESET DOWN FADE MUTING To restore the volume,...
- Page 18 If there is a power failure Cha_oingthe DisplayBri htneS_ DIMMEB d_ z !i,{_ _i!iia. ¸ _.{' kd _'_¸ % ,_' &,> %.¸#¸¸¸ The clock loses the setting and is reset to "AM 12:00." need to set the clock again. You carl dim the display window.
- Page 19 Programming ibe elayin_Orde }" iiiiiiil iiiiiiil iiiiiiil You can arrange the playing order of the tracks (up to 32) iiiiiiil iiiiiiil before you start playback. iiiiiiil • You cannot enjoy MP3 discs for program play. iiiiiiil iiiiiiil • You can repeat all the programmed tracks by pressing iiiiiiil REPEAT.
- Page 20 To checkthe programmedcontents Playing_] Rand_m_nd_mPIJ_ While the PRGM indicator is shown on the display before playback... You call play back all tile tracks on the selected disc at random. In the l)rogrammed order. • You call repeat the current disc by pressing REPEAT.
- Page 21 You can repeat playback. You call lock tile disc trays so that no one call eject tile loaded discs. For CD: • This is possible while the System is oil standby. While the disc trays are closed... c:_1"_ -_---_ALL _ Canceled (No indication) i JQJ-i/I-...
- Page 22 iiiiiiii R emote control iiiiiii! iiiiiiii Using Daily Timer, you can wake up with nmsic, etc. iiiiiiii • You can store three Daily Timer settings; however, you can iiiiiiii iiiiiiii activate only one of Daily Timers at the same time. iiiiiiii •...
- Page 23 To turn off the Timer after its setting is done Make the timer setting as you want. Set the hour then the minute for on-time. Since Daily Timer is activated at the same time everyday, you may need to cancel it on some particular days.
- Page 24 Daily Operations--Sound& OtherAdjustments (see pages 13 and 14) Daily Operations--Playback (see pages 8 to 12) Adjusting the Volume: Listening to the Radio: • Be sure to turn down the voltlme before counectiug or putting the headphones. • If you store a new station into an occupied preset number, the previously stored station in that number will be erased.
- Page 25 Timer Operations: Daily Timer does not work. If you are having a problem with your System, check this list c=)The System has been turned oil when tile on-time comes. ff)r a possible solution before calling for service, Timer starts working only when the System is turned off. General: Adjustments or settings are suddenly canceled before...
- Page 26 Parts S_e_i_icat i_ns i ;;;;;: ::::;;: Amplifiersection Refer to the pages to see how to use the buttons and controls. Output Power: 90 W per channel, rain. RMS, driven into 6 f) at 1 kHz Remote control with no more than 10% total harmonic distortion.
- Page 27 TO OUR VALUED CUSTOMER THANK YOU FOR PURCHASING THIS JVC PRODUCT. WE WANT TO HELP YOU ACHIEVE A PERFECT EXPERIENCE. NEED HELP ON HOWTO HOOK NEED ASSISTANCE ON HOW TO OPERATE? NEEDTO LOCATE A JVC SERVICE CENTER? LIKE TO PURCHASE ACCESSORIES? ®...
- Page 28 OF PUERTO RICO. WHAT WE WILL DO: If this product is found to be defective within the warranty period, JVC will repair or replace defective parts with new or ,_. -k rebuilt equivalents at no charge to the original owner.
- Page 29 "11 "0 "0 .< "_ 0105MWMMDWBE A 6_b 2 005 Victor Company of Japan, Limited...
Need help?
Do you have a question about the FS-G5 and is the answer not in the manual?
Questions and answers