JVC FS-GD7 Instructions Manual
Compact component system consists of ca-fsgd7 and sp-fsgd7
Hide thumbs
Also See for FS-GD7:
- Service manual (63 pages) ,
- Instructions manual (100 pages) ,
- Instructions manual (93 pages)
Table of Contents
Advertisement
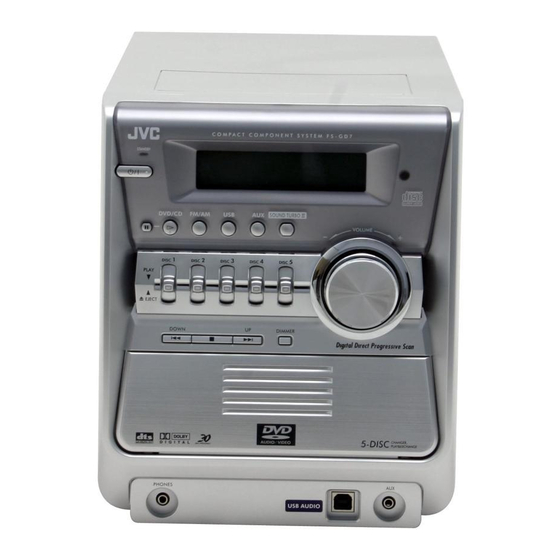
COMPACT COMPONENT SYSTEM
FS-GD7
—Consists of CA-FSGD7 and SP-FSGD7
D I G I T A L
INSTRUCTIONS
For Customer Use:
Enter below the Model No. and Serial No.
which are located either on the rear, bot-
tom or side of the cabinet. Retain this
information for future reference.
Model No.
Serial No.
LVT1348-001D
[J]
Advertisement
Table of Contents

Related Manuals for JVC FS-GD7


Summary of Contents for JVC FS-GD7
- Page 1 COMPACT COMPONENT SYSTEM FS-GD7 D I G I T A L INSTRUCTIONS —Consists of CA-FSGD7 and SP-FSGD7 For Customer Use: Enter below the Model No. and Serial No. which are located either on the rear, bot- tom or side of the cabinet. Retain this information for future reference.
- Page 2 Mises en garde, précautions et indications diverses CAUTION RISK OF ELECTRIC SHOCK DO NOT OPEN CAUTION: TO REDUCE THE RISK OF ELECTRIC SHOCK, DO NOT REMOVE COVER (OR BACK). NO USER SERVICEABLE PARTS INSIDE. REFER SERVICING TO QUALIFIED SERVICE PERSONNEL. The lightning flash with arrowhead symbol, within an equilateral triangle is intended to alert the user to the presence of uninsulated...
- Page 3 Consult the dealer or an experienced radio/TV technician for help. CAUTION Changes or modifications not approved by JVC could void the user’s authority to operate the equipment. For the main unit: Declaration of Conformity...
-
Page 5: Table Of Contents
Introduction ... 2 Precautions ... 2 How to Read This Manual ... 2 Getting Started ... 3 Step 1: Unpack ... 3 Step 2: Prepare the Remote Control... 3 Step 3: Hook Up... 4 Changing the Scanning Mode ... 6 Before Operating the System ... -
Page 6: Introduction
Precautions Installation • Install in a place which is level, dry and neither too hot nor too cold—between 5°C and 35°C (41°F and 95°F). • Install the System in a location with adequate ventilation to prevent internal heat buildup inside the System. DO NOT install the System in a location near heat sources, or in a place subject to direct sunlight, excessive dust or vibration. -
Page 7: Getting Started
Step 1 :Unpack the package and check the accessories. Step 2 : Prepare the remote control. Step 3 : Hook up the components such as AM/FM antennas, speakers, etc. (see pages 4 to 6). Finally plug the AC power cord. Now you can operate the System. -
Page 8: Step 3: Hook Up
Step : Hook Up If you need more detailed information, see page 6. Illustrations of the input/output terminals below are typical examples. When you connect other components, refer also to their manuals since the terminal names actually printed on the rear may vary. - Page 9 For better FM/AM reception Vynile-covered wire (not supplied) Extend it horizontally. AM loop antenna Keep it connected. Disconnect the supplied FM antenna, and connect to an outdoor FM antenna using a 75 Ω wire with coaxial type connector. Outdoor FM antenna (not supplied) SUBWOOFER...
-
Page 10: Changing The Scanning Mode
To assemble and connect the AM loop antenna To assemble the AM loop antenna To connect the AM loop antenna 1 Hold 2 Insert • If the AM loop antenna wire or speaker cords are covered with vinyl, remove the vinyl to expose the tip of the antenna by twisting the vinyl. -
Page 11: Before Operating The System
Before Operating the System Playable Disc Types This System has been designed to play back the following discs: Disc Type Mark (Logo) DVD Video DVD Audio Video CD (VCD) DIGITAL VIDEO Super Video CD (SVCD) SUPER VIDEO COMPACT Audio CD DIGITAL AUDIO CD-R The System can play back CD-R or CD-RW... -
Page 12: Display Indicators
Display Indicators The indications on the display teach you a lot of things while you are operating the System. Before operating the System, be familiar with when and how the indicator illuminates on the display. 1 Disc tray indicators • 1–5: Disc tray number indicators. •... - Page 13 Indications on the main display while operating a disc While playing back a disc: • DVD Video: Chapter no. Elapsed playing time • By pressing SHIFT+DISPLAY, you can show the current title and chapter numbers for a few seconds. • DVD Audio: Elapsed playing time Track no.
-
Page 14: Turn On The Power
Daily Operations Numeric buttons DISPLAY RETURN TOP MENU GROUP/TITLE 4,¢ FM/PLAY MODE SHIFT 3D PHONIC —Playback Turn on the power. The STANDBY lamp on the main unit turns off. • Without pressing AUDIO by pressing one of the source selecting buttons in the next step. -
Page 15: Listening To The Radio
Listening to the Radio To select the band (FM or AM) To tune in to a station While FM or AM is selected... Remote control: Main unit: sec. Frequency starts changing on the display. When a station (frequency) with sufficient signal strength is tuned in, the frequency stops changing. -
Page 16: Playing Back A Disc
Playing Back a Disc Before operating a disc, be familiar how a disc is recorded. • DVD Video comprises of “Titles” which includes “Chapters,” DVD Audio/MP3 comprise of “Groups” which includes “Tracks,” and CD/SVCD/VCD comprise of only “Tracks.” • For JPEG playback, see “Operations on the CONTROL Screen”... - Page 17 To locate a particular portion While playing a disc except MP3... • No sound comes out while searching on DVD Video/ SVCD/VCD. To return to normal playback, press DVD/CD 3. Remote To locate an item directly ONLY You can select a title/chapter/track directly and start playback.
-
Page 18: Playing Back From The Pc
Playing Back from the PC This System is equipped with a USB terminal on the front panel. You can connect your PC to this terminal and enjoy sound reproduced through your PC. When you connect your PC for the first time, follow the procedure below. -
Page 19: Daily Operations-Sound&Other Adjustments
Daily Operations Remote control CANCEL A.STANDBY SLEEP BASS/TREBLE ENTER SHIFT Main unit —Sound&Other Adjustments Adjusting the Volume You can adjust the volume level from level 0 (VOL MIN) to level 31 (VOL MAX). Remote control: DISPLAY DIMMER CLOCK/ TIMER FADE MUTING To drop the volume in a moment AUDIO VOL... -
Page 20: Making Dvd Voice Clear-Clear Voice
Making DVD Voice Clear—CLEAR VOICE Remote ONLY This function allows you to easily understand the dialog of DVD even with the volume turned down. • This function only works for center-channel signal encoded multi-channel disc. Canceled Presetting Automatic DVD Sound Increase Remote Level—DVD LEVEL ONLY... -
Page 21: Setting The Clock
To adjust the picture tone Select “USER1” or “USER2.” • Follow steps 1 and 2 explained on page 16. Select a parameter you want to adjust. GAMMA Adjust if the neutral color is bright or dark (–3 to +3). BRIGHTNESS Adjust if the entire picture is bright or dark (–8 to +8). -
Page 22: Turning Off The Power Automatically
Turning Off the Power Remote Automatically ONLY To turn off the System after playback is over— Auto Standby (at the same time) When Auto Standby is in use, the A.STANDBY indicator lights on the display. When the disc play stops, the A.STANDBY indicator starts flashing. -
Page 23: Unique Dvd/Vcd Operations
Unique DVD/VCD Operations Remote control PAGE -/+ DVD/CD 3 ENTER SUBTITLE AUDIO SHIFT Selecting the Sound Track For DVD Video: While playing back a chapter containing audio languages, you can select the language to listen to. For DVD Audio: While playing back a track containing audio channels, you can select the audio channel to listen to. -
Page 24: Selecting The Subtitle Language
Selecting the Subtitle Language For DVD Video: While playing back a chapter containing subtitles in different languages, you can select the subtitle language to display on the TV screen. For SVCD: While playing back a track, you can select the subtitles even if no subtitles are recorded on the disc. -
Page 25: Selecting Browsable Still Pictures
Selecting Browsable Still Pictures • This function is only used while playing DVD Audio. While playing back a track linked to browsable still pictures (B.S.P.), you can select the still picture (turn the page) to be shown on the TV screen. •... -
Page 26: Advanced Disc Operations
Advanced Disc Operations Remote control CANCEL Numeric buttons DVD/CD 3 5,∞ 4,¢ FM/PLAY MODE SHIFT Main unit DISC1 Programming the Playing Order— Program Play You can arrange the playing order of the chapters or tracks (up to 99) before you start playback. Before starting playback, activate Program Play. -
Page 27: Playing At Random-Random Play
Start playback. Playback starts in the order you have programmed. To skip a step: To pause: To release, press DVD/CD 3. To check the programmed contents Before or after playback... In the reverse order. In the programmed order. To modify the program Before or after playback... -
Page 28: Playing Repeatedly
Playing Repeatedly Remote ONLY • You can also select the repeat mode using the on-screen bar (see page 26). Repeat Play You can repeat playback. • For DVD Video: During playing... Canceled Before playback... ALL * Canceled • For DVD Audio: During or before playback... -
Page 29: On-Screen Disc Operations
On-Screen Disc Operations Remote control Numeric buttons DVD/CD 3 ENTER 4,¢ REPEAT On-screen bars DVD Video DISC TITLE 2 CHAP CHAP 3 8.5Mbps TITLE DVD-VIDEO TIME CHAP. TIME DVD Audio GROUP 14 TRACK 23 DISC DVD-AUDIO TIME TRACK PAGE SVCD TRACK 3 TITLE DISC... -
Page 30: Operations Using The On-Screen Bar
Operations Using the On-screen Bar Ex.: Selecting a subtitle (French) for DVD Video: While a disc is selected as the source... Display the on-screen bar with the pull-down menu. DISC 3 8.5Mbps TITLE 2 DVD-VIDEO 8.5Mbps DISC 3 TITLE TITLE 2 DVD-VIDEO TIME TIME... -
Page 31: Time Search
Select the repeat mode you want. Repeats all discs or all programmed tracks. Repeats a desired portion (see next column). TITLE Repeats the current title. GROUP Repeats the current group. DISC Repeats the current disc (except for DVD). CHAPTER Repeats the current chapter. TRACK* Repeats the current track. -
Page 32: Operations On The Control Screen
Chapter/Track Search You can search for the chapter (DVD Video) or track (DVD Audio) number to play. While playing, display the on-screen bar with the pull- down menu. Select CHAP. TRACK Display the pop-up window. 8.5Mbps DISC 2 TITLE TITLE 2 CHAP CHAP 3 DVD-VIDEO... - Page 33 To move the highlight bar between group list and track list Moves the bar to the track list. Moves the bar to the group list. To select a group/track in the list Move the highlight bar to a desired item. •...
-
Page 34: Timer Operations
Remote control CANCEL Timer Operations Setting the Daily Timer Using Daily Timer, you can wake up with your favorite music. You can store three Daily Timer settings; however, you can activate only one of the timers at a time. • To exit from the timer setting, press CLOCK/TIMER as AUDIO required. - Page 35 5 Select the volume level. • You can select the volume level (“1” to “MAX” and “VOL – –”). If you select “VOL – –,” the volume is set to the last level when the System has been turned off. Once settings are complete, the Timer setting information appears in sequence.
-
Page 36: Setup Menu Operations
Setup Menu Operations Remote control ENTER SET UP Setup Menu Icons The icon for the selected Setup Menu will be highlighted. Setup Menu Ex.: LANGUAGE is selected. LANGUAGE MENU LANGUAGE ENGLISH AUDIO LANGUAGE ENGLISH SUBTITLE ON SCREEN LANGUAGE ENGLISH SELECT TO SELECT. -
Page 37: Language Setup Menu
Finish the setting. Repeat steps 3 to 4 to set other items on the same Setup Menu. Repeat steps 2 to 4 to set other items on another Setup Menu. To erase the Setup Menu LANGUAGE Setup Menu You can select the initial languages for disc playback. You can also select the language shown on the TV screen while operating this System. -
Page 38: Audio Setup Menu
PICTURE SOURCE You can obtain optimal picture quality by selecting an appropriate option—picture source type (either video source or film source). Select one of the following: AUTO: Normally select this. When playing back a disc containing both video and film sources, the System automatically changes the processing to match it to the picture type (film or video source) of the current chapter. -
Page 39: Others Setup Menu
D. (Dynamic) RANGE COMPRESSION You can compress the dynamic range (the difference between the loudest sound and the softest sound) to enjoy a powerful sound even at a low volume level when listening to Dolby Digital software. This is useful at night. •... -
Page 40: Operating The Tv
Remote control TV CH+/– SHIFT Operating the TV Operating TV You can operate the JVC’s TV using this remote control. To operate the TV To turn on or off the TV: TV/VIDEO TV VOL+/– To adjust the TV volume: To select the TV channel:... -
Page 41: Additional Information
Additional Information Learning More about This System Getting Started (see pages 3 to 6) Changing the Scanning Mode: • To enjoy the progressive video picture, connect a TV with the progressive video input using component video cord. Daily Operations—Playback Listening to the Radio: •... - Page 42 Advanced Disc Operations (see pages 22 to 24) Programming the Playing Order—Program Play: • If you try to program a 100th track, “MEM FULL (memory full)” appears on the display. • While programming steps... Your entry will be ignored if you have tried to program an item number that does not exist on the disc (for example, selecting track 14 on a disc that only has 12 tracks).
-
Page 43: Maintenance
Maintenance To get the best performance of the System, keep your discs and mechanism clean. Handling discs • When removing the disc from its case, hold it at the edge while pressing the center hole lightly. • Do not touch the shiny surface of the disc, or bend the disc. •... -
Page 44: Troubleshooting
Troubleshooting If you are having a problem with your System, check this list for a possible solution before calling for service. General: Adjustments or settings are suddenly canceled before you finish. ] There is a time limit. Repeat the procedure again. Operations are disabled. -
Page 45: Language Code List
Language Code List Afar Abkhazian Afrikaans Ameharic Arabic Assamese Aymara Azerbaijani Bashkir Byelorussian Bulgarian Bihari Bislama Bengali, Bangla Tibetan Breton Catalan Corsican Czech Welsh Danish Bhutani Greek Esperanto Estonian Basque Persian Finnish Fiji Faroese Frisian Irish Scots Gaelic Galician Guarani Gujarati Hausa Hindi... -
Page 46: Optical Digital Out Signals
OPTICAL DIGITAL OUT Signals DIGITAL AUDIO Playback disc DVD Video with 48 kHz, 16/20/24 bit Linear PCM with 96 kHz, Linear PCM with Dolby Digital with DTS DVD Audio with 48/96/192 kHz, 16/20/24 bit Linear PCM with 44.1/88.2/176.4 kHz, 16/20/24 bit Linear PCM with Dolby Digital with DTS SVCD, VCD, CD... -
Page 47: Parts Index
Parts Index Refer to the pages to see how to use the buttons and controls. Remote control 23, 31, 36 11, 13, 16 – 18, 20 – 22, 27, 28 10, 12, 13, 21, 23, 29 11, 13, 21 12, 21, 23, 29 10, 15, 36 11 –... -
Page 48: Specifications
Specifications Amplifier section Output Power: 90 W per channel, min. RMS, driven into 6 Ω at 1 kHz with no more than 10% total harmonic distortion. Analog input: AUX: Sensitivity/Impedance (at 1 kHz) 400 mV/47 kΩ USB input: USB Ver.1.1 Digital output: OPTICAL DIGITAL OUT: –21 dBm to –15 dBm (660 nm ±30 nm) - Page 51 0205MWMMDWBET © 2005 Victor Company of Japan, Limited...
Need help?
Do you have a question about the FS-GD7 and is the answer not in the manual?
Questions and answers