
Related Manuals for GreenWorks 1500 PSI


Summary of Contents for GreenWorks 1500 PSI
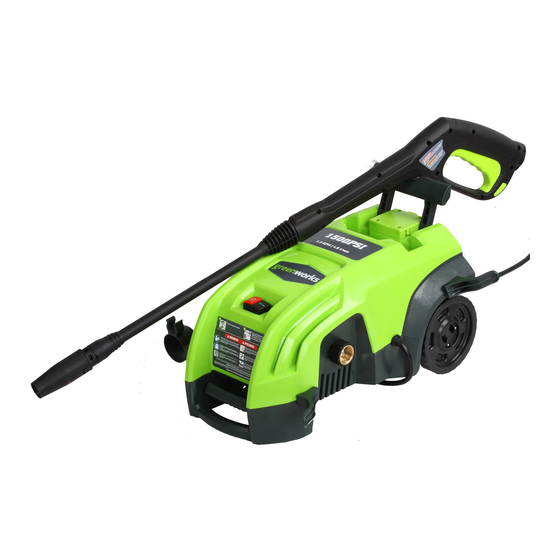
- Page 1 1500 PSI / 1.3 GPM ELECTRIC PRESSURE WASHER 51052 OPERATOR’S MANUAL TOLL-FREE HELPLINE: 1-888-90WORKS (888.909.6757) Read all safety rules and instructions carefully before operating this tool.
-
Page 2: Table Of Contents
Parts Ordering and Service.................. Back Page PRODUCT SPECIFICATIONS Universal Motor ..................120 V, 60 Hz, 13 Amps Rated Pounds Per Square Inch Pressure* ..............1500 psi Rated Gallons Per Minute* ................... 1.3 gpm Maximum Inlet Water Temperature .................. 104˚F... -
Page 3: Important Safety Instructions
IMPORTANT SAFETY INSTRUCTIONS W A R N I N G Read and understand all instructions. Failure to follow all instructions listed below may result in electric shock, fire, and/or serious personal injury. W A R N I N G When using this product basic precautions should always be followed, including the following READ ALL INSTRUCTIONS BEFORE USING THIS PRODUCT •... -
Page 4: Important Safety Instructions
IMPORTANT SAFETY INSTRUCTIONS EXTENSION CORDS Use only extension cords that are intended for outdoor use.These extension cords are identified by a marking “Acceptable for use with outdoor appliances; store indoors while not in use.” Use only extension cords having an electrical rating not less than the rating of the product. Do not use damaged extension cords. -
Page 5: Specific Safety Rules
SPECIFIC SAFETY RULES • Know your product. Read the operator’s manual care-fully. Learn the machine’s applications and limitations as well as the specific potential hazards related to this product. • To reduce the risk of injury, keep children and visitors away. All visitors should wear safety glasses and be kept a safe distance from work area. -
Page 6: Specific Safety Rules
SPECIFIC SAFETY RULES plug. If the plug still does not fit, contact a qualified electrician to install the proper wall outlet. Do not change the equipment plug, extension cord receptacle, or extension cord plug in any way. • Make sure your extension cord is in good condition. When using an extension cord, be sure to use one heavy enough to carry the current your product will draw. -
Page 7: Symbols
SYMBOLS Some of the following symbols may be used on this product. Please study them and learn their meaning. Proper inter-pretation of these symbols will allow you to operate the product better and safer. SYMBOL NAME DESIGNATION/EXPLANATION Volts Voltage Amperes Current Hertz Frequency (cycles per second) - Page 8 To avoid serious personal injury, do not attempt to use this product until you read thoroughly and understand completely the operator’s manual. If you do not understand the warnings and instructions in the operator’s manual, do not use this product. Call GREENWORKS customer service for assistance.
-
Page 9: Electrical
ELECTRICAL W A R N I N G The double insulated system is intended to protect the user from shock resulting from a break in the product’s internal insulation. Observe all normal safety precautions to avoid electrical shock. DOUBLE INSULATED Double insulation is a concept in safety in electric power tools, which eliminates the need for the usual three-wire grounded power cord. - Page 10 ELECTRICAL W A R N I N G Keep the extension cord clear of the working area. Position the cord so that it will not get caught on lumber, tools, or other obstructions while you are working with a power tool. Failure to do so can result in serious personal injury.
-
Page 11: Know Your Pressure Washer
KNOW YOUR PRESSURE WASHER The safe use of this product requires an understanding of the information on the tool and in this operator’s manual as well as a knowledge of the project you are attempting. Before use of this product, familiarize yourself with all operating features and safety rules. (See Figure 2.) Detergent tank High pressure hose storage hook Trigger... -
Page 12: Assembly
ASSEMBLY W A R N I N G Do not use this product if any parts on the Packing List are already assembled to your product when you unpack it. Parts on this list are not assembled to the product by the manufacturer and require customer installation. - Page 13 ASSEMBLY CONECTING THE WATER SUPPLY TO THE PRESSURE WASHER (See Figure 3.) C A U T I O N : Always observe all local regulations when connnecting hoses to the water main. Some areas have restrictions against connecting directly to public drinking water supply to prevent the feedback of chemicals into the drinking water supply.
- Page 14 ASSEMBLY USING THE TELESCOPING HANDLE (See Figure 4.) • To use the telescopic handle, pull up on it until the pins click into position. • To store the handle, push the spring pins in, and press down on the handle. Fig.
- Page 15 ASSEMBLY DUAL DETERGENT TANKS (See Figure 7.) • Insert the male bayonet end of the bottle into the female bayonet outlet firmly. • While pushing in the bottle firmly, turn clockwise until tabs lock into place to ensure a leak- free connection.
- Page 16 ASSEMBLY CONNECTING THE GARDEN HOSE (See Figure 9.) C A U T I O N : Always observe all local regulations when connecting hoses to the water main. Some areas have restrictions against connecting directly to public drinking water supply to prevent the feedback of chemicals into the drinking water supply.
-
Page 17: Operation
OPERATION W A R N I N G Do not allow familiarity with the product to make you careless.Remember that a careless fraction of a second is sufficient to inflict serious injury. W A R N I N G Always wear eye protection with side shields marked to comply with ANSI Z87.1. Failure to do so could result in objects being thrown into your eyes resulting in possible serious injury. -
Page 18: Starting And Stopping
OPERATION STARTING AND STOPPING THE PRESSURE WASHER (See Figure 11.) C A U T I O N : Do not run the pump without the water supply connected and turned on. • Connect the garden hose. • Turn the garden hose on then squeeze the high pressure trigger to relieve air pressure. Once a steady stream of water appears, release the trigger. -
Page 19: Using The Spray Wand Trigger
OPERATION USING THE SPRAY WAND TRIGGER (See Figure 12.) For greater control and safety, keep both hands on the trigger handle at all times. • Pull back and hold the trigger to operate the pressure washer. • Release the trigger to stop the flow of water through the nozzle. TO ENGAGE THE LOCK-OUT: •... - Page 20 OPERATION OPERATING THE PRESSURE WASHER (See Figure 13.) Use only detergents designed for pressure washers. Many detergents may require mixing prior to use. Prepare cleaning solution as instructed on the solution bottle. Fig. 13 To clean: • Pour detergent in the detergent tank. •...
-
Page 21: Maintenance
MAINTENANCE W A R N I N G When servicing, use only identical replacement parts.Use of any other parts may create a hazard or cause product damage.. W A R N I N G Always wear eye protection marked to comply with ANSI Z87.1. Failure to do so could result in objects being thrown into your eyes, resulting in possible serious injury. - Page 22 MAINTENANCE • Unplug the pressure washer. • Turn off the pressure washer and shut off the water supply. Pull trigger to release water pressure. • Remove the nozzle from the spray wand. NOTE: Never point the spray wand at your face Using a straightened paper clip or nozzle cleaning tool (not provided), free any foreign materials clogging or restricting the nozzle.
-
Page 23: Maintenance
MAINTENANCE TAKING A BREAK If taking a break of five minutes or more. • Engage gun safety lock. • Turn unit to “OFF” (O) position. • Unplug the power cord from the outlet. C A U T I O N : The use of a pump protector is recommended to prevent cold weather damage during storage over the winter months. -
Page 24: Troubleshooting
TROUBLESHOOTING PROBLEM POSSIBLE CAUSE SOLUTION Motor will not start. On/Off switch is in the Turn switch to the “ON” “OFF” (O) position. ( | ) position. Power cord is not plugged in. Plug in power cord. Extension cord is too long. Replace extension cord with either Extension cord is not proper a 25’... - Page 25 TROUBLESHOOTING PROBLEM POSSIBLE CAUSE SOLUTION Output pressure varies Discharge nozzle is ob- Blow out or remove debris with a high and low. (contin- structed. fine needle. ued) Calcified gun, hose or power Run distilled vinegar through nozzle. detergent tank. Unit does not reach Diameter of garden hose is Add more detergent.
- Page 26 TROUBLESHOOTING PROBLEM POSSIBLE CAUSE SOLUTION Motor buzzes but fails Supply voltage below mini- Verify that only the pressure to run. mum. washer is running on this circuit. System has residual pres- Turn unit “OFF”, squeeze trigger sure. on spray wand to release pres- sure, then turn unit “ON”...
-
Page 27: Warranty
(1) years against defects in materials, parts or workmanship. GREENWORKS™, at its own discretion will repair or replace any and all parts found to be defective, through normal use, free of charge to the customer. This warranty is valid only for... -
Page 28: Parts List & View
EXPLODED VIEW... -
Page 29: Parts List
PARTS LIST ITEM NO. PART NO. DESCRIPTION 31105368 Telescopic handle Assy 32202368 Screw ST4.2*16-F 34202365 Rubber pad 34107368 Handle clip 1 34108368 Handle clip 2 32201368 Screw 34117368 Cord hook 34128319 Cord clip 36403302 Power cord assy 31114368 Wheel assy 34105304 Wire clip 34118368... - Page 30 PARTS LIST ITEM NO. PART NO. DESCRIPTION 33201368 Shaft 34104368 Tail panel 34103368 Tail 32217301A Screw 2.9*8-F 31112368 High pressure hose 31107368 Gun handle 31108368 Lance 31109368 Gun nozzle 31111368 Tank...
- Page 31 TOLL-FREE HELPLINE: 1-888-90WORKS (888.909.6757) Rev: 00 (10-10-30) Printed in China on 100% Recycled Paper...
Need help?
Do you have a question about the 1500 PSI and is the answer not in the manual?
Questions and answers
Is there a way to buy the oil and water seals