Hoover washing machine Instruction Book
10kg washing machine
Hide thumbs
Also See for washing machine:
- Instructions for use manual (17 pages) ,
- Instructions for use manual (17 pages) ,
- Instructions for use manual (17 pages)
Table of Contents
Advertisement
Advertisement
Table of Contents

Related Manuals for Hoover washing machine


Summary of Contents for Hoover washing machine
- Page 1 Instruction Book Instructions for installation and use 10kg Washing Machine...
-
Page 2: Table Of Contents
Contents Introduction Delivery Information Guarantee Customer Service Caring for the Environment Warning and Safety Instructions Unpacking the Product Installation Electricity Supply Water Supply Connecting the Cold Water Supply Connecting the Drainage Pipe Levelling the Machine Testing the Installation Description of the Machine The Control Panel Digital Display Wash Options... -
Page 3: Introduction
Serial Number (16 digits): _ _ _ _ _ _ _ _ _ _ _ _ _ _ _ _ Our customer service advisors will require this information whenever you contact Hoover. Please keep all documentation in a safe place for future reference or for any future owners. -
Page 4: Customer Service
Customer Service At Hoover, we aim to make appliances that are reliable and long lasting. However, should your appliance need to be serviced during its working life, no one is more qualified to maintain your appliance than our own Hoover Service engineers. To book... -
Page 5: Caring For The Environment
Together, we share the responsibility to safeguard our environment for future generations. At Hoover, that means continually developing new, intelligent technologies to produce electrical appliances that perform more efficiently and use less electricity and less water. This significantly reduces the carbon footprint from your appliance. -
Page 6: Warning And Safety Instructions
If the appliance is not running properly or breaks down, switch off the power, turn off the tap and do not tamper with the appliance. Contact an authorised serviceman and ask them to use official Hoover spare parts. Warning! The company denies all liability if and when these instructions are not... -
Page 7: Unpacking The Product
Unpacking the Product Remove the machine from its packaging close to the final location of the machine. Step 1. Remove all outer packaging from the machine. Check there is no damage to the machine before continuing the installation process. Step 2. Carefully cut through the hose-retaining clip at the rear of the machine, taking care not to cut the hose itself. -
Page 8: Installation
Electricity can be extremely dangerous. Please take care when connecting your machine to the electricity supply. This washing machine must be earthed. The socket outlet and the plug on the appliance must be of the same type. Do not use multiple adapters and/or extension leads. -
Page 9: Water Supply
Water Supply This machine should only be connected to a cold-water supply. The cold-water pressure should be between 0.5 and 8 bar (0.05-0.8 Mpa). Do not connect the machine to a single outlet instantaneous water heater. Before connecting the fill hose, check that the water is running from the water supply tap to be used. -
Page 10: Connecting The Cold Water Supply
Connecting the Cold Water Supply Only one hose is required to install this machine to a cold water supply. Cold fill is an energy efficient system. Only the water required to wash the laundry is heated. There is no loss of heat in the pipeline from the hot water tank or the boiler. If your previous machine installation was hot and cold fill ensure that the hot tap is firmly closed to prevent leakage. -
Page 11: Connecting The Drainage Pipe
Connecting the drainage pipe This machine must be connected in accordance with the water supply regulations. Water bylaws prohibit connection to a surface water drain. Decide which plumbing option suits you best then follow the instructions below: Option 1 - Waste pipe connection (waste trap) Fit the hooked end support to the outlet pipe and position it at least 800mm off the floor. -
Page 12: Levelling The Machine
Levelling The Machine Your machine is heavy so care must be taken when moving it. We recommend that two people move the machine to avoid strain and possible injury. Take care not to damage flooring when moving the machine and do not drag or lift the machine by its door. - Page 13 Step 5. Select the spin programme and press the Start Pause button to start the machine. If the machine takes longer than one minute to empty check the drain hose for kinks. Installation testing is now complete. Now you have successfully installed the machine we advise that you run the machine to ensure the drum is thoroughly clean after testing and storage.
-
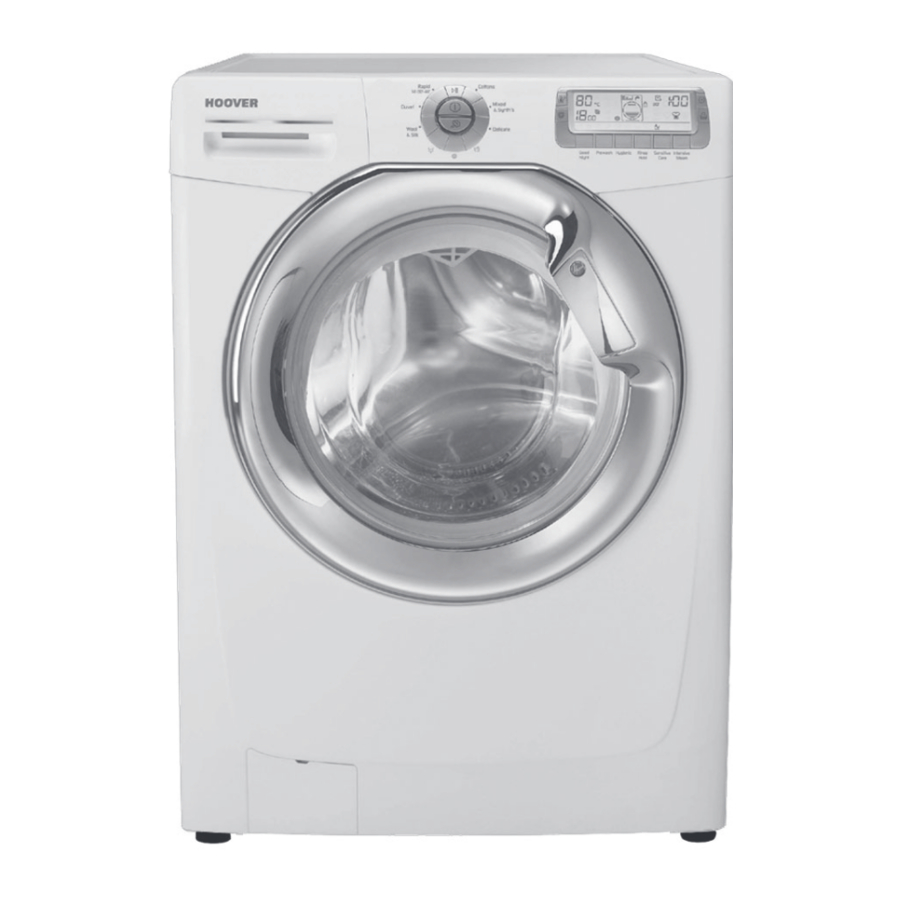
Page 14: Description Of The Machine
Description of the Machine The Hoover washing machine details are indicated below: Control Detergent Dispenser Panel Door Handle Porthole Door Filter Adjustable Feet... -
Page 15: The Control Panel
The Control Panel Start/Pause Temperature Button Delay Start On/Off Button Button Button Display Cottons 20° 60°C 40°C Stain Sensitive Wash Time Night Programme Care & Day Blaster Button Buttons Rinse Spin Speed Easy Iron Hold Button Wash Turning the Machine On Pressing the ON/OFF ( ) button will turn the machine on. -
Page 16: Digital Display
Door Locked indicator The Door Locked indicator light is illuminated when the door is fully closed and the machine is ON. When Start Pause is pressed on the machine with the door closed the indicator will flash momentarily and then illuminate. If the door is not closed the indicator will continue to flash. A special safety device prevents the door from being opened immediately after the end of the cycle. -
Page 17: Spin Speed
Spin Speed When a programme is selected the maximum spin speed allowed for that programme appears on the display. Pressing the Spin Speed button will reduce the speed by 100rpm each time the button is pressed. The minimum speed is 400rpm, or continuing to press the button will eliminate the final spin completely. -
Page 18: Wash Options
Wash Options The following options should be chosen once the required programme has been selected and BEFORE pressing the Start Pause button. The indicator light on each option button will illuminate if that option has been selected. Night & Day Press this button (available for all the washing programmes) to reduce the intermediate spin speed to 400 rpm, where applicable;... -
Page 19: Easy Iron
Sensitive Care Sensitive Care The Sensitive Care option washes your clothes in a deeper than normal water level to The Sensitive Care option washes your clothes in a deeper than normal water level to provide gentler washing for especially delicate fabrics, while detergent is removed provide gentler washing for especially delicate fabrics, while detergent is removed thoroughly with five extra rinses. - Page 20 Spin Speed The spin cycle is used to remove as much water as possible from the laundry without damaging your clothes. The recommended spin speed for each programme is already set to the highest level for that chosen programme. By pressing the Spin Speed button you can reduce the spin speed in 100rpm intervals.
-
Page 21: Automatic Features
8 Pulse Technology This washing machine is equipped with an innovative system that by means of 8 high pressure jets, sprays a mixture of water and detergent directly into the load. The “inverter motor” technology used in this machine manages the drum movement... -
Page 22: Programme Descriptions
Programme Descriptions For handling the various types of fabric and their level of dirtiness in your laundry the washing machine has different programme groups according to type of wash, temperature, spin speed and duration (see Programme Guide). Once the programme is selected, the intelligent sensor will weigh the laundry using the KG Mode and adjust the critical elements of the wash cycle depending on the weight of the laundry to ensure perfect results (available on Cotton and Synthetic cycle). - Page 23 Rinse This programme carries out three rinses with an intermediate spin (which can be reduced or excluded by using the Spin Speed option). It can be used for rinsing any type of fabric e.g. use after hand washing. Spin & Drain The spin programme completes the spin at the maximum spin speed, this can be reduced by using the Spin Speed option button or excluded if you want drain only.
-
Page 24: Programme Guide
Programme Guide Programme Fabric Type Water Water Spin Temp Temp Speed Load Recommended Size (C°) (C°) (RPM) (kg) Cottons, Non- 1600 Cottons fast Coloureds, mixed fabrics Mixed & Mixed fabrics 1000 and synthetics Synth’s Duvet Mixed fabrics Machine washable wool &... - Page 25 Detergent ** Information for laboratories test (see page 26) 1) For the programmes shown you can adjust the duration and intensity of the wash Only with the prewash button using the Wash Time button. selected 2) Using the Wash Time button on the Rapid cycle Only with the will enable you to select either a 14, 30 or prewash button...
-
Page 26: Detergent
For dosage amounts please follow the instructions on the detergent package label. Only use detergents that are suitable for use in a washing machine. You will obtain the best results from your wash with the minimum use of chemical products, and the best care for your laundry if you take into consideration the level of dirtiness as well as the type of detergent to choose. -
Page 27: Laundry
Amount of laundry ● It is possible to reduce the amount of detergent when washing only a small amount of laundry. For smaller loads use less detergent. The dosages shown on the packaging of detergents for washing delicates often already refer to a reduced wash size. -
Page 28: Washing Advice
Loading your washing machine To make further reductions of energy, water and detergent consumption, we recommend that you put a full load into your machine. Energy savings of up to 50% can be achieved by washing one full load compared to two half loads. -
Page 29: Running A Wash Cycle
Select and sort the laundry according to the wash care labels found on each garment. Loading the laundry Open the door. Put the laundry in the washing machine. Close the door by pushing it until it clicks, ensuring that no items of laundry are obstructing the lock or door seal. - Page 30 the wash cycle, the KG Mode will weigh the clothes and update the wash time. In some programs in the initial phase of the cycle there are planned spin sequences to ensure optimal wash results. Do not try to open the door when the door locked indicator is on, nor open the dispenser drawer during the wash programme.
-
Page 31: Care And Maintenance
Care and Maintenance The washing machine needs very little maintenance, but regular attention to a few small details will ensure the continued performance of your washing machine. Do not use abrasive cleaners, scouring pads, solvent-based cleaners or polishes; wiping the outside of the machine with a damp cloth will suffice. -
Page 32: Maintenance Wash
Step 4. Turn the filter anti-clockwise until it stops in the vertical position. Remove the filter and clean. Step 5. Replace the filter and turn in a clockwise direction until locked in position. Replace the stopper in the hose and close the filter cover. We recommend that the filter be cleaned frequently, at least once a month. -
Page 33: Problem Solving Guide
A charge will be made if the machine is found to be working or has been installed incorrectly or used incorrectly. If the problem persists after completing the recommended checks, please call Hoover Service (tel: 08705 400 600); they may be able to assist you over the telephone. - Page 34 Water on the floor around the washing machine... Is the fill hose tightened? If so, replace the rubber washers and re-tighten. ● Is the standpipe or the household drain blocked? If so, clear the blockage yourself ● or call a plumber.
-
Page 35: The Door Will Not Open
Remember, you may be charged for the service call if incorrect installation or misuse causes a problem with your machine. If the following error codes are displayed, switch OFF the machine and contact Hoover Service: 0, 1, 4, 5, 7 and 8. -
Page 36: Power Failure
Open the door and remove the load. The door can be opened approximately 2 minutes after the power failure. Do not force open the door. Further Problem Solving advice can be found on the After Sales Service pages of our website www.hoover.co.uk... -
Page 37: After Sales Service
After Sales Service Customer Service At Hoover, we aim to make appliances that are reliable and long lasting. However, should your appliance need to be serviced during its working life, no one is more qualified to maintain your appliance than our own Hoover Service engineers. To book... - Page 38 A number of accessories can also be purchased using the above contact details. Brochures At Hoover, we produce a range of home appliances including vacuum cleaners, cooling appliances, washing machines, tumble dryers, dishwashers, cookers and built-in appliances. If you would like a brochure for any of our product ranges please call our head office...
- Page 40 ® Note: Hoover policy is one of continuous development and accordingly we reserve the right to alter specification without notice. The manufacturer declines all responsibility for errors printed in this instruction manual. Hoover Ltd. Pentrebach, Merthyr Tydfil, Mid Glamorgan, CF48 4TU...
Need help?
Do you have a question about the washing machine and is the answer not in the manual?
Questions and answers
Hoover H wash350 hello I **** struggling to know which programme to use and can't figure out with pdf Yesterday I tried the eco setting, it lasted 3 Hours!!! I'm just trying to find the best programme settings ecologically and economically for a normal wash. Thank you
The best program settings for an ecological and economical normal wash on the Hoover H Wash 350 washing machine are the standard cotton programs at 40°C or 60°C. These are designed to clean normally soiled cotton laundry using the least combined energy and water.
This answer is automatically generated