
Related Manuals for Mhouse WG2


Summary of Contents for Mhouse WG2
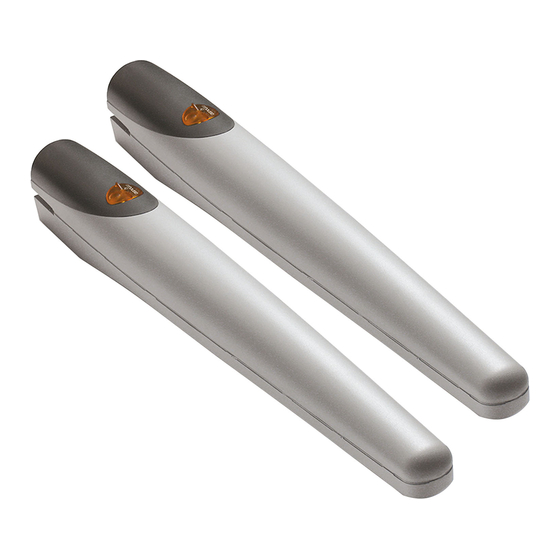
- Page 1 MhouseKit WG2 For power-operated swing gate Installation instructions and warnings, and User Manual IS0003A00EN_28-03-2011...
-
Page 3: Table Of Contents
CONTENTS GENERAL SAFETY WARNINGS AND PRECAUTIONS MAINTENANCE STEP 9 STEP 1 PRODUCT DISPOSAL KNOWLEDGE OF THE PRODUCT AND PREPARATION FOR INSTALLATION STEP 2 FURTHER INFORMATION 2.1 - PRODUCT DESCRIPTION AND INTENDED USE STEP 10 2.2 - COMPONENTS USED TO SET UP A COMPLETE SYSTEM 10.1 - ADVANCED SETTINGS 10.2 - OPTIONAL ACCESSORIES PRELIMINARY CHECKS FOR INSTALLATION... -
Page 4: General Safety Warnings And Precautions
• This manual describes how to set up a complete and optimal 2.1 - PRODUCT DESCRIPTION AND INTENDED USE automation, such as that shown in fig. 6, using all Mhouse devices that are part of the automation system named “WG2S”. Some of The devices in this kit, plus other accessories (some optional and not these devices are optional and may not be present in the kit. -
Page 5: Components Used To Set Up A Complete System
2-wire cable (“ECSbus” system). The control unit can also be - opening angle up to 120° mains-powered (230 V) or alternatively by the Mhouse PF photovoltaic The shape of the gate and weather conditions (such as the presence of system. -
Page 6: Step
Fig. 6 shows a system made b) - Refer to fig. 6 to check positions of the electrical cables in the area. using this product and other optional accessories in the Mhouse range. Then draw a similar diagram on paper, adapting it to specific require- These elements are positioned according to a typical standard layout. - Page 7 min. GRAPH 2 English – 5...
-
Page 8: Installation: Assembly And Connection Of Components
Note - These stops are not supplied in the pack and are not place the rear support on the fixing surface, in the envisaged position; part of the Mhouse product range. Caution! - check the positions in fig. 15. -
Page 9: Step
the fork slides smoothly on the worm gear of the gearmotor and that 6.3 - INSTALLING AND CONNECTING THE FLASHING there are margins of at least 5 mm on the opening and closing limits, LIGHT FL100 (fig. 30) while avoiding a situation in which an excessive section of the worm gear is not used;... - Page 10 8 – English...
- Page 11 English – 9...
- Page 12 PH100 PH100 KS100 FL100 WG1SK WG1SK Brown Brown Yellow/Green Yellow/Green Blue Blue Brown Yellow/Green Blue 10 – English...
- Page 13 A / B A / B A / B Ø = 6 mm English – 11...
- Page 14 Ø = 6 mm A / B A / B A / B A / B A / B A / B A / B A / B 12 – English...
-
Page 15: Programming
PROGRAMMING ––– STEP 7 ––– 7.4 - LEARNING THE GATE LEAF OPENING AND CLOSING ANGLES 7.1 - POWER SUPPLY CONNECTION After learning devices, the control unit must recognise the opening angles WARNINGS of the leafs. In this phase the system reads the leaf opening angle from the –... - Page 16 14 – English...
-
Page 17: Testing And Commissioning
TESTING AND COMMISSIONING ––– STEP 8 ––– solutions adopted, manufacturer’s declaration of conformity for all devices used (use appendix 1). 02. Affix a dataplate on the door, specifying at least the following data: These are the most important phases when setting up an automation, in type of automation, name and address of manufacturer (responsible order to guarantee maximum safety. -
Page 18: Further Information
FURTHER INFORMATION ––– STEP 10 ––– 5) Level of discharge of motor 1 on closing sets the duration of the “brief inversion” of the motor after a closing manoeuvre, serving to reduce the final residual force. 10.1 - ADVANCED SETTINGS 6) Level of discharge of motor 1 on opening: sets the duration of the “brief inversion”... -
Page 19: Optional Accessories
PT100: Pair of columns (height 1000 mm) with two photocells 01. Press and hold the keys T1 and T3 simultaneously for at least 5 s seconds. For information on new accessories, consult the MHOUSE catalogue or visit the website www.mhouse.com. 02. Release T1 and T3 03. - Page 20 and the PF instruction manual. this indicates the “Standby” function. When the control unit receives a command, it restores normal operation (with a short delay). This function When the automation is powered by the solar panel, 60 seconds after a is used to reduce consumption;...
-
Page 21: Adding Or Removing Devices
Caution! – If the STOP input is used to connect devices with safety functions, only the devices with 8.2 kΩ constant resistance output information on ECSBus devices, refer to the MHOUSE catalogue or visit will guarantee the fail-safe category 3. -
Page 22: Memorizing All Radio Transmitters
10.3.4 - Adding optional photocells Additional photocells to those supplied with the WG2S can be installed at any time. On an automation for 2-leaf gates, these can be positioned as shown in fig. 42. In order for the control unit to correctly recognise the photocells they must be assigned with addresses using special electric jumpers. - Page 23 Press key P1 [B] (fig. 44) for at least 3 s. When the LED P1 [A] (fig. 44) 10.4.4 - Deleting a radio transmitter switches on release the key. It is necessary to have a radio transmitter to delete it. 02.
-
Page 24: Troubleshooting
10.5 - TROUBLESHOOTING Table 10 gives possible indications on how to deal with malfunctions that may be met during installation or due to a fault. TABLE 10 (fig. 45) Symptoms Probable cause and possible solution The radio transmitter does not •... - Page 25 10.6.2 - Flashing light anomalies the light flashes at more frequent intervals (half a second); the During a manoeuvre the flashing light flashes every second; in case of flashes are repeated twice with an interval of one second; see Table 12. TABLE 12 Quick flashes Status...
- Page 26 LED P1 [D] Status Action Off * Everything OK No memorisation underway Memorisation mode 1 This is normal during memorisation mode 1 which lasts maxi- mum 10 s. Series of quick flashes, Memorisation mode 2 This is normal during memorisation mode 2 which lasts maxi- from 1 to 4 mum 10 s.
-
Page 27: Technical Specifications Of Product Components
TECHNICAL SPECIFICATIONS OF PRODUCT COMPONENTS The product WG2S is produced by Nice S.p.a. (TV) I, Mhouse is a company part of the NICE S.p.a. group. In order to improve its products, NICE S.p.a. reserves the right to modify the technical characteristics at any time without prior notice. In any case, the manufacturer guarantees their functionality and fitness for the intended purposes. - Page 28 Control unit CL2S Product type Control unit for 1 or 2 24Vdc motors for automation of automatic gates or doors, complete with radio receiver for “GTX4” transmitters Adopted technology Electronic board governed by 8-bit microcontroller with flash technology A transformer incorporated in the control unit, but separated from the board, reduces the mains voltage to the nominal 24 V voltage used in the whole automation system.
- Page 29 Indicator light with 12V 21W lamp controlled by the control units for MHOUSE automations Lamp 12V 21W fitting BA15 (vehicle type lamp) Power supply The device can only be connected to the terminals “FLASH” and “AERIAL” of the MHOUSE automation control units Ambient operating temperature -20 ÷ 50°C...
- Page 30 WG1SK,CL2S, GTX4, PH100 and FL100 are produced by NICE S.p.a. (TV) I; MHOUSE S.r.l . is a commercial trademark owned by the group Nice S.p.a. Note - The contents of this declaration correspond to declarations in the last revision of the official document deposited at the registered offices of Nice Spa available before this manual was printed.
-
Page 31: User's Guide
USER’S GUIDE ––– STEP 11 ––– • Suspend the use of the automation immediately as soon as you notice something abnormal in the operation (noises or jolting movements); failure to follow this warning may cause This guide must be stored safely and be accessible to all automa- serious danger and accidents. -
Page 32: Maintenance Operations Admissible To The User
05. To reset the automation turn the key clockwise and at the 11.5 – Remote control battery replacement same time move the gate until you hear the carriage engage. (fig. 51) 06. Remove the key and close the release cap cover by turning it When the battery charge is low, the transmitter range is reduced clockwise. - Page 33 APPENDIX 2 CE DECLARATION OF CONFORMITY In conformity with Directive 2006/42/EC, APPENDIX II, part A (EC declaration of conformity for machinery) –––––––––––––––––––– The undersigned/company (name or company name of the person responsible for commissioning of the power-ope- rated gate): ..................Address: .
- Page 36 Customer Service (03) 9364 8288 See downee.com.au for your state office Tech Support 1800 241 733 techsupport@downee.com.au downee.com.au Mhouse is a commercial trademark owned by Nice S.p.a. Nice S.p.a. Via Pezza Alta, 13 - Z.I. Rustignè 31046 Oderzo (TV), Italia Tel.
Need help?
Do you have a question about the WG2 and is the answer not in the manual?
Questions and answers