Cisco Catalyst Express 500 Getting Started Manual
Switches
Hide thumbs
Also See for Catalyst Express 500:
- Getting started manual (29 pages) ,
- User manual (15 pages) ,
- Appendix (8 pages)
Table of Contents
Advertisement
Quick Links
Getting Started Guide for the
Catalyst Express 500 Switches
INCLUDING LICENSE AND WARRANTY
2
1
1X
4
3
6
5
8
7
9
2X
PO W ER
OVE R
ET HE RN
ET
10
12
11
14
13
11 X
13 X
16
15
18
17
20
19
22
21
24
23
23 X
12 X
14 X
24 X
Getting Started Guide
C a t a l y
s t E x p
r e s s 5
0 0
SE RI ES
25
25
SY ST EM
26
ALE RT
PoE
26
SE TU P
Advertisement
Table of Contents

Related Manuals for Cisco Catalyst Express 500


Summary of Contents for Cisco Catalyst Express 500
- Page 1 Getting Started Guide Getting Started Guide for the Catalyst Express 500 Switches INCLUDING LICENSE AND WARRANTY 11 X 13 X PO W ER OVE R ET HE RN 23 X C a t a l y 12 X s t E x p...
-
Page 2: About This Guide
For more information For complete information about installing and using the switch, see the User Guide for the Catalyst Express 500 Switches online at Cisco.com > Technical Support & Documentation > Switches > Catalyst Express 500 Switches. -
Page 3: Quick Tour
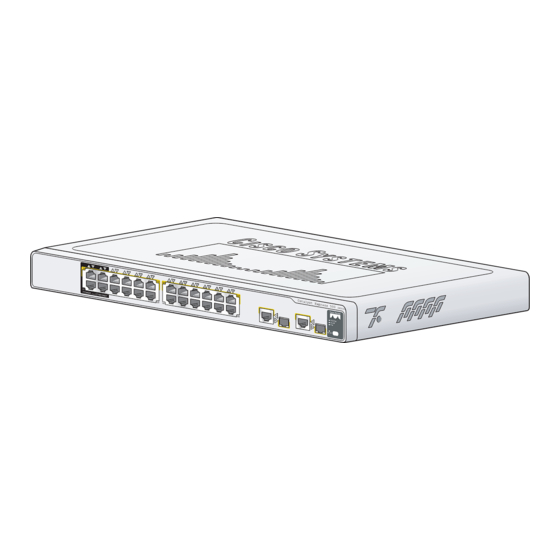
To set up the switch, you use the SETUP button, an Ethernet port, and the SYSTEM, SETUP, and port LEDs. The model shown is a Catalyst Express 500-24LC. Your switch model might look slightly different. AC power connector... -
Page 4: Unpack The Box
Unpack the box Verify that you have received the items shown here. If any item is missing or damaged, contact your Cisco representative or reseller for instructions. Switch PO WE ET HE RN OVER Ca ta ly st Ex pr... - Page 5 Make sure that nothing is connected to the switch PO W ER OVE R ET HE RN C a t a l y s t E x p r e s s 5 SE RI ES SYS TEM ALE RT RP S SET UP Power the switch...
- Page 6 Wait for the SETUP LED to blink green o E 4 PO W ER OVE R ET HE RN C i s c o S Y S T E M 2 9 6 0 se ri es + P o E - 4 A L E R T SYS TEM ALE RT...
- Page 7 PC. You might also need to enter a URL in your browser, such as cisco.com, or another well-known website. If you need help, see the “Troubleshooting” section on page 17.
- Page 8 Enter the network settings Network Settings Description Management We recommend using the default, VLAN 1. Interface The management VLAN establishes an IP (VLAN) connection to the switch. IP Assignment We recommend using the default, Static, Mode which means that the switch always has the IP address that you assign.
- Page 9 Network Settings Description Password Enter a password. The password can be from 1 to 25 alphanumeric characters, can start with a number, is case sensitive, allows embedded spaces, but does not allow spaces at the beginning or end. In the Confirm Password field, enter your password again.
- Page 10 We recommend that you apply the Cisco Smartports roles now. The ports are then correctly configured before they are connected to devices. Smartports roles provide optimal performance on port connections, including appropriate levels of reliability, security, and availability. They also help prevent many problems caused by port misconfigurations.
- Page 11 Smartports Roles Description Access Apply this role on switch ports connecting to Point wireless access points (APs). Connected to the AP are mobile devices, such as wireless laptop PCs. Printer Apply this role on switch ports connecting to a printer, such as a network printer or an external print server.
-
Page 12: Install The Switch
Safety Information document that came with your switch. For more information about installation, see the User Guide for the Catalyst Express 500 Switches online at Cisco.com. When selecting an installation site, observe these guidelines: • Cabling is away from sources of electrical noise, such as radios, power lines, and fluorescent lighting fixtures. -
Page 13: Desktop Mounting
PO W ER OVE R ET HE RN C at al ys t E xp re ss 5 0 0 SE RI ES SYS TEM ALE RT RP S SET UP Insert the switch into the 19-inch rack and align the bracket in the rack. -
Page 14: Wall Mounting
Wall-mounting Position the mounting bracket and screw on the side of the switch, rotated 90-degrees from the view shown in the rack-mounting illustration. Tighten the screw with a screwdriver. Repeat on the opposite side. Mount the switch on the wall with the front panel facing up. For the best support of the switch and cables, make sure that the switch is attached securely to wall studs or to a firmly attached plywood mounting backboard. -
Page 15: Connect Devices
Ethernet connection. Uplink port connections • Use the 10/100/1000BASE-T port or add a Cisco fiber-optic SFP module to the SFP module port for a Gigabit uplink connection to another switch. Use Category 5 cables with RJ-45 connectors to connect to a 10/100/1000BASE-T port. -
Page 16: More Information
Reselection occurs when the active link is disconnected. For a list of supported modules, see the Catalyst Express 500 Switch Release Notes on Cisco.com. For detailed instructions on installing, removing, and connecting to SFP modules, see the documentation that accompanied the module. -
Page 17: Troubleshooting
4. To end the session, close your browser window. About Cisco Network Assistant Cisco Network Assistant is a free software program that you download from Cisco.com and run on your PC. Network Assistant offers advanced options for configuring and monitoring multiple devices. - Page 18 IP address after Setup device manager screen to you have already change the switch IP address. For completed the initial more information about changing setup? the swith IP address, see the User Guide for the Catalyst Express 500 Switches online at Cisco.com.
-
Page 19: Cisco Limited Lifetime Hardware Warranty Terms
Your formal Warranty Statement, including the warranties and license agreements applicable to Cisco software, is available on Cisco.com. Follow these steps to access and download the Cisco Information Packet and your warranty and license agreements from Cisco.com. - Page 20 The Cisco warranty page appears. d. Read the document online, or click the PDF icon to download and print the document in Adobe Portable Document Format (PDF). You can also contact the Cisco service and support website for assistance: http://www.cisco.com/public/Support_root.shtml. Duration of Hardware Warranty...
- Page 21 To Receive a Return Materials Authorization (RMA) Number Contact the company from whom you purchased the product. If you purchased the product directly from Cisco, contact your Cisco Sales and Service Representative. Complete the information below, and keep it for reference.
- Page 24 CCVP, the Cisco logo, and Welcome to the Human Network are trademarks of Cisco Systems, Inc.; Changing the Way We Work, Live, Play, and Learn is a service mark of Cisco Systems, Inc.; and Access Registrar, Aironet, Catalyst, CCDA, CCDP, CCIE, CCIP, CCNA, CCNP, CCSP, Cisco, the Cisco Certified...
Need help?
Do you have a question about the Catalyst Express 500 and is the answer not in the manual?
Questions and answers