Table of Contents
Advertisement
Quick Links
Advertisement
Table of Contents
Troubleshooting

Related Manuals for ASCOM Elise3


Summary of Contents for ASCOM Elise3
-
Page 1: Installation Guide
TD 92679GB Installation Guide Elise3 12 April 2011 Ver. D... -
Page 2: Table Of Contents
4.4.4 LON Bus ....................16 4.4.5 Error Relay Output ................16 4.4.6 Connection of AUX Inputs and AUX Outputs ........17 4.5 Accessing Elise3 .................... 17 4.5.1 Access via the Network ................. 17 4.5.2 Access via the Management port ............18 4.6 Basic Configuration.................. - Page 3 7.3 Reset Back to Factory Default Settings............30 8 Troubleshooting Guide ..................31 8.1 Troubleshooting from Boot Mode ..............32 9 Related Documents .................... 33 10 Document History .................... 33 Appendix A: Move a license from ELISE2, to Elise3..........34 12 April 2011 Ver. D...
-
Page 4: Introduction
Elise3 comes in different variants; Elise3 Lite, Elise3 Standard, Elise3 LON/ISC and Elise3 LON/NSS. The Elise3 Lite is intended for connections via IP only. It has two LAN connections, two USB 2.0 ports for communication with external devices, one mini-USB port for easy management and is equipped with two galvanically isolated physical inputs and outputs. -
Page 5: About This Document
Secure Digital memory card Requirements Refer to the Data Sheet, Elise3, TD 92678GB. FCC Compliance Statements for Class B Digital Device This equipment has been tested and found to comply with the limits for a Class B digital device, pursuant to Part 15 of the FCC Rules. - Page 6 Installation Guide TD 92679GB Elise3 IC Requirements for Canada This Class B digital apparatus complies with Canadian ICES-003. Cet appareil numérique de la Classe B conforme á la norme NMB-003 du Canada. 12 April 2011 Ver. D...
-
Page 7: General Information
General Information Licenses All Elise3 modules must have a valid software license. The license number can be found in the application’s GUI in the Setup Wizard, on the Configuration page (the first view), on the Advanced Configuration page in System Setup > Common > License. New licenses are downloaded from the Ascom extranet (https://www.ascom-ws.com). - Page 8 Installation Guide TD 92679GB Elise3 All configurations can be set and changed on the Advanced Configuration page, such as system setup, changing passwords, etc. This page also contains troubleshooting and detailed configuration, for example Messaging interfaces, i.e. DECT, WLAN and Serial interfaces etc.
-
Page 9: Description
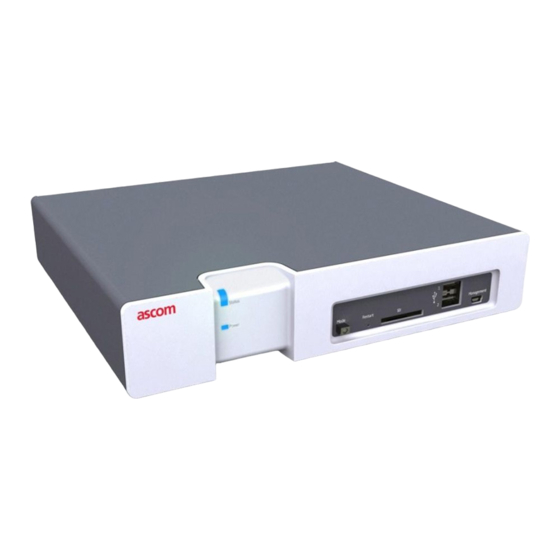
Elise3 Description The Elise3 front side has different status indications and is used for maintenance. The LEDs indicates the status of the module and the management port makes it possible to have direct connection to the module. It also has an SD card slot and two USB ports for external temporary devices. -
Page 10: Label For Ip Address/Host Name
COM ports for connection of RS232 communication, see 4.4.1 COM Ports (RS232 Communication with External Equipment) on page 15. Not applicable for the Elise3 Lite version. LAN1 Modular jacks (RJ45) for connection of 10baseT or 100baseT Ethernet TCP/IP network, see 4.4.2 Ethernet Ports... -
Page 11: Led Indications
* also used if the Power parameter conflicts with the actual setup. Figure 3. LED indications Operating Modes Besides normal operation the Elise3 can be operated in three other modes, i.e. Boot Mode, Demonstration Mode and Troubleshoot Mode. 3.4.1 Normal Operation... -
Page 12: Boot Mode
3.4.2 Boot Mode When the application running on Elise3 cannot be accessed the module can be set in Boot Mode i.e.the web interface of the module. From this GUI it is possible to install new software, start Troubleshoot Mode, see settings and to reset the module back to factory default settings. -
Page 13: Installation And Configuration
Elise3 Installation and Configuration The Elise3 can be mounted vertically on a wall or be placed horizontally in a 19" rack. It must be fixed by screws or other fixtures to the wall or rack, and must not be easily movable. -
Page 14: Rack Mounting
TD 92679GB Elise3 4.2.2 Rack Mounting The Elise3 can be either front mounted or reverse mounted in a 19´´ rack. Accessories for mounting in a rack (ordered separately) Standard 19´´ rack kit: Small left/right brackets for two front mounted Elise3 modules and one big bracket for one front mounted Elise3 module. - Page 15 Installation Guide TD 92679GB Elise3 Front mounted double • Requires the standard 19´´ rack kit Use the supplied assembly brackets and fasten the two modules together, both on the rear side and on the bottom side, as shown in the two figures below.
- Page 16 Installation Guide TD 92679GB Elise3 Fasten the assembly brackets in the rack, see below (screws not included) Figure 7. Figure 7. Rear mounted single in rack Rear mounted double • Requires the reverse 19´´ rack kit Use the supplied assembly brackets and mount the two modules together, both on the rear side and on the bottom side, see figure below.
-
Page 17: Supply Voltage
Elise3 Supply Voltage Elise3 can be connected to an external power supply (12-24 V DC battery or power source) as a complement to the primary power supply (100-240 V AC). If the primary power supply fails it switches over to the external power supply automatically, without any negative influence on the running application. -
Page 18: Connections
4.4.1 COM Ports (RS232 Communication with External Equipment) Requires the Elise3 Standard or LON variant. If the RS232 ports can be used or not is also depending on the application software. The Elise3 has two identical RS232 connectors; COM1 and COM2. How to connect external equipment to the Elise3 is described in the documentation of the software application. -
Page 19: Lon Bus
Error relay output Figure 14. Error relay When the Elise3 is running the relay is closed, i.e. the error relay output is activated when the relay releases, for example if the power is dropped. At power up or restart the relay is... -
Page 20: Connection Of Aux Inputs And Aux Outputs
Galvanic isolation of the inputs and outputs is provided by using a separate power supply. If galvanic isolation is not needed and Elise3 is supplied by an external 12 V power source, the supply voltage can be taken from the 12-24 V DC screw connector by connecting +V Ext to “+”... -
Page 21: Access Via The Management Port
Figure 16. Connection via the Management port The management port can be used when Elise3 has not got a valid and unique IP address or when the IP address has been changed, i.e. if Elise3 has been moved from one network to another. - Page 22 Mode button LED. Locate the required “elise3.inf” driver and save it on your PC. Press the Mode button twice again to change the mode to network access The Found new hardware..dialogue box opens.
- Page 23 Mode button LED. Locate the required “elise3.inf” driver and save it on your PC. Press the Mode button twice again to change the mode to network access Select Control Panel > Hardware and Sound.
-
Page 24: Basic Configuration
Basic Configuration Elise3 needs to be configured with basic settings. Some products settings can be set in an installation Setup Wizard accessible from the web interface. The Setup Wizard will start automatically the first time the module is accessed from the web browser and every time until the configuration has been saved. -
Page 25: Change Secured Settings
The clock in different Elise3 modules can be set from the web browser, A-bus (i.e. Central Unit in System 900) or a time server. To be able to synchronize the clocks in different Elise3 modules a time server has to be used. Depending on software application and license, an Elise3 can be used as time server. -
Page 26: Time Synchronization
TD 92679GB Elise3 An Elise3 can also set the time in connected systems, for example System 900. In this case, the Elise3 will send its time to the connected system once every 24-hour period and when the time is updated. - Page 27 • No module addressing 127.0.0.1/S900 The data is sent to the System 900 interface in the Elise3 module, which sends the data on the A-bus without the module address defined. The Central Unit in the system has to be configured to distribute the data to a module. It is also possible to address the System 900 interface on another module by entering its IP address instead of 127.0.0.1 (localhost).
-
Page 28: Working In Boot Mode
Elise3 Working in Boot Mode If no application is running on Elise3 or if the application cannot be started, the Boot Mode can be used for installing new software, see settings, performing factory reset, troubleshooting and also starting up in normal operation again. If the module detects several major errors (for example restart loop), the module can set itself in Boot Mode. -
Page 29: Network Settings
Installing new software is normally done from the application’s web interface, refer to the application documentation. But if the application’s web interface cannot be reached it is possible to put Elise3 in Boot Mode, access the modules web interface and install new software from there. -
Page 30: Return To Normal Operation
Installation Guide TD 92679GB Elise3 Two software versions can be installed on the module. One software version is active and the other inactive in normal operation. Figure 20. Figure 22. Software installation in Boot Mode Put the module in Boot Mode, see 5.1 Set the Module in Boot Mode... -
Page 31: Run In Demonstration Mode
Installation Guide TD 92679GB Elise3 Run in Demonstration Mode The Demonstration Mode can be set when the module is running in normal operation, either via the application's web interface or manually by using the Mode button. Using the Mode button: Press and hold the Mode button for 10 seconds. -
Page 32: Maintenance
Installation Guide TD 92679GB Elise3 Maintenance Software Management 7.1.1 Installation of Software Normally the installation of software is done from the application’s web interface but it can also be done in Boot Mode, see 5.1.4 Install Software in Boot Mode on page 26. -
Page 33: Restarting The Elise3
Installation Guide TD 92679GB Elise3 Restarting the Elise3 7.2.1 Controlled Restart via the Restart Button When a controlled restart is performed via the Restart button, all ongoing jobs on the module ends in a controlled way and everything is logged. When the module has shut down the user can unplug the power cable or wait one minute for the module to automatically start up again. -
Page 34: Troubleshooting Guide
DHCP server. • The installation of the USB port Try the following. driver has been successful, but you Open the Command Prompt still cannot connect to your Elise3 via and type: the USB network. route DELETE 192.5.36.229 arp -d 192.5.36.229 •... -
Page 35: Troubleshooting From Boot Mode
Installation Guide TD 92679GB Elise3 Troubleshooting from Boot Mode Via the Troubleshoot button in the Boot Mode GUI, you get access to the application's web interface (no applications are running) and will be able to see logs and other information. When troubleshooting, it is always a good idea to examine the log files, since they provide additional information that may prove useful. -
Page 36: Related Documents
Installation Guide TD 92679GB Elise3 Related Documents Data Sheet, Elise3 TD 92678GB Elise3 Getting Started, including Safety Instructions M0282501 Function Description, Activity Logging in Unite TD 92341GB Applicable documentation for the software application Document History For details in the latest version, see change bars in the document. -
Page 37: Appendix A: Move A License From Elise2, To Elise3
Appendix A: Move a license from ELISE2, to Elise3 A license for a product on ELISE2 can, if the license is compatible with Elise3, be moved to Elise3 by moving the Module key from the ELISE2 module to the Elise3 module. Example of compatible products are UniteCM and Mobile Monitoring Gateway (MMG).
Need help?
Do you have a question about the Elise3 and is the answer not in the manual?
Questions and answers