Table of Contents
Advertisement
Para uma utilização segura e correcta, leia o "Informações de utilização" antes de utilizar o projector.
Перед использованием проектора внимательно прочтите «Замечания об эксплуатации», чтобы обеспечить безопасную и
For trygg og sikker bruk, må du lese "Merknad om bruk" før du bruker projektoren.
Dla bezpiecznego i prawidłowego używania przed użyciem projektora należy przeczytać część "Uwaga dotycząca użytkowania".
A biztonságos és helyes használat érdekében feltétlenül olvassa el a "Használattal kapcsolatos megjegyzés" című részt, mielőtt használná a
Aby bylo zajištěno bezpečné a správné používání, před používáním tohoto projektoru si přečtěte „Upozornění".
Varmistaaksesi turvallisen käytön varmista, että luet "Heijastusasetukset" ennen projektorin käyttöä.
Pour garantir une utilisation sécurisée et appropriée, veuillez lire la «Instructions d'utilisation» avant d'utiliser le projecteur.
For safe and correct use, be sure to read the "Usage Notice" before using the projector.
Para un uso seguro y correcto, asegúrese de leer el "Aviso acerca del uso" antes de utilizar el proyector.
Voor veilig en juist gebruik, dient u het "Gebruiksmededeling" te lezen voordat u de projector gebruikt.
Es empfiehlt sich, vor Verwendung des Projektors die „Bedienungshinweise" aufmerksam durchzulesen, um Bedienungsfehler und Sicherheitsrisiken
Af sikkerhedsgrunde skal du sørge for at læse "Bemærkninger om anvendelse", før du bruger projektoren.
För säker och korrekt användning se till att läsa "Anmärkning om användningen" innan projektorn används.
Per un uso sicuro e corretto, assicurarsi di leggere "Avvertenze per l'uso" prima di utilizzare il proiettore.
为安全正确地使用投影机,务必在使用之前阅读"使用注意事项"。
為確保安全及正確使用,使用投影機前務必閱讀「使用須知」。
правильную эксплуатацию.
zu vermeiden.
készüléket.
Руководство пользователя
Podręcznik użytkownika
Felhasználói kézikönyv
Gebruikshandleiding
Manual do utilizador
Uživatelská příručka
Manual del usuario
Benutzerhandbuch
Manuel Utilisateur
Brugervejledning
Användarmanual
Bruksanvisning
Manuale d'uso
User's Manual
Käyttöopas
用户手册
使用手冊
Advertisement
Table of Contents

Subscribe to Our Youtube Channel
Related Manuals for Ricoh PJ WX5140


Summary of Contents for Ricoh PJ WX5140
- Page 1 Руководство пользователя Podręcznik użytkownika Felhasználói kézikönyv Gebruikshandleiding Uživatelská příručka Manual do utilizador Manual del usuario Benutzerhandbuch Manuel Utilisateur Brugervejledning Användarmanual Bruksanvisning Manuale d’uso User’s Manual Käyttöopas 用户手册 使用手冊 为安全正确地使用投影机,务必在使用之前阅读“使用注意事项”。 Aby bylo zajištěno bezpečné a správné používání, před používáním tohoto projektoru si přečtěte „Upozornění“. Af sikkerhedsgrunde skal du sørge for at læse "Bemærkninger om anvendelse", før du bruger projektoren.
-
Page 2: Table Of Contents
Table of Contents Table of Contents ......1 Default Settings 2 ......... 39 Default Settings 2 | 3D Projection ..42 Usage Notice ........2 Default Settings 2 | Network Setting ..43 Precautions .........2 Display Status ........44 Safety Labels of This Machine ....6 Controls via Network.....45 Regulation &... -
Page 3: Usage Notice
Usage Notice Precautions Follow all warnings, precautions and maintenance as recom- mended in this user’s guide to maximize the life of your unit. ■ This apparatus must be earthed. Warning- ■ Do not look into the projector’s lens when the Warning- lamp is on. - Page 4 Usage Notice ■ Never operate this unit on AC power during Caution- a thunderstorm. If you see lightning or hear thunder, never touch the unit, cables and/or pe- ripherals. An electric surge caused by the storm, may result in an electrical shock or damage to the unit.
- Page 5 Usage Notice ■ This product incorporates glass components, in- Caution- cluding a lens and a lamp. If these should break, please handle with care to avoid injury and con- tact your sales representative for repair service. Avoid any broken pieces of glass since they may cause injury.
- Page 6 Usage Notice ■ After unpacking this product, read the manual carefully, and follow all the operating and other instructions. ■ Turn off the product before cleaning. ■ Use a soft cloth moistened with mild detergent to clean the display housing. ■...
-
Page 7: Safety Labels Of This Machine
Usage Notice Safety Labels of This Machine 1 Do not block the air intake or exhaust. Doing so could cause a fire due to internal overheating. Do not place your hands, face, or other objects near the air exhaust, the lamp cover or the bottom of the unit. -
Page 8: Regulation & Safety Notices
Regulation & Safety Notices This appendix lists the general notices of your Projector. Notice: Users in the United States of America FCC notice MODEL NAME: PJ WX5140 / PJ WX5150 TRADE NAME: PROJECTOR MODEL NAME: PJ WX5140 / PJ WX5150 Tested To Comply... -
Page 9: Declaration Of Conformity For Eu Countries
Usage Notice RESPONSIBLE PARTY: Ricoh Americas Corporation 5 Dedrick Place, West Caldwell, NJ 07006 Phone: 973-882-2000 Notice: Shielded cables All connections to other computing devices must be made using shielded cables to maintain compliance with FCC regulations. Caution Changes or modifications not expressly approved by the manufacturer could void the user’s authority,... -
Page 10: Overseas Affiliates And Noise Emission Information
Usage Notice CE Marking Traceability Information (For EU Countries Only) Manufacturer: Ricoh Co., Ltd. 3-6 Nakamagome 1-chome, Ohta-ku, Tokyo. 143-8555, Japan Authorized representative: Ricoh Europe PLC 20 Triton Street, London. NW1 3BF, United Kingdom Overseas Affiliates and Noise Emission Information In accordance with TUV “GS Symbol”... - Page 11 Usage Notice reduce potential impacts on the environment and human health, which could otherwise result from inappropriate handling. Recycling of products helps to conserve natural re- sources and protect the environment. For more detailed information on collection and recycling systems for this product, please contact the shop where you purchased it, your local dealer or sales/service representatives.
-
Page 12: Remote Control Batteries
Usage Notice REMOTE CONTROL BATTERIES Warning • Never throw batteries into a fire. Using the batteries improperly may cause them to explode or leak and may result in seri- ous injury. If battery-leaking fluid contacts skin, wash the fluid off immediately with clean water and consult a doctor. - Page 13 Usage Notice Following information is only for EU-member states: [Disposal of batteries and/or accumulators] The crossed out wheeled dust bin symbol indicates that batteries and/or accu- mulators must be collected and disposed of separately from household waste. If the battery or accumulator contains more than the specified values of lead (Pb), mercury (Hg), and/or cadmium (Cd) defined in the Battery Directive (2006/66/EC), then the chemical symbols for lead (Pb), mercury (Hg) and/or cadmium (Cd) will appear below the crossed out wheeled dust bin symbol.
-
Page 14: Other Information
Usage Notice Other Information Copyrights to Images When projecting images using the projector, be careful not to infringe the copyright of protected materials. The following are examples that may infringe the copy- right of protected materials. • Broadcasting images or movies for commercial purposes •... -
Page 15: Introduction
Introduction Product Features Outstanding features include: True PJ WX5140 / PJ WX5150 - WXGA(1280×800) ad- ■ dressable pixels Single chip DLP technology ■ ® NTSC3.58/NTSC4.43/PAL(B/D/G/H/I/M/N)/ ■ SECAM (B/D/G/K/K1/L) and SDTV(480i/576i), EDTV(480p/576p), HDTV(720p/1080i/1080p) compat- ible Multi-Auto functions: Auto detection, Auto image and ■... -
Page 16: Package Overview
Introduction Package Overview This projector comes with all the items shown below. Check to make sure your unit is complete. Contact your dealer immedi- ately if anything is missing. Due to the differ- Projector with lens cap Wireless Remote Control Batteries for Remote ence in applications Control (AAA/R03) -
Page 17: Product Overview
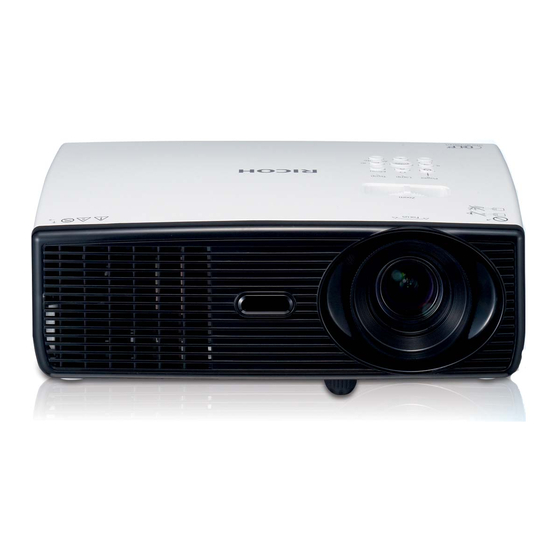
Introduction Product Overview 1. Control panel 2. Zoom lever 3. Ventilation (inlet) 4. Speaker 5. Focus ring 6. Ventilation (outlet) 7. Remote sensor 8. Lens 9. Lens cap 10. Connection ports 11. Adjustable feet English... -
Page 18: Connection Ports
Introduction Connection Ports 1. LAN terminal 2. Service Port 3. HDMI In terminal 4. Computer 1 In terminal 5. Monitor Out terminal 6. S-Video In terminal 7. Video In terminal 8. Audio 2 In terminal (For Computer 2 In) 9. Audio Out terminal 10. -
Page 19: Control Panel
Introduction Control Panel Lamp indicator Indicate the projector’s lamp status. Temp indicator Indicate the inside of the projector’s temperature status. Power indicator Indicate the projector’s power status. Power Refer to the “Power On/Off the Pro- jector” section. (See pages 24~25) Volume - Decrease speaker volume. -
Page 20: Remote Control
Introduction Remote Control Infrared trans- Sends signals to the projector. mitter Indicator Enter Select or confirm settings. Four to select items or Directional make adjustments to your selection. Select Keys AV Mute Momentarily turn off/on the audio and video. Freeze Pause the screen image. - Page 21 Introduction Dim the projector lamp which will lower power consumption and extend the lamp life. Volume +/- Increase/decrease speaker volume. Video Press “Video” to choose Video in terminal. HDMI Press “HDMI” to choose HDMI in terminal. Magnify Enlarge part of the screen image. You cannot use this function when “Na- tive”...
-
Page 22: Remote Control Battery Installation
Introduction Remote Control Battery Installation Press firmly and Install new batteries (AAA/ Slip the cover back over the slide the battery R03). Ensure that you have batteries until it snaps into cover off. the batteries’ polarity (+/–) place. Do not mix different aligned correctly. -
Page 23: Basic Operations
Basic Operations Connecting the Projector Connect to Computer/Notebook Audio Output Make sure that the power plug is fully inserted into both the projector AC inlet and the wall outlet. The AC outlet must be near this equipment and must be easily ac- cessible. -
Page 24: Connect To Av Equipment
Basic Operations Connect to AV Equipment Make sure that the DVD player, HDTV receiver power plug is fully inserted into both the projector AC inlet and Video Output Audio Output the wall outlet. The AC outlet must be near this equipment and must be easily ac- cessible. -
Page 25: Powering On/Off The Projector
Basic Operations Powering On/Off the Projector Powering On the Projector 1. Ensure that the power cord and signal cable are securely connected. The Power indicator will turn red. 2. Remove the lens cap. 3. Turn on the lamp by pressing “Power” on the control panel or the remote control. -
Page 26: Powering Off The Projector
Basic Operations Powering Off the Projector 1. Press the “Power” and you will see a message as below on the on-screen display. Press the “Power” again to turn off the projector lamp. 3. The cooling fan continues to operate for about 60 seconds for cooling cycle and the Power indicator will flash red. -
Page 27: Warning Indicator
Basic Operations Warning Indicator When the “Temp” indicator lights red, it indicates the pro- jector has overheated. The projector will automatically shut itself down. When the “Lamp” indicator lights red, and you see the mes- sage below displays on-screen, the projector has detected that the lamp is approaching its end of life. -
Page 28: Adjusting The Projected Image
Basic Operations Adjusting the Projected Image Adjusting the Position of Projector Image The projector is equipped with adjustable feet to raise and lower the image to fill the screen. 1. Use to fine-tune the display angle You can raise the projector front up to 6.5 degrees by rotating the Front Adjustable feet... -
Page 29: Adjusting The Projector Zoom And Focus
Basic Operations Adjusting the Projector Zoom and Focus You may turn the zoom lever to zoom in or out. To focus the image, rotate the focus ring until the image is clear. Focus at distances from 3.28 to 32.8 feet (1.0 to 10.0 meters). ... - Page 30 Basic Operations PJ WX5140 / PJ WX5150 Screen Size W x H Projection Distance (D) Diagonal length Offset (Hd) (inch) size of (inch) (feet) 16:10 Screen Width Height Width Height wide tele wide tele (feet) 0.65 0.40 25.4 15.9 0.05 0.86...
-
Page 31: User Settings
User Settings Using the On Screen Display (OSD) The Projector has a multilingual On Screen Display that allows you to make image adjustments and change a variety of set- tings. How to operate To open the OSD, press “Menu” on the Control Panel or Remote Control. -
Page 32: Image Adjustment
User Settings Image Adjustment Contrast The contrast controls the degree of difference between the lightest and darkest parts of the picture. Adjusting the contrast changes the amount of black and white in the image. Press the to decrease the contrast. ... -
Page 33: Picture Mode
User Settings Picture Mode There are many factory presets optimized for various types of im- ages. Use the to select the item. Bright: Mode for emphasizing brightness. Standard: Mode for optimizing the balance between brightness and color reproduction. Natural: Mode for emphasizing color reproduction. -
Page 34: Image Adjustment | Position
User Settings Image Adjustment | Position Phase Eliminate flicker from the image displayed. Use the to adjust the value. “Position” is only Frequency supported in Analog signal. Adjust the number of total dots in one horizontal period. Use the to adjust number to match your PC image. H-position (Horizontal Position) Press the to move the image left. -
Page 35: Display Settings
User Settings Display Settings Aspect Use this function to choose your desired aspect ratio. Normal: Enlarge an input image to fit the screen by detecting the input signal aspect ratio. The image may not be displayed cor- rectly depends on the aspect ratio. If so, select other aspect ratio. Full: Displays an input image by enlarging it to fill the entire ... - Page 36 User Settings Start-up Screen Use this function to set the desired startup screen when the projec- tor is turned on. If changes are made they will take effect the next time the projector is powered on. On: Display the startup screen. ...
- Page 37 User Settings Confirm Logo: Display the registered user logo. Reset Logo: Return to the default logo. Image format: • Only capture of external source is supported. • Capture of background color is not supported. • If the source image resolution is bigger than 2368512 bytes (24-bit WXGA image resolution) image size, the splash image will be captured after center-cropping the source image to a maximum of 2368512 bytes by retaining the source aspect ratio.
-
Page 38: Default Settings 1
User Settings Default Settings 1 Power Off on No Signal Sets the countdown timer interval. The countdown timer will start, when there is no signal being sent to the projector. The projector will automatically power off when the countdown has finished. Auto Input Search When this function is turned “On”, the projector will search for other signals if the current input signal is lost. -
Page 39: Projection Mode
User Settings Language Choose the multilingual OSD. Press “ENTER” to open the sub menu and then use the key to select your preferred language. Press “ENTER” to finalize the selection. Projection Mode Stnd. (Standard) The factory default setting. The image is projected straight on the screen. -
Page 40: Default Settings 2
User Settings Default Settings 2 High Altitude Mode When “On” is selected, the fans will spin faster. Set High Altitude mode to “On” when the projector is used over 2500ft (750m) eleva- tion. Key Lock When the keypad lock function is “On”, the control panel will be locked. -
Page 41: Closed Caption
User Settings 3. Enter the new password and press “ENTER” to confirm. 4. Enter new password again and press “ENTER” to confirm. ■ Change Password The password has to 1. Press “ENTER” to input old password. be 6 digits. Use number button ... -
Page 42: Network Setting
User Settings Due to the different broadcasting or signaling system, it may not operate correctly in other regions or countries where TV programs do not support closed captioning. Closed Caption may not appear correctly depending on the signal conditions or the recording conditions of videotapes. -
Page 43: Default Settings 2 | 3D Projection
User Settings Default Settings 2 | 3D Projection 3D Projection Off: Choose “Off” to display normal (2D) picture. On: Choose “On” to display 3D format. DLP Link Compatible 3D source, 3D content and Select “On” to display 3D image viewing with DLP Link 3D glasses. active shutter glasses are required for 3D Optional sold 3D glasses uses DLP link system to synchronize with... -
Page 44: Default Settings 2 | Network Setting
User Settings Default Settings 2 | Network Setting Connection Status Display the network connection status. MAC Address Be sure to set “Control Method” to Display MAC address. “LAN” before start- ing to set Network DHCP setting. If you change the setting from one to another, when you exit the OSD menu, the new setting will take effect on next open. -
Page 45: Display Status
User Settings Display Status Input Input source name. Resolution Resolution (in dots). Picture Mode Display the setting of Picture mode. Lamp Time Time of lamp use. Total Time Total Time, including Eco mode and Standard mode. Lamp Reset Count Display the number of projector replacement lamps. Firmware Version Display Firmware version. -
Page 46: Controls Via Network
2.2 Home: This is a web page which shows basic information of your projector. There are 5 tabs and you can click a tab for specific controls. For more information, you can download a manual of web control function from the download page of the following URL. http://www.ricoh.com/ English English... -
Page 47: Installing Projector Management Utility
Controls via Network Managing the Projector Using Projector Management Utility Projector Management Utility conforms to the PJLink class 1 standards, and is compatible with all class 1 commands. A maximum of 100 projectors connected to the network can be managed using one computer. Projector Management Utility operating environment is described below. -
Page 48: Troubleshooting
Troubleshooting If you experience trouble with the projector, refer to the follow- ing information. If the problem persists, please contact your local dealer or service center. Problem: No image appears on screen Ensure all the cables and power connections are correctly and ... - Page 49 Troubleshooting Problem: The screen of the Notebook computer is not dis- playing a presentation If you are using a Notebook PC: Some Notebook PCs may deactivate their own screens when a second display device is in use. Each has a different way to be reactivated.
- Page 50 Troubleshooting Problem: Lamp burns out or makes a popping sound When the lamp reaches its end of life, it will burn out and may make a loud popping sound. If this happens, the projector will not turn on until the lamp module has been replaced. To replace the lamp, follow the procedures in the “Replacing the Lamp”.
- Page 51 Troubleshooting Problem: Indicator lighting message POWER TEMP LAMP indicator indicator indicator Message (Red/Blue) (Red) (Red) Standby (Red) Normal (Power on) (Blue) Powering up (Warming up) Flashing Blue (0.5 sec) Power off (Cooling Down) Flashing Red (0.5 sec) Temperature Error (Over temp. (Blue) On Event) Temperature Error (Over temp.
- Page 52 Troubleshooting Problem: Message Reminders Temperature Error - the projector is overheat inside. Check the environmental condition. Replacing the lamp - the lamp is about to reach its maximum life- time. Prepare to replace it soon. Fan Error - the cooling system fan is not working. ...
-
Page 53: Replacing The Lamp
Replacing the lamp The projector will detect the lamp life itself. It will show you a warning message When you see this message, change the lamp as soon as pos- sible. Make sure the projector has been cooled down for at Warning: To avoid least 60 minutes before changing the lamp. -
Page 54: Appendices
Appendices List of Compatible Signals A. VGA Analog (1) VGA Analog - PC Signal V.Frequency H.Frequency Modes Resolution Clock (MHz) (Hz) (kHz) 640 x 480 31.47 25.18 640 x 480 37.86 31.50 640 x 480 37.50 31.50 640 x 480 43.27 36.00 640 x 480... - Page 55 Appendices A. VGA Analog (2) VGA Analog - Extended Wide V.Frequency H.Frequency Modes Resolution Clock (MHz) (Hz) (kHz) WXGA 1280 x 768 47.78 79.50 1280 x 768 60.29 102.25 1280 x 768 68.63 117.50 1280 x 720 44.80 74.25 1280 x 800 49.60 83.50 1440 x 900...
- Page 56 Appendices B. HDMI (1) HDMI -PC Signal SXGA 1152 x 864 67.50 108.00 1152 x 864 77.10 121.50 1280 x 1024 63.98 108.00 1280 x 1024 77.90 134.60 1280 x 1024 79.98 135.00 1280 x 1024 91.15 157.50 QuadVGA 1280 x 960 75.00 126.00 PowerBook G4...
-
Page 57: Configurations Of Terminals
Appendices Configurations of Terminals Terminal: Computer in 1/2 (Mini D-sub 15 pin) Red (R/Cr) Input/R Output DDC 5V / NC* Green (G/Y) Input/G Output Ground (Ver. sync.) Blue (B/Cb) Input/B Output DDC Data / NC* Ground (Horiz.sync.) Horiz. sync. Input / Output (Composite H/V sync. -
Page 58: (Mini D-Sub 15 Pin)
PJ WX5140: High-pressure mercury lamp (230W) PJ WX5150: High-pressure mercury lamp (300W) Lamp Life PJ WX5140: 2500 hours typical (Full Mode) / 4000 hours typical (ECO Mode) PJ WX5150: 2500 hours typical (Full Mode) / 3500 hours typical (ECO Mode) Projection screen size... -
Page 59: Trademarks
Appendices Trademarks • DLP is trademarks of Texas Instruments. • IBM is a trademark or registered trademark of International Business Machines Corporation. • Macintosh, Mac OS X, iMac, and PowerBook are trademarks of Apple Inc., registered in the U.S. and other countries. •... - Page 60 © 2012...
- Page 61 Y018-6225 Y018-6232 Y018-6234 Y018-6231 Y018-6229 Y018-6230 Y018-6233 Y018-6228 Y018-6224 Y018-6223 Y018-6226 Y018-6222 Y018-6236 Y018-6235 Y018-6237 Y018-6227 Y018-6220...
Need help?
Do you have a question about the PJ WX5140 and is the answer not in the manual?
Questions and answers