Table of Contents
Advertisement
Advertisement
Table of Contents

Related Manuals for Geller SX-590


Summary of Contents for Geller SX-590
- Page 1 SX-590 SX-590 QUICK SET-UP GUIDE...
-
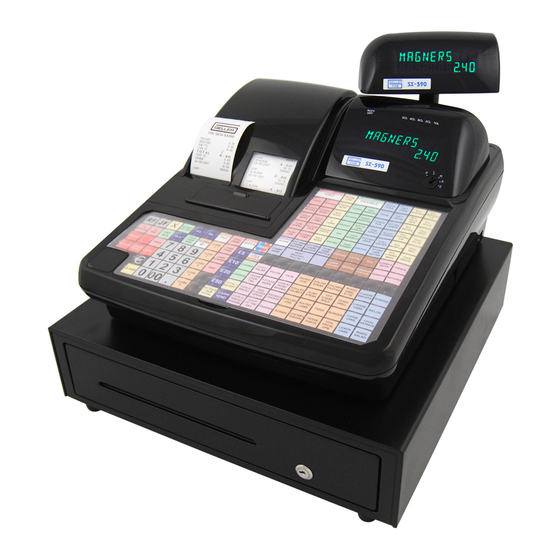
Page 2: S X-590 Features
58mm Receipt & Journal Printers ü 5 Server Holds With Auto Store (Optional Pre Set Time Limit) ü PC Link (Geller David Utility Available) with Pre-Installed Demos (Bar, Retail/Scanning and Fish/Chip Demo) ü Scanning with Barcode Auto Search, Price Check & Plu Delete Features ü... -
Page 3: Table Of Contents
Pin Outs for SX-590 to PC Communications Cable Pin Outs for SX-590 Modem to SX-590 Communications Cable Pin Outs for the Elco Switch Multiplexor Direct to SX-590 Pin Outs for the Elco Switch Multiplexor via the Hayes Modem CONFIGURING MODEM SETTINGS... - Page 4 MULTIPLEXOR ELCO SWITCH CONFIGURATION GRAPHICAL LOGO FOR SX-590 Creating the Graphical Logo Downloading Logo to ECR SCANNING CONFIGURATION ADDING A PLU BARCODED ITEM TO THE ECR Updating the Price/Name of Previously Scanned Products SCANNING UN-PROGRAMMED PRODUCTS IN THE ‘R’ POSITION...
-
Page 5: Paper Rolls
PAPER ROLLS INSTALLING THE PAPER ROLLS Your cash register features a thermal printer which uses two rolls of 58mm standard bond paper; one roll (left side) is for the customer receipt and the other roll is for the journal record (right side). If a customer receipt is not required, a paper saving option is available by pressing the [ON/OFF] key on the keyboard. -
Page 6: Installing The Paper Roll For The Receipt
Installing the Paper Roll for the Receipt From the front of the cash register, hold onto the rear of the printer cover and lift it up Push the platen release button (left) to raise the paper guide Load the paper roll into the receipt location, and put the paper end to this side Depress the paper guide (see fig 2) Keep the paper guide to this end and close the printer cover Fig 2... -
Page 7: Removing The Paper Rolls
Insert the end into the slot in the take-up reel and wind two or three turns of paper around the reel (See fig 3) Load the take-up reel into the support Press the ‘J’ feed key (See fig 4) Close the printer cover Removing the Paper Rolls Fig 4 To remove the paper roll for the receipt... -
Page 8: Sx-590 Initialising
SX-590 INITIALISING WARNING This procedure will clear all sales data and program settings • Turn off the power at the mains (Or side switch) • Turn the key to the ‘P’ position with the ‘MA’ Key Hold down the ‘CLR’ key and power on the ECR. -
Page 9: Programming Tips
The SX-590 does have a soft keyboard, but when the key is turned to the ‘P’ position, the default programming keyboard is... -
Page 10: Setting The Date
DATE &TIME SETTINGS Setting the Date • Turn the key to the ‘P’ position on the Control Lock • Enter the date (DD/MM/YYYY) press # / NS Example 20032008 = 20 March 2008 Note The # / NS key must be the default button which can be found on the standard programming layout. - Page 11 PROGRAMMING INFORMATION This is the programming layout for the SX-590 Flat ECR...
-
Page 12: Flag Set-Up Procedure
FLAG SET-UP PROCEDURE The following flag settings will configure your SX-590 for a basic demonstration system, see below - • Turn the key to the ‘P’ position on the Control Lock • Enter the Flag Number followed by the setting required and press... - Page 13 EASY PLU PRICE & NAME CHANGES EASY PLU PRICE CHANGE • Turn the key to the ‘P’ position on the control lock • Enter the PLU Number and Press the PLU key • Enter the Price and Press the DEPT# key EASY PLU NAME CHANGE •...
- Page 14 PLU SHIFT FEATURE HALF PINTS / DOUBLE Etc.. The SX590 can now perform PLU shifts allowing you to do popular functions such as Half Pints, Doubles, Large Glasses of Wine etc. The multiplier function will also work with this feature. The First PLU Shift Range is 1 –...
-
Page 15: Quick Tender Keys
QUICK TENDER KEYS The SX590 has 4 keys to allow a quick payment of a transaction. £5.00, £10.00, £20.00 and £50.00 Keycode 072 = £5.00 Tender Keycode 073 = £10.00 Tender Keycode 074 = £20.00 Tender Keycode 075 = £50.00 Tender Please Note: Ensure MF 116 Bit 1 = 1 TOTALS ONLY ON JOURNAL PRINT The SX590 has an option for totals only on the Journal Print. -
Page 16: Tax Rates
PROGRAMMING TAX RATES Programming a Vat Inclusive value to Department 1 • Turn the key to the ‘P’ position on the Control Lock • Press 1 1 followed by the Charge Key • Enter the Tax rate 175000 followed by the TOTAL key •... -
Page 17: Additional Information
ADDITIONAL INFORMATION To Set the Drawer Alarm Delay • Turn the key to the ‘P’ position on the Control Lock • Press 5 • Enter the number of seconds required for the delay Ie 10 for ten seconds • Press the PO key ( The PO must be the default button) To Set the Clerk Hold Timer The SX590 can store an opened clerk after a pre-programmed time... -
Page 18: Passwords
PASSWORDS Setting Secret Clerk Passwords A maximum of 40 different clerk passwords can be set, which allow clerks to operate the ECR in the ‘R’ position. • Turn the key to the ‘P’ position on the Control Lock • Enter 4 4 4 4 4 4 and press the CASH key •... -
Page 19: Pc Communications
PC COMMUNICATIONS The SX-590 has the capability to read / send programming & sales data from a Personal Computer. The SX-590 Windows utility is available on CD and can also be upgraded from our web site www.geller.co.uk The utility has 3 demo programs for your use. - Page 20 • The progr am will now be sent to the SX-590 • Once the progam has fully downloaded, Perform a Loop reset on the SX-590 (Turn the key to the P position, Power off the ECR, wait 30 Seconds, Power...
- Page 21 SX-590 SALES UTILITY DAVID SX-590 KEY BENEFITS • Windows operating system • Program all important aspects of the ECR ie PLUs, Depts, Clerks, Keyboard, Receipt & Graphic logo • Multiplexor support with multiple Read / Send • Modem Support • Create customer keyboard template within David. (Copy Buttons, indexes and picture functions all included •...
-
Page 22: Cable Configuration
Pin Outs for SX-590 HAYES MODEM to SX-590 Communications Cable The cable used for Modem communication is a straight through RJ45 lead connected to an Adapter 12 (SX-590 Modem) (see below for Pin Outs) 25 Way Male 25 Way Male... - Page 23 CONFIGURING CABLE Cont… Pinouts for the Elco Switch Direct to SX-590 MUX Input ADP 1 (9 way female) ADP 6 (9 way female) 1 – NA 6 - Red 1 – N/A 6 - Orange 2 – Brown 7 – Yellow 2 –...
-
Page 24: Configuring Modem Settings
For automatic configuration please use ‘GMODEM’ which is available on the GELLER CD and GELLER Website. This is the easiest configuration method. For manual configuration, the Geller modem should be configured as follows - The settings must be changed using AT commands via communication software such as Terminal, Hyper Terminal or Q modem. - Page 25 MULTIPLEXOR CONFIGURATION A multiplexor will allow you to connect multiple SX-590 Cash registers to a PC. This is useful for programming updates & software sales reads. IMPORTANT When entering the Switch Port commands in the Windows Utility, please ensure capitals are used.
-
Page 26: Creating The Graphical Logo
GRAPHIC LOGO FOR SX-590 The SX-590 has a built in Flash type Graphical Eprom facility. A Graphic Logo can be downloaded as many times as required. The following System Flag has to be enabled. SF 26 = 1 – This enables the Graphical logo to be sent via a PC... - Page 27 Your Geller scanner will arrive already pre-configured. Please ensure when ordering that you state the model of ECR your scanner is to be configured for i.e SX-590 Plug the scanner into the labelled COM B socket on the SX-590 and follow the simple procedure below -...
- Page 28 ADDING A PLU BARCODED ITEM TO THE ECR • Turn the key to the ‘P’ position on the control lock • Scan the Bar Code (This will automatically select the next available PLU Number) • Enter the Price and press ENT / RLS •...
-
Page 29: Deleting A Previously Scanned Product
The product is deleted from the cash register We have included some sample Barcodes overleaf for you to use for demonstrations. These are pre-configured on the demo programs within the Geller Windows utility Note The Price Key (Code 057) can be used as a price check key... -
Page 30: Bar Codes Sample
BAR CODES SAMPLE... -
Page 31: Euro Set -Up
EURO SET-UP The following settings will configure the SX-590 for the EURO Function • Put Euro Key on keyboard (Key Code 68) Work out Euro Conversion Rate e.g if the Euro is 1.64 to the pound then do the following: •... -
Page 32: Reports
REPORTS Displaying a Report It is possible to have the report of your choice displayed on the SX-590. This will be an X Report so that it is impossible to accidentally reset the report without printing it • Turn the key to the X Position on the Control Lock •... -
Page 33: Glossary
GLOSSARY The following list describes the SX-590’s general terms and explanations for the functionality of the machine DEPARTMENT A department can be used for grouping purposes. When a product is sold, it will report under the heading of the designated department that the product is linked to ie Stationery. -
Page 34: Clerk Id
CLERK ID Each user (Clerk) can have their own unique password for operating the Cash register. This is useful for security and for reporting purposes. The Clerk ID key can also be used to toggle the receipt on and off. CLERK HOLD This will allow a clerk to hold their sale in the ECR while another Cler k carries out a transaction. -
Page 35: X-Time
X-TIME The X-Time key is used for multiplication. Example 2) (X/TIME) (1.00) (DPT 1) would register a sale of 2.00 in Dept 1. The key is also used for displaying the current time on the display The FC key is used for tendering in a foreign currency for example the Euro. -
Page 36: Void
The Error Correct key will void the last item that was registered. Simply press the EC key to void the last item VOID The Void key is used for voiding any item in the current transaction. Example Press Void – 1.00 – DPT 1 or Press Void – Press/Scan PLU RETURN The Return key is used for voiding any item that was registered in a previous transaction. -
Page 37: Flags
FLAGS This is for the Engineers use. Flags are settings of the SX-590 and can change the way the machine works. Please do not alter these without consulting your Geller dealer. INITIALISE If in the unlikely event the ECR is in a “Lock up situation” i.e. not able to produce a transaction or the machine is continuously bleeping then an initialisation is required.
Need help?
Do you have a question about the SX-590 and is the answer not in the manual?
Questions and answers