Table of Contents
Advertisement
Congratulations for selecting the Fusion Motorized Treadmill from Reebok. Whether you are an accomplished athlete
seeking to maintain peak performance or a beginner realizing the benefits of exercise for the first time, the fusion Motorized
Treadmill will help you to achieve your goals. In the "Hints to Help You" section of this manual we have outlined some tips
that we hope will help you maximize the effectiveness and fun of your workouts.
In the meantime, remember that the benefits of exercise are many and varied including higher energy levels, reduced
stress, improved self-esteem, clearer and more radiant skin, greater cardiovascular efficiency, higher metabolic rate, and
improved body posture – all of which can result in a longer and more enjoyable life.
While purchasing the Fusion Motorized Treadmill will not do all of this alone, it is an important step towards understanding
and achieving the benefits of exercise.
All Reebok products are manufactured to the highest specifications and this
instruction manual should enable you to assemble the Fusion Treadmill and
commence your workout programme. If, however, you have any additional
questions, please call out UK Customer Service on +44 (0) 871 474 2614. To help
us assist you, please quote the product model number and batch number when
calling. The model number is REV-11301. The serial number can be found on a
sticker attached to the Reebok Fusion (located on the left hand side of the treadmill
base next to the mains power cord inlet).
1
Fusion TREADMILL
BEFORE YOU BEGIN
Opening Carton/Assembling Your Product
Advertisement
Table of Contents

Related Manuals for Reebok Fusion


Summary of Contents for Reebok Fusion
-
Page 1: Before You Begin
Congratulations for selecting the Fusion Motorized Treadmill from Reebok. Whether you are an accomplished athlete seeking to maintain peak performance or a beginner realizing the benefits of exercise for the first time, the fusion Motorized Treadmill will help you to achieve your goals. In the “Hints to Help You” section of this manual we have outlined some tips that we hope will help you maximize the effectiveness and fun of your workouts. -
Page 2: Table Of Contents
Before beginning this or any exercise programme, consul your physician. This is especially important for persons who have not exercised regularly before or persons with pre-existing health problems. Read all instructions before using. Reebok® assumes no responsibility for personal injury or property damage sustained by or through the use of this product. Questions? As a manufacturer, we are committed to providing complete customer satisfaction. -
Page 3: Precautions
Fusion TREADMILL PRECAUTIONS WARNING: To reduce the risk of burns, fire, electric shock, or injury to persons, read the following important precautions and information before operating the treadmill. It is the responsibility of the owner to ensure that all users of this treadmill are adequately informed of all warnings and precautions. -
Page 4: Contents Checklist
Fusion TREADMILL CONTENTS CHECKLIST Carton contents: For your convenience, we have identified the contents of the shipping carton. Please check to make sure you have all of the components before assembly. This chart is provided to help you identify the components used in the assembly of this product. -
Page 5: Hardware Comparison Chart
NOTE: We suggest that you do not open the hardware pack until you are ready to assemble your FUSION TREADMILL . When you open the pack, please do so carefully to ensure that the pieces remain in their position by their identification numbers. -
Page 6: Parts List
Fusion TREADMILL PARTS LIST Description Qty. Order No. Console Assembly Overlay REV11301 Computer insert REV11301 Console housing -upper REV11301 Console Housing-lower REV11301 Safety key REV11301 Safety Key Base REV11301 Hand pulse sensor wire REV11301 Computer insert holder REV11301 Handle Bar Assembly... - Page 7 Fusion TREADMILL PARTS LIST Description Qty. Order No. Base Frame Assembly Motor Hood REV11301 DC Motor REV11301 Motor Bracket REV11301 Driving Belt REV11301 Motor Cover – Bottom REV11301 Control Board REV11301 Shaft REV11301 Triangle Plastic Cap - Upper REV11301 Shaft Cover...
- Page 8 Fusion TREADMILL PARTS LIST Description Qty. Order No. Front Roller Shaft REV11301 Fold Up Support Tube REV11301 Small Wheel REV11301 Rear Roller REV11301 Rear Roller Shaft REV11301 Rear Caster REV11301 Fastening ∮ 3.5X14 Screw REV11301 ∮ 3X10 Screw REV11301 ∮ 3X14 Screw REV11301 ∮...
- Page 9 Fusion TREADMILL PARTS LIST Description Qty. Order No. M8X18 Allen Head Cap Screw REV11301 M16X73 Allen Head Bolt REV11301 ∮ 12 Washer REV11301 M8X45 Allen Head Cap Screw REV11301 M8X30 Screw REV11301 M8X18 Allen Head Cap Screw REV11301 M16X73 Allen Head Bolt...
-
Page 10: Parts Diagram
Fusion TREADMILL PARTS DIAGRAM A MAJORITY OF THE PARTS SHOWN HERE HAVE BEEN PRE-ASSEMBLED AT THE FACTORY. - Page 11 Fusion TREADMILL PARTS DIAGRAM A MAJORITY OF THE PARTS SHOWN HERE HAVE BEEN PRE-ASSEMBLED AT THE FACTORY.
- Page 12 Fusion TREADMILL PARTS DIAGRAM A MAJORITY OF THE PARTS SHOWN HERE HAVE BEEN PRE-ASSEMBLED AT THE FACTORY.
- Page 13 Fusion TREADMILL PARTS DIAGRAM A MAJORITY OF THE PARTS SHOWN HERE HAVE BEEN PRE-ASSEMBLED AT THE FACTORY. 820 412...
- Page 14 Fusion TREADMILL PARTS DIAGRAM A MAJORITY OF THE PARTS SHOWN HERE HAVE BEEN PRE-ASSEMBLED AT THE FACTORY. 805 806...
- Page 15 Fusion TREADMILL PARTS DIAGRAM A MAJORITY OF THE PARTS SHOWN HERE HAVE BEEN PRE-ASSEMBLED AT THE FACTORY.
- Page 16 Fusion TREADMILL PARTS DIAGRAM A MAJORITY OF THE PARTS SHOWN HERE HAVE BEEN PRE-ASSEMBLED AT THE FACTORY.
-
Page 17: Assembly Instructions
Fusion TREADMILL ASSEMBLY INSTRUCTIONS Before you Begin Clear your work area. • Make sure that you’ve cleared a large enough area in order to assemble the treadmill. • Make sure there is nothing in the area that may cause injury during assembly. - Page 18 Fusion TREADMILL ASSEMBLY STEP 1: Remove your treadmill from carton and place it on the floor in an open area Attach the Upright-Left #301 and Upright-Right #302 to the Base Frame and ∮ secure in place using one Bolt #805 and three 8 Washer # 806, two Bolt #830.
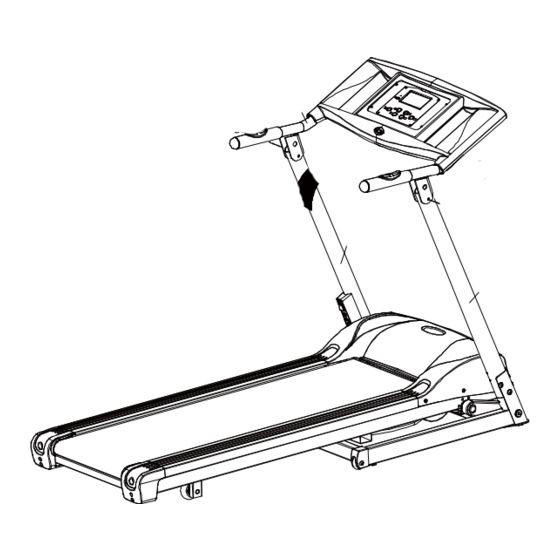
- Page 19 Fusion TREADMILL ASSEMBLY STEP 2: Rotate the console up to the correct position as shown and secure in place using one Bolt #805 and one Washer #806. Repeat this procedure on the Upright - Right...
-
Page 20: Stabilizer Adjustment
Fusion TREADMILL STABILIZER ADJUSTMENT FOLLOW THESE INSTRUCTIONS TO LEVEL YOUR TREADMILL: An uneven floor or improper stabilizer level can cause the treadmill to wobble during use as well as the incline adjustment to function incorrectly. Please follow the procedure described below to make sure the treadmill stabilizer is adjusted correctly prior to use. - Page 21 Fusion TREADMILL How to fold up the treadmill: Your treadmill can be folded up for space saving storage. To do this follow the instructions here: Lift the deck from the rear so that the treadmill rests on the front transportation wheels.
- Page 22 Fusion TREADMILL How to unfold the treadmill: To unfold the treadmill for use follow the instructions here: Lift the deck from the rear so that the treadmill rests on the front transportation wheels. Roll to a desired location.
-
Page 23: Locking Pin
Fusion TREADMILL Lock Pin After folding the deck up insert the safety lock pin through the hole in the base frame. BE SURE TO INSERT THE SAFETY LOCK PIN COMPELETELY AS SHOWN BELOW. Remember to remove the lock pin before... -
Page 24: Level Adjustment
Fusion TREADMILL LEVEL ADJUSTMENT FOLLOW THESE INSTRUCTIONS TO LEVEL YOUR TREADMILL: An uneven floor or improper stabilizer level can cause the treadmill to wobble during use as well as the incline adjustment to function incorrectly. Please follow the procedure described below to make sure the treadmill stabilizer is adjusted correctly prior to use. -
Page 25: Computer Instructions
Fusion TREADMILL COMPUTER INSTRUCTIONS COMPUTER INSTRUCTIONS... -
Page 26: Computer Operation
FUSION COMPUTER INSTRUCTIONS COMPUTER OPERATION START Button INCLINE UP/DOWN Buttons SPEED UP/DOWN Buttons SAFETY KEY Display Window STOP/ENTER Button BUTTON FUNCTIONS START – Press to start exercise at initial speed 0.5MPH / 0.8KPH. STOP / ENTER a. Press to confirm program and preset function values setting mode. - Page 27 FUSION COMPUTER INSTRUCTIONS COMPUTER OPERATION POWER ON Set the POWER SWITCH, located on the base frame, to ON and insert the SAFETY KEY. The UPPER LCD and LOWER LCD screens light up all digits and enter the POWER ON mode.
- Page 28 FUSION COMPUTER INSTRUCTIONS COMPUTER OPERATION SET USER HEIGHT After setting the user weight, the lower LCD will display H. The CALORIES LCD display now shows the blinking factory setting user height 5’3”/160CM. Press the INCLINE UP/DOWN buttons to adjust the user height correctly and press STOP/ENTER to set the user height.
- Page 29 FUSION COMPUTER INSTRUCTIONS COMPUTER OPERATION LEVEL MIN. LEVEL MAX. LEVEL During the workout, press the SPEED UP/DOWN buttons to adjust the speed. Users can overwrite the incline level by pressing the INCLINE UP/DOWN buttons. COOL DOWN After the pre-set TIME counts down to 0, treadmill will start a one minute cool down program. The TIME LCD will display COOL and blink for 10 seconds and continue counting down 50 seconds at speed 2 MPH/3.2KPH.
- Page 30 FUSION COMPUTER INSTRUCTIONS COMPUTER OPERATION P4 WEIGHT LOSS If you select the P4 WEIGHT LOSS program, the upper and lower LCD will show the following: After completing the user information set up, the SPEED, CALORIES and PULSE LCD display 0. The TIME display shows factory setting 24:00 and the blinking workout load level shows 1.
-
Page 31: Heart Rate Control Operation
FUSION COMPUTER INSTRUCTIONS HEART RATE CONTROL OPERATION P6 HEART RATE CONTROL If you select the P6 5K HEART RATE CONTROL program, the upper and lower LCD will show the following: After completing the user information set up, the TIME LCD shows the blinking factory pre-set workout time 60:00. Press the INCLINE UP/DOWN buttons to adjust the workout time and press the STOP/ENTER button to confirm. -
Page 32: Helpful Hints
Even if you only do it one day of the week it all helps. For more product and fitness information including Reebok University Workouts, visit our website: www.reebokfitness.co.uk Heart Rate Training In the normal course of our everyday lives our bodies use oxygen to convert nutrients from our food intake into energy for muscle movement and body functions. -
Page 33: Stretching Routine
Fusion TREADMILL STRETCHING ROUTINE Warm up and cool down: A successful exercise program consists of a warm-up, aerobic exercise, and a cool-down. Warming up is an important part of your workout, and should begin every session. It prepares your body for more strenuous exercise by heating up and stretching out your muscles, increasing your circulation and pulse rate, and delivering more oxygen to your muscles. - Page 34 Fusion TREADMILL STRETCHING ROUTINE Hamstring Stretch: Sit with your right leg extended. Rest the sole of your left foot against your right inner thigh. Stretch toward your toe as far as possible. Hold for 15 counts. Relax and then repeat with left leg extended.
-
Page 35: How To Maintain The Fusion Treadmill
FUSION TREADMILL twice (4 ML). Lift the side of the belt 18 inches/45 cm from the rear roller. Squeeze 1 ML under the left side of the belt and 1 ML under the right side of the belt. Run your FUSION TREADMILL at 5 MPH/8 KMH for 5-10 minutes before exercising. -
Page 36: Troubleshooting
Fusion TREADMILL TROUBLESHOOTING Troubleshooting NOTE: Do not touch any internal electric wires without consulting the technical support team. No display on the Computer LCD, after the power is switched on. Make sure the power cord has been plugged in properly to the power switch on the base frame and mains power socket. -
Page 37: Ordering Replacement Parts / Limited Warranty
Department on +44 (0) 871 474 2614. To help us assist you, please be prepared to give us the following information: The Model Number of the product (REV-11301) The Name of the product (FUSION TREADMILL) The Serial Number/Manufacturing Date of the product The Description of the part(s) Limited Warranty –... - Page 38 Fusion TREADMILL...
Need help?
Do you have a question about the Fusion and is the answer not in the manual?
Questions and answers