Xerox CopyCentre C123 Quick Reference Manual
Hide thumbs
Also See for CopyCentre C123:
- User manual (360 pages) ,
- Scan manual (28 pages) ,
- Service manual (22 pages)

Related Manuals for Xerox CopyCentre C123


Summary of Contents for Xerox CopyCentre C123
-
Page 1: Quick Reference Guide
CopyCentre WorkCentre WorkCentre Pro C123/C128 M123/M128 123/128 Quick Reference Guide ME3242E4-1... - Page 3 The CD provides User Guide including full instructions for optional configurations such as Fax and Scanner. It also includes System Administration Guide describing instructions to connect the machine to network. Load the CD on your hard drive for further information. Xerox CopyCentre/WorkCentre/WorkCentre Pro 123/128 Quick Reference Guide...
- Page 4 See the About License section for detailed information on licensed products. The information in this document is correct at the time of publication. Xerox reserves the right at any time to change the information without notice. Changes and technical updates will be added in subsequent editions of the documentation.
-
Page 5: Table Of Contents
Illegal Copies..................24 USA ....................24 Canada ....................25 Other Countries .................26 Product Recycling and Disposal.............26 Product Overview.................27 Machine Components ................27 System Controls ..................29 Services and Features ................30 Power On/Off..................32 Powering On ..................32 Powering Off ..................32 Xerox CopyCentre/WorkCentre/WorkCentre Pro 123/128 Quick Reference Guide... - Page 6 Bound Originals .................53 2 Sided Book Copy................54 Original Size ..................54 Mixed Size Originals................55 Border Erase ..................56 Margin Shift ..................56 Image Rotation ..................58 Mirror Image/Negative Image ............59 Original Orientation................60 Output Format - Copy ................60 Xerox CopyCentre/WorkCentre/WorkCentre Pro 123/128 Quick Reference Guide...
- Page 7 Preparing Paper for Loading..............85 Loading the Paper Trays ..............85 Bypass Tray (Tray 5) .................87 Tandem Tray Module (TTM)..............88 Auto Tray Switching................88 Storing and Handling Paper ..............89 Supported Paper Sizes and Types............89 Supported Paper Sizes..............89 Xerox CopyCentre/WorkCentre/WorkCentre Pro 123/128 Quick Reference Guide...
- Page 8 Removing the Old Drum Cartridge ..........112 Recycling the Drum Cartridge ............113 Inserting the New Drum Cartridge ...........114 Replacing the Toner Cartridge .............116 Removing the Old Toner Cartridge..........116 Inserting the New Toner Cartridge ..........117 Xerox CopyCentre/WorkCentre/WorkCentre Pro 123/128 Quick Reference Guide...
- Page 9 Screen Messages ................144 Output Quality ..................145 Xerox Welcome Center ................145 12 Appendix .....................147 Additonal Information ................147 Languages Displayed on the Touch Screen........147 Country Code for Fax Option............147 Cautions and Limitations ..............148 13 Index ....................149 Xerox CopyCentre/WorkCentre/WorkCentre Pro 123/128 Quick Reference Guide...
- Page 10 Table of Contents Xerox CopyCentre/WorkCentre/WorkCentre Pro 123/128 Quick Reference Guide...
-
Page 11: Before Using The Machine
This User Guide provides detailed information, technical specifications and procedures for using the integral features of the machine. Xerox Welcome Center If you need assistance during or after product installation, visit the Xerox website for on-line solutions and support. http://www.xerox.com/ If you require further assistance, contact our experts at the Xerox Welcome Center. -
Page 12: Conventions
• Paper is synonymous with media. • Document is synonymous with original. • Xerox CopyCentre/WorkCentre/WorkCentre Pro 123/128 is synonymous with the machine. Key Operator/System Administrator Key Operator describes the person who is responsible for hardware maintenance. - Page 13 Notes Notes are statements that provide additional information. For example: NOTE: If the document feeder is not fitted to the machine, this feature is not available. Xerox CopyCentre/WorkCentre/WorkCentre Pro 123/128 Quick Reference Guide...
-
Page 14: Related Information Sources
Read these safety notes carefully before using this product to make sure you operate the equipment safely. Your Xerox/Fuji Xerox product and recommended supplies have been designed and tested to meet strict safety requirements. These include safety agency approval, and compliance to established environmental standards. -
Page 15: Warning - Electrical Safety Information
See data plate on the rear panel for the rated ampere and voltage of this equipment. If the machine needs to be moved to a different location, contact a Xerox Service Representative or your authorized local representative or service support organization. -
Page 16: Laser Safety Information
Class 1 laser product. It does not emit hazardous light, as the beam is totally enclosed during all phases of customer operation and maintenance. Operational Safety Information To ensure the continued safe operation of your Xerox/Fuji Xerox equipment, follow these safety guidelines at all times. Do These: •... -
Page 17: Maintenance Information
• Never override or “cheat” any of the electrical or mechanical interlock devices. • Never operate the equipment if you notice unusual noises or odors. Disconnect the power cord from the electrical outlet and contact your local Xerox/Fuji Xerox Service Representative or Service Provider immediately. -
Page 18: Ozone Safety Information
If you need additional information about ozone, please request the Xerox publication Ozone by calling 1-800-828-6571 in the United States and Canada. In other markets please contact your Service Provider. -
Page 19: Regulatory Information
Regulatory Information CE Mark The CE mark applied to this product symbolizes Xerox’s declaration of conformity with the following applicable Directives of the European Union as of the dates indicated: January 1, 1995: Council Directive 72/23/EEC amended by Council directive 93/68/ EEC, approximation of the laws of the member states related to low voltage equipment. - Page 20 Telephone Company may request that you disconnect the equipment until the problem is resolved. Repairs to the machine should be made only by a Xerox Service Representative or an authorized Xerox Service Provider. This applies at any time during or after the service warranty period.
- Page 21 EUROPE Radio Equipment & Telecommunications Terminal Equipment Directive: This Xerox product has been self-certified by Xerox for pan-European single terminal connection to the analogue public switched telephone network (PSTN) in accordance with Directive 1999/5/EC. The product has been designed to work with the national...
-
Page 22: Regulatory Information For Rfid
Modification of this product, connection to external control software or to external control apparatus not authorized by Xerox, will invalidate its certification. Regulatory Information for RFID This product generates 13.56 MHz using an Inductive Loop System as a radio frequency identification system device (RFID). -
Page 23: Canada
Copier, printer, digital press and fax products must meet energy efficiency and emissions criteria, and exhibit compatibility with recycled supplies. Currently, Environmental Choice more than 1600 approved products and 140 licenses. Xerox has been a leader in offering EcoLogo approved products. - Page 24 (INCLUDING, BUT NOT LIMITED TO, PROCUREMENT OF SUBSTITUTE GOODS OR SERVICES; LOSS OF USE, DATA, OR PROFITS; OR BUSINESS INTERRUPTION) HOWEVER CAUSED AND ON ANY THEORY OF LIABILITY, WHETHER IN CONTRACT, STRICT LIABILITY, OR TORT (INCLUDING Xerox CopyCentre/WorkCentre/WorkCentre Pro 123/128 Quick Reference Guide...
- Page 25 SPECIAL, EXEMPLARY, OR CONSEQUENTIAL DAMAGES (INCLUDING, BUT NOT LIMITED TO, PROCUREMENT OF SUBSTITUTE GOODS OR SERVICES; LOSS OF USE, DATA, OR PROFITS; OR BUSINESS INTERRUPTION) HOWEVER CAUSED AND ON ANY THEORY OF LIABILITY, WHETHER IN CONTRACT, STRICT Xerox CopyCentre/WorkCentre/WorkCentre Pro 123/128 Quick Reference Guide...
-
Page 26: Illegal Copies
Stamps and other representatives of value, of whatever denomination, which have been or may be issued under any Act of Congress. 2. Adjusted Compensation Certificates for Veterans of the World Wars. 3. Obligations or Securities of any Foreign Government, Bank, or Corporation. Xerox CopyCentre/WorkCentre/WorkCentre Pro 123/128 Quick Reference Guide... -
Page 27: Canada
Canada or of a province, the government of a state other than Canada or a department, board, Commission or agency established by the Government of Canada or of a province or of a government of a state other than Canada. Xerox CopyCentre/WorkCentre/WorkCentre Pro 123/128 Quick Reference Guide... -
Page 28: Other Countries
Xerox product is part of the program. For more information about Xerox environmental programs, visit www.xerox.com/environment.html. If your product is not part of the Xerox program and you are managing its disposal, please note that the product may contain lead, mercury and other materials whose disposal may be regulated due to environmental considerations. -
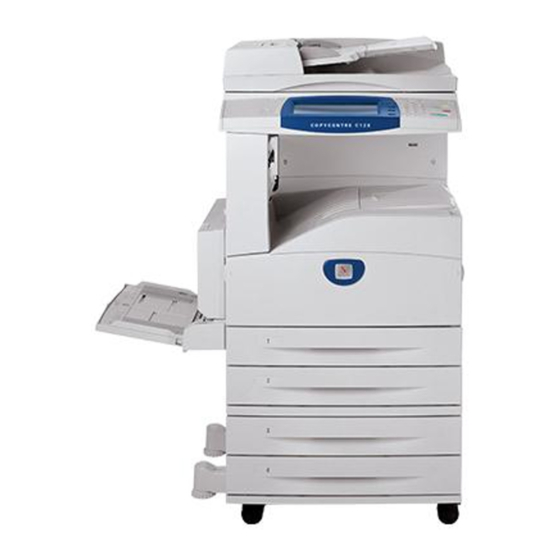
Page 29: Product Overview
The button names and icons on the control panel also vary depending on machine configuration. However, machine features described here remain the same. For more information on available options not described here, visit the Xerox website or contact your Xerox Sales Representative. Machine Components The following diagrams show the standard and optional components of the machine. - Page 30 Letter or A4 size, long edge feed. Tray 4 can hold 1,200 sheets of 20 lb bond or 80 g/m paper in Letter or A4 size. The Tandem Tray Module is referred to as “TTM” in this manual. Xerox CopyCentre/WorkCentre/WorkCentre Pro 123/128 Quick Reference Guide...
-
Page 31: System Controls
<C> Deletes a numeric value or the last digit entered, and replaces the current value with a default value. Also cancels suspended jobs. <Dial Pause> Inserts a pause while dialing a fax number. Xerox CopyCentre/WorkCentre/WorkCentre Pro 123/128 Quick Reference Guide... -
Page 32: Services And Features
Allows you to send scanned documents by e-mail in various ways. For example, you can set the density for scanning, or specify the file format for saving the documents. For more information, refer to the Scan/E-mail chapter. Xerox CopyCentre/WorkCentre/WorkCentre Pro 123/128 Quick Reference Guide... -
Page 33: Stored Programming
Allows you to set or change the following features from this screen: Mailbox, Stored Programming, Job Flow Sheets, Address Book, Group Send, Comment, and Paper Type. For more information, refer to the Setups chapter and the Stored Programming chapter on User Guide. Xerox CopyCentre/WorkCentre/WorkCentre Pro 123/128 Quick Reference Guide... -
Page 34: Power On/Off
RESET button on the back of the machine. If the GFI has been triggered, the RESET button will be in the tripped position. To restore power to the machine, press the RESET button. Xerox CopyCentre/WorkCentre/WorkCentre Pro 123/128 Quick Reference Guide... -
Page 35: Power Saver Modes
TEST button NOTE: If the RESET button pops back up when you press it, or if power is not restored by this procedure, contact the Xerox Welcome Center. Power Saver Modes The machine has energy saving features that significantly reduce the power consumption during inactivity. -
Page 36: Changing The Default Time Settings
[System Administrator Login] screen. NOTE: The default Key Operator ID is “11111”. If the Authentication feature is enabled, you may be required to enter a password. The default password is “x-admin”. Xerox CopyCentre/WorkCentre/WorkCentre Pro 123/128 Quick Reference Guide... - Page 37 Select [Common Settings] on the [System Settings] screen. Select [Machine Clock/Timers] on the [Common Settings] screen. Select the required option. Select [Change Settings]. Change the value using the scroll buttons or select required options. Select [Save]. Xerox CopyCentre/WorkCentre/WorkCentre Pro 123/128 Quick Reference Guide...
-
Page 38: Modes
NOTE: The arrangement of service icons displayed on the screen can be changed by the Key Operator. Press the <All Services> button on the control panel. Use the scroll buttons to switch between screens. Xerox CopyCentre/WorkCentre/WorkCentre Pro 123/128 Quick Reference Guide... -
Page 39: Features
Press the <Start> button on the control panel. To restart the interrupted job, press the <Interrupt> button <Interrupt> button again and press the <Start> button. NOTE: Interrupted jobs cannot be promoted, released or deleted in the Print Queue. Xerox CopyCentre/WorkCentre/WorkCentre Pro 123/128 Quick Reference Guide... -
Page 40: Recycled Paper
The use of recycled paper in the machine benefits the environment with no degradation in performance. Xerox recommends recycled paper with 20% post consumer content which can be obtained both through Xerox and other office suppliers. Contact your Xerox representative or go to www.xerox.com for more information on other types of recycled paper. -
Page 41: Copy
For information on how to enter a document size manually, refer to Original Size on page 54. Xerox CopyCentre/WorkCentre/WorkCentre Pro 123/128 Quick Reference Guide... -
Page 42: Document Feeder
For more information on tray selection, refer to Paper Supply on page 45. Document Glass The document glass is used for a single page or bound document of 15–297 mm for width and 15–432 mm for length. Xerox CopyCentre/WorkCentre/WorkCentre Pro 123/128 Quick Reference Guide... -
Page 43: Select The Features
If you need assistance, contact the Key Operator. Select the button for the feature required. If [More] is selected, select [Save] to confirm the selected feature or [Cancel] to return to the previous screen. Xerox CopyCentre/WorkCentre/WorkCentre Pro 123/128 Quick Reference Guide... -
Page 44: Enter The Quantity
While the machine is warming up, you can also program the next job. 5. Confirm the Copy Job in the Job Status Press the <Job Status> button on the control panel to display the [Job Status] screen. Xerox CopyCentre/WorkCentre/WorkCentre Pro 123/128 Quick Reference Guide... -
Page 45: Stop The Copy Job
2 Sided – page 47 Copy Output – page 48 Press the <All Services> button on the control panel. Select [Copy] on the touch screen. Ensure that the [Basic Copying] screen is displayed. Select the required option. Xerox CopyCentre/WorkCentre/WorkCentre Pro 123/128 Quick Reference Guide... -
Page 46: Reduce/Enlarge
Key Operator. • Copy All – Reduces the image of documents slightly smaller than the selected reduction/enlargement ratio to copy all the image of documents onto the paper. Xerox CopyCentre/WorkCentre/WorkCentre Pro 123/128 Quick Reference Guide... -
Page 47: Paper Supply
Allows you to select a paper tray from the three preset trays set up by the Key Operator. The tray number, paper size, and orientation are also displayed for all trays except Tray 5. Xerox CopyCentre/WorkCentre/WorkCentre Pro 123/128 Quick Reference Guide... - Page 48 • Non-standard Size – Allows you to specify the width and length of paper size using the scroll buttons in 1 mm (0.1 inch) increments. The acceptable ranges of paper sizes are 89–297 mm (3.5–11.7 inches) for width and 99–432 mm (3.9–17.0 inches) for length. Xerox CopyCentre/WorkCentre/WorkCentre Pro 123/128 Quick Reference Guide...
-
Page 49: Sided
NOTE: When using the document glass for [1 2 (H to H)] or [2 2 (H to H)], the machine will display a message when it is ready to scan the next document. More Displays the [2 Sided] screen. Xerox CopyCentre/WorkCentre/WorkCentre Pro 123/128 Quick Reference Guide... -
Page 50: Copy Output
[Bound Originals], [Covers], [Blank Separators + N Sets], [Stapling], [Build Job], [Sample Set], or [Booklet Creation]. For all other options, [Uncollated] is applied. Top Left Staples the top left corner of the output. Xerox CopyCentre/WorkCentre/WorkCentre Pro 123/128 Quick Reference Guide... -
Page 51: Staple Position
• Collated – Delivers the specified number of copy sets in the same order as the documents. For example, two copies of a three-page document are delivered in the order 1-2-3, 1-2-3. Xerox CopyCentre/WorkCentre/WorkCentre Pro 123/128 Quick Reference Guide... -
Page 52: Image Quality - Copy
Original Type This feature allows you to copy at optimum image quality by selecting the type of the original documents. Select [Original Type] on the [Image Quality] screen. Select the required option. Select [Save]. Xerox CopyCentre/WorkCentre/WorkCentre Pro 123/128 Quick Reference Guide... -
Page 53: Lighten/Darken
Select the density level. Select [Save]. Sharpness This feature allows you to increase or decrease the sharpness level of fine lines and edges. Select [Sharpness] on the [Image Quality] screen. Select the sharpness level. Select [Save]. Xerox CopyCentre/WorkCentre/WorkCentre Pro 123/128 Quick Reference Guide... -
Page 54: Auto Exposure
Original Orientation – page 60 Press the <All Services> button on the control panel. Select [Copy] on the touch screen. Select the [Scan Options] tab. Use the side tabs to switch between screens. Select the required option. Xerox CopyCentre/WorkCentre/WorkCentre Pro 123/128 Quick Reference Guide... -
Page 55: Bound Originals
Erases printing of the center gutter area of the book that tends to be shadowed. Use the scroll buttons to specify the area to be erased from the center of an open book within the range of 0–50 mm (0.0–2.0 inches) in 1 mm or 0.1 inch increments. Xerox CopyCentre/WorkCentre/WorkCentre Pro 123/128 Quick Reference Guide... -
Page 56: Sided Book Copy
Using this feature, the size of the document can be automatically detected, selected from a list of preset sizes, or manually specified using the custom option. If Custom is used, documents will be copied according to the specified size regardless of their actual size. Xerox CopyCentre/WorkCentre/WorkCentre Pro 123/128 Quick Reference Guide... -
Page 57: Mixed Size Originals
Select [On] to enable the feature. Select [Save]. NOTE: If you disable this feature and make copies of the mixed sized originals, the size of first page will be the size for all the copies. Xerox CopyCentre/WorkCentre/WorkCentre Pro 123/128 Quick Reference Guide... -
Page 58: Border Erase
NOTE: When [Mixed Size Originals] is selected, the amount shifted is determined by the image position of the first sheet and is applied to all subsequent sheets of the documents. Select [Margin Shift] on the [Scan Options] screen. Select the required option. Select [Save]. Xerox CopyCentre/WorkCentre/WorkCentre Pro 123/128 Quick Reference Guide... - Page 59 Moves images by specified amounts on the paper. You can specify up to 50 mm (2 inches) for both dimensions using the scroll buttons. [Margin Shift - Side 2] Screen This feature allows you to move images on the Side 2 page. Xerox CopyCentre/WorkCentre/WorkCentre Pro 123/128 Quick Reference Guide...
-
Page 60: Image Rotation
This feature allows you to automatically rotate the image to match the orientation of the paper in the tray. Select [Image Rotation] on the [Scan Options] screen. Select the required option. Select [Save]. Disables the feature. Always On Rotates an image every time. Xerox CopyCentre/WorkCentre/WorkCentre Pro 123/128 Quick Reference Guide... -
Page 61: Mirror Image/Negative Image
Mirror Image Select [On] to create a mirror image of the document. Negative Image Select [On] to invert all the black images on the page to white and all the white images to black. Xerox CopyCentre/WorkCentre/WorkCentre Pro 123/128 Quick Reference Guide... -
Page 62: Original Orientation
Set Numbering – page 68 Press the <All Services> button on the control panel. Select [Copy] on the touch screen. Select the [Output Format] tab. Use the side tabs to switch between screens. Xerox CopyCentre/WorkCentre/WorkCentre Pro 123/128 Quick Reference Guide... -
Page 63: Booklet Creation
Allows you to specify the amount of inside margin in 1 mm (0.1 inch) increments between 0 to 50 mm (0.0–2.0 inches) using the scroll buttons. Select [Booklet Creation - Gutter] on the [Booklet Creation] screen. Perform the necessary operations. Select [Save]. Xerox CopyCentre/WorkCentre/WorkCentre Pro 123/128 Quick Reference Guide... - Page 64 [Booklet Creation - Originals] Screen Allows you to specify the type of the documents being used to make booklets. Select [Booklet Creation - Originals] on the [Booklet Creation] screen. Select the required option. Select [Save]. Xerox CopyCentre/WorkCentre/WorkCentre Pro 123/128 Quick Reference Guide...
-
Page 65: Covers
• On – Copies the first and last pages of the documents onto the cover stock. If you want only the front or the back cover to be blank, add a blank sheet to the first or last of the documents accordingly. Xerox CopyCentre/WorkCentre/WorkCentre Pro 123/128 Quick Reference Guide... -
Page 66: Transparency Separators
[Transparency Tray] and the [Separators/N Sets Tray]. Five presets including [Bypass Tray] are available for each. For more information on the bypass tray, refer to [Tray 5 (Bypass)] Screen on page 46. Xerox CopyCentre/WorkCentre/WorkCentre Pro 123/128 Quick Reference Guide... -
Page 67: Multiple-Up
Format] screen. Perform the necessary operations. Select [Save]. NOTE: The machine automatically overlaps partitioned images when copying to allow for cutting and pasting. The overlap width is set at 10 mm (0.4 inch). Xerox CopyCentre/WorkCentre/WorkCentre Pro 123/128 Quick Reference Guide... -
Page 68: Repeat Image
Image Layout • Even – Copies the repeated images equally on the paper. • Bias – Copies the repeated images on the paper with no spaces between the images. Xerox CopyCentre/WorkCentre/WorkCentre Pro 123/128 Quick Reference Guide... -
Page 69: Annotation
Displays the [Annotation - Page Number] screen. Use this screen to print page numbers on the copies. The following options are available. • Off – Disables the feature. • On – Enables the feature. Xerox CopyCentre/WorkCentre/WorkCentre Pro 123/128 Quick Reference Guide... -
Page 70: Set Numbering
• Off – Disables the feature. • On – Enables the feature. Select [Copy Prohibited], [Copy] or [Duplicate] for the phrase. User Account Number Prints the User Account No when the Authentication or Auditron Administration feature is enabled. Xerox CopyCentre/WorkCentre/WorkCentre Pro 123/128 Quick Reference Guide... -
Page 71: Job Assembly
This will allow you to check the print result and adjust the settings if necessary. Select [Build Job] on the [Job Assembly] screen. Select the required option. Select [Save]. Disables the feature. Enables the feature. Xerox CopyCentre/WorkCentre/WorkCentre Pro 123/128 Quick Reference Guide... - Page 72 Last Original Select this option to indicate that you have finished scanning the whole job. Next Original Select this option to sequentially scan more sections for the job. Start Starts scanning the next section. Xerox CopyCentre/WorkCentre/WorkCentre Pro 123/128 Quick Reference Guide...
-
Page 73: Fax/Internet Fax
This machine is capable of scanning mixed size originals, using the document feeder. Align the documents against the inner corner of the document feeder; and enable the Xerox CopyCentre/WorkCentre/WorkCentre Pro 123/128 Quick Reference Guide... -
Page 74: Select The Features
ID and password (if one is set up). If you need assistance, contact the Key Operator. Press the <Clear All> button once on the control panel to cancel any previous selections. Xerox CopyCentre/WorkCentre/WorkCentre Pro 123/128 Quick Reference Guide... -
Page 75: Specify The Destination
<Dial Pause> button. When you dial manually, <Dial Pause> is not required. You can simply wait for a voice prompt and proceed accordingly. For more information, refer to Special Characters on User Guide. Xerox CopyCentre/WorkCentre/WorkCentre Pro 123/128 Quick Reference Guide... -
Page 76: Start The Fax/Internet Fax Job
<Stop> button <C> button If required, press the <Job Status> button on the control panel to display the [Job Status] screen. To exit the [Job Status] screen, press the <Features> button. Xerox CopyCentre/WorkCentre/WorkCentre Pro 123/128 Quick Reference Guide... - Page 77 <Start> button on the control panel. NOTE: Once the transmission starts, you can stop the job only by selecting [Stop] on the touch screen. You cannot resume the canceled job after the transmission starts. Xerox CopyCentre/WorkCentre/WorkCentre Pro 123/128 Quick Reference Guide...
- Page 78 4 Fax/Internet Fax Xerox CopyCentre/WorkCentre/WorkCentre Pro 123/128 Quick Reference Guide...
-
Page 79: Scan/E-Mail
3. Start the Scan Job – page 79 4. Confirm the Scan Job in the Job Status – page 79 5. Save the Scanned Data – page 79 Stop the Scan Job – page 80 Xerox CopyCentre/WorkCentre/WorkCentre Pro 123/128 Quick Reference Guide... -
Page 80: Load The Documents
ID and password (if one is set up). If you need assistance, contact the Key Operator. Press the <Clear All> button once on the control panel to cancel any previous selections. Perform the necessary operations. Xerox CopyCentre/WorkCentre/WorkCentre Pro 123/128 Quick Reference Guide... -
Page 81: Start The Scan Job
Mailbox Viewer2 allows you to easily import documents from a mailbox on the machine to a computer. Mailbox Viewer2 is an application on the CentreWare CD- ROM supplied with the machine. For information on how to install Mailbox Viewer2, refer to the CentreWare CD-ROM. Xerox CopyCentre/WorkCentre/WorkCentre Pro 123/128 Quick Reference Guide... -
Page 82: Stop The Scan Job
5 Scan/E-mail Click [Start] on the taskbar, then select [Program]>[Xerox]>[Utility]>[Mailbox Viewer 2]. From the list displayed, click the name of the machine, and then [Select Scanner]. Enter the number (001–200) of the mailbox to be accessed. Enter the correct password as necessary. -
Page 83: Print
This feature allows you to print documents at the specified time within 24 hours. The documents will be printed automatically at the specified time. For more information, refer to Delayed Print in the Job Status chapter on page 98. Xerox CopyCentre/WorkCentre/WorkCentre Pro 123/128 Quick Reference Guide... -
Page 84: Print Driver Features
You can select [Flip on Long Edge] to align to the long edge of the paper, or [Flip on Short Edge] to align to the short edge of the paper. Xerox CopyCentre/WorkCentre/WorkCentre Pro 123/128 Quick Reference Guide... - Page 85 Specifies whether you want to be notified by e-mail when your print job is finished. Specify Job Owner Selects how the job owner is specified. This job owner is used when print job tabulation functions are used. Xerox CopyCentre/WorkCentre/WorkCentre Pro 123/128 Quick Reference Guide...
- Page 86 6 Print Xerox CopyCentre/WorkCentre/WorkCentre Pro 123/128 Quick Reference Guide...
-
Page 87: Paper And Other Media
Depending on the machine configuration, up to four paper trays will be available excluding the bypass tray. NOTE: If the machine is processing a job, do not open the active paper tray. Pull out the paper tray towards you. Xerox CopyCentre/WorkCentre/WorkCentre Pro 123/128 Quick Reference Guide... - Page 88 Close the paper tray. Paper can be loaded either short edge feed or long edge feed. Long edge feed Short edge feed (LEF) (SEF) Xerox CopyCentre/WorkCentre/WorkCentre Pro 123/128 Quick Reference Guide...
-
Page 89: Bypass Tray (Tray 5)
However, when loading C5-size envelopes, set the long edge feed so that the edge with the flaps is facing towards you. Xerox CopyCentre/WorkCentre/WorkCentre Pro 123/128 Quick Reference Guide... -
Page 90: Tandem Tray Module (Ttm)
NOTE: Key Operator access is required to set target trays and priorities. For more information, refer to Paper Tray Priority in the Setups chapter and Paper Type Priority in the Setups chapter on User Guide. Xerox CopyCentre/WorkCentre/WorkCentre Pro 123/128 Quick Reference Guide... -
Page 91: Storing And Handling Paper
Paper Size Settings in the Setups chapter on User Guide. Dimensions Tray 1, 2/Tray 3, 4 Tray 3, 4 Tray 5 Duplex Paper Size LEF/SEF Finisher (mm) (Two Tray Module) (TTM) (Bypass) Module 105.0 148.0 148.0 210.0 210.0 297.0 297.0 420.0 Xerox CopyCentre/WorkCentre/WorkCentre Pro 123/128 Quick Reference Guide... -
Page 92: Xerox Copycentre/Workcentre/Workcentre Pro 123/128 Quick Reference Guide
4 × 6” 101.6 152.4 Photo 2L 127.0 177.8 5 × 7” Youkei 0 120.0 235.0 Envelope Commercial 104.8 241.3 10 Envelope Monarch 98.4 190.5 Envelope DL Envelope 110.0 220.0 C4 Envelope 229.0 324.0 Xerox CopyCentre/WorkCentre/WorkCentre Pro 123/128 Quick Reference Guide... - Page 93 182 to 432 mm 99 to 432 mm 127 to 432 mm Not Available Not Available 7.2 to 17.0” 3.9 to 17.0” (for Tray 5 (Bypass)) 182 to 432 mm (for Tray 1–4) Xerox CopyCentre/WorkCentre/WorkCentre Pro 123/128 Quick Reference Guide...
-
Page 94: Supported Paper Types
• Side 2 Paper: Refers to the paper already printed on one side (i.e. scrap paper). • Transparency: When using Xerox paper backed (3R3028) (for US) or 3M Type L Desktop Laser (3R91334) (for EU) in low temperature and humidity (10 C, 15%) select [Heavyweight1] on the [Paper Type] screen. -
Page 95: Job Status
Stored Documents – page 96 Press the <Job Status> button on the control panel. Press the <Features> or <All Services> button at any time to exit. <Job Status> button Select the required option. Xerox CopyCentre/WorkCentre/WorkCentre Pro 123/128 Quick Reference Guide... -
Page 96: Current And Pending Jobs
Promotes a job in the list to be processed immediately after the one being processed. The promoted job will be marked with an arrow in the job list on the [Current and Pending Jobs] screen. Last Original Select this option to finish scanning. Xerox CopyCentre/WorkCentre/WorkCentre Pro 123/128 Quick Reference Guide... -
Page 97: Completed Jobs
Displays the name of the recipient for a fax job, the paper size for a copy job, or the box number for a scan job, etc. Status Displays the number of printed, scanned, sent, or received pages. For cancelled jobs, the status will be blank. Xerox CopyCentre/WorkCentre/WorkCentre Pro 123/128 Quick Reference Guide... -
Page 98: Stored Documents
The settings for Charge Print are set up by the Key Operator. For more information, refer to Charge Print Settings in the Setups chapter on User Guide. Select [Charge Print] on the [Stored Documents] screen. Refresh Brings the information up to date. Xerox CopyCentre/WorkCentre/WorkCentre Pro 123/128 Quick Reference Guide... -
Page 99: Secure Print
• Print – Prints a document selected in the list. You can select whether or not to delete the stored documents after printing. NOTE: If you have forgotten the password, contact the Key Operator. The Key Operator can access the stored documents without entering a password. Xerox CopyCentre/WorkCentre/WorkCentre Pro 123/128 Quick Reference Guide... -
Page 100: Sample Print
You can confirm or output the stored documents before the specified time. You can also delete the stored job. Select [Delayed Print] on the [Stored Documents] screen. Refresh Brings the list up to date. Xerox CopyCentre/WorkCentre/WorkCentre Pro 123/128 Quick Reference Guide... -
Page 101: Public Mailbox
Refresh Brings the list up to date. Select All Selects all the documents in the [Public Mailbox]. Print Prints a document selected in the list. Delete Deletes a document selected in the list. Xerox CopyCentre/WorkCentre/WorkCentre Pro 123/128 Quick Reference Guide... - Page 102 8 Job Status Xerox CopyCentre/WorkCentre/WorkCentre Pro 123/128 Quick Reference Guide...
-
Page 103: Machine Status
For more information on the features available, refer to the following. Machine Information – page 102 Paper Tray – page 102 Overwrite Hard Disk – page 103 Print Mode – page 103 Fax Receiving Mode – page 104 Xerox CopyCentre/WorkCentre/WorkCentre Pro 123/128 Quick Reference Guide... -
Page 104: Machine Information
Allows you to check the status of each paper tray including the bypass tray and the optional Tandem Tray Module. It also displays the size, type, and remaining amount of media in each tray. Select [Paper Tray] on the [Machine Status] screen. Xerox CopyCentre/WorkCentre/WorkCentre Pro 123/128 Quick Reference Guide... -
Page 105: Overwrite Hard Disk
Select [PCL Emulation] on the [Print Mode] screen. Enter the parameter item number in the [Item No.] field. Select [Change Value] to change the displayed value. Select [Confirm] if no change is required. Xerox CopyCentre/WorkCentre/WorkCentre Pro 123/128 Quick Reference Guide... -
Page 106: Fax Receiving Mode
Allows you to enter a password to restrict access to PDF direct printing. Fax Receiving Mode Allows you to set the fax reception mode: Manual Receive or Auto Receive. Select [Fax Receiving Mode] on the [Machine Status] screen. Xerox CopyCentre/WorkCentre/WorkCentre Pro 123/128 Quick Reference Guide... -
Page 107: Billing Meter/Print Report
Allows you to view the total number of prints made on the machine using the [Current Meter Reading]. You can also view the serial number. Select [Billing Meter] on the [Billing Meter/Print Report] screen. Xerox CopyCentre/WorkCentre/WorkCentre Pro 123/128 Quick Reference Guide... -
Page 108: User Account Billing Meter
Prints the job counter readings in the form of a Job Counter Report. Print Report/List Allows you to print various reports and lists for each service. Select [Print Report/List] on the [Billing Meter/Print Report] screen. Xerox CopyCentre/WorkCentre/WorkCentre Pro 123/128 Quick Reference Guide... - Page 109 • PCL Settings List • PCL Form List • PDF Settings List • TIFF Settings List • TIFF Logical Printer List • PS Logical Printer List • Fonts List • PostScript Fonts List Xerox CopyCentre/WorkCentre/WorkCentre Pro 123/128 Quick Reference Guide...
- Page 110 Select this option and press the <Start> button to output this list. • Billing Data List Displays the billing data for fax jobs. Select this option and press the <Start> button to output this list. NOTE: This option is displayed with Key Operator access. Xerox CopyCentre/WorkCentre/WorkCentre Pro 123/128 Quick Reference Guide...
-
Page 111: Consumables
• Auditron Report (Copy) • Auditron Report (Fax) • Auditron Report (Scan) Consumables This screen allows you to view toner usage and the status of cartridges. Select the [Consumables] tab on the [Machine Status] screen. Xerox CopyCentre/WorkCentre/WorkCentre Pro 123/128 Quick Reference Guide... -
Page 112: Faults
The status is either active or cleared. Press the <Machine Status> button on the control panel. Select the [Faults] tab. Select [Error History Report] and press the <Start> button on the control panel to output the report. Xerox CopyCentre/WorkCentre/WorkCentre Pro 123/128 Quick Reference Guide... -
Page 113: Maintenance
A variety of supplies, such as a drum/toner cartridge, cleaning solvents, editing markers, and staples are available for the machine. To obtain supplies, contact the local Xerox office, giving the company name, the product number and its serial number. Use the space below to record the telephone number. -
Page 114: The Document Glass And Constant Velocity Transport Glass
Order a replacement cartridge now to insure continuous operation. Removing the Old Drum Cartridge Pull the front cover towards you to open it. Xerox CopyCentre/WorkCentre/WorkCentre Pro 123/128 Quick Reference Guide... -
Page 115: Recycling The Drum Cartridge
Recycling the Drum Cartridge The drum cartridge is designed to be re-manufactured. To recycle used drum cartridges, return them to Xerox in the original packaging. Return labels are included with each new cartridge. Xerox CopyCentre/WorkCentre/WorkCentre Pro 123/128 Quick Reference Guide... -
Page 116: Inserting The New Drum Cartridge
Place the cartridge in position as shown and slide it into the machine until it clicks. Pull out the cartridge tape straight without breaking it. Push the cartridge again to ensure it is positioned correctly. Xerox CopyCentre/WorkCentre/WorkCentre Pro 123/128 Quick Reference Guide... - Page 117 Replacing the Drum Cartridge Close the Cover A until it latches, and then close the bypass tray. Close the front cover. Xerox CopyCentre/WorkCentre/WorkCentre Pro 123/128 Quick Reference Guide...
-
Page 118: Replacing The Toner Cartridge
Hold the handle and remove the cartridge from the machine. NOTE: Hold the empty cartridge away from you to avoid spilling any toner residue. Xerox CopyCentre/WorkCentre/WorkCentre Pro 123/128 Quick Reference Guide... -
Page 119: Inserting The New Toner Cartridge
When this message is displayed, load a new staple case into the staple cartridge by following the steps below. NOTE: Load the correct staple case specified for the product model of the machine. Open the front cover of the finisher. Xerox CopyCentre/WorkCentre/WorkCentre Pro 123/128 Quick Reference Guide... - Page 120 NOTE: If there are still staples inside the staple case, the case will not rise Insert your fingertip into the round section on the cartridge to remove the staple case. Xerox CopyCentre/WorkCentre/WorkCentre Pro 123/128 Quick Reference Guide...
- Page 121 Remove the tab from the new staple case as shown in the diagram. Return the staple cartridge to its original position and push in until it clicks into place. Close the front cover of the Finisher. Xerox CopyCentre/WorkCentre/WorkCentre Pro 123/128 Quick Reference Guide...
- Page 122 10 Maintenance Xerox CopyCentre/WorkCentre/WorkCentre Pro 123/128 Quick Reference Guide...
-
Page 123: Problem Solving
• If the problem persists, or a message indicates that you should call for service, refer to Xerox Welcome Center on page 145. NOTE: If fax jobs are queued in the machine not equipped with the hard disk and a loss of power occurs, the machine will print a Power Off Report when the machine is switched on. -
Page 124: Paper Jams
Cover Cover E Center Output Tray Cover A Duplex Module Cover D Front Cover Tray 5 (Bypass) Tray 1 Tray 2 Cover B Tray 3, 4 - Two Tray Module Cover C (Optional) Xerox CopyCentre/WorkCentre/WorkCentre Pro 123/128 Quick Reference Guide... - Page 125 • The orientation of the media in the paper tray must match the orientation of the documents. • Check the maximum fill line in the tray to make sure the paper tray is not overloaded. • Do not use media that is torn, wrinkled, or folded. Xerox CopyCentre/WorkCentre/WorkCentre Pro 123/128 Quick Reference Guide...
-
Page 126: Paper Jams In Cover A
Close the Cover A until it latches, and then close the bypass tray. Green Lever A2 Open the bypass tray, and then open Cover A while lifting up the release lever. Xerox CopyCentre/WorkCentre/WorkCentre Pro 123/128 Quick Reference Guide... -
Page 127: Paper Jams In Cover B
Follow the steps below to rectify paper jams in Cover B. Open Cover B while lifting up the release lever. Remove the jammed paper. Close the Cover B until it latches. NOTE: Firmly press the center of the cover to close it.. Xerox CopyCentre/WorkCentre/WorkCentre Pro 123/128 Quick Reference Guide... -
Page 128: Paper Jams In Cover C
Follow the steps below to clear paper jams in Cover E. Open the bypass tray, and then open Cover A while lifting up the release lever. Lift up the handle to open Cover Xerox CopyCentre/WorkCentre/WorkCentre Pro 123/128 Quick Reference Guide... -
Page 129: Paper Jams In Trays 1, 2, And 3, 4 (Optional)
Follow the steps below to clear paper jams in the Tandem Tray Module. In Tray 3 Pull out Tray 3 of the Tandem Tray Module. Remove the jammed paper. Close the Tray 3. Xerox CopyCentre/WorkCentre/WorkCentre Pro 123/128 Quick Reference Guide... -
Page 130: Paper Jams In Tray 5 (Bypass)
Open the bypass tray. Open the Duplex Module Cover D while lifting up the release lever. Remove the jammed paper inside the Duplex Module. Close the Duplex Module Cover D until it latches. Xerox CopyCentre/WorkCentre/WorkCentre Pro 123/128 Quick Reference Guide... -
Page 131: Paper Jams In The Finisher (Optional)
In Finisher Top Cover Press the button on the Finisher Top Cover to open it. Remove the jammed paper. Close the Finisher Top Cover. In Finisher Transport Cover F Open the Finisher Transport Cover F. Xerox CopyCentre/WorkCentre/WorkCentre Pro 123/128 Quick Reference Guide... -
Page 132: Document Jams
If a double-sided document is jammed underneath the inner cover, open it and turn the green wheel to remove the document. Inner Cover Close the inner cover, and then the document feeder cover. Xerox CopyCentre/WorkCentre/WorkCentre Pro 123/128 Quick Reference Guide... -
Page 133: Troubleshooting Tables
The machine displays a memory full error • Check with the Key Operator about message. available memory. • Divide the remaining pages of the job into several small jobs and run the job again. Xerox CopyCentre/WorkCentre/WorkCentre Pro 123/128 Quick Reference Guide... - Page 134 • Load fresh paper. • Check the quality of the document. • Select [Lighten/Darken] on the touch screen. • Run off more prints until the copy quality improves. • Replace the drum cartridge. Xerox CopyCentre/WorkCentre/WorkCentre Pro 123/128 Quick Reference Guide...
- Page 135 [Reduce/Enlarge] screen. • Select [Auto Center] in [Margin Shift]. Output does not reflect the selections made • Select [Save] after each selection on the on the touch screen. touch screen, if one exists. Xerox CopyCentre/WorkCentre/WorkCentre Pro 123/128 Quick Reference Guide...
- Page 136 • Refer to the Paper and Other Media chapter for procedures. Cannot store a document for secure polling • Cancel the operation and try again later due to full memory. when additional memory is available. Xerox CopyCentre/WorkCentre/WorkCentre Pro 123/128 Quick Reference Guide...
-
Page 137: Fault Codes
Booklet Creation/Poster feature. Set the correct size of document and restart the job. 003-980 The staple position is not correct. Check the document orientation and staple position, and select the correct settings or cancel the staple feature. Xerox CopyCentre/WorkCentre/WorkCentre Pro 123/128 Quick Reference Guide... - Page 138 Stapling mixed size documents is available only for documents with the same width. Cancel the staple feature or reset the documents with the same width. 005-275 An error occurred in the document feeder. Contact the Xerox Welcome Center. 005-280 005-283...
- Page 139 TIFF file exceeded the limit. Change the number of colors and resolution of the TIFF file, and instruct it to print again. 016-731 Printing of the TIFF data stopped midway. Instruct it to print again. Xerox CopyCentre/WorkCentre/WorkCentre Pro 123/128 Quick Reference Guide...
- Page 140 Services. Specify the correct DNS address. Alternatively, set the address of the scan data repository as an IP address. 016-773 The IP address of the machine is not set correctly. Check the DHCP environment. Alternatively, manually specify an IP address of the machine. Xerox CopyCentre/WorkCentre/WorkCentre Pro 123/128 Quick Reference Guide...
- Page 141 CentreWare Internet Services. 016-777 An error occurred on the disk during image processing, probably due to a disk malfunction. For details on replacing the hard disk, contact the Xerox Welcome Center. 016-778 Conversion of the scanned image was discontinued due to insufficient disk space.
- Page 142 027-744 There is a problem in the domain name of the job template server. Make sure that the DNS server connection and the domain name are registered to the DNS server. Xerox CopyCentre/WorkCentre/WorkCentre Pro 123/128 Quick Reference Guide...
- Page 143 The output destination is not correct. Specify the correct destination and resend the e-mail. 034-211 An error occurred in the fax controller. Contact the Xerox Welcome Center. 034-212 034-501 Is the telephone cable correctly connected? Check that the telephone cable is connected correctly, and resend the document.
- Page 144 The other party's telephone number was redialed the set number of times but the remote machine did not answer. Ask the other party to check the telephone line and connection to the machine. 041-210 An error occurred in the paper tray or Tandem Tray Module. Contact the Xerox 041-211 Welcome Center. 047-211 An error occurred in the paper output assembly.
- Page 145 Description and Remedy 047-216 An error occurred in the finisher. Contact the Xerox Welcome Center. 047-218 An error occurred in the Tandem Tray Module. Contact the Xerox Welcome Center. 062-211 An error occurred in the document feeder. Contact the Xerox Welcome Center.
-
Page 146: Screen Messages
124-701 Due to a malfunction in the specified tray, the output destination was changed to the center output tray. Contact the Xerox Welcome Center. Use a different paper tray. Screen Messages Along with fault codes, the following messages are displayed on the touch screen in some occasions. -
Page 147: Output Quality
WorkCentre copier/printer, you can: 1) Refer to this User Guide 2) Contact the Key Operator 3) Visit our Customer Web Site at www.xerox.com or contact the Xerox Welcome Center. Please have your serial number at hand when contacting Xerox. The Welcome Center will want to know the following information: The nature of the problem, the serial number of the machine, the fault code (if any), as well as the name and location of your company. - Page 148 NOTE: The serial number is also found on the metal plate on the left side of the machine behind Cover A. For more information, refer to Xerox Welcome Center in the Before Using the Machine chapter on page 9.
-
Page 149: Appendix
Enter the System Settings mode, select [Common Settings], then select [Other Settings]. In the [Other Settings] screen, scroll down to and select [Country], then select the required country. For more information, refer to Entering the System Settings in the User Guide. Xerox CopyCentre/WorkCentre/WorkCentre Pro 123/128 Quick Reference Guide... -
Page 150: Cautions And Limitations
• When moving the machine, make sure to hold the middle part of the machine, not the control panel or document feeder area. Excessive pressure on the document feeder may cause machine malfunction. Xerox CopyCentre/WorkCentre/WorkCentre Pro 123/128 Quick Reference Guide... -
Page 151: Index
Repeat Image .........66 Set Numbering ........68 Stamp .............67 Internet Fax ............71 Transparency Separators .......64 Interrupt button ........... 29 Paper Supply ..........45 Tray 5 (Bypass) ........46 Reduce/Enlarge ..........44 Scan Options ..........52 Job Interrupt ............37 Xerox CopyCentre/WorkCentre/WorkCentre Pro 123/128 Quick Reference Guide... - Page 152 Paper Jams ..........122 PS Logical Printer List ......107 Troubleshooting Tables ......131 Scan Mode Settings ......108 Xerox Welcome Center ......145 Setting List ...........107 Stored Document List ......107 TIFF Logical Printer List .......107 Recycled Paper ...........38 Xerox CopyCentre/WorkCentre/WorkCentre Pro 123/128 Quick Reference Guide...
- Page 153 Tandem Tray Module ..........28 Toner cartridge ..........116 Touch Screen ............27 Tray ..............27 Tray 1 ..............27 Tray 2 ..............27 Tray 3 ............27, 28 Tray 4 ............27, 28 Two Tray Module ..........27, 28 Xerox Welcome Center .........9 Xerox CopyCentre/WorkCentre/WorkCentre Pro 123/128 Quick Reference Guide...
- Page 154 13 Index Xerox CopyCentre/WorkCentre/WorkCentre Pro 123/128 Quick Reference Guide...
Need help?
Do you have a question about the CopyCentre C123 and is the answer not in the manual?
Questions and answers