Table of Contents
Advertisement
Quick Links
Download this manual
See also:
Owner's Manual
Advertisement
Table of Contents

Subscribe to Our Youtube Channel
Related Manuals for FireplaceXtrordinair 36A-ZC


Summary of Contents for FireplaceXtrordinair 36A-ZC
-
Page 2: Table Of Contents
Blower Installation ........................24 Facing and Hearth Installation ....................25 ADDITIONAL INFORMATION DETAILING THE FIREPLACE....................... 27 Acid Wash And The Fireplace Xtrordinair................27 Installing the Faceplate and Doors..................28 Door Latch Adjustment ......................30 Installing the Baffle ........................31 INSTALLING A NATURAL GAS LINE..................32... -
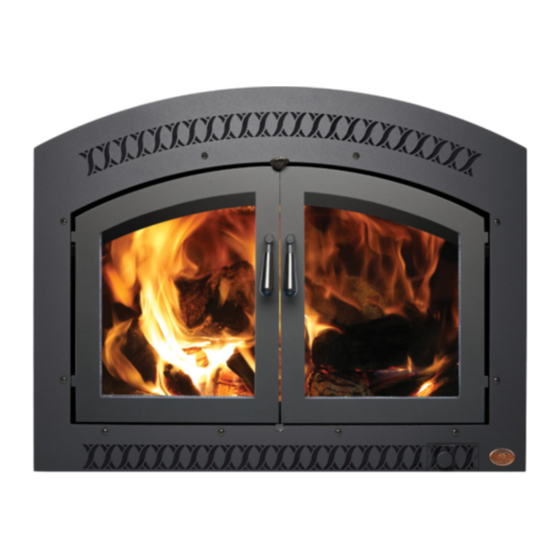
Page 3: Features And Specifications
FEATURES AND SPECIFICATIONS ¥ EPA Phase II approved. ¥ Gas line sleeve through the left side of the firebox for easy ¥ Heavy duty steel construction. installation of gas log lighter or gas log set. ¥ Large firebox capacity - 3 cu. ft. ¥... -
Page 4: Preparation For Zero Clearance Installation
READ THIS ENTIRE MANUAL BEFORE INSTALLING THE NEW FIREPLACE. FAILURE TO FOLLOW INSTRUCTIONS MAY RESULT IN PROPERTY DAMAGE, BODILY INJURY, OR EVEN DEATH. PACKING LIST: Your Fireplace Xtrordinair 36A-ZC is packaged with the following items included: ¥ 36A-ZC Fireplace ¥... -
Page 5: Zero Clearance Installation - Specifications
¥ The Fireplace Xtrordinair warranty will be voided by, and Travis Industries disclaims any responsibility for, the following actions: a ) Modifications of the fireplace components: doors, blower, air inlet systems, damper control, or any other component supplied by Travis Industries. - Page 6 ZERO CLEARANCE INSTALLATION - SPECIFICATIONS (Cont.) Each of the following items listed in this illustration have important specifications that must be followed. Cooling Cooling V e n t s V e n t s Chase Factory-Built F r a m i n g C h i m n e y Chase F r a m i n g...
-
Page 7: Fireplace Placement
ZERO CLEARANCE INSTALLATION - SPECIFICATIONS (Cont.) Fireplace Placement To determine the most efficient location for the fireplace, consider such factors as room traffic, location of doors and windows, and construction above and below the installation area. A location that requires cutting the least number of joists or roof rafters will make the installation easier and reduce the cost. - Page 8 7/16" wrench. Nail-Down Bracket The Fireplace Xtrordinair is equipped with a nail-down bracket located near the rear of the unit on each side. The lifting handle that comes attached to the fireplace is attached in the rear to the nail-down bracket.
- Page 9 ZERO CLEARANCE INSTALLATION - SPECIFICATIONS (Cont.) Fireplace Placement (Continued) Corner Placement If installing the fireplace into a corner, follow all of the specifications listed in this manual along with the additional specifications listed in the illustration below. These minimum clearances are: ¥...
-
Page 10: Chase Framing
Fireplace Xtrordinair suggests that the framing that is above the fireplace be installed after the fireplace is installed to make the chimney installation easier. Consider installing the fireplace in the desired location and then constructing the framing around it to the proper clearances. -
Page 11: Facing
ZERO CLEARANCE INSTALLATION - SPECIFICATIONS (Cont.) TILE OR MARBLE FACING - TOP VIEW Facing 2 x 4 Studs (Part of the chase framing) Ð Can make contact with 1/2" spacers Constructing a quality facing can on side of fireplace. add extra beauty to the fireplace. It must be made of a non-combustible F i r e p l a c e Flange Ð... - Page 12 ZERO CLEARANCE INSTALLATION - SPECIFICATIONS (Cont.) Facing (Continued) Square or Arched Faceplate The set-up face shipped with the fireplace is for a square faceplate. To use the arched set-up face, the top and two side pieces of the square set-up face will need to be removed. Loosen the six set-up face screws and pull the three pieces from behind the arched set-up face, then re-tighten the set-up face screws (see the illustration below).
-
Page 13: Hearth
ZERO CLEARANCE INSTALLATION - SPECIFICATIONS (Cont.) Hearth If the fireplace is set on a combustible floor, a hearth extension is required to protect it. It must have a minimum of 1/2" of non-combustible material (1/2" cement fiberboard or equivalent) between the combustible floor and the non-combustible hearth material (tile, marble, etc.). It must extend a minimum of 20"... -
Page 14: Cooling Vents
10' away from the Cooling chimney termination. Cooling Air Ducts 6' Max. 25' Max. Cooling Air Fireplace Xtrordinair 6' Max. Crawl Space Ð See Note 1 above for information on crawl Cooling Air space, attic, or garage terminations. -
Page 15: Blower
ZERO CLEARANCE INSTALLATION - SPECIFICATIONS (Cont.) Blower The blower system on the Fireplace Xtrordinair is located away from the fireplace on an outside wall. It draws air in from outside, circulating it around the fireplace, and delivering it as heated air to the home. This type of blower system will create positive pressure inside the home, reducing cold air infiltration. - Page 16 ZERO CLEARANCE INSTALLATION - SPECIFICATIONS (Cont.) Blower Duct (Continued) Provided with the fireplace is a start collar with a section of 6" flex duct that can be used as the blower duct. The flex duct connects to the blower housing and the start collar connects to one of the three blower duct hook-ups on the fireplace (right side, left side, and bottom).
- Page 17 ZERO CLEARANCE INSTALLATION - SPECIFICATIONS (Cont.) Blower (Continued) Routing the Conduit: CAUTION: DO NOT RUN THE CONDUIT OVER THE TOP OF THE FIREPLACE. During assembly match the plug on the end of the wires coming from the blower conduit with the plug coming from the top of the blower housing (See the drawing below).
-
Page 18: Factory-Built Chimney
ZERO CLEARANCE INSTALLATION - SPECIFICATIONS (Cont.) Factory-Built Chimney The zero clearance installation is designed to be used with a factory-built double-wall chimney. Use only the brands of chimney listed in this section. It is very important to follow the clearance specifications listed in this section. The chimney can be installed at any point after the fireplace position is precisely determined. - Page 19 ZERO CLEARANCE INSTALLATION - SPECIFICATIONS (Cont.) Factory-Built Chimney (Continued) Rain Cap 2' Min. Chimney Height Storm Collar Min. Flashing The system height, measured from the floor the fireplace Roof Framing (See Roof Opening sets on to the top of Table) the chimney cap, Attic Firestop must not exceed 35'...
- Page 20 ZERO CLEARANCE INSTALLATION - SPECIFICATIONS (Cont.) Factory-Built Chimney (Continued) Using Offsets Offsets can be used to align the chimney and to gain clearance to combustibles. When using offsets, make sure to follow all of the specifications below. A system can have no more than a total of 2 offsets (Four 30 degree elbows).
- Page 21 ZERO CLEARANCE INSTALLATION - SPECIFICATIONS (Cont.) Factory-Built Chimney (Continued) Using Offsets (Continued) Elbows may be used directly off the starter sections. In the chase above the fireplace the chimney must maintain a 5" clearance to combustibles on the back wall, 4 1/2" minimum on the front wall and header, and 18"...
- Page 22 Factory-Built Chimney (Continued) Factory-Built Chimney Brands Approved for use: Fireplace Xtrordinair is approved with the use of Temco 82 Series, Superior TF8, FMI 8DM, Marco 8D series, and Majestic CF8 series chimneys (See the table below for part numbers). All the components used in the chimney system must be from the same model line and manufacturer or supplied by Travis Industries as a component for that chimney system.
- Page 23 ZERO CLEARANCE INSTALLATION - SPECIFICATIONS (Cont.) Factory-Built Chimney (Continued) Framing for Roof (Continued) To determine the appropriate size of the roof opening, use the table below. Notice that the first dimension is the same for every slope listed on the left. This is because the width will always be the same no matter what slope the roof has.
- Page 24 ZERO CLEARANCE INSTALLATION - SPECIFICATIONS (Cont.) Factory-Built Chimney (Continued) Minimum Chimney Height on a Flat Roof Less Than 10' 10' or Greater 24" Wall or Parapet 42" 36" 6" 18" "A" "B" These minimum chimney heights are required by building codes for safety purposes, to allow time for sparks exiting a chimney to cool before they land on the roof.
-
Page 25: Zero Clearance Installation
ZERO CLEARANCE INSTALLATION READ THIS ENTIRE MANUAL THROUGH BEFORE STARTING TO INSTALL A ZERO CLEARANCE FIREPLACE. THERE ARE CERTAIN SPECIFICATIONS AND MEASUREMENTS LISTED IN THE ZERO CLEARANCE SPECIFICATIONS PORTION OF THIS MANUAL THAT MUST BE MET TO ENSURE A PROPER INSTALLATION. FAILURE TO FOLLOW THESE SPECIFICATIONS MAY PRESENT A FIRE HAZARD. -
Page 26: Facing And Hearth Installation
ZERO CLEARANCE INSTALLATION (Continued) Blower Installation (Continued) Provided with the fireplace is a start collar with a section of 6" flex duct attached. Insert the start collar into the knockout hole, reach through the duct and bend over the tabs to lock the start collar in place. - Page 27 ZERO CLEARANCE INSTALLATION (Continued) INSTALLATION SPECIFICATIONS (See Installation Instructions) Mantle (Combustible or Non-Combustible) Standard Ð Must be a Wall Board minium of 23" from top edge of faceplate 5" Min. Combustible Header Facing 4 1/2" Min. 23" 12" Cooling Vents (2) Spacer 16"...
-
Page 28: Detailing The Fireplace
(Refer to instructions on the packaging when reading the test strip). If the strip shows a high acid content, take steps to properly neutralize the brick. Please be aware that the warranty for the Fireplace Xtrordinair will not cover damage to the plating as a result of an improperly neutralized acid wash. -
Page 29: Installing The Faceplate And Doors
This will cause a cloudy film on the gold plated surfaces. The acid must be neutralized (see the section "Acid Wash And The Fireplace Xtrordinair"). 1. Open the box containing the faceplate and carefully remove its contents. The box will contain the faceplate, a #3 square driver and a bag containing the screws, switch assembly and knobs. - Page 30 DETAILING THE FIREPLACE (Continued) 5. Put all the screws in a few turns before tightening them up. If a screw starts hard, back it out until a click can be heard, then start it in again. Tighten all the screws. 6.
-
Page 31: Door Latch Adjustment
DETAILING THE FIREPLACE (Continued) 7. Remove the doors from their packaging and set them on the hinges (see the illustration two pages previous to this one). If the door does not slide down completely, check that the hinge hole is not filled with polishing compound. Use a wire or small drill bit to clean it out if necessary. -
Page 32: Installing The Baffle
DETAILING THE FIREPLACE (Continued) Door Latch Adjustment (Continued) tightened slightly, over-tightening will prevent the handle from turning. Put the other two washers between the latch and the nut farther away from the door. This will tighten the latch by approximately 1/16". To make minor adjustments, loosen the outer nut, then turn the inner nut until the desired distance is obtained. -
Page 33: Installing A Natural Gas Line
INSTALLING A NATURAL GAS LINE All Fireplace Xtrordinair products are designed to accept a 1/2" gas line. The gas line should be installed by a qualified plumber in accordance with all building codes. The gas connection may enter from the left side only. The gas line must be installed in accordance with the National Fuel Gas Code ANSI A223.1-1984 or local codes that may have... -
Page 34: Safety Label
SAFETY LABEL The following is a copy of the safety label that is attached to the fireplace.
Need help?
Do you have a question about the 36A-ZC and is the answer not in the manual?
Questions and answers