Table of Contents
Advertisement
Advertisement
Table of Contents

Related Manuals for FireplaceXtrordinair 36A-BI


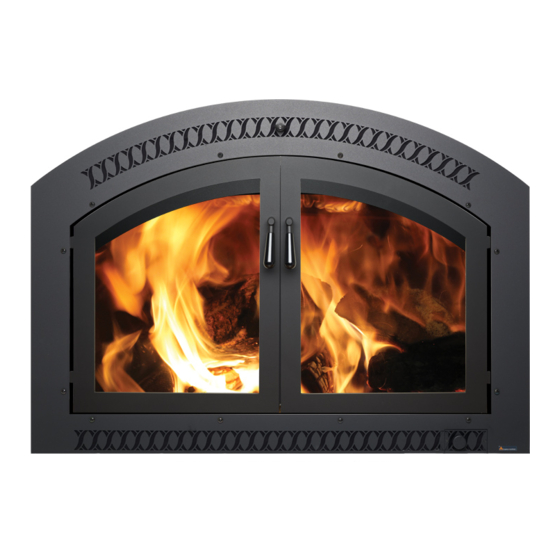
Summary of Contents for FireplaceXtrordinair 36A-BI
-
Page 2: Safety Precautions
SAFETY PRECAUTIONS ¥ VIEWING DOOR MUST BE CLOSED ¥ GASOLINE OR OTHER FLAMMABLE AND LATCHED DURING OPERATION. LIQUIDS MUST NEVER BE USED TO START THE FIRE OR "FRESHEN-UP" ¥ THIS APPLIANCE HAS BEEN THE FIRE. DO NOT STORE OR USE DESIGNED AND TESTED FOR GASOLINE OR OTHER FLAMMABLE BURNING OF WOOD OR NATURAL... -
Page 3: Table Of Contents
TABLE OF CONTENTS Page IMPORTANT INFORMATION Introduction ............................1 Safety Precautions ......................... 2 Features And Specifications......................4 Chimney Size And Proper Draft....................5 Protecting The Gold On The Fireplace Xtrordinair ..............6 OPERATING YOUR APPLIANCE Location and Use of Controls....................... 7 Burning Procedure ......................... -
Page 4: Features And Specifications
FEATURES AND SPECIFICATIONS ¥ EPA Phase II approved. ¥ Firebrick lining for firebox protection. ¥ Heavy duty steel construction. ¥ 388 CFM blower for convection ¥ Thermostat for automatic control of heat and outside combustion air. the blower. ¥ Gas line sleeve through the left ¥... -
Page 5: Chimney Size And Proper Draft
CHIMNEY SIZE AND PROPER DRAFT Your Fireplace Xtrordinair comes with a set of installation instructions. These instructions should be followed by the installer and kept for future reference. Before installing the fireplace the chimney's size and draft should be verified. The installation instructions contain all of the specific information for chimney size and installation. -
Page 6: Protecting The Gold On The Fireplace Xtrordinair
PROTECTING THE GOLD ON THE FIREPLACE XTRORDINAIR Gold is the very best material available for plating fireplace fronts, but it is not indestructible. The most common complaint with any plated surface on a wood burning appliance is discoloration. This can only be caused by heat or chemicals. The discoloration is permanent and cannot be removed. -
Page 7: Operating Your Appliance
OPERATING YOUR APPLIANCE Location and Use of Controls NOTE: The Combustion Air Control and Combustor By-Pass Control become hot during operation. Use a glove to adjust these controls while the appliance is hot. Combustion Air Control The Combustion Air Control is located over the door on the right side and is operated by sliding it from left to right. -
Page 8: Burning Procedure
OPERATING YOUR APPLIANCE (Continued) To build a fire in disregard of the information provided in this section can cause permanent damage to your appliance and void your warranty. This appliance is not designed for use with the door open. Burning with the loading door open could create a safety hazard. -
Page 9: Maintaining Catalytic Light-Off
OPERATING YOUR APPLIANCE (Continued) Maintaining Catalytic Light-Off Your Fireplace Xtrordinair is equipped with a catalytic combustor which increases the efficiency of your appliance. It is located along the roof of the firebox and is accessed from within. Its purpose is to re-ignite the flue gases before they exit up the chimney. This process, called catalytic light-off, increases the heat output of your fireplace and reduces the amount of emissions. -
Page 10: Burning Your Appliance Efficiently
OPERATING YOUR APPLIANCE (Continued) Burning Your Appliance Efficiently Your Fireplace Xtrordinair is designed to heat your home efficiently with the lowest amount of creosote build-up and pollutants emitted. The following steps provide a guideline to efficient burning: On cold days, when you wish for high heat output from your appliance, load the appliance fully after the fire has been established and burn at a medium-high to high burn mode. -
Page 11: Wood
OPERATING YOUR APPLIANCE (Continued) Wood This appliance is designed to burn natural wood only. Higher efficiencies and lower emissions generally result when you burn air dried, seasoned hardwoods as compared to softwoods or to green or freshly cut hardwoods. DO NOT BURN treated wood, garbage, solvents, trash, coal, cardboard, colored paper, or wax impregnated logs (i.e. -
Page 12: Seasoning Wood
OPERATING YOUR APPLIANCE (Continued) Wood (Continued) Wet wood not only causes more work for you due to the increase in weight making it more burdensome to carry, but most importantly it will not burn as efficiently. You will receive less heat output from a wet piece of wood because it wastes energy evaporating the water, energy that should be used for heating your home. - Page 13 OPERATING YOUR APPLIANCE (Continued) Seasoning Wood (Continued) Place firewood in an open area to obtain rapid drying and to prevent deterioration. Preferably, put a cover on the top tier of wood. If you cut trees in summer, let them lie for a week.
-
Page 14: Storing Wood
OPERATING YOUR APPLIANCE (Continued) Seasoning Wood (Continued) The bathroom scales can be used to check if firewood is still seasoning. Weigh a basket or bag of a few pieces of firewood. Place them back in the wood pile as an identified unit. Then weigh them again in about a month. - Page 15 OPERATING YOUR APPLIANCE (Continued) Storing Wood (Continued) If sufficient space is available under a roof, seasoning and storage can be accomplished in one handling. This practice eliminates the extra handling of moving wood that has been dried outside into a covered storage area. Outside, wood will dry to between 14 and 25% moisture content depending on humidity, temperature, and wind.
-
Page 16: Safety In Operation
OPERATING YOUR APPLIANCE (Continued) SAFETY IN OPERATION The Following Safety Rules Should Be Followed Whenever Using Your Appliance: Do not use this appliance for any purpose other than heating. Never use gasoline, gasoline-type lantern fuel, kerosene, engine oil, charcoal lighter fluid, or similar liquids to start or "freshen up" a fire. -
Page 17: Care And Maintenance
CARE AND MAINTENANCE Maintenance Schedule The following schedule should be followed to insure your appliance stays in peak condition. Weekly Maintenance: The following should be done once a week: ASH DISPOSAL CLEANING OF GOLD PLATED SURFACES GLASS CLEANING Bi-Monthly Maintenance: The following should be done every two months during the heating season: DOOR AND WINDOW GASKET INSPECTION... - Page 18 CARE AND MAINTENANCE (Continued) GLASS CLEANING Clean the glass only when the appliance is cool, using a non-abrasive cleaner. If the glass cracks or breaks, let the appliance cool before replacing it. DO NOT OPERATE THE APPLIANCE WITH BROKEN OR MISSING GLASS. IF THE GLASS DOES BREAK, FOLLOW THE DIRECTIONS IN THE SECTION TITLED "REPLACEMENT PARTS AND REMOVAL INSTRUCTIONS"...
- Page 19 CARE AND MAINTENANCE (Continued) If the door is too loose (it has more than 1/16" of play), the latch needs to be adjusted closer to the door (tightened). To do this, first remove the outer nut, the washer next to it, the latch, the inner nut, and the two washers next to the inner nut.
- Page 20 CARE AND MAINTENANCE (Continued) CHECK FOR CREOSOTE (Continued) Most problems with creosote are due to poor chimneys with low draft and/or cold chimney walls, and to a low rate of burn when little heat is needed during the spring and fall months. Burning green and wet wood also creates creosote.
- Page 21 CARE AND MAINTENANCE (Continued) CATALYTIC COMBUSTOR INSPECTION & CLEANING (Continued) mode). Use the following three steps to determine your catalytic combustor's performance: Step 1. Light fireplace. Let the fireplace reach operating temperature. Step 2. With smoke routed through the catalyst (By-pass closed), go outside and observe the emissions leaving the chimney.
- Page 22 CARE AND MAINTENANCE (Continued) CHIMNEY SYSTEM CLEANING We recommend you have your chimney system and appliance checked and cleaned by a Check the chimney competent chimney sweep at least termination for any blockage once a year. (ash, leaves, etc.) The chimney should be fully sealed and securely attached.
-
Page 23: Before Calling For Service
BEFORE CALLING FOR SERVICE SAVE TIME AND MONEY - CHECK THIS LIST BEFORE YOU CALL FOR S E R V I C E To eliminate unnecessary service calls, first read all the instructions in this manual carefully. The following checklist provides possible solutions to common occurrences that are not the result of defective workmanship or materials in this appliance. -
Page 24: Replacement Parts And Removal Instructions
REPLACEMENT PARTS AND REMOVAL INSTRUCTIONS Several components inside your appliance are serviceable by you. These components are usually easy to remove and replace without special tools. Before you attempt to carry out any of these steps, be sure to read through the entire section. To order new parts, use the chart below to order the appropriate part number through your dealer. - Page 25 REPLACEMENT PARTS AND REMOVAL INSTRUCTIONS (Continued) Removing and Replacing the Glass DO NOT OPERATE THE APPLIANCE WITH BROKEN OR MISSING GLASS. IF THE GLASS DOES BREAK, FOLLOW THE DIRECTIONS BELOW TO REPLACE THE GLASS. To remove the glass, simply remove the fiberglass packing rope that holds the window in place.
- Page 26 REPLACEMENT PARTS AND REMOVAL INSTRUCTIONS (Continued) Removing and Replacing the Firebricks The firebricks inside your wood-burning appliance are used to store the radiating heat and create a more thorough combustion inside the firebox. Occasionally one of them will crack and require replacement. Before any bricks are removed, make sure the appliance is cool and cleaned out.
- Page 27 REPLACEMENT PARTS AND REMOVAL INSTRUCTIONS (Continued) Removing and Replacing the Firebricks (Continued) REMOVING THE BOTTOM FIREBRICKS (Continued) 4. Remove the bottom firebricks in the order listed below. Note the position of each firebrick as they are being removed from the firebox. Certain firebricks have unique dimensions which require that their relative position is correct when they are replaced.
- Page 28 REPLACEMENT PARTS AND REMOVAL INSTRUCTIONS (Continued) Removing and Replacing the Catalytic Combustor (Continued) 2. Reach into the firebox and remove the baffle that is along the roof of the firebox right behind the doors by sliding it Remove the Baffle by backwards and then Sliding it Backwards pivoting it down.
-
Page 29: 5-Year Warranty
5-YEAR WARRANTY TRAVIS INDUSTRIES, INC. warrants the FIREPLACE XTRORDINAIR appliance to be defect-free in material and workmanship for five (5) years from the date of purchase, with the exception of the glass, gold plating, paint, brick, refractory, removable baffle parts and blowers. The blowers and removable baffle parts are warranted for one (1) year from the date of purchase to be defect - free in material and workmanship. -
Page 30: Safety Label
SAFETY LABEL 36A-BI 36 A -ZC Page 30...
Need help?
Do you have a question about the 36A-BI and is the answer not in the manual?
Questions and answers